

TexasEd
-
Content Count
1,416 -
Joined
-
Last visited
-
Days Won
34
Reputation Activity
-
 TexasEd reacted to Rich Ackermann in 69 mach1 Wheel and tire size
Just adding my two cents to this thread...
I found that modern tire design and brands, such Nitto do not make many, if any performance tires below 17 inch diameter. On my 70 Mach 1 M-code, I went with 17 US Mags Bandit rims and Nitto NT555 G2s. I have factory height big block constant 640 lbs rated coil springs up front with Global West suspension and a 1" Shelby drop (upper Arm Control). Global West Plus 3 upper arms have 3 degrees of positive caster built into them. This will eliminate the need to pull the lower arm so far forward in order to get the optimal alignment.
In the rear I have stock height 138 lbs rated/Competition Handling Eaton rear springs and an aftermarket 1" rear sway bar. The US Mags Bandit front 17x 8 with a 1 Offset and 4.54 backspace with Nitto NT555 G2 245 x 45 tires. The rear US Mags Bandit front 17x 9 with a 8 Offset and 5.31 backspace with a big Nitto NT555 G2 275 x 50 tires.
I prefer the look of a larger width and height rear tire. I did have to roll my rear fender lips. I also lightly rolled the front fender lips too, but I don't think I needed to.
-
TexasEd reacted to Len69Coupe in 69 mach1 Wheel and tire size
Front 17X8 245/45 0° offset
Rear 17X9.5 275/40 0° offset
Stock suspension with no rubbing anywhere. Edit: I did roll the fenders.
Got it back on the road last Friday after a 9 year resto.
-
TexasEd reacted to BuckeyeDemon in Measuring Temperatures - Possible dumb question
your sensor of the fan activity should be located at the exit of the radiator/entrance to the engine (lower hose). basically, if the radiator (without fans) is able to adequately cool the fluid before it enters the engine, then there is no point in turning on the fans or have them turned up. locating that sensor in the intake manifold will basically have you running the fans more necessary. which of course won't hurt beyond consuming a little more energy/power at certain times.
-
TexasEd reacted to Midlife in Quick dash ground/voltage regulator question
Nope: when you replace the circuit board, you have to loosen the nuts holding the various gauges. The posts can easily contact the metal housing when reinstalling and tightening the nuts, shorting out the CVR output and the gauges will not work. This is a chronic problem for 69/70 dash clusters. The cheapest solution is to remove the circuit card and place black electrical tape over the rectangular cutout sides so that the posts won't contact the metal housing. Re-install the cardboard insulation pad, the circuit card, and tighten the nuts.
As a check, you can measure the resistance between each post and the housing metal. If you see 1 to 14 ohms, one of the gauges is shorting out, causing the others to short out too. The ammeter, if shorted, will cause a massive short and because the lines are not fused, can cause a fire. Bad design by Ford.
-
TexasEd reacted to Brian Conway in Door Frame windlace that covers the fiberglass panels
Any help? Brian
-
TexasEd reacted to Ridge Runner in Door Frame windlace that covers the fiberglass panels
One end of it should have a slight curl to it ,that end goes up ,the flap goes under the fiberglass
-
 TexasEd got a reaction from RPM in What project to attack?
I've done one side of my glue-in glass repair and the other side is almost done. I did not get the applicator so I wasted some and had to get a second tube.
I had a shop put in all new exhaust front to back with Dynomax Super Turbo 17733, cross pipe and curved turn downs behind the valance. I love the sound.
-
 TexasEd got a reaction from det0326 in What project to attack?
I've done one side of my glue-in glass repair and the other side is almost done. I did not get the applicator so I wasted some and had to get a second tube.
I had a shop put in all new exhaust front to back with Dynomax Super Turbo 17733, cross pipe and curved turn downs behind the valance. I love the sound.
-
 TexasEd got a reaction from Mountaineerfan in New hidden Bluetooth radio - and while I have the dash out...
Through the firewall. I had the heater box out and that made it relatively easy. I actually installed a heavy gauge amplifier wire to the battery and to a junction box mounted to the right of the glove box. I then used a relay with the original radio wire as the trigger.
-
TexasEd reacted to aslanefe in Front Grill
Find a vendor who has "Daniel Carpenter" "original tooling" grill in stock.
-
TexasEd got a reaction from RPM in New hidden Bluetooth radio - and while I have the dash out...
That’s what I did. I went with the perfect fit
-
TexasEd got a reaction from RPM in New hidden Bluetooth radio - and while I have the dash out...
My car has a crappy am/fm cassette player from the 80s in it so I bought an original AM radio to go in it’s place. I don’t know if it works but I almost don’t care. I did make sure the light works.
I found this Bluetooth receiver amplifier designed for ATVs, motorcycles or watercraft that has a line in and Bluetooth. It is pretty small and I plan to mount it above the factory radio location behind the dashboard. I have a non AC car so there’s plenty of room. I may wire the AM radio to a dash speaker just for fun.
I added a set of new speakers. I was mainly concerned about how the grilles look. I also got the 6x9 spacers from Crutchfield to help mount them in the package tray.
I will update as the install progresses.
-
 TexasEd got a reaction from capemustang in New hidden Bluetooth radio - and while I have the dash out...
Here you can see wher I put it above the original radio and under where the AC vent goes.
-
 TexasEd reacted to Mach1 Driver in Kill Switches and how to Protect your Car
Kill Switches and Protecting your Car
It seems that everyone has their own opinion or philosophy about protecting their car…and you know what they say about opinions, but here is mine. Some people only insure their car and don’t even lock it, insisting that an accomplished thief will steal it if they want it. To me, that says they have no personal investment in the car- no blood, sweat, or pride of ownership. Mine is part of the family, a very old friend, and it’s MY CAR, not theirs for the taking. So here are the steps I have taken.
I believe you must have a layered approach, with as many layers as you can apply. Slow the thieves down and make it as difficult as possible. In this case, I believe that paranoia can be your friend.
1. Insurance: today's thieves could roll up with a car hauler and a GPS jammer. Unless you have your Mark 1000 Visual Acuity Devices trained on it (your eyeballs), your car will be gone. But most thieves aren’t that accomplished or prepared, and don’t need to be- it’s just too easy to steal a classic Mustang. So insure it and keep it in sight as much as possible when it is out of your garage.
2. Where you take it: don’t take it to the mall, theatre, supermarket, or other long term parking place. They only need seconds. When on a road trip, one of our members will take his car to the local police department and ask them to lock it in their secured parking overnight. He claims he has never been turned away as long as he offered them a ride.
3. Lock the hood: everything they need to steal the car is under the hood, so protect it. There is way too much mischief they can get into under there. I use a 76 Ford F350 truck hood latch. It has a cable going inside to a handle with a keyed lock. You also need a “helper spring” mounted to the hood. This pushes the hood up and away from the latch so the latch doesn’t re-engage as soon as you release the pull handle. Mid 70s Ford truck latches will bolt right into a 69-70 Mustang and the same vehicle also has the helper spring. All I had to modify was the secondary safety release arm so it was easier to access.
4. Lock the doors: this is so obvious that I almost didn’t mention it. If you don’t give them an open invitation, they may move on. It’s just basic common sense.
5. Alarm: a noise maker is good- I like them. Even if other people don’t pay attention, you will. They can have vibration, and glass sensors, door, hood and trunk switches (remember to lock the hood anyway), and they can even call you if they sense an alarm or set off a GPS tracker. It’s all good stuff and part of the layering process. Where they fall short is how they attempt to actually prevent the car from running, and that will require a technical discussion on KILL SWITCHES. On the other hand, a system like LoJack is good (and expensive), but it doesn’t try to stop the theft, it just shows the cops where it is once you notify them it has been taken.
6. How cars are stolen: the method most often used is a jumper wire and a screwdriver. This is so ridiculously easy that you won’t believe it, and it literally only requires seconds. Here’s what they do:
(1) Lift the hood (that’s why you have to lock it).
(2) Put a jumper wire from the battery positive to the coil positive. This supplies power directly to your ignition system, and bypasses everything, including aftermarket alarms.
(3) Use a screwdriver to short from the front solenoid terminal to the “S” terminal. This cranks the engine to start it, and they are gone.
Seeing is believing, so here is a link to an 8-1/2 minute video, where he shows how to jack a 60s era car. It’s not a Mustang, but it has the SAME features. If anything, a Mustang is easier to steal because the coil and solenoid are up front. If you pay attention around 4:15, he talks about Fords. He’s a little long winded, but I find him entertaining, and everything he says is unfortunately accurate. As you’ll see, it takes him about 58 seconds to open the locked door, then the hood, start the engine and close the hood- all while explaining it and not rushing the process. PLEASE WATCH THIS
Below is a schematic (not a wire diagram) that shows why this is so simple and how it works. This is the ignition system for a classic Mustang:
The jumper wire is #2, which connects the battery directly to the coil and bypasses everything else (ignition switch, alarm, whatever). The screwdriver is #3, which connects the battery to the solenoid “S” or coil terminal. This turns the solenoid on and the engine cranks for as long as the screwdriver is there. And away they go.
7. KILL SWITCHES: this is a kill switch used on a car with points. It is just a simple on-off toggle switch with one side connected to the chassis and the other side connected to the wire going between the coil and the points.
Don’t let this description throw you – this is just how the physical laws in our little corner of the universe work: The points have to open and close to make the magnetic field of the coil build and collapse to make a high voltage spark. With the kill switch closed the coil will stay on, but the field can’t collapse, so there is no transformer action in this DC circuit, so there is NO spark.
8. Kill Switches for other ignition systems: here are a few other popular ignition systems and how to disable them.
This would work for a Pertronix 1 as well. When I showed the example in #6 above to Pertronix, they were sure it would disable the car, but thought it may also damage the Pertronix module. They offered this solution instead:
ANOTHER...
9. Fuel kill switches: there’s no magic here, just a switch to open the circuit to a pump or fuel solenoid.
10. The Problem with Kill Switches is simple- where to hide the switch? If it could be hidden in a place where it’s not seen or found, but can still be activated, then that would make it very difficult to defeat. That can be done using a magnetic reed switch. The reed can be hidden behind the plastic of the dash or console, or “A” pillar trims, or behind any plastic. Then when you pass a magnet over it (within about an inch) it will allow the car to start. In this simple circuit, the kill switch is turned on as soon as the ignition key is turned off. So you can’t forget to set the kill switch (its automatic), you just have to use the magnet to turn the kill switch off, so you can start the car. So, turn the key to ON, pass the magnet near the reed switch and the LED will turn ON, announcing the kill switch is OFF, then turn the key to start. Easy peasy. For maintenance by some shop, insert a fuse (safer than using a switch) and the kill switch is bypassed.
Side note...you may think this is a bit too complicated and unnecessary, but after reading all of the above, one guy told me that he uses RFID (radio frequency identification) to "unlock" his limit switch. I think that's really cool, but WOW! That's a whole lot more complicated than a reed switch, a magnet and a relay.
11. Transmission lock: If you have a 70, I understand this was done from the factory. If the back wheels can’t roll, it makes the process of towing more difficult. I have a 69 with an automatic and of course it has a floor shifter (since that’s all they ever came with). Back in the day, and long before digital pictures, I came up with a method to lock the shift linkage with a spring loaded pin. The pin is removed from the linkage by a solenoid, and it is operated by a switch that is controlled by the shift button on the T-handle. If the kill switch is on, the power to the solenoid is cut and you can’t take it out of park. I would love to show it to you, but I still don’t have any pictures. I came up with this using the simple home tools I had at the time, so think about it and surprise us with your version. You may be able to provide pictures before I tear mine apart ;)
12. Electronic handbrakes: sometimes called electronic parking brakes – work on the same basis but use electric motors to achieve the locking effect. Press or pull the button and motors on the rear brakes press the pads onto the discs. You can often hear a reassuring whirring noise as the motors do their work.
-
TexasEd reacted to Mike65 in Power Steering conversion
I am 64 years old & have manual steering in my 69 Coupe with a roller idler arm & it steers like it had PS.
-
TexasEd reacted to RPM in Power Steering conversion
I'd check with Dan at Chockostang.com. He won't steer you wrong. That said, a rebuilt box from Chockostang works wonders without power assist. I'm an out of shape 66 year old guy who loves the manual steering in our light cars.
-
TexasEd reacted to 69RavenConv in Windshield Ribbon Size
I used 3/8" when I replaced my glass 2 years ago. Replacement glass is a tad thinner than OEM so I went with bigger ribbon. It worked no problem; I got it through NPD
-
TexasEd reacted to shelbyshelby in Windshield Ribbon Size
Thank you much. I went with the 3/8. Install went perfect today.
-
TexasEd reacted to stangs-R-me in 3 pt seat belt experience
I had posted all these pics of the Scott Drake 3-Point Kit that I installed in my Hardtop in this thread ...
seat belt buckles - 1969-70 Technical Forum - 69stang.com and 1969stang.com The 1969 and 1970 Mustang Supersite
... back in 2017. All the pics are gone, so I'm reposting them here.
Used all the stock mounting locations and just had to ream out the inner belt and retractor anchor plates (used a 0.501" reamer) to be able to use the OEM bolts.
Read the thread (last 3 posts on page 1 & more on page 2) for all the details.
-
TexasEd reacted to Len69Coupe in Quarter Post Windlace?
Here's how mine turned out. Don't know if it's correct because I could never find a photo anywhere to work from. PIA there is nothing to work off of.
-
TexasEd reacted to Rich Ackermann in Custom Console
I used my original 70 center console and repurposed the front and rear ashtrays. The rear now has usb charging ports and the front now houses my own custom warning and diagnostic lights, which I can close the old ashtray lid and hide them. The console is where I mounted the duel power window switch so it is accessible to both front passengers and the power side view mirror control.
-
TexasEd reacted to Ridge Runner in Talk me out of painting my car
Wow ,over 300 just for buffing supplies ,i am going to have some where around 3000 just in paint and finish materials . I think i have everything now ...i hope !
-
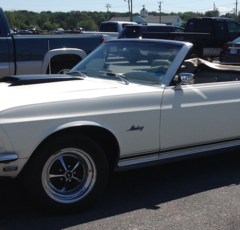
 TexasEd got a reaction from Mustang1272 in 69 mach1 Wheel and tire size
I don't think I ever posted in this thread.
Wheels and Tires:
Coker Magnum 500 15x7 front, 15x8 rear
Cooper Cobra P235/60 R15 in front, P245/60 R15 in rear
Suspension Mods Sourced from Opentrackerracing :
1" UCA drop, 560 1" drop coil springs, 1/4" Poly coil spring insulators, 1 1/8" front sway bar kit, Roller spring perches, Standard Upper arms, Standard Lower arms, New Strut rod bushings, KYB Front shocks, Grab-A-Track rear shocks, 4.5 Mid eye 1" drop leaf springs with new U-Bolt, front eye bolt and rear shackle kit
-
 TexasEd got a reaction from bigmal in Custom Console
I love this. This is much more appealing to me than what is out there.
-
TexasEd reacted to bigmal in Custom Console
I also added cup holders to my 69 consul. I used the wood insert from a 70 without the seat belt hole