-
Content Count
3,515 -
Joined
-
Last visited
-
Days Won
117
Mike65 last won the day on October 25
Mike65 had the most liked content!
About Mike65
-
Rank
Working on the Coupe
- Birthday 12/27/1957
Profile Information
-
Gender
Male
-
Location
Horse Pasture, Virginia
-
Interests
Working on my 69 Mustang, 2000 Ranger 4X4, 99 Explorer Sport, & woodworking.
Converted
-
Biography
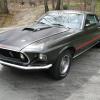
Currently rebuilding a 69 Coupe & a 65 Fastback
-
Location
Toms River, NJ
-
Interests
Mustangs, & woodworking
-
Occupation
Recieving
Recent Profile Visitors
21,920 profile views
-
-
-
-
@RPM we thank you for purging the site of the spam. I would help if I had the power to delete spam.
-
-
Vic, your Mustang looks great. Congrats on getting it finished.
-
Welcome back. Your 69 looks great. At almost 67 years old I need one of those 4 post lifts for my garage.
-
-
Yes, to be able to post pictures again.
-
-
-
Correct, no lighter.
-
-
-
-
It was 70° this morning after I got home from work, so I figured I would get in some Mustang time. I pulled the valve covers, distributor & spark plugs. I used a cordless drill long 1/4" drive extension & small socket to prime the engine with oil. Timed the engine, re-installed the spark plugs, valve covers & the distributor.
-
I have 3 of the GT caps that are on the styled steel wheels, are those the ones you need? I can look in the car tomorrow to see if I have a 4th one. These are the ones I have. Scott Drake C8OZ-1130-C Scott Drake Styled Steel Hub Caps | Summit Racing
-

A New Milestone for Midlife Harness Restorations
Mike65 replied to Midlife's topic in All mustang products and vendors
Congrats Randy. -
Yes, it has the same mounting flange but there is a slosh pan in the tank for the electric fuel pump & the standard fuel sender will not fit properly. Plus, I already have a stock fuel pump & the fuel line to the carb installed.
-
New never used Spectrum Premium 22-gallon EFI fuel tank for sale with electric fuel pump module which I purchased from Rockauto.com last year. Was installed in the car but has never had fuel in it. I ordered it for my 69 Mustang Coupe, but I decided to go carbureted instead of EFI. It is listed @ $372.79 I am looking for $150.00 plus shipping but will consider an alternate offer. More Information for SPECTRA PREMIUM F28DFI (rockauto.com)
-
-
-
-
Today I spent some time in the garage until the heat got to me. I installed the fuel sender in the tank, the fuel line from the pump to the carb & finished painting the trunk black.
-
-
Just to let everyone know Ridge's suggestion to install the hood hinge spring works great.
-
Thanks for the tip, Ridge, I will give it a try & report back.
-
-
Yesterday I installed the new l/s hood hinge. Next, I have to fight with the hinge spring.
-
-
Pete, I installed a center mount hand brake in my 69 Coupe. I got a used one from E Bay from a 1987 (IIRC) Fox body Mustang & used Lokar parking brake cables. If you want to send me a pm with your e mail address I can send you pics of my setup.


