


Vicfreg
-
Content Count
2,252 -
Joined
-
Last visited
-
Days Won
134
Reputation Activity
-

 Vicfreg got a reaction from Grabber70Mach in 1970 Convertible Restoration
Car is finally home.
Will start final assembly after Labor Day
AusTex.. I think I have previous posts on trunk, will look when I get back home next week.
-
 Vicfreg got a reaction from latoracing in 1970 Convertible Restoration
Car is finally home.
Will start final assembly after Labor Day
AusTex.. I think I have previous posts on trunk, will look when I get back home next week.
-
-

-

-
 Vicfreg got a reaction from fvike in Attaching the chrome strip to the front of the Bonnet
The orange body book shows item number "B" as D0ZB168746 which is a "Type 8" moulding retainer. That is shown on page 248 of the AMK fastener book.
Item "C" is show in the body book as part number 384102 S100, which is a hex acorn nut, shown on page 214 of the AMK fastener book.
-
Vicfreg got a reaction from RPM in Headers
I have a 351 W in my '70 Convertible. I used Hedman Elite Shorty Headers (88650 Series). I did this for a couple reasons First is I needed to clear my Borgeson steering box. Second, i needed to clear the C-6 that I am running on the car. I used Stage 8 locking bolts. Everything fits and sounds great.
-
-
-
 Vicfreg got a reaction from TexasEd in Headlight Adjuster Hack...
Well, things happen to a 55 year old car. This occurred on my '68, but directly applicable to '69 and '70.
I was installing LED headlights on my '68 coupe, and went to adjust them, and noticed that the adjuster screw heads were stripped. I attempted a small vise grip slow turn, but the result was the plastic insert in the headlight adjusting screw retainer came out. Oh-oh... Reinstalling them properly means removing the bumper and headlight bucket. Not going to happen, as my headlight buckets are very happy where they are with the as-new paint from 15 years ago.
I did some digging around in my hardware bin and came across these license plate mounting screw inserts. Very close in size. I tried one and it fit in the hole but was too wide in one direction to properly seat. So, a pair of diagonal cutters solved this, and resulted in enough clearance to place the insert in the hole cleanly.
I had a fine thread tap that was close to the thread pattern of the headlight adjuster screw. I tried to tap the insert, and was somewhat successful, but got the threads started at least. I removed the screw, installed the insert, and it works like a charm. I used some really nice original screws I had in my headlight hardware container, after an overnight dip in Evap-O-Rust.
Lesson learned is to install new adjusters screws and inserts before you install the headlight buckets.
The LED headlights work great, they are so bright, and also have an original type lens look.
Pics below.
-

-
 Vicfreg got a reaction from kblagron in Front end alignment specs
Thanks, everyone for the feedback. I should be able to run plenty of caster as my UCA already as a (+) 3 due to geometry. I will let you know what others say and document what I do.
-
 Vicfreg got a reaction from bigmal in Headlight Adjuster Hack...
Well, things happen to a 55 year old car. This occurred on my '68, but directly applicable to '69 and '70.
I was installing LED headlights on my '68 coupe, and went to adjust them, and noticed that the adjuster screw heads were stripped. I attempted a small vise grip slow turn, but the result was the plastic insert in the headlight adjusting screw retainer came out. Oh-oh... Reinstalling them properly means removing the bumper and headlight bucket. Not going to happen, as my headlight buckets are very happy where they are with the as-new paint from 15 years ago.
I did some digging around in my hardware bin and came across these license plate mounting screw inserts. Very close in size. I tried one and it fit in the hole but was too wide in one direction to properly seat. So, a pair of diagonal cutters solved this, and resulted in enough clearance to place the insert in the hole cleanly.
I had a fine thread tap that was close to the thread pattern of the headlight adjuster screw. I tried to tap the insert, and was somewhat successful, but got the threads started at least. I removed the screw, installed the insert, and it works like a charm. I used some really nice original screws I had in my headlight hardware container, after an overnight dip in Evap-O-Rust.
Lesson learned is to install new adjusters screws and inserts before you install the headlight buckets.
The LED headlights work great, they are so bright, and also have an original type lens look.
Pics below.
-
Vicfreg got a reaction from Grabber70Mach in 1970 Convertible Restoration
Making progress. Getting front end mocked up with the spoiler and bumper. Some hood adjustments needed, but nothing serious.
Used billet hood hinges. Good news is that they are really strong, and the hood does not move/wiggle/etc. Bad news is that the bolt holes were just a little off, so needed to move one of them. Oh well, 53 year old mass produced car..... to be expected.
Will bring up the hood trim and headlight extension trim tomorrow so they can fit/align everything. Then off to the first trip to the paint booth next week.
-
Vicfreg got a reaction from Grabber70Mach in 1970 Convertible Restoration
I agree. There is a guy who goes to Carlisle that sells Fiberglass Reproductions. That is who I got mine from. They are a fraction of the price, and look good I am obviously building a Resto-Mod not a Concours car. http://www.fordramair.com/new/products/shakers.htm
I got the trim ring and backing brackets from NPD. The NPD hood came pre-drilled for the shaker ring.
Some pics below.
-
Vicfreg got a reaction from Grabber70Mach in 1970 Convertible Restoration
Oh...the pictures of the front spoiler make it look pretty large. That is because the front bumper is not on. I will post an update once the bumper is on and correctly fitted.
-
Vicfreg got a reaction from Grabber70Mach in 1970 Convertible Restoration
Visited the body shop last week, making good progress. I got my NPD Ford tooling shaker hood and am happy to report that it only needed minor tweaking to get aligned. I also have billet hood hinges, apparently they needed some tweaking, I will report back on that after I go back there on Wednesday.
The current work is focused on getting my Maier Racing one piece front spoiler fitted up. That is a very nice piece of work heavy fiberglass, and fits really well. Just a few things to do and it will fit fine.
I was at Carlisle Ford show this weekend, and searched for a decent 1970 hood trim piece. As you know, the NOS ones are hard to find and expensive. I did have a good friend offer to let me use his to make sure the hood and headlight trim line up correctly, will be bringing that up there to the body shop on Wednesday.
I also will bring my front bumper, and the associated mounting brackets up there to ensure that they clear the spoiler/valence combination and that the bumper lines up correctly.
To answer the other questions.... the car will be in the paint booth twice. The first trip will be very soon, and will be the initial prime coat over the body work that has been done. Then, out of the booth, and back into the shop to be block sanded. After that back into the paint booth do do the base coat, hood stripe, and first clearcoat. In the end we will end up with 3 layers of clearcoat.
The place that is doing the work is the same shop that painted my '68 coupe. The main business is called Klassic Rides. The shop where my car is located is called GunnerZ, which is a sister business to Klassic Rides. Both are located in Newton, North Carolina. Klassic Rides painted my '68, it needed a lot of work. GunnerZ is primarily paint and body for cars that don't need an extensive amount of work.
My car has been "waiting in line" for 8 months to get started. The current wait time is approaching a year.
But, my '68 was painted 15 years ago, and the paint job is still flawless.
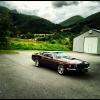
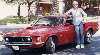
PIcs below of my '68 coupe in 1967 Marina Blue Metallic, a '63 Corvette in my final color of "Sebring Silver", and the ongoing work on the '70 convertible.
My guess is that I will have the car back sometime in July or August.
-
 Vicfreg got a reaction from Rich Ackermann in For those with Convertibles and want 3" exhaust tubes
Wow, interesting. Would like to see it installed with the pipes. The driveshaft safety loop is a nice touch.
Pics of my 2-1/2" exhaust on my convertible, it is VERY tight. It was only possible because Mike (Latoracing) did his magic and somehow got the pipes through there....
-
Vicfreg got a reaction from bigmal in Attaching the chrome strip to the front of the Bonnet
The orange body book shows item number "B" as D0ZB168746 which is a "Type 8" moulding retainer. That is shown on page 248 of the AMK fastener book.
Item "C" is show in the body book as part number 384102 S100, which is a hex acorn nut, shown on page 214 of the AMK fastener book.
-
Vicfreg got a reaction from bigmal in Attaching the chrome strip to the front of the Bonnet
Ridge has a great point about the direction that the spring clip is facing. The body book shows the spring facing up so it gets more compressed when you tighten it. Bending it out a little is a good idea.
The repro '70 hood mouldings are not all consistent. I just examined 2 cars that are Concours level with NOS trim, and there is a difference for sure from what we all can get as a Re-Pop.
-
Vicfreg got a reaction from RPM in 1970 Convertible Restoration
Making progress. Getting front end mocked up with the spoiler and bumper. Some hood adjustments needed, but nothing serious.
Used billet hood hinges. Good news is that they are really strong, and the hood does not move/wiggle/etc. Bad news is that the bolt holes were just a little off, so needed to move one of them. Oh well, 53 year old mass produced car..... to be expected.
Will bring up the hood trim and headlight extension trim tomorrow so they can fit/align everything. Then off to the first trip to the paint booth next week.
-
Vicfreg got a reaction from RPM in 1970 Convertible Restoration
I agree. There is a guy who goes to Carlisle that sells Fiberglass Reproductions. That is who I got mine from. They are a fraction of the price, and look good I am obviously building a Resto-Mod not a Concours car. http://www.fordramair.com/new/products/shakers.htm
I got the trim ring and backing brackets from NPD. The NPD hood came pre-drilled for the shaker ring.
Some pics below.
-
 Vicfreg got a reaction from smh00n in Borgeson pitman arm issue
Upon further examination of my pictures, I stand corrected. The part number in my picture is C9ZA-3590-A. That is a power steering Pitman Arm.
Smhoon - apologize for that.
Vic
-
Vicfreg got a reaction from RPM in 1970 Convertible Restoration
Oh...the pictures of the front spoiler make it look pretty large. That is because the front bumper is not on. I will post an update once the bumper is on and correctly fitted.
-
Vicfreg got a reaction from RPM in 1970 Convertible Restoration
Visited the body shop last week, making good progress. I got my NPD Ford tooling shaker hood and am happy to report that it only needed minor tweaking to get aligned. I also have billet hood hinges, apparently they needed some tweaking, I will report back on that after I go back there on Wednesday.
The current work is focused on getting my Maier Racing one piece front spoiler fitted up. That is a very nice piece of work heavy fiberglass, and fits really well. Just a few things to do and it will fit fine.
I was at Carlisle Ford show this weekend, and searched for a decent 1970 hood trim piece. As you know, the NOS ones are hard to find and expensive. I did have a good friend offer to let me use his to make sure the hood and headlight trim line up correctly, will be bringing that up there to the body shop on Wednesday.
I also will bring my front bumper, and the associated mounting brackets up there to ensure that they clear the spoiler/valence combination and that the bumper lines up correctly.
To answer the other questions.... the car will be in the paint booth twice. The first trip will be very soon, and will be the initial prime coat over the body work that has been done. Then, out of the booth, and back into the shop to be block sanded. After that back into the paint booth do do the base coat, hood stripe, and first clearcoat. In the end we will end up with 3 layers of clearcoat.
The place that is doing the work is the same shop that painted my '68 coupe. The main business is called Klassic Rides. The shop where my car is located is called GunnerZ, which is a sister business to Klassic Rides. Both are located in Newton, North Carolina. Klassic Rides painted my '68, it needed a lot of work. GunnerZ is primarily paint and body for cars that don't need an extensive amount of work.
My car has been "waiting in line" for 8 months to get started. The current wait time is approaching a year.
But, my '68 was painted 15 years ago, and the paint job is still flawless.
PIcs below of my '68 coupe in 1967 Marina Blue Metallic, a '63 Corvette in my final color of "Sebring Silver", and the ongoing work on the '70 convertible.
My guess is that I will have the car back sometime in July or August.