


SA69mach
-
Content Count
529 -
Joined
-
Last visited
-
Days Won
6
Reputation Activity
-

 SA69mach got a reaction from TexasEd in To clarify 69 FB rear seat removal -with pics
OK, not to detract from other posts on this, but I found a lot of confusing and incorrect information about the rear seat cushion removal for a 69 fastback, both online and nothing relevant in the Ford shop manual. Yes, I read it laboriously, since I could not budge my seats.
I am taking out and replacing the rear seat belts, so I need to get in behind the rear seat.
Contrary to the shop manual directions to "Pull seat cushion UP and FORWARD to remove", well, ya don't.
Like many conventional rear seat cushions, you must push DOWN on the cushion and BACK to release the retainers. There are two. When the cushion base is released, push/pull the seat back DOWN to release from under the retaining hooks there.
I 'smacked' the seat cushion open handed DOWN, and jabbed my other palm into the seat front to disengage the lower hook. When both release, the seat base tilts up and forward. Continue this movement to pull the seat back out of the retainers.
If I had some decent pictures of the retainers before I started this would have been a lot easier.
pics below so you can work it out too....
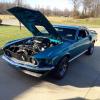
My favorite car
Seat back (upper) retainer
Seat cushion (lower) retainer. Note how shallow the 'hook' is on this part. This is what you have to 'unhook' with the smacking and pushing to release the entire seat.
Passenger side rear footwell. Note the location of the retainer, since this is where you need to PUSH DOWN or smack it down, to release the cushion.
It is the same relevant location on the driver's side
I hope this is helpful to someone else.
-

-
 SA69mach got a reaction from SextKecy in 14 inch Rim Blow wheel.....opinions please
I have bought a couple of 69/70 Mustang/Cougar steering wheels on eBay, in pretty poor condition, for the sole purpose of manufacturing some 14 inch wheels, but still dressed as our beloved Mach1 rim blow wheels.
It is a pity they pull so much money, since even the scrubby examples I managed to get are expensive. Crazy when they will be test-bed items for fitting and finish choices.
On that point - let me know if you have old wheels you no longer have a use for. At this point I will focus on 3-spoke wheels, but eventually I believe it wil be possible for me to create a 14 inch Mustang rim blow from a decent 2-spoke center hub. (By replacing the two spokes with the three spoke arrangement)/
Opinions needed for rim thickness, and material, and finish
The wheels are a steel framework with a phenolic/plastic type resin molding applied over the framework. The rear hoop of the rim is the same color to match the interior trim (Black, Red, Blue, Green Ginger....etc) The front hoop is artificially grained and painted to resemble wood grain.
The rim is almost universally regarded as too thin. The wheel diameter is 15 inches, and many feel it is clumsy and too large for modern driving styles. No 14 inch wheels are available commercially to mimic the rim blow style and trim levels.
The available options for the rim material are timber, or "resin" with many versions and options for that process.
At this early stage I would like opinions on desired sizes for the rim thickness and material finishes.
Rivets or no rivets?
I intend for the rim blow switch to be incorporated, of course
-
 SA69mach got a reaction from quoriSer in 14 inch Rim Blow wheel.....opinions please
I have bought a couple of 69/70 Mustang/Cougar steering wheels on eBay, in pretty poor condition, for the sole purpose of manufacturing some 14 inch wheels, but still dressed as our beloved Mach1 rim blow wheels.
It is a pity they pull so much money, since even the scrubby examples I managed to get are expensive. Crazy when they will be test-bed items for fitting and finish choices.
On that point - let me know if you have old wheels you no longer have a use for. At this point I will focus on 3-spoke wheels, but eventually I believe it wil be possible for me to create a 14 inch Mustang rim blow from a decent 2-spoke center hub. (By replacing the two spokes with the three spoke arrangement)/
Opinions needed for rim thickness, and material, and finish
The wheels are a steel framework with a phenolic/plastic type resin molding applied over the framework. The rear hoop of the rim is the same color to match the interior trim (Black, Red, Blue, Green Ginger....etc) The front hoop is artificially grained and painted to resemble wood grain.
The rim is almost universally regarded as too thin. The wheel diameter is 15 inches, and many feel it is clumsy and too large for modern driving styles. No 14 inch wheels are available commercially to mimic the rim blow style and trim levels.
The available options for the rim material are timber, or "resin" with many versions and options for that process.
At this early stage I would like opinions on desired sizes for the rim thickness and material finishes.
Rivets or no rivets?
I intend for the rim blow switch to be incorporated, of course
-
 SA69mach got a reaction from SweellTrex in 14 inch Rim Blow wheel.....opinions please
I have bought a couple of 69/70 Mustang/Cougar steering wheels on eBay, in pretty poor condition, for the sole purpose of manufacturing some 14 inch wheels, but still dressed as our beloved Mach1 rim blow wheels.
It is a pity they pull so much money, since even the scrubby examples I managed to get are expensive. Crazy when they will be test-bed items for fitting and finish choices.
On that point - let me know if you have old wheels you no longer have a use for. At this point I will focus on 3-spoke wheels, but eventually I believe it wil be possible for me to create a 14 inch Mustang rim blow from a decent 2-spoke center hub. (By replacing the two spokes with the three spoke arrangement)/
Opinions needed for rim thickness, and material, and finish
The wheels are a steel framework with a phenolic/plastic type resin molding applied over the framework. The rear hoop of the rim is the same color to match the interior trim (Black, Red, Blue, Green Ginger....etc) The front hoop is artificially grained and painted to resemble wood grain.
The rim is almost universally regarded as too thin. The wheel diameter is 15 inches, and many feel it is clumsy and too large for modern driving styles. No 14 inch wheels are available commercially to mimic the rim blow style and trim levels.
The available options for the rim material are timber, or "resin" with many versions and options for that process.
At this early stage I would like opinions on desired sizes for the rim thickness and material finishes.
Rivets or no rivets?
I intend for the rim blow switch to be incorporated, of course
-
 SA69mach got a reaction from 1969Fstback in Mach 1 Upholstery
You could take the seat apart yourself, then snip the hog rings and put some foam down on the seat base yourself. The tuck will still be flattened, but the seat height and firmness under your butt will be restored.
There is not much to the whole deal with seats. If your springs are still in one piece, it is just collapsed and worn out foam that is letting you sink down.
Hog rings and pliers are available for the task. It is just time consuming and a work out on the hands.
-
 SA69mach got a reaction from JayEstes in Tuning question
Fair enough. Opinions are like backsides - everyone's got one, and they all stink.....haha
Right - some basics that should clarify a few things and get you providing the best information so "we" can offer better advice.
Cams - it is common to grind a cam with advance already built in. Say 4 degrees advance. So when installed 'dot to dot' - what you call zero, it has some small advance on the stick. The reason is it is easy to line up the dots on installation. Trying to set 4 or 6 degrees is fiddly Most cars will never sit on zero advance at top dead center, it is just too low. And when firing first time, you want a little advance, so they build it in to the grind.
Do you have the spec sheet for your cam? (I think you already said no) That spec will have those details. If not, you need to consider getting some vacuum readings from the manifold while the engine is idling and running so we can see what numbers you have, and take a better guess at what the cam is doing.
Distributor - You have two methods of increasing the advance of the spark timing as the engine revs increase. You want this. and you want to keep within limits. Basically you want about 12 degrees advance at idle, and you want the distributor to increase advance to about 32 degrees by 2500-3000 revs, and NO MORE. that is called the "curve" of the advance. the rate, if you like.
The vacuum can "pulls" some advance for you, and the mechanical weights inside the distributor pull some more as revs get higher. Little weights spin with centrifugal force as revs build, and pull an arm out. So, two separate systems working to make the 'advance curve'
Vacuum source - There is always lively debate about whether to use ported or manifold source for the distributor. At idle, you don't need either vacuum or mechanical advance. it is set at idle by adjusting the distributor - twisting it clockwise or anti-clockwise, and then locked down tight. Lets say you set your 'initial timing' at 12 degrees BTDC. You don't want any vacuum pulling more. If you have a leak in your vacuum line your idle will go to crap, because your initial timing is not properly set, it is being affected by the vacuum from the little can. Follow me???
So, the conventional source of vacuum for your distributor can is from the "ported" vacuum port on your carburetor. Look at the second picture above, that you posted - there is a small rubber plug up the side. Above the level of the butterflies of the carburetor. That is what ported means. So at idle, the butterflies are basically closed, so there is little to no vacuum being pulled through that port (or your distributor.) When you rev, the butterflies open and vacuum is pulled, and pulled at the distributor too, now.
that is exactly how the whole system was designed to work.
Manifold vacuum is always pulling. That is what your distributor is connected to at the moment. and it has solved your poor idle and dieseling. That is because your initial timing was so low, so very low, and now your vacuum advance has pulled in some advance. it is working, but it is not the fix you need. I hope you can understand my rambling and see why you need to keep working on this problem. it is not 'fixed" properly.
You need to set your initial timing to 12* BTDC and then plug your line into ported vacuum. And then tune and adjust as necessary. Barnett was getting around to all this, and he is probably pi$$ed at me, but it is just taking so long, and you don't seem to understand the basics.
Hope this helps.
-
SA69mach got a reaction from JayEstes in Tuning question
You said in your first post you are running MSD ignition and distributor., So, that is the start point and raises some questions.
What model "ignition" and distributor do you have installed?
Is it new? Do you have the spring and bushing kit that comes with?
Can you post a picture of the ignition and the distributor please?
Did you or the shop remove a canister from the distributor?
Where exactly did the fellow stick the hose into the MSD distributor you have?
Do you have a canister or not?
There is something basically wrong with your set up. I predicted low advance way back page 1, and I think that is proven out. The problem is- how did it leave a shop in that state? I don't think the tuning and timing will take long to get a base line and stock setting, however, keep in mind the cam may turn out to be incorrectly "degreed". Wait out on that for now,
You will need the stock vacuum canister for the distributor you have, so please get that information and pictures.
And Barnett - please, stop with the cryptic stuff "What canister do you want?" You know he wants the right canister for his car and distributor. I think you are teasing this guy or making him look foolish. If you can help him, please get on with it. I have faith you can.
nickjames- please watch this video on msd timing and learn something about timing, distributors, and how it all works. Hopefully this will save you and everyone else a lot of time, posts and effort. AND get the details and pics of your ignition and distributor as soon as you can. 5 pages of post to be at this point is a bit long winded, right?
http://setyourtiming.com/video.html
edit - this link might help you identify your ignition unit and distributor if you don't know.
https://msdignition.com/products/distributors/
-
 SA69mach got a reaction from 69R-CODE in Upper and Lower Control Arms (Installation)
The 69 and 70 cars will benefit greatly from a stock rebuild of the UCA's and LCA's. Keep in mind the UCA's on offer from many suppliers can be improved with some careful alignment in the bushings. If you already have yours, then so be it. I would recommend the 'cheater' UCA's from Opentracker if you want accurate bolt-in items.
The Arning drop is a free upgrade for these cars, and will give immediate improvement in performance. If you have your arms out, then why not do it?
A 1" sway bar will also give much improved handling. This will give best results when combined with mildly heavier spring rate and lowered if you wish. 600 lbs is high end for street car. 500lb is sporting. 320 would be a minimum rate IMO. I do not prefer lowering cars beyond 1 inch, plus the 3/8" to 5/8" the Arning drop provides.
Good shocks make a massive difference, and improvement in my own cars. Cant praise the Bilstein shocks enough, as they are just great.
As stated, the LCA alignment shim kit is good insurance for your money. Also the heavy duty Export Brace. Monte Carlo bar too, if you wish.
Alignment specs are key for these cars. Using the BOSS 302 as a guide, most folks find great STREET results from:
-1 Camber (1 degree negative camber)
2.5 - 3.5 Castor.
1/32 - 1/16 toe in. (drivers side/pass side)
There are many other things you can do, especially when you find worn parts, like strut rod bushings, steering linkage bushings, rear spring bushings, etc. But for front end work, this will be inexpensive and guaranteed to work nicely, and eliminate that 'horror drive' situation.
You will need to have some rust loosener, some standard tools, spring compressors, some 'never seize' paste for assembly. Grease gun. torque wrench. Probably other things.
You might consider welding in some gussets from the frame to the shock tower too. That gives great strength to the shock tower and very little cost and work.
-
 SA69mach got a reaction from Desertdave in 69 coupe with boss side decals opinions
My 70 coupe stripe set
.
.
-
 SA69mach got a reaction from RPM in What did you do to/for your Mustang today?
Installed new stainless steel hood pin set on the 70 coupe. Now they make the originals on my 69 look like dirt. Another job on the list.....
Changed out a blown brake light on the 69 Mach 1.
Big day :) But I had to remove a busted throttle cable from my GSXR1000. Then drive across town to get a new one, then reinstall it and adjust it. That killed my day. I had come from a 120 mile ride, and the throttle cable broke 200 yards from my house. Lucky...in one way.
-
 SA69mach got a reaction from Mike65 in 14 inch Rim Blow wheel.....opinions please
Hi Mike65.
This method can be used on any steering wheel. I guess you are referring to the two spoke wheel?
Once you cut away the plastic grip and a bit of the plastic down the spoke (1 or 2 inches), the metal grip frame is exposed.
Assuming you want to make a smaller wheel, -Cut the metal hoop off at the spokes, then resize it, then weld it back on the spokes. Trim the excess spoke metal, and then go for it with the laminated timber.
It is actually a lot less work with a non-rimblow wheel. No cutting of the groove for the horn strip, and the fake metal strip around the outside of the grip. So, hours of work saved right there. My second wheel I deleted both of those items anyway. And that's what I am driving with right now. Love the size, love the center horn button, and love the look. Drives better too.
Let me know if you need any help.
-
SA69mach got a reaction from RPM in Score- 70 spindles for my 69 Mach1
I have been looking for a set of 70 spindles to upgrade my 69 Mach1 for a while. I was looking at Opentracker, but they only make/sell 70 spindles for drum brakes. In many respects those spindles are a good thing, as so many brake kits are designed to fit the drum spindles.
The 69 and 70 have different spindles for drum and disc brakes. The drum spindles are largely regarded as being stronger in design. However it is the larger diameter of the spindle stub axle that I wanted.
So, thanks to Dan and Carol at Chockostang, I look forward to fitting them. New rotors, bearings, dust caps, brake pads and tie rods.
On a side note, Chockostang is a great "mom and pop" business, that serves our Mustang community well. Dan is extremely knowledgeable, and nice to talk to, very helpful and a Mustang enthusiast.
-
SA69mach reacted to Mach1 Driver in Tuning question
I don't want to get off topic here, but if I may offer a guess here, you also installed a MSD ignition box? I say that because in one of the pictures you seem to have a MSD brand Blaster coil. If you confirm the use of a MSD ignition box then I think I can offer an explanation as to why the tach isn't working.
-
SA69mach reacted to Mach1 Driver in Tuning question
I think you are saying that the mechanic took out the old ignition/box and put in a MSD box?
Ok here's how it works- in a stock system a wire is run from the ignition switch to the coil positive terminal and the other side of the coil goes to the distributor which has points that open and close. The opening and closing of the points makes a magnetic field buildup and collapse in the coil and this is what makes a coil operate. Normally coils work on AC power but this a way to make it work in a DC (battery) system. The higher voltage from the coil's secondary is discharged to the plugs via the rotor. If you didn't have the points it would only generate a field when you turned the key on and off- with nothing in between. The tach was connected to the side of the coil that the points were connected to. It would count when the points opened and closed and figure out the RPM from that. There are 8 lobes on the cam inside the distributor to open the points once for each cylinder. The MSD ignition is a "multiple spark discharge" system. It produces multiple sparks for each power stroke. It still uses a coil but now on each power stroke the coil is fired multiple times. This screws-up the tach because it can't count anymore- it doesn't have a clean tach signal. Often the MSD box will have a tach output that you can connect your tachometer to in order to get a clean signal. I hope all of that is understandable.
not my thumbnails
-
SA69mach reacted to RPM in Tuning question
nickjames, if you do remove the power booster, make sure you replace the brake pedal as the power and manual pedals differ. The pivot points mount at different locations to allow for more leverage for the manual pedal.
-
SA69mach reacted to nickjames138 in Tuning question
Please explain. You kept asking where the hose from the distributor was hooked up to. I never had a hose hooked up to the Dist. so I figured when he hooked it up and it started running better that was a good step towards fixing the issue. We played with the timing by ear since I'm waiting on a pointer to arrive via mail and nothing was working. It kept dieseling. Then, once we hooked the hose up and put the timing near the best running position (where it was before) it didn't diesel and it didn't hesitate anymore. So, those 2 issues being gone...I was under the impression that is a great thing.
-
SA69mach reacted to ray1970 in 14 inch Rim Blow wheel.....opinions please
Should I use maple or walnut?
-
SA69mach reacted to Rsmach1 in Which Posi
If properly rebuilt his FMX should be OK, as you stated just need to choose a converter/rear gears wisely, and not be cruising down the hwy at 2200 rpm with a 2500 stall converter. It's also advisable to get a large trans cooler (preferably with it's own fan) to keep temps in check. Being cast iron the FMX tends to run hotter than it's aluminum counterparts.
-
 SA69mach got a reaction from barnett468 in Tuning question
Because it runs with no spark
And I guess it also sounds like a bad diesel engine
-
SA69mach got a reaction from RPM in Which Posi
Your rear wheel hp is under 450, and the truetrac will handle that with ridiculous ease. Smooth and maintenance free. Very strong.
If you are not racing, then they are, by most standards, the perfect LSD for a streeter with solid hp and live axle rear.
You wont be unhappy with the package I spotted above - 3.50, 31 spline, forged axles, truetrac. Great 9 inch combination for any 3 speed automatic Mustang.
It is a lot of work and $$$'s and I would not just throw suggestions from my 'wish list' for you to go do. I have two cars with trutrac Ford 9 inch rears, 31 spline, forged axles. The 3 speed auto has 3.50 and the 5 speed has 3.73 gears.
My 500 rwhp car has the Detroit Locker. 4.30 gears, 6 speed T56 Magnum, lots of go fast bits. Brutal to drive on the street, but absolutely bulletproof track car for nearly 10 years.
My Mach 1 has a 3.00 peg leg 9 inch rear, but this season it will be getting,.... drum roll,....3.50, truetrac 31 spline forged Dutchman axles. In my view it is a proven combination for mid/high hp street car. They can take a beating. they run hard light to light. They are acceptable for highway cruising. You don't give up much with that set up. Maybe long long hauls, that gear would be better at 3.25, but unless you are doing interstate trips 10 times a year, forget it.
-
SA69mach reacted to Midlife in Engine gauge feed harness
The NPD catalog lists a 351C long and short oil sending wire version, but that doesn't solve your issues. I'd cut the harness somewhere in the middle where is is taped and add the appropriate length wires (butt crimp or solder with shrinkwrap) then re-tape the harness.
-
SA69mach reacted to Midlife in Instrument Cluster Voltage Regulator
A constant 5V source for the gauges should not blow the gauges. A CVR should not put out a constant 5V if it is the old style CVR; the newer electronic ones will, though.
I'd remove the CVR and re-test the gauges. If all are blown, then something was amiss with the circuitry would be my guess.
-
 SA69mach got a reaction from JamesS in Boss 2 / big block wraparound tower retro fit
I guess you can if you can find them. It would make me uncomfortable, personally, but that is just me being sentimental. It is just a car part, but I figure those parts should be 'reserved' or 'preserved' for those lucky enough to have a real BOSS.
I have not seen any "great" aftermarket fully braced shock towers - probably a market for some enterprising soul, with a high tonnage press. The multi-piece kits are serviceable, but require a lot of work, and look sketchy. But then again, if you need a braced tower, who cares what it looks like.?
I would think that BOSS parts would rate up there with some of the Shelby stuff - expensive in any condition.
Good luck whatever you decide.
-
SA69mach reacted to Spider69 in FMX gearbox rebuild
Thanks for your reply, obviously I will post pics.
I have some other things to do, like u-joint, harmonic balancer, fuel pump, ...
Gearbox rebuild will start end feb or early march.
Good tip "braze the fins" I will have a deep look on this.
I never opened a converter, do you have some pics related to the fins?
The rebuild is preventive, I have just a leakage at the shifter o-ring and this strange noise during the 500 first meters when engine is cold and not every time.
Apart from that it works fine and the car is driving very well.
I see that we have quiet the same car with FMX gearbox.
Mine was also black jade, It's now Acapulco blue, but I don't have A/C.