
Leaderboard
Popular Content
Showing content with the highest reputation on 11/27/2022 in all areas
-
4 points

Ridgerunner Sail Panels
TexasEd and 3 others reacted to Ridge Runner for a post in a topic
First set is for TexasEd. They already have the proper curve and moon skin grain ,i made the light holes a bit small just incase you use the new lights ,they are a bit smaller than the originals ,a wood dowl and 80 grit paper will open them up if you need to . A strip of foam on the back side at the bottom may be needed to keep them against the hockey stick just like the card board ones have but other than that they slip in under the back window rubber and 1 screw in the front where the small molding is and paint your interior color the pinch on wind lace covers the front just like the card board ones do and thats all thats need to install . -
1 point

windshield washer pump
Grabber70Mach reacted to whe42 for a post in a topic
So was able to test wires and ended up being the plug was faulty so I replaced it and all works well. Thank u to all for ur help. -
1 point

69 SuperCoupe
RPM reacted to Grabber70Mach for a post in a topic
Progress is always good no matter how slowly it goes. It's definitely more progress than I've got done. -
1 pointIf the width is stock 28 spline axle in a big housing would utilize an 88128-RA.
-
1 point

What all seals are involved in the gas tank and sending unit?
Grabber70Mach reacted to RPM for a post in a topic
I guess I got lucky installing my fuel sending unit. It went in easy peasy and didn't leak. Yet... -
1 point

Mike65's 69 Coupe build
Grabber70Mach reacted to Mike65 for a post in a topic
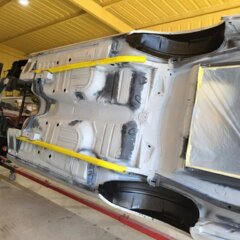
I have not posted here in a couple years, & the Mustang took a back seat to home renovation. Now that the house is where we want it & we got the garage/shop built the work will continue on the Mustang. Here are some pics for your viewing pleasure. New garage/shop with our spare truck 99 Explorer Sport, my newest DD 2005 F150 regular cab 2WD, & my wife's DD 2021 Bronco Sport. We did not plan to have them all red it just worked out that way. The Mustang & my wife's Kawasaki Motorcycle in their new home. Inside complete interior spray foam insulated & the lower area is painted the brightest whit we could find to help with lighting. We have 4 LED lights in the ceiling fixtures, & 4 (2each side) LED light fixtures. -
1 point

69 coupe from SVK
Grabber70Mach reacted to mikee for a post in a topic
Hi Guys ... after a while (that felt like forever) So my lesson learned - never judge engine after removing one cylinder head :) After I took down the second one o found some scratches in cylinder 6 and suspicious spot in cylinder 7 that could be a crack. So my optimism was gone and I knew I have to disassembly whole endine. I made penetration test of cylinder 7 - and it came out that it was no crack. The biggest disappointment was then I realized that the engine is already 0.040 over. The bearings of connection rods were also destroyed as well as on crankshaft. I spent hours on net to browse 351w topics and videos, what are my possibilities. To bore it over to 4.060" is to risky, to sleeve it to expensive and to find some good block for reasonable price in europe is impossible. So I decided to just refresh the engine (hone the cylinders, re ring it and change all bearings, timing, cam, lifters and oil pump), put it together so I can finish the car. With finished hone I was able to get roundness and taper to factory specs, but my bore is up to 0,002 inch over the top limit. Anyway, no option at this time, at least the crank is 0,010 under so I can let it grind to 0,020 and balance. Im looking now for parts to order. Except piston rings and camshaft it should be no problem. Rings - I'm not sure if I buy 0,040 over rings the gap will be not too big (my worn rings make 0,026" gap). I'm thinking to buy 0,060s and grind them to size, but I don't know if the shape of rings is already different because of bigger diameter. Camshaft - I can't find some stock cam or some alternative in any shop (everywhere is only edelbrock performer + ) -
1 point

69 SuperCoupe
Grabber70Mach reacted to RogerC for a post in a topic
A friend at work bead blasted my headlight buckets for me, he's currently doing my headlight extensions. I found I needed to increase the hole on the backside by almost 3/8 inch to clear the back of the bulb housing. I also had to trim 3 tabs off the bulb housings, they were larger and didn't match the buckets. Touched up the backside of the bulb housings where I cut off the tabs with POR15 (the backside is metal). Coated the inside surface of the headlight buckets with POR15. Have to coat the backside then paint. Thinking of coating the rim of each bucket with a couple coats of spray rubber. I'm thinking it might prevent any rubbing of the headlight housing when mounted.