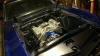
stangme428 33 Report post Posted September 16, 2012 more pics of Saturday's work .. fuel lines, i need to research if any sanctioning bodies dont allow the fuel lines how we have them routed... mainly in the front along the bottom of the radiator support... so the route follows the factory fuel line but instead of turning into engine compartment it routes near the bumper support, around the base of the radiator support, then out the passenger side radiator support, then to the FPS...:biggrin: Quote Share this post Link to post Share on other sites
buening 63 Report post Posted September 17, 2012 Do you have a mechanical or electric fuel pump? If electric that is near the tank, why not run them up along the subframe connectors on the driveshaft side and then up the firewall and to the carb? Quote Share this post Link to post Share on other sites
stangme428 33 Report post Posted September 17, 2012 Do you have a mechanical or electric fuel pump? If electric that is near the tank, why not run them up along the subframe connectors on the driveshaft side and then up the firewall and to the carb? electric ... yes... we thought about several different routes... this is just the one we ended up with... :blink: Quote Share this post Link to post Share on other sites
Mike65 476 Report post Posted September 17, 2012 Stangme428, I have been following your build & was wondering which brand & size radiator did you use?. Mike. Quote Share this post Link to post Share on other sites
stangme428 33 Report post Posted September 17, 2012 Stangme428,I have been following your build & was wondering which brand & size radiator did you use?. Mike. Champion 3 Row... the thickness of the top doesn't allow for a perfect fit of the rubber inserts with the bracket, but we modified the rubber insert by cutting the sides off the rubber just using the top piece, i will use a thinner piece of rubber to fit the sides of the bracket. Quote Share this post Link to post Share on other sites
Mike65 476 Report post Posted September 17, 2012 Thanks for the info. :clap: Quote Share this post Link to post Share on other sites
stangme428 33 Report post Posted September 24, 2012 not much physical work progress -- schedules didn't work out this past weekend for me to make it to Jacksonville. i did get a good bit of time in on the AAW wiring document to mate up the correct wiring with the Summit ProTorque starter, Mallory MaxFire distributor, as well as the 200A one wire alternator from Jeff's Bronco Graveyard. also ordered brake lines and some materials from Eastwood to help fend off oxidation on the Shelby valve covers and CVF racing brackets, and rust prevention in the fender well area etc - Eastwood Diamond Clear Gloss/Metal Surfaces 10200Z Diamond Clear Satin/Metal Surfaces Aerosol 11 oz. 10300Z Eastwood Rubberized Rust Encapsulator Undercoating - Black Aerosol 13651Z New stainless front to rear brake line from NPD, this will allow us to cut out the junction block / proportioning valve and place the block in a vice to remove the old brake lines, then we can install all new stainless brake lines. im sure we will need a aftermarket adjustable proportioning valve, ill order one from street or track when i order the rear disc brake kit from them. keep posting on all the great builds!!!!:thumbup1: soooo much inspiration on this site!! Quote Share this post Link to post Share on other sites
buening 63 Report post Posted September 24, 2012 Word of advice with the stainless brake lines, you will want to tighten the brake line nut into whatever the line attaches to, then loosen, then torque slightly more, etc etc. Rarely does the stainless flare match the brass seat of prop valves and calipers, so you need to conform the brass seats to match the stainless lines by gradually retorquing the nut to deform the brass. Quote Share this post Link to post Share on other sites
stangme428 33 Report post Posted September 24, 2012 thanks for the tip buening... much appreciated!:thumbup1: Word of advice with the stainless brake lines, you will want to tighten the brake line nut into whatever the line attaches to, then loosen, then torque slightly more, etc etc. Rarely does the stainless flare match the brass seat of prop valves and calipers, so you need to conform the brass seats to match the stainless lines by gradually retorquing the nut to deform the brass. Quote Share this post Link to post Share on other sites
stangme428 33 Report post Posted September 25, 2012 (edited) woo hooo... Sanderson headers dropped off today at East Coast Powder Coating in Jacksonville.. going for the ceramic silver coating, should have a shine but not like chrome... cost quoted is 220.00 not bad :tongue_smilie:so thats 344.95 for the headers and 220 for coating... 564.95 and another 60 for the copper gaskets that i may not use... 624.95 ... total close to the cost of the Ford Powertrain Applications Headers i believe... anywho i know these fit!!! Also ordered Techflex F6 wire wrap to protect the wires in the AAW install ... thanks to 66FSTBCK over on VMF forum. Edited September 26, 2012 by stangme428 update info Quote Share this post Link to post Share on other sites
Jayru 17 Report post Posted September 26, 2012 more pics of Saturday's work .. fuel lines, i need to research if any sanctioning bodies dont allow the fuel lines how we have them routed... mainly in the front along the bottom of the radiator support... so the route follows the factory fuel line but instead of turning into engine compartment it routes near the bumper support, around the base of the radiator support, then out the passenger side radiator support, then to the FPS...:biggrin: I'm a little concerned the way you routed the fuel lines. May want to think of getting them out of the front nose in case of a front end collision. Also, It looks like the line is just up against the metal apron near the front, could chafe/cause a leak. Don't run them on the inside of the tunnel either, not legal - especially if the driveshaft snaps and takes them out at the track! Just my 2 cents. Glad you're making progress! Quote Share this post Link to post Share on other sites
stangme428 33 Report post Posted September 26, 2012 Thanks Jayru .... still mulling it over ...:sweatdrop: Quote Share this post Link to post Share on other sites
BuckeyeDemon 211 Report post Posted September 28, 2012 I'm a little concerned the way you routed the fuel lines. May want to think of getting them out of the front nose in case of a front end collision. i wouldn't think a fuel line on the front crossmember in the front located about 12" from the front bumper would be any worse than the gas tank located about 12" from the rear bumper, or the fuel line routed right next to the rocker underneath the driver. if anything a person could maybe claim the probability of a broken fuel line component in an accident would increase since now it's located on three sides (generally speaking) instead of two. of course i routed a return line down the passenger side of the car like the drivers side... Quote Share this post Link to post Share on other sites
stangme428 33 Report post Posted September 28, 2012 i wouldn't think a fuel line on the front crossmember in the front located about 12" from the front bumper would be any worse than the gas tank located about 12" from the rear bumper, or the fuel line routed right next to the rocker underneath the driver. if anything a person could maybe claim the probability of a broken fuel line component in an accident would increase since now it's located on three sides (generally speaking) instead of two. of course i routed a return line down the passenger side of the car like the drivers side... I will be running a inertia switch to cut the fuel pump in the event of a accident... I think I will place extra protection on the fuel line contact points and go with it for now. Backup is place a bulk head -an fitting at the original location and route along the same line as if it had a mech fuel pump over to the FPR... But that has its pros and cons also... Keep the input and suggestions going!!! Quote Share this post Link to post Share on other sites
69gmachine 15 Report post Posted September 28, 2012 (edited) I don't think most sanctioning bodies are going to allow that much flexible line even if it's steel braided, but I'm no drag race expert. Everything I've read says they want hard line as much as possible. Aluminum is cheap and easy to bend, so that's what I used. Something to look into anyway. I saw you bought 275 18s, but I couldn't tell if that was for the front or back. I have a GM J-car rack and use 275 17s up front when I autocross. When my PS went out momentarily because water sprayed all over the belt, I almost couldn't turn the wheel at slow speeds. The TCP rack may be easier to turn. Edited September 28, 2012 by 69gmachine spelling Quote Share this post Link to post Share on other sites
stangme428 33 Report post Posted September 28, 2012 69g --yeah i really may take it to the drag strip a few times nothing regular, maybe 'run what ya got' night... i mainly want to be able to take advantage of autocross and track days when possible, but i want to drive it on the street mainly... just have fun with it. the 275/18 are for all 4 corners, based on feedback from vintage venom and others... i plan on using a stock size steering wheel with the TCP manual rack and no parallel parking.. lol.. we shall see I don't think most sanctioning bodies are going to allow that much flexible line even if it's steel braided, but I'm no drag race expert. Everything I've read says they want hard line as much as possible. Aluminum is cheap and easy to bend, so that's what I used. Something to look into anyway. I saw you bought 275 18s, but I couldn't tell if that was for the front or back. I have a GM J-car rack and use 275 17s up front when I autocross. When my PS went out momentarily because water sprayed all over the belt, I almost couldn't turn the wheel at slow speeds. The TCP rack may be easier to turn. Quote Share this post Link to post Share on other sites
stangme428 33 Report post Posted September 30, 2012 progress -- finished running the -6 AN return line to the Aeromotive FPR finished running the -8 AN main line to the FPR finished running the -6 AN feed line to each bowl of the Demon carb pulled the factory distribution block, replaced all brake lines with new stainless brake lines from NPD... need to re-bend the two at the master cylinder mounted the Modern Drivleline clutch master cylinder back in its location, connected stainless braided lines to TOB .. would like a nice billet reservoir and feed line at some point mounted the factory PDB booster - looks like we returned the bendix specific bracket between the firewall and booster, couldn't find it.. quick call and drive over to Mustang Masters and picked one up... thanks Freddie-- picked up the Shelby center exhaust outlet from Mustang Masters.... need to modify the new lines to mate to the new Vintage Venom brake lines at each caliper need to figure out how to remove the stock front to rear brake line tabs.. new front to rear brake line is routed but not finalized thanks for the help on the 69 this weekend, Andy and Jeff... good times, good food once again...!!!:thumbup1::tongue_smilie::punk: I'll post more pics soon... Quote Share this post Link to post Share on other sites
madmike8 10 Report post Posted September 30, 2012 Hmmm, I remember a 260z at a SCCA driving camp, and a certain driver being pelted in the face by the rubber from his own tires... :) I'm liking your build... Keep it up... Quote Share this post Link to post Share on other sites
stangme428 33 Report post Posted September 30, 2012 Hmmm, I remember a 260z at a SCCA driving camp, and a certain driver being pelted in the face by the rubber from his own tires... :) I'm liking your build... Keep it up... thanks madmike! good times!! rock n roll aint pretty!:tongue_smilie::scared::punk: Quote Share this post Link to post Share on other sites
stangme428 33 Report post Posted September 30, 2012 (edited) ok -- so the goal is to use multiple arduino micro-controllers(prototype) with RGB addressable LED pixel strings to control the gauge cluster lighting, interior lighting, turn signals, tail lights etc.. moving to atmega 328P circuit build once design is completed.. first tests are looking good, since the YearOne bezel did not come with turn signal or bright light indicators, i will program the far right and left to blink green when the appropriate turn signal is enabled, and also have the speedo gauge light blue when the bright lights are on.. the Shelby sequential tail lights should be fun with the arduino.. its all in testing at the moment, obviously the brightness will be the biggest challenge, adding enough RGB LED's to arrive at the brightness needed.. fun stuff.. initial testing of arduino and RGB pixel string-- gauge cluster testing night test Edited September 30, 2012 by stangme428 Quote Share this post Link to post Share on other sites
70mstang 11 Report post Posted October 1, 2012 Funkiness .. in da house! Are you going to keep the colors changing while driving or set them to only change when you use signals or other stuff? I'd drive off the road if they continually changed colors :tongue_smilie: Quote Share this post Link to post Share on other sites
stangme428 33 Report post Posted October 1, 2012 Funkiness .. in da house! Are you going to keep the colors changing while driving or set them to only change when you use signals or other stuff? I'd drive off the road if they continually changed colors :tongue_smilie: lol... nope that's just a test pattern for the pixel string... ill code it out as i go . gonna try a encoder input to control the color aka Ford MyColor in the new mustang ..... Quote Share this post Link to post Share on other sites
70Nightmare 20 Report post Posted October 2, 2012 Thats nice. Quote Share this post Link to post Share on other sites
SWPruett 83 Report post Posted October 2, 2012 I am sooo diggin this build! Still making my way through all the details you have documented, but really nice to see your work! :thumbup1: Quote Share this post Link to post Share on other sites
stangme428 33 Report post Posted October 3, 2012 I am sooo diggin this build! Still making my way through all the details you have documented, but really nice to see your work! :thumbup1: thanks getting close!!! :thumbup1: Quote Share this post Link to post Share on other sites