Mike65 475 Report post Posted January 29, 2012 Lessons learned, keep your original harness until you have EVERYTHING working right. The AAW kit does not have a connector for the heater, at all. I reused connectors for the reverse lights and some other connections. Unfortunately I got my car as semi-bare shell that was being stripped for parts for other cars. The under dash harness was chopped up & is now gone & the tail light harness was shot & is gone the only one I have still is the under hood harness that runs along the l/s inner fender panels from the firewall junction box to the lights & horn. :( Mike. Quote Share this post Link to post Share on other sites
stangme428 33 Report post Posted January 30, 2012 ill post how it goes with the AAW kit Mike65 ... thanks for the pointers 70mstang! Quote Share this post Link to post Share on other sites
stangme428 33 Report post Posted February 4, 2012 wow... dining room is full of mustang parts! received all NPD parts for interior, AAW kit... depending on work schedule, we will be able to start installing more parts next week... current projects and new projects at work are keeping me busy... but, thats a good thing! Quote Share this post Link to post Share on other sites
70mstang 11 Report post Posted February 4, 2012 It's always fun to get those shipments =) I had the same UPS Delivery guy for a lot of my orders and after about 3 large deliveriess, he asked what I was working on. He knew they were coming from MU & NPD. I s showed him the car, back then it was a serious mess though. We traded Mustang stories and he checked in on occasion when the deliveries were smaller. I figure you can tell about how far along by what you're ordering. When it comes down to itty bitty trim pieces for the interior .. you're about finished :lol: Quote Share this post Link to post Share on other sites
stangme428 33 Report post Posted February 8, 2012 (edited) quick update -- received a shorter bolt from CVF Racing for the billet alt bracket at the lower position on the water pump... works like a champ. test fitted the power steering pump from RockAuto - learned that you can take the reservoir off of the pump and clock it a few degrees to help clear the valve cover... thanks to Nate at CVF.. forgot about that CVF is sending me a few brackets to work with to somewhat relocate the 3G alternator and see what type of mount we can come up with.. installed a new billet water pump pulley cover from march.. fits perfect.. since i will not have a stock type fan, going electric on the fan.. plan is to work this weekend 1/11/2012 and layout the AAW wiring harness along side the current factory harness, and install as we go. looks like a daunting task, but it just takes time time time..... no rush.. the diagrams and instructions from AAW look top notch! then to the fuel system install... pics to come... Edited February 8, 2012 by stangme428 Quote Share this post Link to post Share on other sites
stangme428 33 Report post Posted February 13, 2012 (edited) some progress --- installed new stainless gas tank from glenn's performance.. i ordered a 22gal unit which now we need to figure out how to align the neck filler due to the new height and filler tube misalignment.. figured out how we want to run the fuel lines and mount the fuel pressure regulator.. removed PDB and master cylinder.. we mounted the new one very quick before it went to mustang masters last year, unpainted it now had lots of surface rust, so we scuffed up and painted it with some silver stainless color paint used for alternators and painted the master cylinder Eastwood chassis satin black.. something different started laying out the AAW harness to grasp what is needed and started removing the original harness.. then... it got cold... lol... dropped into the 20's and we weren't prepared with the small heater... so we thought yeah we will get up Sunday and knock it out.... um... it got colder... lol.. dunno how you guys up north deal with it.. i guess you have good heaters.. hope to get back to work on her next weekend.. Edited February 13, 2012 by stangme428 Quote Share this post Link to post Share on other sites
stangme428 33 Report post Posted February 13, 2012 (edited) some progress --- installed new stainless gas tank from glenn's performance.. i ordered a 22gal unit which now we need to figure out how to align the neck filler due to the new height and filler tube misalignment.. figured out how we want to run the fuel lines and mount the fuel pressure regulator.. removed PDB and master cylinder.. we mounted the new one very quick before it went to mustang masters last year, unpainted it now had lots of surface rust, so we scuffed up and painted it with some silver stainless color paint used for alternators and painted the master cylinder Eastwood chassis satin black.. something different started laying out the AAW harness to grasp what is needed and started removing the original harness.. then... it got cold... lol... dropped into the 20's and we weren't prepared with the small heater... so we thought yeah we will get up Sunday and knock it out.... um... it got colder... lol.. dunno how you guys up north deal with it.. i guess you have good heaters.. hope to get back to work on her next weekend.. Edited February 13, 2012 by stangme428 Quote Share this post Link to post Share on other sites
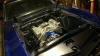
stangme428 33 Report post Posted February 13, 2012 (edited) AAW - a few pics nothing special to see .. just laying out the harness to get an idea of what its all about. read through the instructions, great drawings and every wire is labeled.. getting the original harness out is a bit of fun, with all the different ways they factory held it in place.. ill do a write up with pics of the hard stuff when im done.. snuck in a pic of a future mod... vintage 48's will be up for sale once the new mod is completed... 1st pic is of new holes drilled to mount the AAW fuse panel to the left of the factory fuse panel.. 2nd is the spaghetti that is being installed 3rd is of the new fuse panel... very very nice! 4th ... hmmm 18x9 GT4 5th 69 Shelby / Tbird rear harness.. to be spliced in once the AAW harness is tested.. Edited February 13, 2012 by stangme428 Quote Share this post Link to post Share on other sites
stangme428 33 Report post Posted February 13, 2012 (edited) AAW - a few pics nothing special to see .. just laying out the harness to get an idea of what its all about. read through the instructions, great drawings and every wire is labeled.. getting the original harness out is a bit of fun, with all the different ways they factory held it in place.. ill do a write up with pics of the hard stuff when im done.. snuck in a pic of a future mod... vintage 48's will be up for sale once the new mod is completed... 1st pic is of new holes drilled to mount the AAW fuse panel to the left of the factory fuse panel.. 2nd is the spaghetti that is being installed 3rd is of the new fuse panel... very very nice! 4th ... hmmm 18x9 GT4 5th 69 Shelby / Tbird rear harness.. to be spliced in once the AAW harness is tested.. Edited February 13, 2012 by stangme428 Quote Share this post Link to post Share on other sites
stangme428 33 Report post Posted February 26, 2012 we made a LOT of progress on Saturday! we mounted the new AAW fuse panel, routed the new wiring harness into the engine compartment, got ready for the rear body wiring harness that routes through the driver side sill channel, seated the new Shelby carpet, put the seat brackets together for the new procar scat seats and got them ready to mount.... whew what a day! good times with good friends..!! i have written up a detailed document on the American Auto Wire harness install and will post it once we are completed with the AAW install, we currently have 30++ photos and counting in the document showing the removal of the factory harness and install of the new AAW harness... Notes on the AAW install -- the instruction sheets are GREAT! review them, review them, review them, about the 4th time the light bulb should go off in your head, the sky should part and the sun will shine.... ok the light bulb may go off earlier for some.... the instructions lay out each branch as it relates to the routing and connections and then a detailed view showing a specific branch is expanded upon when needed... for example branch 2 which feeds all lighting for the front of the 69 feeds through the old square firewall hole into the engine compartment.. they show the branch on page 2 of the instructions and then expand upon it with more detail on page 7.... and again for the upper firewall hole mount into the engine compartment for AAW pp 4 showing the wiring for the starter solenoid, washer motor, etc for branch 5 then showing more detain on page 8... good stuff!! :punk::rockon: Quote Share this post Link to post Share on other sites
stangme428 33 Report post Posted February 26, 2012 we made a LOT of progress on Saturday! we mounted the new AAW fuse panel, routed the new wiring harness into the engine compartment, got ready for the rear body wiring harness that routes through the driver side sill channel, seated the new Shelby carpet, put the seat brackets together for the new procar scat seats and got them ready to mount.... whew what a day! good times with good friends..!! i have written up a detailed document on the American Auto Wire harness install and will post it once we are completed with the AAW install, we currently have 30++ photos and counting in the document showing the removal of the factory harness and install of the new AAW harness... Notes on the AAW install -- the instruction sheets are GREAT! review them, review them, review them, about the 4th time the light bulb should go off in your head, the sky should part and the sun will shine.... ok the light bulb may go off earlier for some.... the instructions lay out each branch as it relates to the routing and connections and then a detailed view showing a specific branch is expanded upon when needed... for example branch 2 which feeds all lighting for the front of the 69 feeds through the old square firewall hole into the engine compartment.. they show the branch on page 2 of the instructions and then expand upon it with more detail on page 7.... and again for the upper firewall hole mount into the engine compartment for AAW pp 4 showing the wiring for the starter solenoid, washer motor, etc for branch 5 then showing more detain on page 8... good stuff!! :punk::rockon: Quote Share this post Link to post Share on other sites
stangme428 33 Report post Posted February 26, 2012 (edited) we did a trial fit of the Shelby carpet i picked up from NPD, black with black inserts PN# CA-9-63-51A. the carpet is somewhat molded and comes with some insulation in key areas on the back... we are still working on the pro car scat seats, the mounting should be interesting, we are working on the height to make sure heads dont hit the headliner..... andy is headed to the hardware store or fastenal to find some stainless bolts nad lock nuts to bolt the seats in.... progress!! baby steps!!!:punk: Edited February 26, 2012 by stangme428 Quote Share this post Link to post Share on other sites
stangme428 33 Report post Posted February 26, 2012 (edited) we did a trial fit of the Shelby carpet i picked up from NPD, black with black inserts PN# CA-9-63-51A. the carpet is somewhat molded and comes with some insulation in key areas on the back... we are still working on the pro car scat seats, the mounting should be interesting, we are working on the height to make sure heads dont hit the headliner..... andy is headed to the hardware store or fastenal to find some stainless bolts nad lock nuts to bolt the seats in.... progress!! baby steps!!!:punk: Edited February 26, 2012 by stangme428 Quote Share this post Link to post Share on other sites
Rudolph Schenker 14 Report post Posted February 27, 2012 Nice work! Carpet looks nice. :cool::cool: Quote Share this post Link to post Share on other sites
Rudolph Schenker 14 Report post Posted February 27, 2012 Nice work! Carpet looks nice. :cool::cool: Quote Share this post Link to post Share on other sites
Mike65 475 Report post Posted February 27, 2012 Looking good. Quote Share this post Link to post Share on other sites
Mike65 475 Report post Posted February 27, 2012 Looking good. Quote Share this post Link to post Share on other sites
stangme428 33 Report post Posted February 28, 2012 thanks!! cant wait to get her on the road one day! Quote Share this post Link to post Share on other sites
Jayru 17 Report post Posted February 28, 2012 Looking good man! Carpet looks nice. I plan to re-wire my car someday, so looking forward to your wiring install guide. Quote Share this post Link to post Share on other sites
Pakrat 1,043 Report post Posted February 28, 2012 So what does the Shelby carpet have that the regular carpet doesn't? Which did you get to fit the coupe, the Sportsroof or convertible? I would imagine either might have some fit issues? Quote Share this post Link to post Share on other sites
stangme428 33 Report post Posted March 2, 2012 So what does the Shelby carpet have that the regular carpet doesn't? Which did you get to fit the coupe, the Sportsroof or convertible? I would imagine either might have some fit issues? The Shelby / mach1 carpet has the front and rear inserts, I chose black inserts. So far it fits fine.:rockon: Quote Share this post Link to post Share on other sites
stangme428 33 Report post Posted March 5, 2012 (edited) a bit of progress this weekend, we installed the AN fittings at the gas tank, fuel filter and fuel pump, removed the factory fuel line and ran the ptfe stainless braid along the factory location to the front. got the return line routing figured out on the passenger side. so far the glenn's performance kit has been great... the sleeper stainless tank with sump along with the fuel filter, pump and AN fittings have worked out very well... also mounted the alternator pulley and cone, we are gonna make that alternator fit!!! lol trying to figure out where to mount the aermomotive fuel pressure regulator... looks like where the solenoid mounts.. running the return fuel line directly under the fpr through a factory hole and the main fuel line across the front strut rod area near the radiator and up to the fps... we shall see... any ideas let me know... :tongue_smilie: Edited March 5, 2012 by stangme428 Quote Share this post Link to post Share on other sites
Jayru 17 Report post Posted March 5, 2012 What type of AN fittings are those? Push lock? Also - a return line? Did I miss something? Thought you were going carbureted, did you switch to FI? :thumbup1: Quote Share this post Link to post Share on other sites
stangme428 33 Report post Posted March 5, 2012 jayru -- i wanted to install a fuel system that would support 600hp, and i could later move to EFI with just a regulator swap out. glenn's performance uses "Aeroquip ORB Fittings. All o-ring fittings for positive seal (NO NPT)." they went together easy once you have the braid even, slip the ferrel in, slide in the nipple, pull it all together tightened up... so far so good... What type of AN fittings are those? Push lock? Also - a return line? Did I miss something? Thought you were going carbureted, did you switch to FI? :thumbup1: Quote Share this post Link to post Share on other sites
Jayru 17 Report post Posted March 5, 2012 Interesting, so is the return line just blocked off while you use the carb? I've got to make up a bunch of hoses for the Z and have been panicking about doing it as I've read it can be a bitch to assemble the AN hoses (If it's not done right it leaks/brakes, etc)! Watched a youtube video on it and they file the inner hose so the lining doesn't frey from the inside out. Had never seen that before. Did your kit recommend doing that? It's looking good man! Quote Share this post Link to post Share on other sites