stangme428 33 Report post Posted October 3, 2012 woo hoo.. just got the call, headers are ceramic coated and ready for pickup from East Coast powder coating in JAX ... should pick them up tomorrow 10/4/2012 .. pics to follow.:thumbup1: Quote Share this post Link to post Share on other sites
stangme428 33 Report post Posted October 9, 2012 (edited) I'll see these in a week ... But pics look great!! Bud Andy picked them up while I'm in Anaheim for a week ... Edited October 9, 2012 by stangme428 Quote Share this post Link to post Share on other sites
stangme428 33 Report post Posted October 20, 2012 whew... I'm back from a work/fun week in Anaheim, Cali :punk:... but.. work schedule is keeping me away from the 69.... good times tho... hope to have some progress updates in a few weeks... parts order time!!:thumbup1: Quote Share this post Link to post Share on other sites
Jayru 17 Report post Posted November 5, 2012 ok -- so the goal is to use multiple arduino micro-controllers(prototype) with RGB addressable LED pixel strings to control the gauge cluster lighting, interior lighting, turn signals, tail lights etc.. moving to atmega 328P circuit build once design is completed.. first tests are looking good, since the YearOne bezel did not come with turn signal or bright light indicators, i will program the far right and left to blink green when the appropriate turn signal is enabled, and also have the speedo gauge light blue when the bright lights are on.. the Shelby sequential tail lights should be fun with the arduino.. its all in testing at the moment, obviously the brightness will be the biggest challenge, adding enough RGB LED's to arrive at the brightness needed.. fun stuff.. initial testing of arduino and RGB pixel string-- gauge cluster testing night test Very cool! I'm loving that! I've always wanted to replace the factory gauges but hate losing the turn signals (and the aftermarket single LED turn signal always looks cheesy in my opinion). That is a great and creative option! On the youtube video you said you needed to make custom lights in the bezel, why do you need to do that if you already have them working in the factory light positions? Quote Share this post Link to post Share on other sites
stangme428 33 Report post Posted November 6, 2012 Very cool! I'm loving that! I've always wanted to replace the factory gauges but hate losing the turn signals (and the aftermarket single LED turn signal always looks cheesy in my opinion). That is a great and creative option! On the youtube video you said you needed to make custom lights in the bezel, why do you need to do that if you already have them working in the factory light positions? thanks jayru ... i need to physically mount the led's better in the gauge cluster, i want to make them seat snug like a factory twist in bulb ... work has kept me away from the 69 of late.. hope to get back on it soon. in the actual turn signals ill modify a aftermarket bezel and fit as many led's in as possible. Quote Share this post Link to post Share on other sites
stangme428 33 Report post Posted November 7, 2012 a quick update, had a few minutes last night on the way home from JAX so Andy and I broke out the caliper and measured the Moser Engineering 31 spline axle flange to make sure new ARP studs would fit, the stud holes are within spec so ARP 3" studs as installed in the front hubs, will be ordered soon from Street or Track along with the rear disc brake setup. we also test fit the Nitto 555's 275/35-18 GT4 18x9 (94-98) wheels on the rear to get an idea if a spacer would be needed... and ... nope doesn't look like anything will be needed ... with the factory drum a 1/2" clearance at the rear leaf and amazingly slightly less at the bump stop at the top of the wheel well... although we will remove the bump stop and excess metal.. also, the tire is within the wheel well lip and does not extend out beyond... but when i feel brave we will roll the fender edge..:thumbup: also.. looks like i will have 5 - vintage 48 16x8 wheels for sale soon... 3 are powder coated and two are natural... ill post in the appropriate section when i come up with a price.. Quote Share this post Link to post Share on other sites
stangme428 33 Report post Posted November 16, 2012 woo hoo! took advantage of the Eastwood sale this week .. buy one get one free ... so i ordered 25sq.ft. of 1ft x 1ft tiles of thermo-coustic 5 per box.. while 90% of the inside of the car is covered in lizard skin ceramic insulation and lizard skin sound control, i still needed to cover: firewall behind the dash door panel skin where the door panel mounts rear seat side area rear deck top side of the trunk area should have a nice thud and reduce the road noise ... total product weight according to fedex is 37lbs ... not too bad for 50sq.ft of coverage.. sound-deadening butyl rubber material, bonded to a high-performance, heat-reducing aluminum facing, for an overall thickness of 0.063" hope to get a lot of work done on the 69 this weekend....!!! hopefully i didnt just jinx it...:thumbup: Quote Share this post Link to post Share on other sites
stangme428 33 Report post Posted November 19, 2012 (edited) finally ... all 4 GT4 wheels and Nitto tires installed ... made some good progress today ... more pics to follow... -- need some Shelby inserts on the wheels like on the Shelby GTS .... Edited November 19, 2012 by stangme428 Quote Share this post Link to post Share on other sites
stangme428 33 Report post Posted November 19, 2012 (edited) finally ... all 4 GT4 wheels and Nitto tires installed ... made some good progress today ... more pics to follow... -- need some Shelby inserts on the wheels like on the Shelby GTS .... Edited November 19, 2012 by stangme428 Quote Share this post Link to post Share on other sites
Junior2561 10 Report post Posted November 19, 2012 that is without any spacers at all, just bolted on??? Quote Share this post Link to post Share on other sites
Junior2561 10 Report post Posted November 19, 2012 that is without any spacers at all, just bolted on??? Quote Share this post Link to post Share on other sites
stangme428 33 Report post Posted November 19, 2012 that is without any spacers at all, just bolted on??? vintage venom provides spacers for the front with the GT500 brake kit .... but, no spacers are being used on the back with the 94-98 24mm wheels.. the track width in the front is wider than in the back... i could probably figure out a different back spacing and fit more tire under it but... im good for now... :thumbup: Quote Share this post Link to post Share on other sites
stangme428 33 Report post Posted November 19, 2012 that is without any spacers at all, just bolted on??? vintage venom provides spacers for the front with the GT500 brake kit .... but, no spacers are being used on the back with the 94-98 24mm wheels.. the track width in the front is wider than in the back... i could probably figure out a different back spacing and fit more tire under it but... im good for now... :thumbup: Quote Share this post Link to post Share on other sites
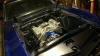
stangme428 33 Report post Posted November 19, 2012 (edited) some progress this weekend: installed TechFlex F6 wire sheathing on the front to rear wiring, positive cable from trunk, and engine compartment wiring - used 3/4 at the firewall - then 3/8 at each wire bundle at the fire wall and 1/8 on the front to rear driver side wiring adjusted the camber on the driver side - changed the eccentric kit setting from TCP to push the lower control arm out a bit... much much better - no more old school VW look in the front bent some 12" brake line extensions to adapt the new stainless engine compartment lines to the flex brake line to Brembo calipers - need one 3/16" union fitting on each side.. i forgot somehow.. installed rear GT4 wheels/tires -- woo hoo finally its the little things that give us motivation!! reviewed plan for neutral safety switch (NSS) to feed though a clutch/brake type switch Edited November 25, 2012 by stangme428 Quote Share this post Link to post Share on other sites
stangme428 33 Report post Posted November 19, 2012 (edited) some progress this weekend: installed TechFlex F6 wire sheathing on the front to rear wiring, positive cable from trunk, and engine compartment wiring - used 3/4 at the firewall - then 3/8 at each wire bundle at the fire wall and 1/8 on the front to rear driver side wiring adjusted the camber on the driver side - changed the eccentric kit setting from TCP to push the lower control arm out a bit... much much better - no more old school VW look in the front bent some 12" brake line extensions to adapt the new stainless engine compartment lines to the flex brake line to Brembo calipers - need one 3/16" union fitting on each side.. i forgot somehow.. installed rear GT4 wheels/tires -- woo hoo finally its the little things that give us motivation!! reviewed plan for neutral safety switch (NSS) to feed though a clutch/brake type switch Edited November 25, 2012 by stangme428 Quote Share this post Link to post Share on other sites
stangme428 33 Report post Posted November 25, 2012 (edited) progress -- installed the autopower roll bar with cross brace finalized front brake lines to brembo calipers installed new stainless mounting tabs/screws holding brake lines in engine compartment installed new pro form billet tied rod sleeves on the electronics side -- ordered encoder with clear shaft and knob for input to arduino modified code to remove sweep pattern from arduino hope everybody had a great weekend!! more pics to follow..:thumbup1: and the last pic is of the Shelby i do own, relaxing on Thanksgiving day! Edited November 25, 2012 by stangme428 Quote Share this post Link to post Share on other sites
stangme428 33 Report post Posted November 25, 2012 (edited) progress -- few photos of the proforged billet tie rod sleeves -- nice quality:thumbup1: update on GT500 vintage venom kit -- a pic of the 3/16" coupler union between the factory brake line and the extension to mate to the factory ford bracket (sn197) to caliper flex hose. still need to get the C clip that holds the flex hose in the bracket ... good stuff!! Edited November 26, 2012 by stangme428 Quote Share this post Link to post Share on other sites
Jayru 17 Report post Posted November 29, 2012 Good to see you making progress! Do you plan to weld plates in and then the cage to the plates at some point? I can't imagine it's very strong the way it's bolted in now. Or is it just for show? Quote Share this post Link to post Share on other sites
stangme428 33 Report post Posted November 29, 2012 Good to see you making progress! Do you plan to weld plates in and then the cage to the plates at some point? I can't imagine it's very strong the way it's bolted in now. Or is it just for show? the kit comes with plates that bolt to the bottom... which we installed ... its bolt in or weld in ... ... we still have the option to weld.. etc:thumbup1: Quote Share this post Link to post Share on other sites
stangme428 33 Report post Posted December 2, 2012 ok -- a major setback and some progress -- also posted similar info in the "what did you do today" thread.. so i added pics here.. well.. one step forward .. two steps back ... new turn signal switch installed new lacarra billet hub horn button new turn signal arm installed thermal insulation under the carpet bolted in the pro car by Scat seats progress!! I will install the Alpine audio setup next year.... the new turn signal switch was an easy install, remove three screws, cut the end off of the factory harness connector (order a new connector to seat the new switch wires in).. the billet hub went on without any problems, it has a nice adjustable collar on the back of the hub to slide over the factory column to take up the gap between the hub and the factory column housing, nice look. when you install the steering wheel shaft nut it pulls the hub down nice and tight. the horn button has basically two wires, you connect the wires from the hub to the tabs on the new button, and pop the cap into the hub.... just wish i had the steering wheel to mount... according to Mustang Depot it will be here in a few weeks.. oh.. but they will ship it 3 day fedex when they get it ... now for the bad... we decided to pull the motor/trans after looking at the clutch adjustment... did the math on the Mcleod throw-out bearing installation... subtracting B (distance from trans facing to end of bearing) from A (distance from face of bell housing to clutch fingers = no way the bearing would ever disengage the clutch, it just doesn't have enough throw to reach the fingers even with the .700 adjustment sleeve all the way out ... so i have a call into Bruce at Modern Driveline to see what we can do... i believe i have a throw-out bearing setup for a Cobra T56 not for a Viper T56.. cant believe we never caught this... we shall see btw-- ordered several parts earlier this week and remembered why i hadn't ordered from Mustang Depot for a long while... they cant seem to ship things out as expected, and the website seems to be static in that no inventory feedback to know if something is on back order, in stock etc. ordered items this week 3 day fedex, needless to say i received everything in the steering wheel kit.. except the steering wheel.. among other items.. live learn and hopefully remember. more pics on the interior later... mine washed out with the flash.. Quote Share this post Link to post Share on other sites
BuckeyeDemon 211 Report post Posted December 2, 2012 just a heads up, but i had installed a new turn signal switch in mine too. i discovered later the turn signals were intermittent because internally the assembly didn't have enough pressure on the contacts. hopefully yours doesn't have a similar issue. Quote Share this post Link to post Share on other sites
miketyler 15 Report post Posted December 2, 2012 What Alpine equipment are you going with? I like the older 9835 with the black and white bio-lite screen. I bought one of these also with the glide touch (9855) to try out in place of my exisiting 9835 in the Cuda. Quote Share this post Link to post Share on other sites
stangme428 33 Report post Posted December 2, 2012 What Alpine equipment are you going with? I like the older 9835 with the black and white bio-lite screen. I bought one of these also with the glide touch (9855) to try out in place of my exisiting 9835 in the Cuda. well this is what remains of the system out of my 96 Cobra ... its an older setup but can be made to sound good... not sure what ill be using as a head unit, i.e another car pc etc.. and im looking into Focal separates and SR series Polk subs or similar.. but thats for next year... im ready to get her on the road!! Audio:RUX-C701, PXA-H701, MRV-F545, MRD-M1005, Polk/Momo MMC6500, MM2104 thanks BuckeyDemon ill check the turn signal circuit as soon as i apply power etc..:thumbup1: Quote Share this post Link to post Share on other sites
stangme428 33 Report post Posted December 7, 2012 (edited) ok .. proposed audio system for the 69 ... we shall see how it turns out.. i already have all of the Alpine equipment, most out of my 96 Cobra - car pc build. Im not sure what i will be feeding the optical input on the Alpine H701, maybe a 7" android tablet with a USB to optical audio conversion, maybe a Windows 7 carpc with lilliput 7" touchscreen ... v2 layout is using the Google Nexus 7 with usb audio to the Musical Fidelity USB > Optical converter> Alpine H701 optical input.... Alpine electronics Dayton Audio speakers some form of a Car PC ---- also ordered a Viper hyd-TOB setup to verify the dimensions and if we can adapt current lines to the Viper part.. or just build a base for the current TOB to seat against. Edited December 7, 2012 by stangme428 Quote Share this post Link to post Share on other sites
stangme428 33 Report post Posted December 8, 2012 (edited) worked on the 69 last night, installed the viper TOB to check fit etc.. well i have all but decided to make a spacer to go behind the base of the McLeod kit, per email from Bruce at Modern Driveline, i am just doing a bit more research before we do so. i posted a question in the technical section to get opinions.. most viper users are having problems with the TOB and some are installing against the pressure plate and some not, on some the plastic of the TOB is melting due to premature failure of the bearing etc.. so we will double/tripple check our measurements and math and get a spacer made out of aluminum for the McLeod kit. never a dull moment... good times!!:rockon: Edited December 8, 2012 by stangme428 Quote Share this post Link to post Share on other sites