

fvike
-
Content Count
949 -
Joined
-
Last visited
-
Days Won
33
Everything posted by fvike
-
So the Mustang turns 50 today. It was built on 12/26/68. I was hoping to have it assembled with fenders and doors for today, but December proved to hectic to get any garage time.
-
Shine for dayyyys! Looks top notch!
-
Now you gotta go re-read all my posts.
-
Pictures AND video! Dang! Nice progress, that Cleveland sounds good! Did you find my hidden message in my first post?
-
I will be back when you have pictures. LOL!
-
Thanks guys. I've installed the battery cables into the car, with a connector thru the firewall. Pretty straightforward stuff, but I did have to remove the heater again to get to the corner where I decided to put the bulkhead connector. Figured I had to get that job done before I put the dash back in. I also received my Fuelsafe 22 gallon Mustang fuel cell this week. It is a vital component in my view to keep these cars safe. Also all race track activity in Norway requires a rear firewall between the fuel tank and the passenger compartment. Which the Mustang don't have. Hence a FIA approved Fuel Cell. I want to use my car on the occasional track day.
-
On that setup, I wouldn't go for a 3-link like the one above. I'd look into the TCP g-bar 4-link with the fat billet control arms. You'll need them to take the punishment from 1000 hp. Get the splined anti-roll bar and fab9 housing too. There is no magic "good and affordable" suspension that is going to keep up with the 1000 hp. It's gonna cost ya.
-
New headliner - need to remove seatbelts and hanger hooks
fvike replied to MustangRanch's topic in 1969-70 Technical Forum
Yup, you just have to pry away the plastic cover on the seat belt to uncover the bolt. They are pretty thick, so they won't tear. At least mine didn't when I removed them 6 years ago. But go slow. No need to hurry this job. -
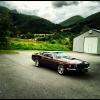
I'm a bit back and forth on the things I work on, depending on what parts I need. I'm missing a few connectors to get the harness done, but I did get my new crank hub (for the pulley) on friday. I had to get a shorter one, because the radiator and fans took up more real estate than the previous setup. So Now I got all the pulleys moved back about .625 I think it was. I used to run a spacer inside the water pump pulley, so luckily, I had room to work with. The PS pump and Alternator was as easy as to remove spacers. on the bolts to the cylinder heads. All this mean that I could install the radiator. The clearance to the alternator pulley isn't much, but enough. I should paint those screws and clips on the fan shroud black. The Upper radiator hose was a bit tricky, as the radiator is a lot bigger than stock. '69 351W upper hose wouldn't fit. Not the 24" rad hose or the 20" rad hose. But The '70 351C upper hose did fit - after a bit of trimming. I took off almost 1-1/2 inch at the rad end. Then a 1/2 inch at the termostat housing end to get it to clear under the TCP export brace. I also need to post this picture of my Holley 750 Ultra XP, just because!
-
I read somewhere that the top EFI kits in the aftermarket today is basically early '90s OEM stuff.
-
If you're ever going to the track or strip, they're pretty much mandated.
-
They connect to the left and right flashers at the very front ot the car, outside the radiator support. I have a repro harness. There is two 3-pin connectors. One for the left, one for the right. This looks different. Can it be for a '70 with the fog Sports lamps?
-
Will a T5 shifter line up with a Mach1 console hole
fvike replied to rays69mach1's topic in 1969-70 Technical Forum
Yes. http://www.mustangandfords.com/how-to/drivetrain/mump-0307-how-to-install-a-five-speed-in-vintage-mustangs/ -
I will use those. for the battery to solenoid cable. By brother has been running one for years in his 'Cuda. On Mopars the battery cable go straight to the starter motor.
-
As I mentioned on another tread, the AAW harness do not have the heater fan speed control harness in it, just the power supply for it. So I sourced that from my original Ford harness, first just to grab the connectors, but I found the wires so good and flexible that I decided to use them. After a little bit of cleaning, they looked mint! Put the right connector with a locking tab on the backside on the power supply, and replaced the old yellow wire. The interior harness is 99% done now. Have just a few loose ends, but routing is done. The orange and blue wires is way to long, but I think I will just loop them inside the harness. OEMs does that too sometimes. Next thing up is to wire up the firewall bulkhead connector. Then do the front harness, before testing everything before I tape it all up.
-
I found it in a box I had labeled "interior" from the teardown of the car. So it should be a Mustang part. Thanks for clearing that up. If you do have an installde picture, pleas post it up. It probably installs only one way, but it's great to have a reference on this tread then.
-
It's ca 3 inches diameter. How big is a standard U.S bread box ??
-
I've not gotten the car on the road yet, so I don't know. But it does box off the area. With a good shroud behind the radiator, it won't hurt.
-
Where is this going on the car? Is it even a Ford part?
-
Built the harness for the console the other day. I installed an USB dock in the back of it. I have the '70 console box without the cigarette lighter. this is the backside of the box. I just realized that I do not have a picture inside the box of the USB unit. Doesn't matter though, cause It's comming apart again when I try my hand at flocking it. The two flip-up cover switches in the console is for the fan override, and the to open the Accusump solenoid. The switches was in the car when I got it, so I never removed them. Back then only one was used, it turned on the fans. It had no controller or probe then. Now I'll be using a Auto Cool Guy controller. Also changed the console pod instruments form mechanical oil and water to electrical oil and volts. I also wired up the harness for the transmission rear lockup controller and reverse lights connector. I use a different tape to the external wiring. It's still a cloth type tape, but it is weatherproof. Both these tapes (The other from the previous post) are what Audi / Volkswagen use. I have seen them in my Audi, and bought them from my local VW dealer. Trying to tape up stuff like the OEMs with strain relief in the splits.
-
Frequently. So here's an update to what I've been doing this summer. I can be quite disorganized at times, that is probably why I started to do the rear electrical harness. Did not finish it, because the trunk lid is not on the car, and I need it to have the correct length for the trunk light. This is typical of me. I'm using a soft cloth tape for the interior. Assembled the steering column, and found out that I never had the harness cover. So I got one from WCCC I think it was. Needs to be painted still. I converted the AAW GM type steering column harness connector to the OEM type which I sourced from my original harness. The male connector is not in reproduction. I got the pins from @Midlife. Thanks again!
-
Do you mean one like this? They got 'em at NPD. https://www.npdlink.com/1965-1973-mustang/body-exterior/body-parts-and-sheet-metal/radiator-support/custom-details?top_parent=1&year=1969
-
This is my Tachman (H&H Auto) restored clock panel. hope the pictures help.
-
Does the original Ford/Kenwood radio knobs fit the Retrosound radios?
-
Did you bench bleed the MC before installing it?
