
Rich Ackermann
-
Content Count
362 -
Joined
-
Last visited
-
Days Won
30
Reputation Activity
-


-
 Rich Ackermann got a reaction from Grabber70Mach in My new 1970 M-Code Mach 1 Project
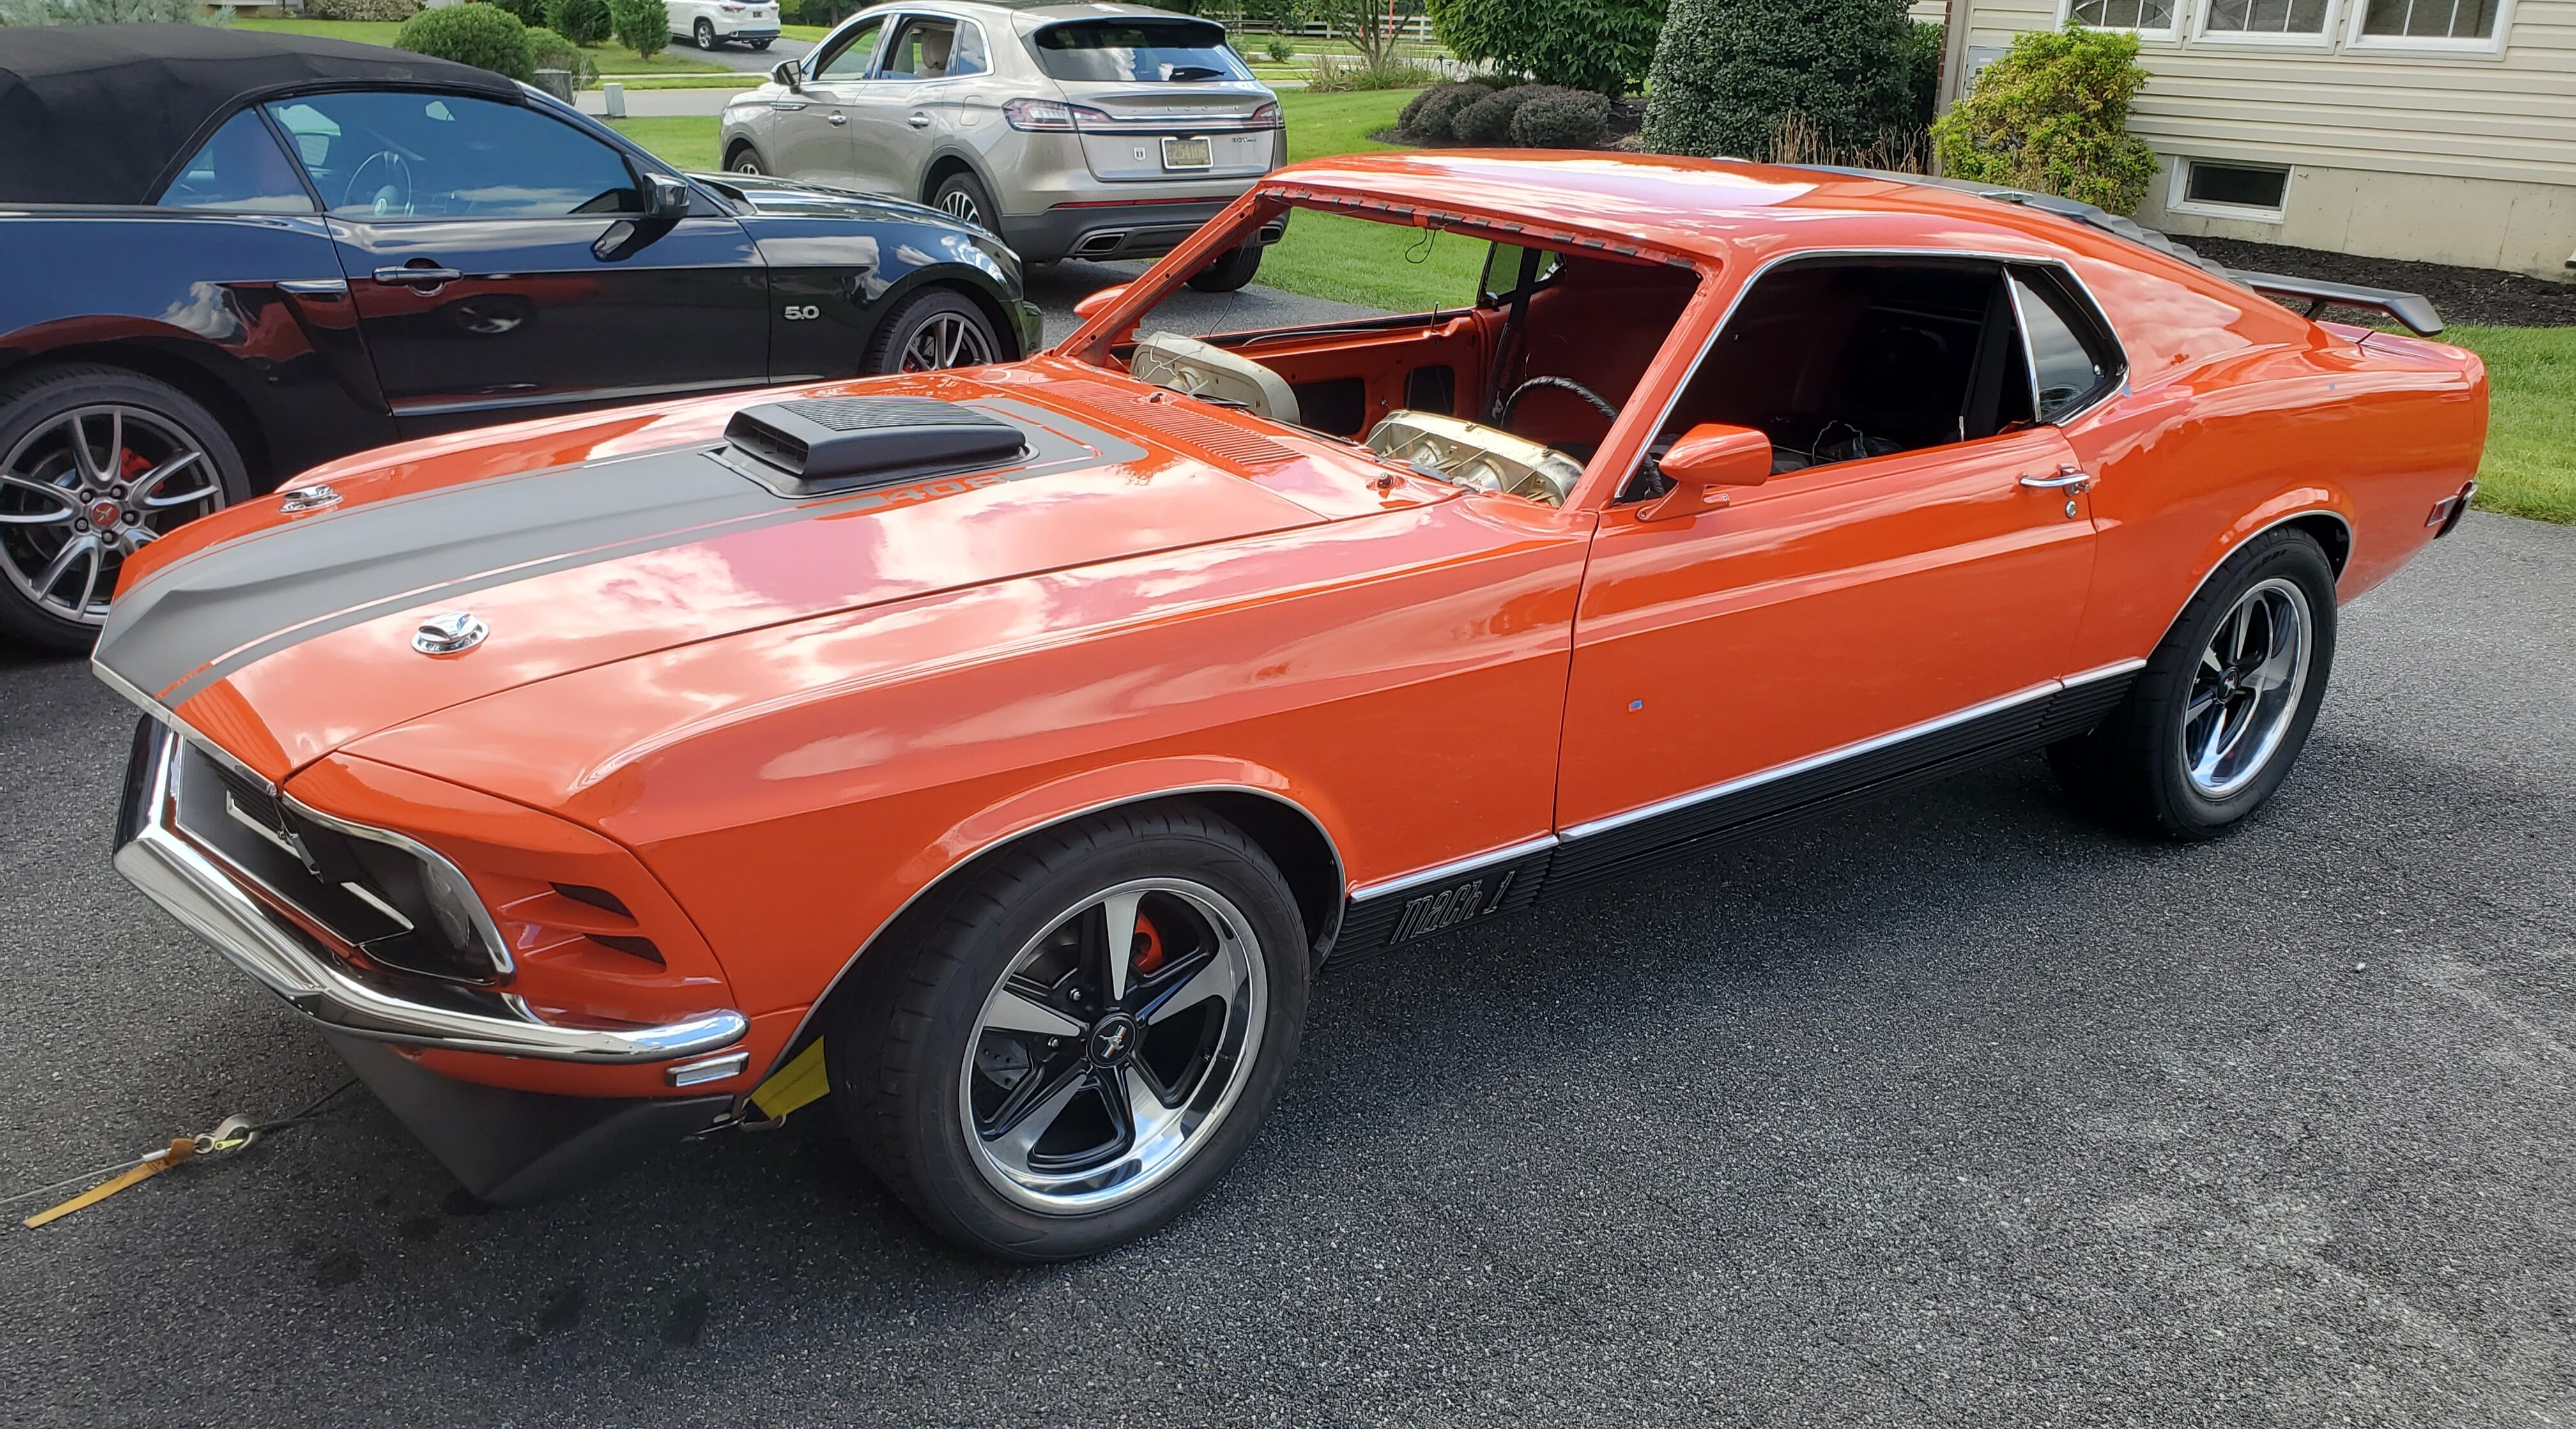
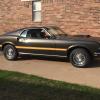
Going to paint on Monday! Well the time is finally arrived! Applied the Lizard Skin and painted the engine compartment Eastwood Chassis Black. Can't wait to see it get a nice coat of Calypso Coral. I still need to touch up the red oxide just a bit underneath.
-

 Rich Ackermann got a reaction from Mach1 Driver in 1970 Mustang Exterior Lights (turn signals)
Got it. Thanks for the further explanation. Maybe a thin flexible sheet of diffusing material that is red tinted would solve both the transparency and light hotspot/orange color issue?
I have seen a product callled "Rosco lux Red Cyc Silk, 20x24" Sheet of Light Diffusing Material".
-
Rich Ackermann got a reaction from Grabber70Mach in My new 1970 M-Code Mach 1 Project
Making good progress. Done with welding sheetmetal and finished fitting panels. Painted undercarriage with a red Epoxy primer. Going to spray Lizard skin sound deadener on the floor pans then start block sanding.
-
Rich Ackermann got a reaction from Grabber70Mach in My new 1970 M-Code Mach 1 Project
In the meantime I had the rear center section built... A Yukon case with a Eaton True Trac and 3.70 gears. I stayed with the 28 spline axles.
-
Rich Ackermann got a reaction from Grabber70Mach in My new 1970 M-Code Mach 1 Project
Tackled to part that scared me more than anything I done so far... Fitting the rear quarter panel skins. Decided to use the Dyancorn panel as is, (I did trim the front top edge under the quarter window) and trim the original quarter to meet it. I bought a HFT air flange tool and flanged the original quarter edge. You can see the flanged edge in the previous picture. Fit the panel to the flanged edge and screwed the panel down all the way around.... to the door jamb, wheel well lip, drop down, rear tail panel. The panel laid nice and flush into the flange on top. I checked the fit against the end caps. So far so good... what relief. Now the next worry....to stitch weld it to the original quarter.
-
Rich Ackermann got a reaction from Grabber70Mach in My new 1970 M-Code Mach 1 Project
Floor and one piece seat support is in and bolted up.
I applied a coat of Raptor bed liner. Yes I chose "Caution Orange" instead of black for the floors. My thinking is I will lightly cover it again with the body color Calypso Coral and orange would be easier than covering black. Sure is bright! Looks more like that late sixties GM Hugger Orange. I went with Raptor in black in and around the wheel wells and outside of the front aprons.
-
Rich Ackermann got a reaction from Grabber70Mach in My new 1970 M-Code Mach 1 Project
Moving on with replacing the footboard or lower part of the firewall, top of the driver side torque box, and floor pan. I am relieved that the rockers are great shape. Decided not to replace the floors under the rear seat as they are also in great shape, so I just cut the full floor off at the top of the riser. Also using a one-piece seat support and Tinman sub- frame connectors to add some rigidity.
-
Rich Ackermann got a reaction from Mach1 Driver in Remote Motorized Side View Mirrors Using stock 1969 to 73 housings
Yes I used the two wire with the built-in sequencer. Yes I hooked it up to an electronic flasher module when I first got them and it still worked. I will video it. Another option is to add a small capacitor in line with the mirror sequential lights, but I have not experienced a need for it.
Here is the video. The flasher helps to keep the sequential arrows in sync with the other flashing bulbs.
20190803_015147.mp4 -
 Rich Ackermann got a reaction from bigmal in Remote Motorized Side View Mirrors Using stock 1969 to 73 housings
Center console is an option. 69 have the cigarette lighter hole in the front of the compartment. On a 70 console you drill a hole thru the woodgrain top. Under the woodgrain in that spot is a space where 69 years had the seatbelt buckle holder. Just a few ideas.
-
 Rich Ackermann got a reaction from mwye0627 in Remote Motorized Side View Mirrors Using stock 1969 to 73 housings
Center console is an option. 69 have the cigarette lighter hole in the front of the compartment. On a 70 console you drill a hole thru the woodgrain top. Under the woodgrain in that spot is a space where 69 years had the seatbelt buckle holder. Just a few ideas.
-
Rich Ackermann got a reaction from Grabber70Mach in Remote Motorized Side View Mirrors Using stock 1969 to 73 housings
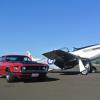
I always wanted to add motorized side view mirrors to our cars. Well in my case my 1970 Mach 1 project car. I have seen posts where folks have adapted 2015 Mustang side view mirrors to a 1969 Mustang, but I wanted to have a more original look.
Well with some research, a few parts from a (non-Ford) donor car and some fabrication and experimentation, I made it work. As an added bonus, I incorporated sequential LED directional lights to the package. I made very little mods to the original mirror. Obviously a hole thru the inside of the pedestal and the housing where the two meet for the wires. Also needed to fashion a custom mount bracket inside to mount the motor and mirror. Check out the video attachment file at the bottom of the passenger side it in operation.....
Motorized Side View Mirrrors.mp4 -
Rich Ackermann got a reaction from bigmal in Remote Motorized Side View Mirrors Using stock 1969 to 73 housings
Well I still am working on refining the mod before I shared it all. I have not completed the drivers' side yet and I am looking at using different motors. Here are pictures of what I have done so far....
-
Rich Ackermann got a reaction from Mach1 Driver in Remote Motorized Side View Mirrors Using stock 1969 to 73 housings
Well I still am working on refining the mod before I shared it all. I have not completed the drivers' side yet and I am looking at using different motors. Here are pictures of what I have done so far....
-
Rich Ackermann got a reaction from mwye0627 in Remote Motorized Side View Mirrors Using stock 1969 to 73 housings
I always wanted to add motorized side view mirrors to our cars. Well in my case my 1970 Mach 1 project car. I have seen posts where folks have adapted 2015 Mustang side view mirrors to a 1969 Mustang, but I wanted to have a more original look.
Well with some research, a few parts from a (non-Ford) donor car and some fabrication and experimentation, I made it work. As an added bonus, I incorporated sequential LED directional lights to the package. I made very little mods to the original mirror. Obviously a hole thru the inside of the pedestal and the housing where the two meet for the wires. Also needed to fashion a custom mount bracket inside to mount the motor and mirror. Check out the video attachment file at the bottom of the passenger side it in operation.....
Motorized Side View Mirrrors.mp4 -
Rich Ackermann got a reaction from bigmal in Remote Motorized Side View Mirrors Using stock 1969 to 73 housings
I always wanted to add motorized side view mirrors to our cars. Well in my case my 1970 Mach 1 project car. I have seen posts where folks have adapted 2015 Mustang side view mirrors to a 1969 Mustang, but I wanted to have a more original look.
Well with some research, a few parts from a (non-Ford) donor car and some fabrication and experimentation, I made it work. As an added bonus, I incorporated sequential LED directional lights to the package. I made very little mods to the original mirror. Obviously a hole thru the inside of the pedestal and the housing where the two meet for the wires. Also needed to fashion a custom mount bracket inside to mount the motor and mirror. Check out the video attachment file at the bottom of the passenger side it in operation.....
Motorized Side View Mirrrors.mp4 -
 Rich Ackermann got a reaction from Caseyrhe in Remote Motorized Side View Mirrors Using stock 1969 to 73 housings
I always wanted to add motorized side view mirrors to our cars. Well in my case my 1970 Mach 1 project car. I have seen posts where folks have adapted 2015 Mustang side view mirrors to a 1969 Mustang, but I wanted to have a more original look.
Well with some research, a few parts from a (non-Ford) donor car and some fabrication and experimentation, I made it work. As an added bonus, I incorporated sequential LED directional lights to the package. I made very little mods to the original mirror. Obviously a hole thru the inside of the pedestal and the housing where the two meet for the wires. Also needed to fashion a custom mount bracket inside to mount the motor and mirror. Check out the video attachment file at the bottom of the passenger side it in operation.....
Motorized Side View Mirrrors.mp4 -
 Rich Ackermann got a reaction from barnett468 in Remote Motorized Side View Mirrors Using stock 1969 to 73 housings
I always wanted to add motorized side view mirrors to our cars. Well in my case my 1970 Mach 1 project car. I have seen posts where folks have adapted 2015 Mustang side view mirrors to a 1969 Mustang, but I wanted to have a more original look.
Well with some research, a few parts from a (non-Ford) donor car and some fabrication and experimentation, I made it work. As an added bonus, I incorporated sequential LED directional lights to the package. I made very little mods to the original mirror. Obviously a hole thru the inside of the pedestal and the housing where the two meet for the wires. Also needed to fashion a custom mount bracket inside to mount the motor and mirror. Check out the video attachment file at the bottom of the passenger side it in operation.....
Motorized Side View Mirrrors.mp4 -
 Rich Ackermann got a reaction from mikee in My new 1970 M-Code Mach 1 Project
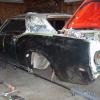
My lower cowl was not salvageable. I also need to replace the footwell or lower part of the firewall over torque boxes, passenger side torque box and the inner passenger kickboard/vent area below the A-Pillar. With all that needed to be done, it just made sense to replace the cowl instead of repairing it. I was able to salvage the original outer cowl with its date stamp. I should give credit to my buddy John who has done this work before, and without his help and experience, I would not have tackled it by myself.
Next, we will install the upper cowl and replace lower firewall and floors. Stay tuned....
-
 Rich Ackermann got a reaction from JayEstes in Fastback inner rockers
I have only replaced an inner rocker in my 73 vert. It was a lot of work and a lot of spot welds. They were not from Dynacorn and were three pieces welded together. On a 73 vert you have to use coupe/fastback floors which required modification to the lip on the outer edge. I am now replacing the floor pan in my 70 Mach and was planning to use SFCs, but now you have me thinking. Look forward to following this thread closely.
-
 Rich Ackermann got a reaction from Cantedvalve in Turn indicator turns on with dash lights
As Midlife states, when you ground either socket pins you are essentially completing the circut directly at that bulb which circumvents the way the system would seek ground normally. It will always test good that way. Remember the brown parking wire is positive and seeks ground thru the white/blue and white/green passing thru other bulbs to get there. That ground connection can come from the ground wire for the hood signal lights if you have them or the dash ground, etc.
The directional switch in the column plays games with the + and - when LH or RH the blinker is on. It's a mess, if you ask me.
-
Rich Ackermann got a reaction from Grabber70Mach in My new 1970 M-Code Mach 1 Project
Removed the radiator support, Inner fender apron, and cowl....
-
 Rich Ackermann reacted to thegizmo in Intake By-Pass Tube Size - C5AE9425C
Thanks JET, I appreciate you taking the time to comment. I use Firefox too but I think the issue was more behind the scenes with the Forum
Woohoo! Just logged in without having to reset my password!! Thanks Rich for your efforts and thanks bswor (I'm assuming you fixed mine when you fixed Rich's)!!
-
 Rich Ackermann got a reaction from 69RavenConv in Intake By-Pass Tube Size - C5AE9425C
My Password problem has been fixed! So nice to be able to log in without having to do a password reset. Thanks again bswor for your help.
-
Rich Ackermann got a reaction from Grabber70Mach in My new 1970 M-Code Mach 1 Project
Some of the sheetmetal just arrived. Decided to go with Dynacorn's "Weldthru Primer" version. Still waiting on a few more on back order, then I can get started. We will see how well it fits.
Already had a NOS OEM RH inner fender apron.