


stangs-R-me
-
Content Count
989 -
Joined
-
Last visited
-
Days Won
22
Reputation Activity
-

 stangs-R-me reacted to copb8 in 3 pt seat belt experience
I installed these same belts almost immediately after buying the car. I believe I may have even used stangs-r-me's post for some guidance (thanks). I'm very happy with the belts overall but have 2 small complaints. The retractor for the shoulder belt isn't very strong so you have to slightly coax it to rewind sometimes.
The adjustment clasp of the buckle strap needs to have more aggressive knurling as it slowly (over many uses) allows the buckle to slide out along the strap. Easy enough to occasionally readjust it so not a big deal. I do feel it'll hold strong in an accident at the position it's set so not a safety issue.
-
 stangs-R-me got a reaction from TexasEd in 3 pt seat belt experience
I had posted all these pics of the Scott Drake 3-Point Kit that I installed in my Hardtop in this thread ...
seat belt buckles - 1969-70 Technical Forum - 69stang.com and 1969stang.com The 1969 and 1970 Mustang Supersite
... back in 2017. All the pics are gone, so I'm reposting them here.
Used all the stock mounting locations and just had to ream out the inner belt and retractor anchor plates (used a 0.501" reamer) to be able to use the OEM bolts.
Read the thread (last 3 posts on page 1 & more on page 2) for all the details.
-

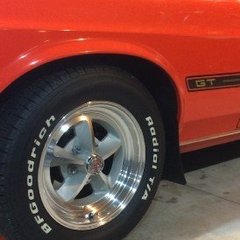
 stangs-R-me got a reaction from johnk in Tyres
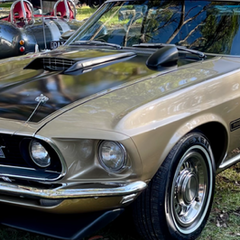
First off ... WELCOME to the site and very nice Champane Gold Mach !!
I last tire shopped in 2017 for my '69, but I wanted white letter and 225/60-15 size. At the time there were really only 2 options ... BFG Radial T/A & Cooper Cobra.
Just looked on Coker Tire (probably stock / sell the most 14 & 15" classic car tires than anyone else) and only ONE Narrow (1") Whitewall option popped up in your size:
https://www.cokertire.com/tires/p215-75r14-american-classic-1-whitewall-tire.html
Here is a 215/70-14, which they claim is for '69 Mach 1 / GT with a 3/8" wide whitewall:
https://www.cokertire.com/tires/p215-70r14-bf-goodrich-3-8-pin-whitewall.html
My '69 GT ran 225/70-14 between 1983-2017 on the stock GT wheels like you have but argent instead of chrome. However, no narrow white wall option pops up in this size.
Good luck !!
Doug
-
stangs-R-me reacted to EastYorkStang in What is this panel?
Picture with the blue arrow is not stock. My factory A/C car looks just like the other black interior piece.
-
stangs-R-me reacted to TexasEd in 69 quarter scoop chrome attachment
What part are you describing when you say quarter scoop? I'm picturing the 69 sportsroof rear quarter fake scoop. I have one of mine out now to tighten the black inserts because they are loose and rattle a little but there is no chrome around these parts.
Edit - thinking now that this is the coupe trim?
-
stangs-R-me reacted to ronandmelady in 70 coupe electrical issues
Update on 70 Coupe Project: OK...so I've owned the car for a year now and you already read about the electrical issues early on. Over spring and summer, I resolved a terrible overheating problem that in the end I attributed to just a plain old radiator and a collapsing lower radiator hose and got it purring like a kitten with a terrible breaking up / weak spark issue. I tried to resolve the dreaded leaking FMX transmission, but think it's still leaking from pan. And finally, last weekend I replaced the 52 yr old 85 lb spring rate rear leaf springs with Detroit Eaton 70 Competition Suspension 138 lb spring rate springs and dual exhaust shackles and got on my old school Keystone Klassic wheels with BFG Radial T/As. Love the rear stance and the ride is great. Think I'm going to cut 1/4 to 1/2 coil out of new front springs to bring it down 1/2 to 1 inch. Very happy with progress and soon moving on to stripping off the original ugly green paint. Going with a bright pearl white or white metallic. And also new carpet, front seat covers, and dash pad. Having a great time working on an old mustang again. Cheers to you all until next update.
-
stangs-R-me reacted to BobW70Mach1 in 1970 Grande seat frames same as Mach 1?
I live in Ridgefield WA. Just north of Portland OR. I bought the car as a "drove when parked" situation near San Francisco. Had no idea if I could get it running. 351 cleveland 2V. not original engine. After entirely new fuel system from gas tank to carburetor, and a fixing a massive leak at the shifter on the FMX, I have it running and driving. I've spent about $8,000 at CJ Pony parts already just on the interior parts (interior was completely trashed.) Still thinking about how I want to attack the restoration.
20211106_170749.mp4 -
stangs-R-me reacted to 69Mach1 M code in Hurst shift lever
Thank you to everyone who responded to this thread, and for taking the time for the photos and measurements. It was very informative and hopefully will help someone in the same situation in the future.
I ended up ordering the installation kit # 3735587. The shifter lined up with the console installed.
-
stangs-R-me got a reaction from TexasEd in Rear Qtr Drain Plugs
I've had my car since 1981 and the drop-off metal is all original and complete, but these valves appear to have never been installed on my Metuchen built car.
Until today seeing Briain's original valve in place, I had no idea how or where these things mounted !!
Looking at the NPD catalog, they show 3 options for '69:
67-70 "Good Repo"
68-70 Dearborn built "Exact & CC"
68-69 San Jose built "Exact & CC"
Is it possible that these were not installed on Metuchen built cars ??
Figured pics would be good to show OE metal without the valves in place.
Doug
-
stangs-R-me reacted to Twin 69 in Twin-Turbo Coyote '69 Hardtop
I've been meaning to make a build thread for months now, if only to keep a record for myself. Hopefully it will be useful for other people as well. I've had the project for 15 months now, and finally know exactly where it is going to end up.
I had been shopping for a 67-70 Mustang for a few months, and had moved too slow on a few excellent deals. I finally found a red '69 hardtop that seemed in good shape. It was originally a Grande, but the vinyl had been removed at some point. It had been repainted, the interior was redone, and it had a built 347 stroker. The price was a little high, and the motor was mated to a 3-speed and an 8 inch. The frames and panels all looked solid, except for evidence of a crash on the passenger front quarter. I ended up buying it. The original plan was to slowly upgrade things as I went along, starting with the trans and a 9-inch.
The car was running and driving, but it was 2 hours back home.
Interior was pretty nice, with some small details being a bit wrong, such as the door panels.
Had the car for all of 2 weeks, before I blew the 8-inch to pieces. To be fair, both the 3-speed and the 8-inch were ticking time-bombs with that stroker in front of them. Got it back to my garage, and started deciding what to do with it. I had a pretty solid body of a Mustang that wasn't particularly special. I also had a decent motor, but nothing worth getting excited about in 2021. I decided that I was going to go pretty far as a restomod, though at that time I was still planning ion using the stroker.
The motor was far prettier on the inside vs. the outside, but still was only an old stock roller block.
Started pulling it all apart in January 2021. It is still up on jacks in my garage as of today.
I won't bore y'all with all the details of the teardown, just the interesting bits. Overall it went smoothly. Some parts were a little crooked due to subpar repair on the previous wreck. There was also some rust that had been poorly repaired when they painted the car. Both doors and both front quarterpanels had bad Bondo jobs that had been painted over. The front floorpans also had significant rust, though it couldn't be seen from the bottom. Someone had fiber glassed over the floorpans, encasing the rust, before they had done the interior. There were a few other small p[arts, like around the gas tank mounting and where they welded support tabs for the previous exhaust. Drip rails aren't terrible, and the only other body rust is a 1/4" hole in the rear passenger quarterpanel.
Passenger door cancer. Drivers is only slightly better. Luckily entire doors are cheap to replace.
Floorpan after the fiberglass was taken up. you can see the chunks of it in the picture. Both sides are similar. Whoever put this in must have simply gone right over the rust without repairing.
The rest of the teardown was uneventful. during this time, I decied on what i wanted to do to try and make this thing go anywhere other than a straight line. I went with TCI's torque arm 3-link and IFS. This setup fully braces the subframe, allows for a no-bind setup to mount a 9-inch rear end, deletes the front shock towers, provides new motor mounts, replaces the front steering and suspension with a double a-arm coil spring setup and custom spindles, and allows the car to be lowered. This particular kit also came with 13' 4-pot Wilwoods all the way around, and double-adjustable Ridetech shocks.
Before the new front suspension setup, with the shock towers deleted.
View just before final welding.
Fully installed with rotors from outside the fender well.
The rear suspension install is ongoing. I'm currently debating the overall width of the 9-inch, and whether or not to add small rear fender flares to give it a subtle widebody and allow for wider rear tires. The rear end will need to be beefy, because I sold the original 347 stroker and acquired a Gen 1 coyote and a pair of Precision 6266s. Current plans are to put 1,000 hp to the rear wheels. The turbos can get that high, but the stock Coyote internals will need some help. This power will go through a new close-ratio TKX, hardened by American powertrains Extreme package. They claim that it'll hold 950 lb-ft of torque. Clutch is TBD, but I will be running a 31 or 35 spline Trutrac or Wavetrac posi 9-inch rear and hardened axles. Standalone engine management will come from a Holley Terminator X Max to retain Ti-VCT capability. This car will be a daily driver, with the occasional track and drag outing. This means I'm adding A/C, sound deadening, etc., but I'm also installing a roll cage, SFI fuel cell, and other safety equipment. Currently, I expect to have it primed and running by Summer 2022. I will update this thread as I get significant portions done. If anyone has questions or wants further pics, please let me know.
The coyote fit perfectly onto the crossmember provided by TCI.
-
stangs-R-me reacted to paulb in Paul's 69 Mach1
We’ll after having it for 13 years and rebuild over the last eight,she’s finally registered and driving , it’s been a long road.
-
stangs-R-me reacted to Vicfreg in 1970 Convertible Restoration
Catching up on some mini projects while I’m home for the holidays. I have my LED tail light assembly‘s together, and did some quick checks of my tail light wiring harness, and connections, to make sure everything was working OK.
everything seems to be working well, I just need to get an LED flasher, to check out my sequential tail lights.
You will probably notice my powder coated tail light housings, that’s keeping with my all black trim theme. Should be pretty cool.
-
stangs-R-me got a reaction from TexasEd in Where does this bar go (dash support)?
Above the gas pedal from firewall to bottom of dash ...
-
-
stangs-R-me reacted to 69RavenConv in Odd question
And all the folks I meet that had a '69 just like mine with the 289 in it...
-
stangs-R-me reacted to Vicfreg in Toploader yoke installed depth
I push the yoke all the way in, and make a mark on the yoke at the rear of the transmission. Then, pull it out 1" and mark the yoke again for reference.
Ask the person who is going to make your driveshaft how they want it to be measured. Typically, it is from centerline to centerline of the u-joints. A CRITICAL step is to make sure the weight of the car is on the rear suspension when you do the measuring.
-
stangs-R-me reacted to Jesse 69 Fastback in 1969 Flashback
While I was in high school, i stumbled across a red 1969 Mustang Fastback for sale. The asking price was $6K and it was in pretty decent shape. The downside is that as a high school student I didn't have the $6K. But I was able to secure a personal loan from a family friend, with the agreement that I had to pay it off within 1 year. I worked my ass off that year and made the final payment just before the 1 year mark. Later that same year, I enlisted in the Marine Corps, and after several months of basic training and then technical training for my job within the military, I went home on leave and picked up the Mustang. I drove it to Virginia, and then several months later I crossed the country with it to San Diego, CA. I planned to be in San Diego for at least 3 years (I never left), so I decided to take the opportunity to go through the car, restoring and repairing what I could. Unfortunately, I bit off more than my wallet could handle at the time (hey, who hasn't with these things?), so the project ended up taking much longer than I had originally planned. So much that I eventually, and very reluctantly, decided to sell the car to an older gentlemen that was planning on finishing the restoration with his son. I have no idea what ever happened to that car, but I hope it's still on the road and not sitting in a junk yard somewhere.
I always regretted selling that car, and over the years I'd looked casually at picking up another one but it never seemed like the right time. That is until last year, when I was window shopping online and found another red 1969 Mustang Fastback for just the right price. Not perfect, but not a bucket of junk either, which is exactly what I wanted. So after a few exchanges with the seller, I took a road trip to Vegas to see the car in person. I test drove it and it was like a freaking time machine. As soon as I sat behind the wheel I felt 18 again. I bought it on the spot.
So that was a year ago, and I've been slowly going through the car making upgrades and improvements. I replaced the cooling system, swapped in a completed MSD system, and upgraded the stock dash instrument cluster with one from Dakota Digital. Then earlier this year I came across a local body shop that does absolutely amazing work (Sylvester's Customs). I drove out to see the owner and spent a few hours learning about his shop, his employees, and his process. At the end of the conversation he agreed to put my car on the waiting list and I couldn't be more excited!
Now it seems that I'm all in on a restoration/rejuvenation. I'm not planning on going all original, since I like the idea of taking advantage of the 50 years of auto advancements since the car was launched, but I'm mostly keeping with the original look of the 69 Mach 1. I'll be using this thread to keep track of all the work that I do to the car over time. Right now I'm in the middle of swapping out the Ford 8inch rearend with a 9inch from Currie, and replacing the C4 with a Tremec TKX swap from SST.
My original Mustang from high school:
My new Mustang:
-
stangs-R-me reacted to RobotMan in My Son Mike's 69 Mach 1 Restoration
Yes it is amazing! Created a lifetime of memories.
-
stangs-R-me reacted to Vicfreg in 1970 Convertible Restoration
Got my rear bracket made and fitted up. What a huge difference in how sturdy it is now! I took me maybe 2 hours to make both brackets out of aluminum stock I got from Ace Hardware.
Now to get my hood and see how the whole thing fits...or not....
-
stangs-R-me reacted to Vicfreg in 1970 Convertible Restoration
I don't have a lot of metal forming equipment in my small shop, so I rely on basic tools and also basic metal working skills to make stuff.
In this case, the local Ace Hardware had some Aluminum stock that was had for a good price.
When I want to make a bracket, I use a coat hanger to bend and re-bend until I get the shape I want. Then I take a new, straight, coat hanger piece and bend it cleanly to match my original prototype. I put my aluminum stock in my heavy vice. I have magnetic/rubber vise blocks, but needing a tight fit, I used painters tape to wrap my aluminum stock to keep from marring the surface.
Using an old 8oz Ball Peen hammer (flat end), I carefully work the piece to the angle I want, with the coat hanger mock up next to it. In this case, it worked quite nicely, as you can see.
Then, I marked and drilled pilot holes, verified the locations, and drilled my final holes for mounting.
Inside the base, I will use a 1/4 -20 Tee Bolt and epoxy it in.
Now to use some self etching primer, and paint my bracket.
More to come
-
stangs-R-me reacted to mikee in 69 coupe from SVK
Painted!
Finally, thats been long time to get here, but was worth every minute and cent :). Winner of my dilemma "titanium silver" vs "pepper grey" is obvious.
-
stangs-R-me reacted to 69Mach1 M code in Hurst shift lever
Thanks for your very detailed explanation, Doug. I'll take the dive into the shallow end of the pool this weekend and order the parts. I should have it installed the following weekend to report back.
-
stangs-R-me reacted to Past Time in Lower Clutch Rod.... Does this look right to you???
So..... quite a bit of time has gone by and I've finally put this to bed. As with many of these types of issues there were several factors that ended contributing to the issue. And then there's the "while you're" in there stuff that happen as well as the "this isn't right" stuff that needed to be addressed. Here's some of the stuff that was repaired to get the pedal/clutch working like new again.....
Pedal box - Yep the PITA pedal bushings were toast and took the clutch pedal with them. Ended up doing the Scott Drake bearing kit which made the pedal action light and wonderful. Clutch / Throw out bearing and Flywheel - I think some of this was because the pedal and other items were bad but the throw out bearing and clutch were toast. Well that doesn't look right stuff Turns out the master cylinder was leaking which was found while the trans was out so that came out and was replaced. When we pulled the pedal box with found someone had pinched the starter switch circuit wires which were nearly shorted. That could have burned the car down so that was fixed. So this was the first go around which work pretty good for nearly a month but slowly the pedal started not returning and the shifter started jamming again. So it was back to the shop. On the second go around we did the following...
The clutch and throw out bearing were fine but the adjustment on the clutch link had changed. We decided to bite the bullet and pull the Z-Bar out of the car. Sure enough the Z-Bar had a crack that had started opening up that we didn't see the first time around. This time we replace all the bushings along with the Z-Bar. The bushings for the Z-Bar looked like they were never greased and could not be adjusted to work smoothly. These were changed as well. So with all this done the car now shifts very well and the pedal returns with authority. The roller setup on the peddles is the stuff and a worthy upgrade if your ever looking for a PITA job to do or are in there anyway.
So lesions learned.....
Bring it all - For the amount of money I spent and frustration let alone the time I missed driving the car this summer, in hind site I would have replaced everything right off the bat. I think the Z-Bar, bushings and other misc parts were about $100. While I did manage to pick off some other issues along the way replacing everything from the pedal to the linkage would have been the smarter move. For the life of me I can't believe I didn't do it all to start with. Anyway my thanks to everyone that helped with suggestions along this journey. So many times I see these threads that stop without the ending that I decided to go ahead and close this one out properly. Hope some of this can help someone else out along the way.
-
stangs-R-me reacted to mikee in 69 coupe from SVK
And some "fun facts", or if someone is planning how to spend some quality time during winter :).
My labour hours up to blocked spray filler and already done some parts restoration:
Total labour hours (h) 938,5 Disassembly (h) 44 Body 20 Drivetrain 7 Interior 6 Miscl 11 Paint stripping (h) 77 Fenders 9 Sandblasting 4 Body 37 Prep for primer 10 Trunk lid 2 Headlights buckets, cowl grille, valances 7 Hood 5 Outside painted trim 1 Mirrors 2 Bodywork (h) 342 Underbody 22 Torque boxes replacement 24 Antena delete 2 R door - skin fabrication and repair 22 Fender 3 Shock tower repair and reinforcement 9,5 Rear frame reinforcement 3 Battery holder and window rim 8 Right floor pan 20 Roof 2 Left floor pan 23,5 Rear frame 8 Subframe Connectors 9 Rear fender L 17 Seat platforms 10 Rear fender R 17 Quarter panel R 17 Roof / Front glas rim 27 Drip rails 12 Dent pulling 8 Quarter panel L 8 L door 27 Trunk lid 16 Hood 5 Front light buckets 15 Hood Scoop cutouts 4 Valances 3 Prep and Paint (h) 150 Preparation and transport for blasting 2 Setup after blasting 2 Primer after blasting 4 Rear seam sealer and antigravel 5 Engine bay sanding and battery holder 4 Seam sealer 8 Primer repair engine bay 8 Antigravel 4 Acryl engine bay and underbody 5 Repair of primer after bodywork 8 Acryl - rear underbody 4 Trunk area 13 interior blackout acryl 3 Sanding for spray filler 11 Primer repair after Fillers, rockers and Quarters 15 Fenders prep and primer 7,5 Doors and hinges 12 Primer doors and fenders 8 Anti Gravel and acryl fenders 5 Hood 8 Mirrors 1,5 Front and rear valance 12 Body filler (h) 276 Filler roof 16 Filler R quarter panel 15 Filler L quarter panel 10 Filler R rocker panel 7 Filler L rocker panel 5 Body finishing and cleaning 7 Rear extensions 2 Trunk lid 18 Spray filler - body 6 Sanding spray filler 57 R door 12 Back end 6 L door 20 R Fender 10 L Fender 13 Door and fender alignment 16 Spray filler fenders, trunk lid and doors 17 Valances 4 Hood 14 Spray filler hood 5,5 Light buckets 10 Spray filler, valances, light buckets and cowl 5,5 Various restoration (h) 39 Door hinges 7 Miscl 1,5 Derusting bolts and parts 2 Steering column 11 Trunk lid springs 1 Door locks 2 Headlights buckets 5 Passenger side mirror 4 Door mechanism (cleaning, restoring) 4 stainless window moulding 2 driver seat 1,5 Drivetrain restoration(h) 4 Rearend restoration 3 Front end restoration 1 Installation - Assembly (h) 6,5 fuel line install 1 brake line install 3,5 Preassembly front 2 Parts fabrication 27
-
 stangs-R-me got a reaction from Mach1 Driver in Next Up. New Seat Covers and Foam.
NOTE / FYI ...
Mach1 original seat covers and earlier reproductions used actual knitted vinyl for the comfortweave centers. This Knitted Vinyl is no longer available, so all the reproductions use an embossed vinyl instead of the actual knitted stuff.
I've got early repro seat covers in mine (from mid 80's) that are correct so when I rebuilt my seats a couple of years ago with new foam & spring sets, I re-used my slightly worn but still in great shape upholstery in order to maintain the correct comfortweave material.
So if you still have the correct knitted vinyl in yours and at least the comfortweave is in really good shape you may want to see if an upholstery shop can salvage / re-use your comfortweave to make new seat covers.
Before you commit to TMI or another repro seat cover set, have them send you a sample of the embossed comfortweave material ... especially if you have the real stuff in the car now.
Doug