


Vicfreg
-
Content Count
2,252 -
Joined
-
Last visited
-
Days Won
134
Posts posted by Vicfreg
-
-
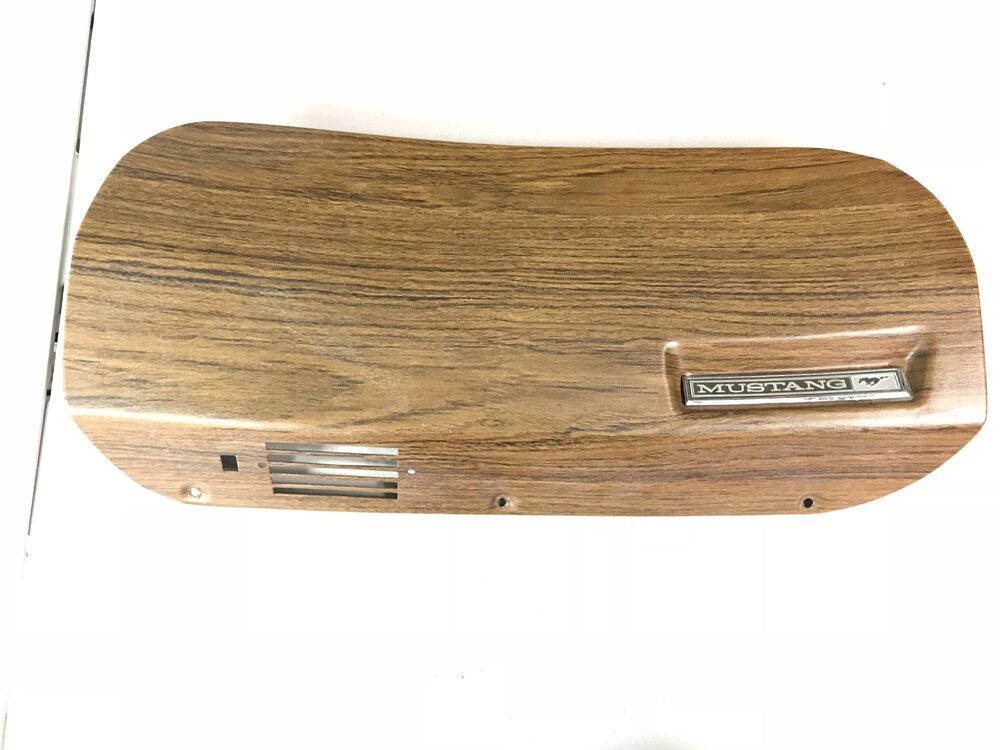
Have one of these for sale if anyone is interested. These are pretty rare, most people got the clock option. Message me if interested.

-
The one from Summit Racing works pretty well. Link below:
https://www.summitracing.com/popup/calcsandtools/compression-calculator
-
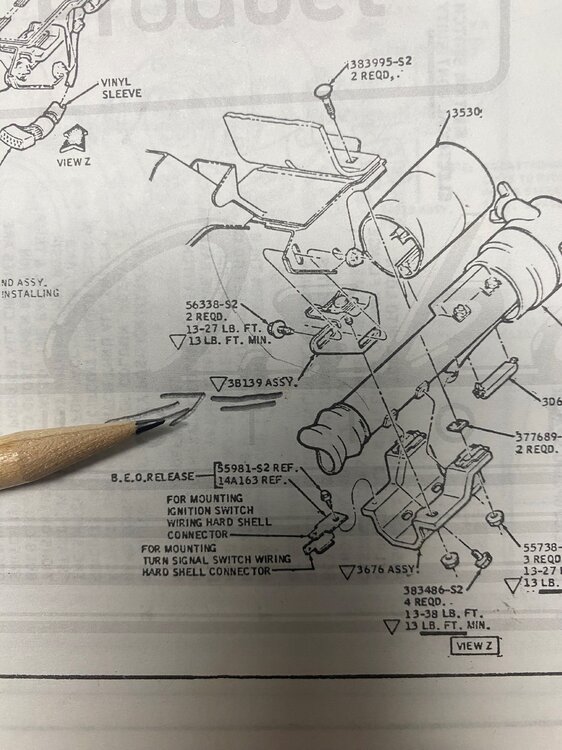
That looks like a '69 bracket in your picture.
The '70 version of that bracket is in the diagram below, with my pencil pointing at it. They serve the same purpose, which is to tie the forward facing part of the under column bracket to the clutch/brake pedal support bracket. This is only on the drivers side of the column. The diagram is from the Orange "Chassis" Assembly Manual.
The '69 column also has an upper column bracket. The '70 column doesn't have that, instead uses threaded bosses on the column that attach the column to the lower column support.
For some reason, on the '70, Ford decided to change the design to anchor the column differently. In the assembly drawings, the '70 small bracket (3B139) has a small diamond next to it, which means that it had to be installed per some specific instructions to meet government safety standards. This is because it is tied into the function of the collapsing steering column, which has to be anchored inside the car to prevent rearward movement into the passenger compartment. This started in 1968, which also delivered such goodies as padded dashes, shoulder belts, padded steering wheel centers, side marker lights, etc, etc...
Anyway, the 2 pictures you posted yesterday are the '70 bracket.
-
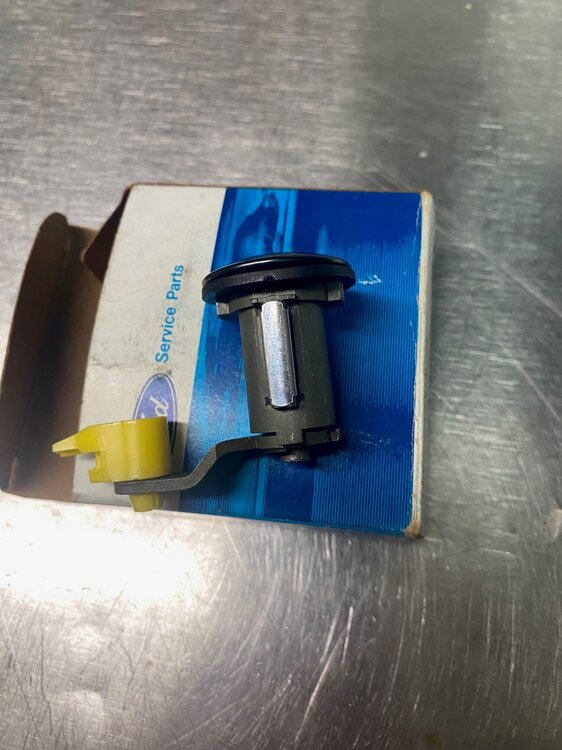
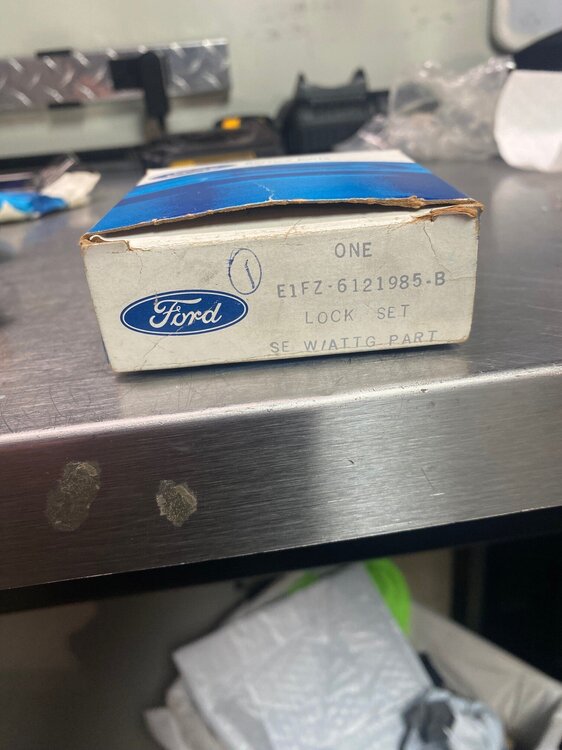
I don't have one of those on my '70. The steering column hardware is different between the years. The '70 has the ignition key/lock on the column, and the ignition switch is mounted underneath, along with the wiring. All that stuff is inside the dash on a '69.
I will go and look at the Assembly manual, as I am in my shop, and send some drawings/pics along.
-
Got the Fox Body door locks, and they are great OEM quality parts. Just had to install the lock rod retainer on the other side of the lever, and they went right in. The new style plastic retainers are really heavy duty, more so than the original plastic insert with the little metal clips. Tip is to install that on door lock before putting the lock in the car. Less busted knuckles that way....
-
-
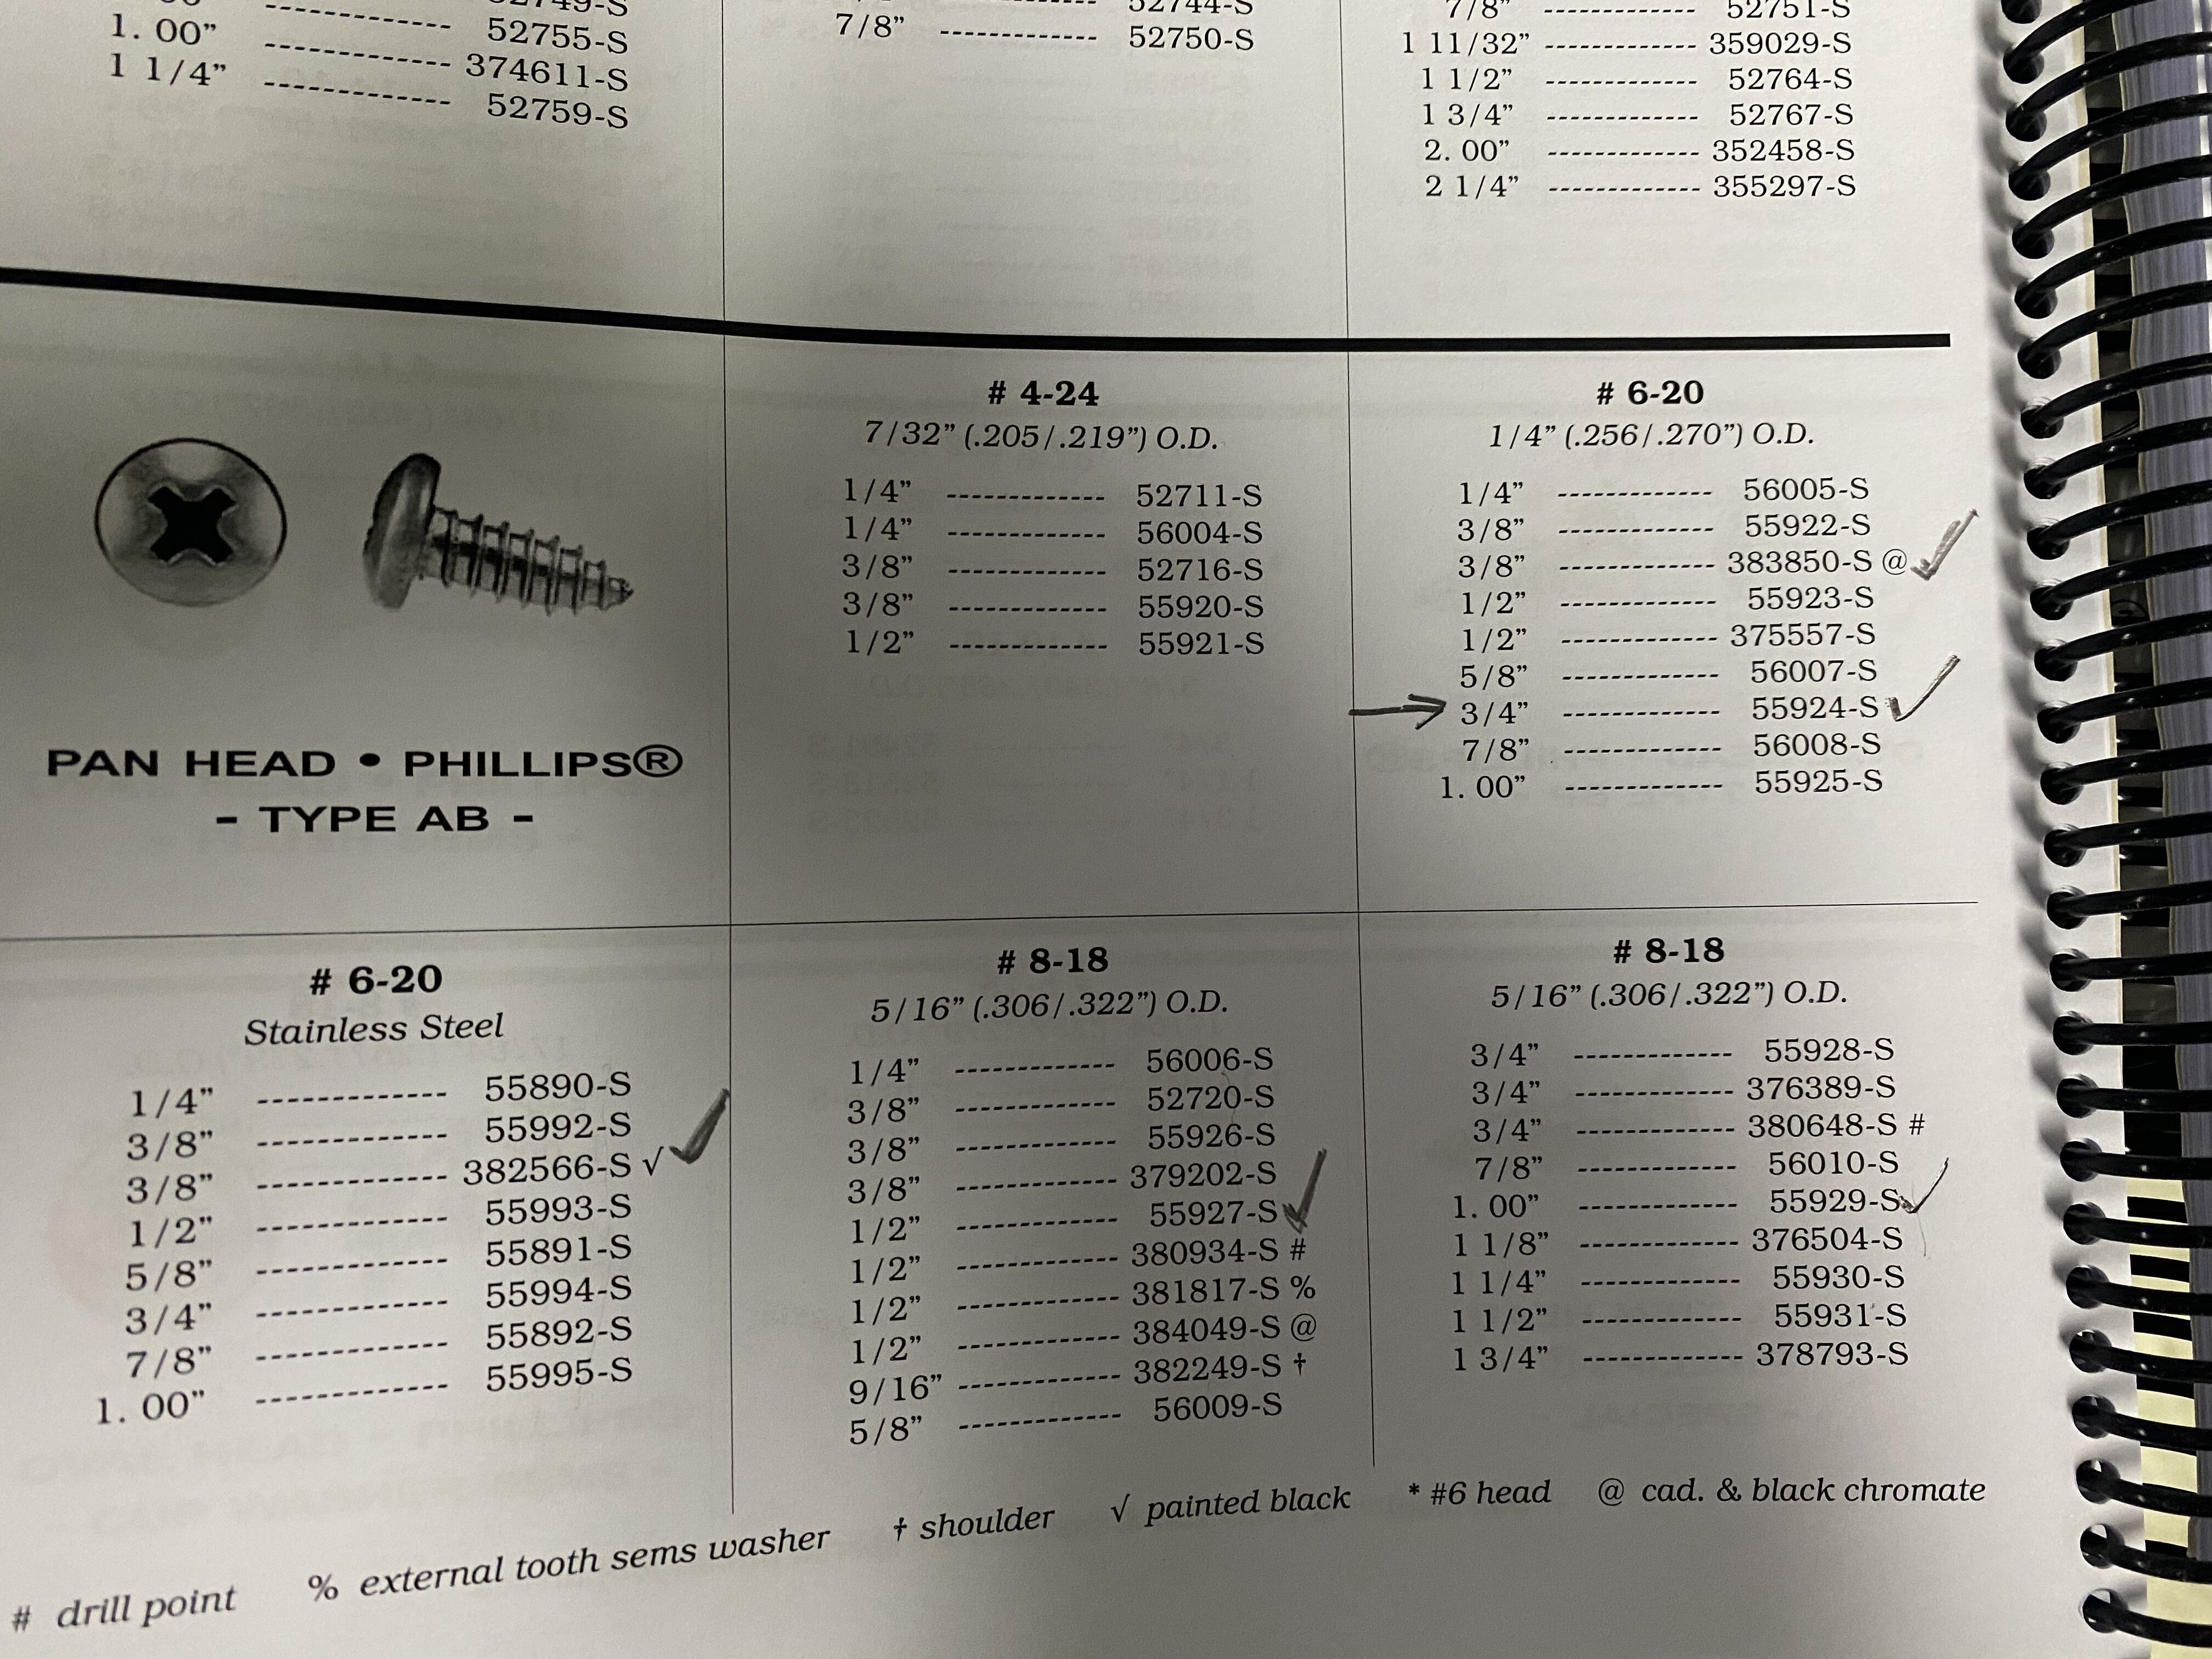
That post came out weird..
I used #6 SS Pan Head Sheet Metal Screws, 1-1/2" long. Used #6 SS washers.
-
-
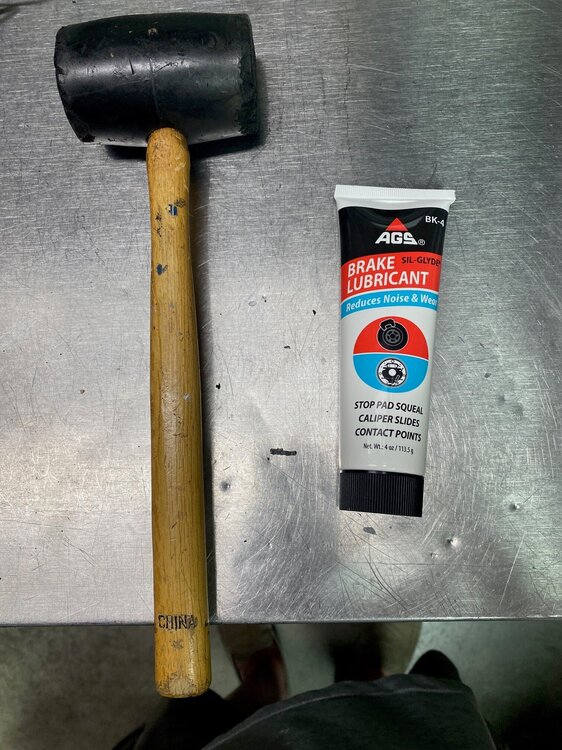
This visor installation has not been a lot of fun. I wound up doing the rubber mallet and brake lube technique, and it worked. On my drivers side visor bracket, which is chromed, I actually cracked the chrome slightly (not too visible) due to the pounding on the visor bracket. But, I got them on. This was not easy. What a shitty design. I did get a set of cheaper visors, and they were even worse. I don't see this working at all if you do not use brake lube or some other lubricant. Not sure how the heck they did this at the factory.
-
Pretty sure on the steering column. Used for wiring support. Check the assembly drawings. Pretty sure I have one on my ‘70
-
-
-
-
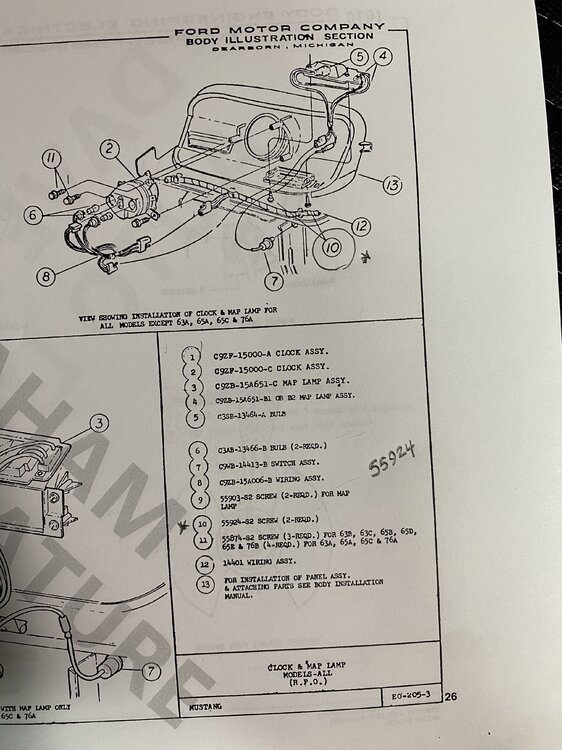
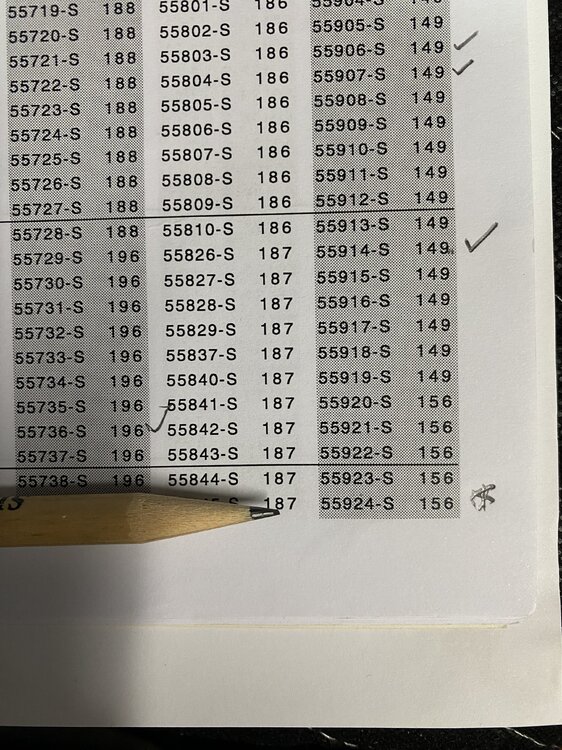
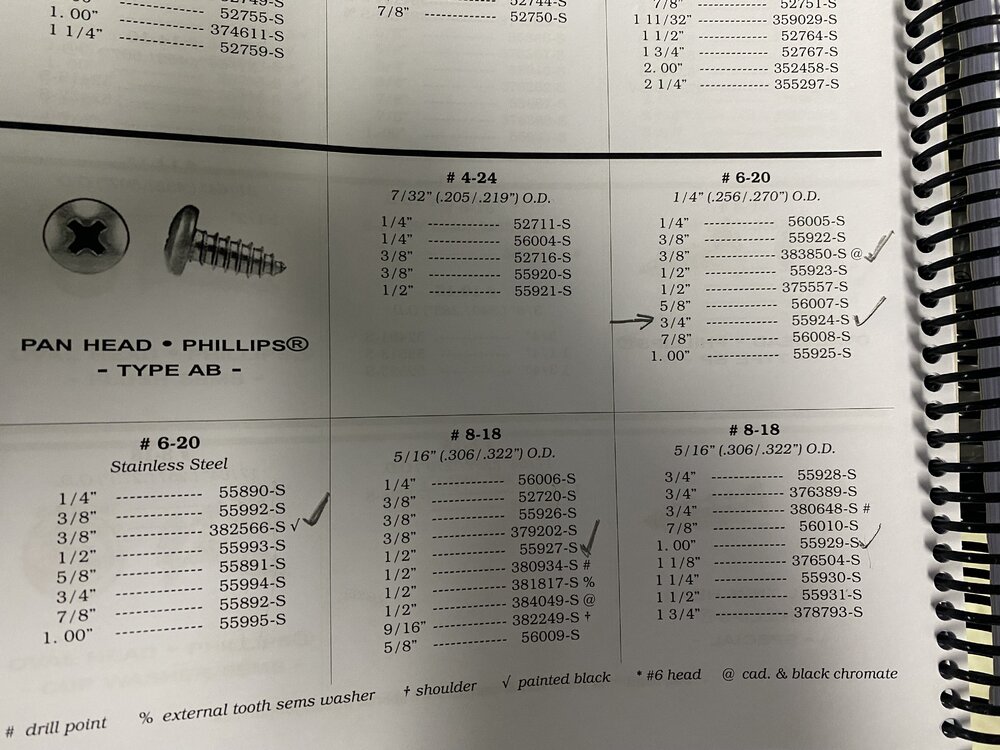
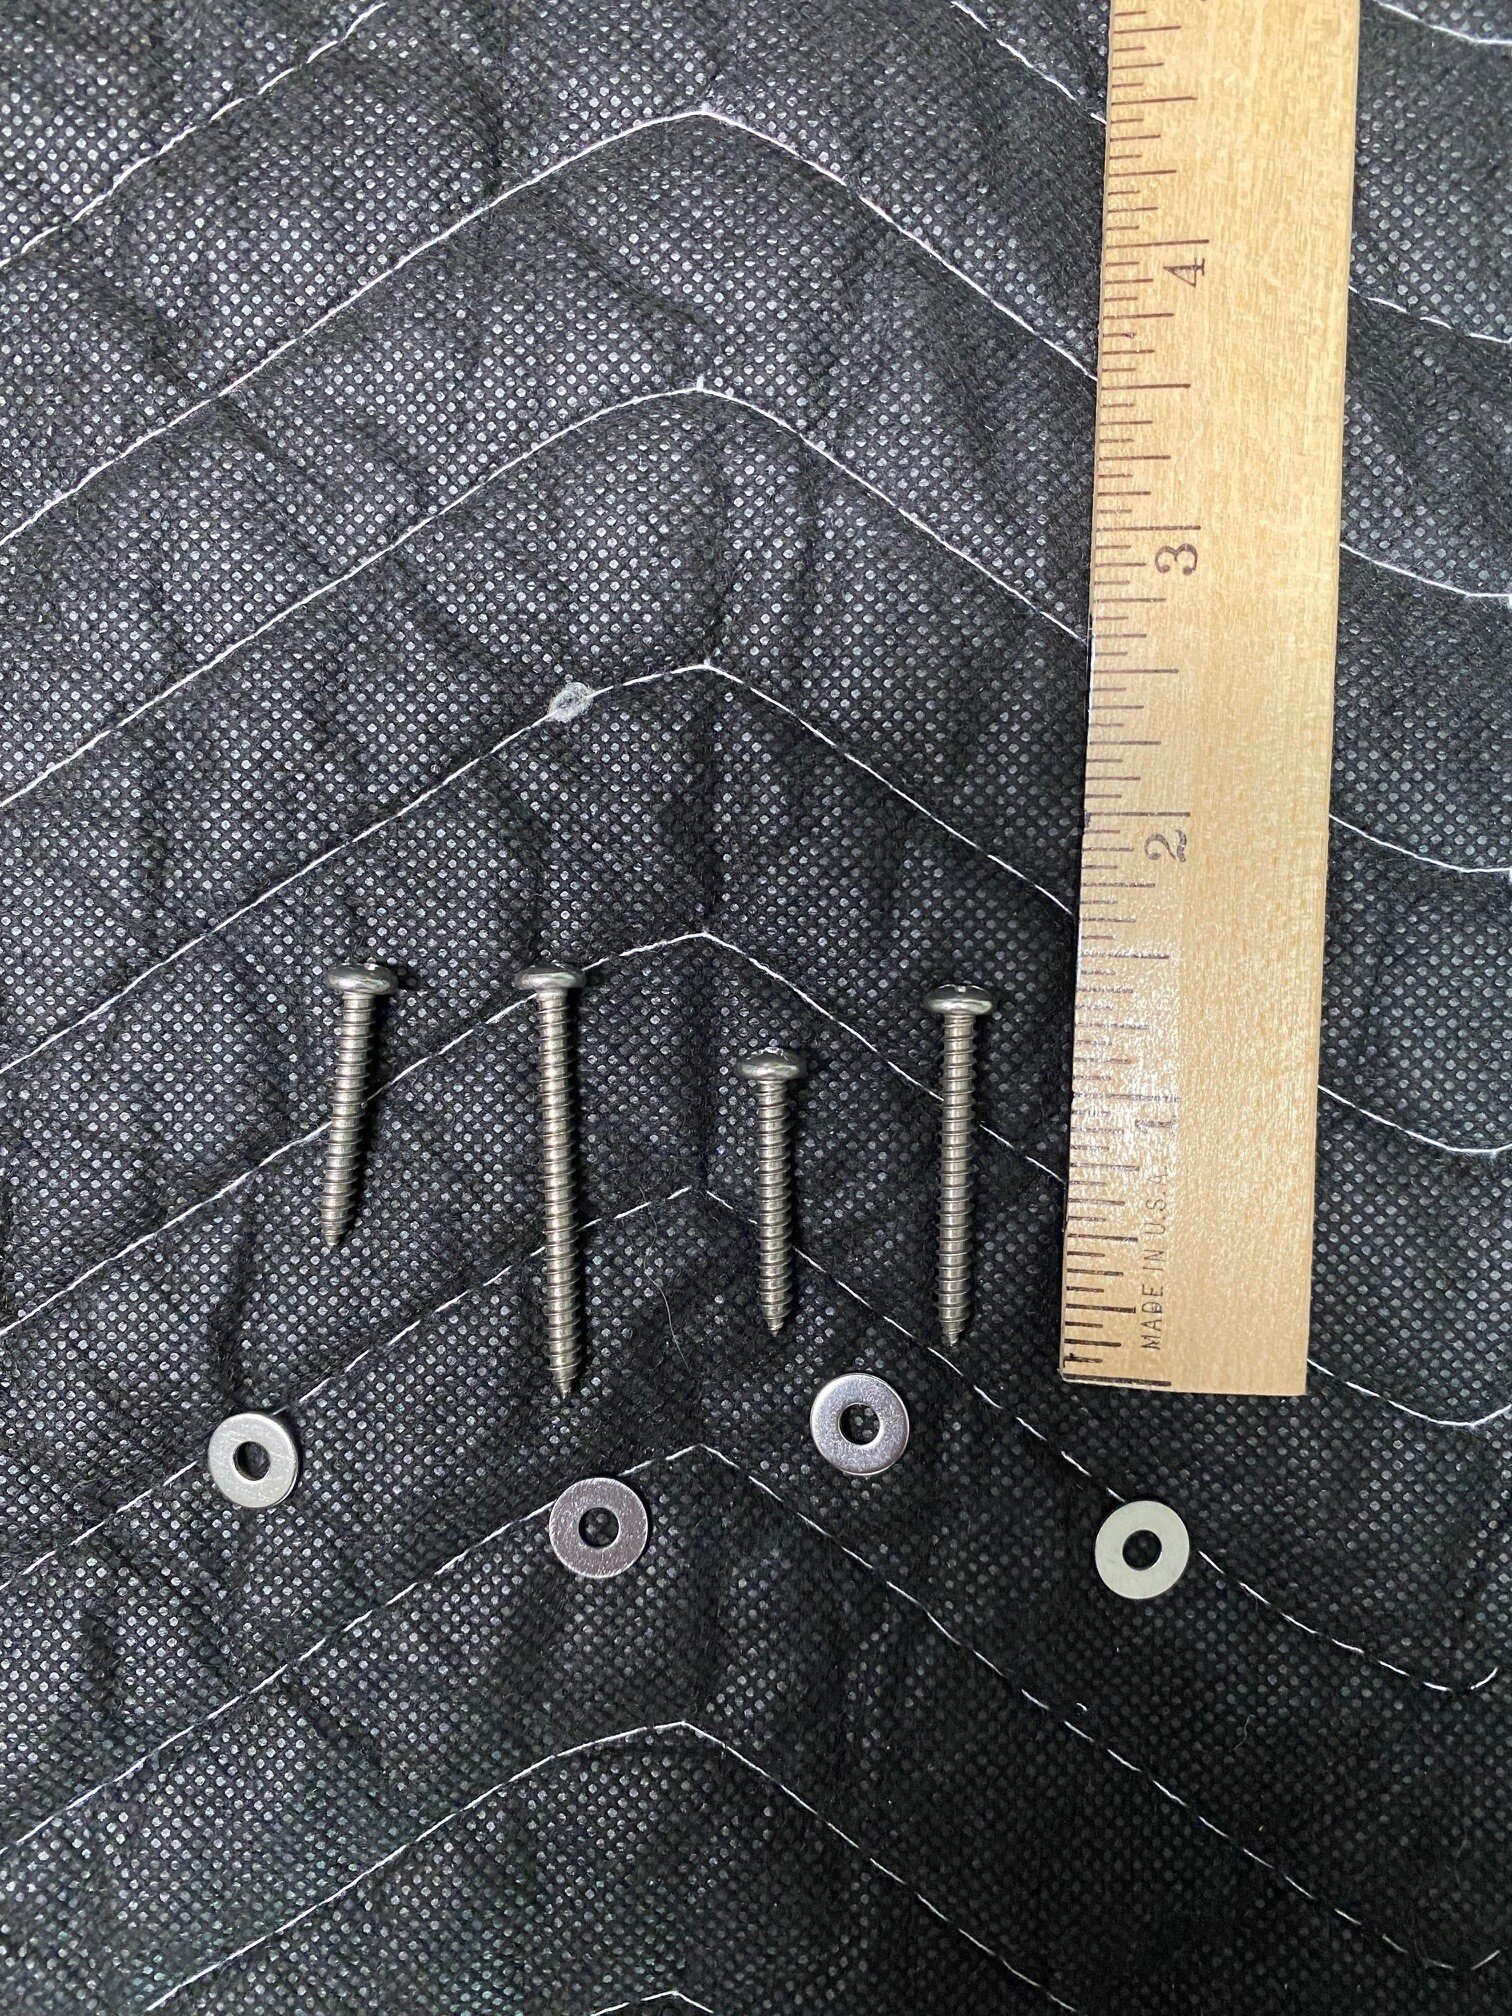
I finally did sort out, but the official fastener should be for this map light.
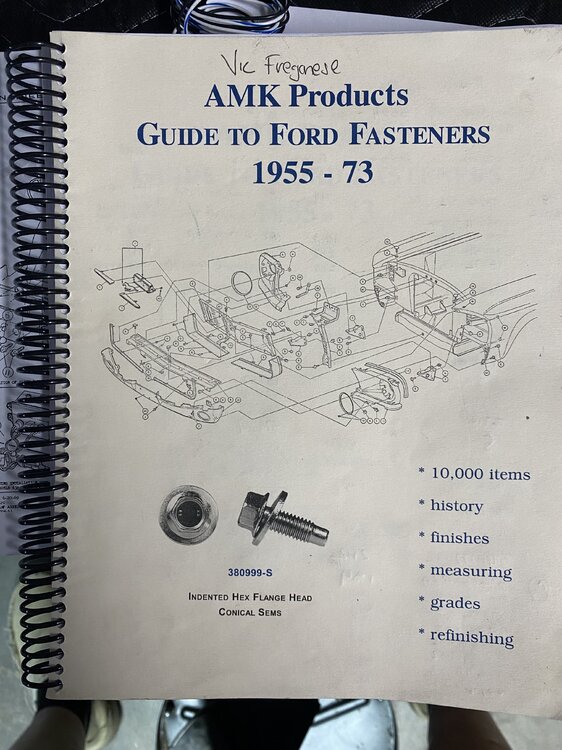
For those of you who do not have the Ford fastener manual, I have found this to be one of my most important resources, as I did not disassemble all of my car, and only had coffee cans full of hardware when I purchased it
The assembly manuals have references to every fastener, and the Ford fastener manual has a cross reference that shows the exact hardware that was used by the factory at the time.
It actually shows photographs of what the fastener should look like, and it has a very detailed reference section on the type of finish, and so forth that was used by the factory for these fasteners, including the markings.
It’s worth the money, it’s actually not that expensive. This allowed me to go to local fastener shop, and get what I need for these miscellaneous fasteners, that are not easily procured in these interior or exterior or body kits
An example here shows the drawing out of the assembly manual, with the map, light fastener circled, and then that fastener number is shown in the Ford fastener, manual, cross reference, and it takes you right to the page which shows the type of fastener it is.
In this case, it’s a number six pan head sheet metal screw that is three-quarter of an inch long.
I’m actually going to use the number six screw, with a washer, and mine will be stainless
-
Oh cool, send some pics of that
-
-
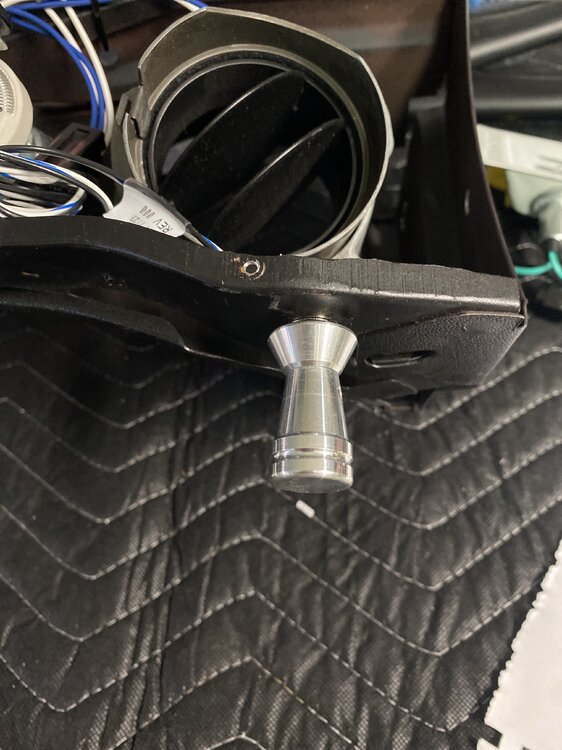
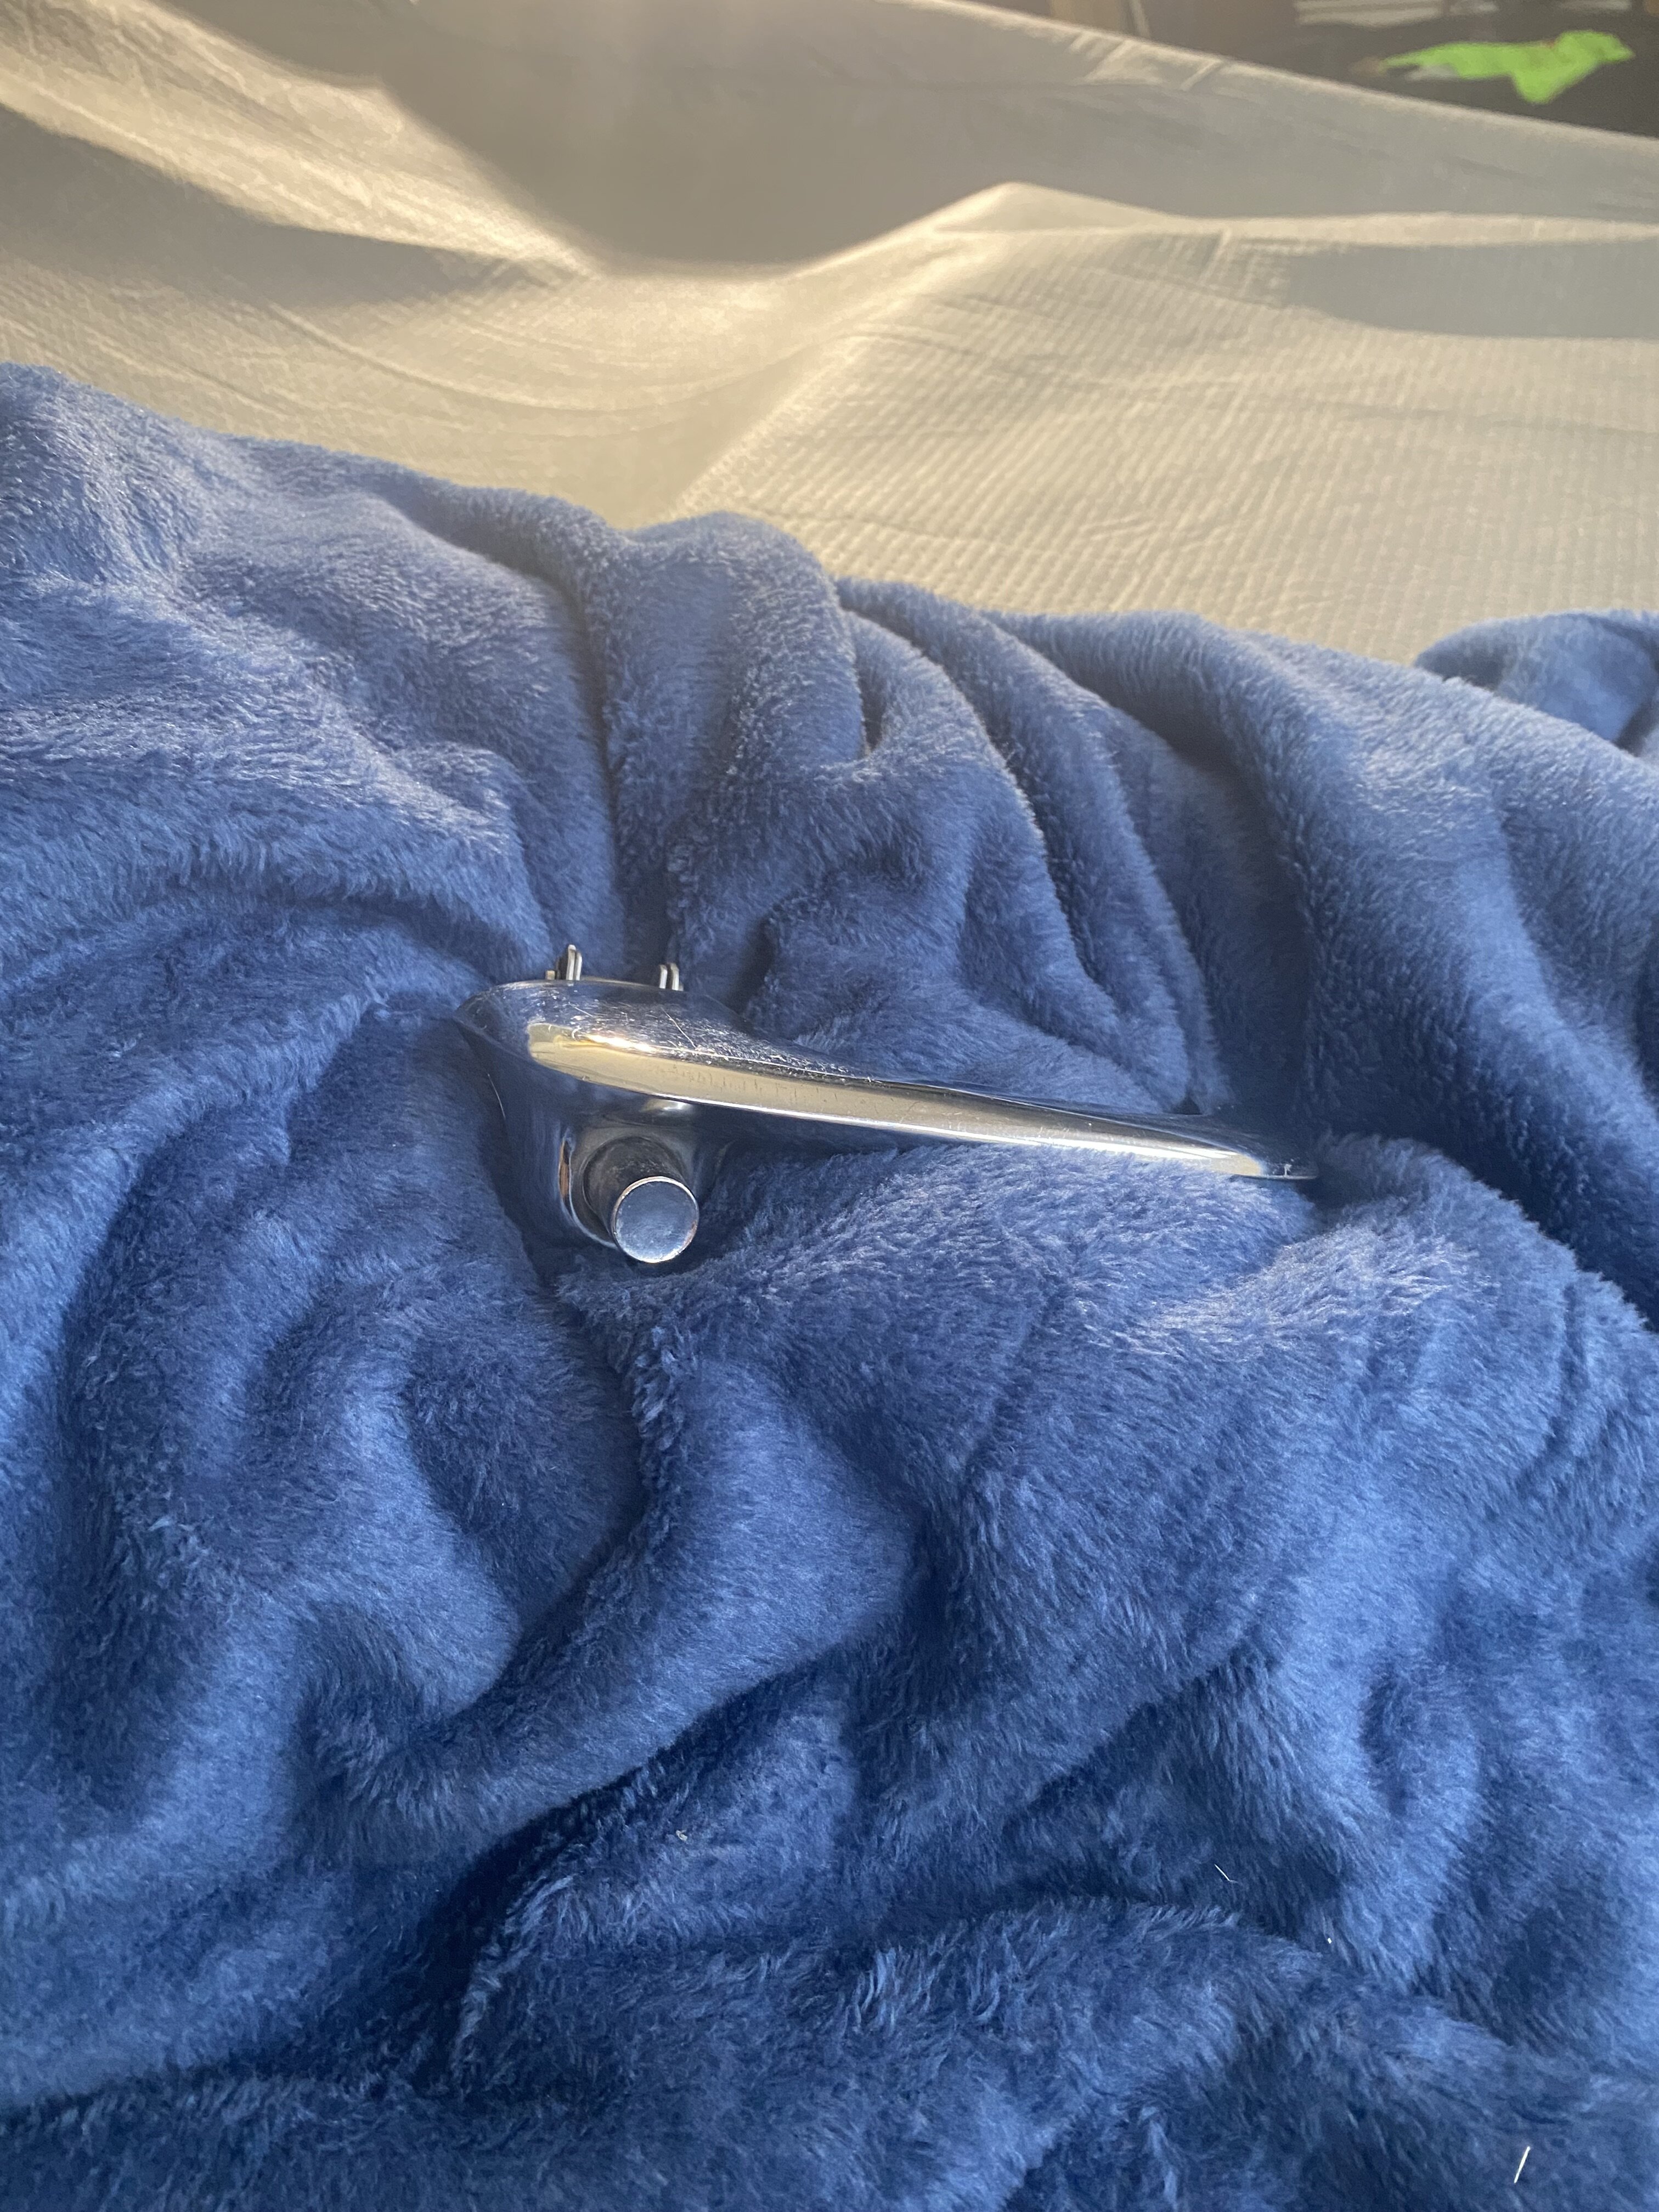
Installed my VHX Dash LED dimmer control.
This goes into the VHX box, and allows you to dim your dash lights and clock light at night.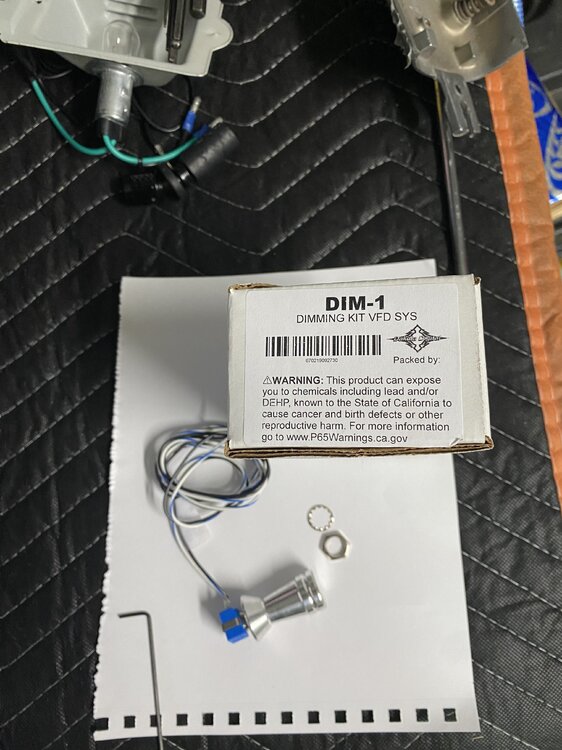
-
-
Found this in my archives. Shows the original non-shaker ram-air set up, with just the Mach 1 style hood scoop feeding the air cleaner....
-
-
Big Duke - How did this work out? Do you have enough clearance with the flat top pistons?
Also, the Air Gap is a tall intake manifold. If you are going to run a Shaker Hood, that might be too tall to close the hood properly with the Shaker.
I see that you are from Germany. I used to spend a lot of time in Erlangen doing some work with Siemens.
Vic
-
I finally went with Eaton Spring (the old Detroit Spring) and used 5 leaf springs on my '68. They have the original spring patterns from Ford, and reproduce them with high quality steel.
I used the part number for the GT suspension. The car is stiff, with a firm ride, but no bouncing. I have Bilsteins.
Did the same on my '70 convertible.
One other possibility is that your driveshaft is binding. I had this happen years ago, because I measured my driveshaft length when the car was up in the air. Big mistake. I installed the driveshaft when the car was in the air, and it seemed to fit fine. But the car did ride and handle funny.
I found this out later when my rear universal joint failed.....
Mach1 Driver reacted to this -
I was trying to find my Pertronix instructions, but I remember ditching the pink wire as there was only like 9 volts going to the coil, and I am pretty sure that it needs 12 volts.
Not sure why that would cause these intermittent problems. Good luck. Sounds like a really nice car.
Vic
-
Oh, ok. Sounds like you have covered all the bases. Not sure what else to check.


Outer Shock Tower Braces/Covers
in Parts for Sale / Wanted
Posted · Report reply
Selling these, they are really nice, media blasted and coated in black satin epoxy. Date codes are easily visible.
Message me if interested.
Vic