


stangs-R-me
-
Content Count
989 -
Joined
-
Last visited
-
Days Won
23
Reputation Activity
-

 stangs-R-me got a reaction from Shep69 in Fuel Neck Filler Mods?
INSERT ORDER UPDATE ...
Supplier was expecting these in March 3rd/4th ... as this is now past and my order still shows as "in process" I called them today to follow up. They have not yet received their stock order, but expect it any day. As soon as I see that order has shipped out to me, I'll post another update.
Anyone else want IN, I'll be ordering a 2nd batch as soon as I see the 1st order shipped / they have stock again so there will not be the long wait like the first batch ... more like a few days between when I receive the 1st & 2nd orders.
Thanks,
Doug
-

 stangs-R-me got a reaction from Bob & Sue in Spare & Jack Kit in trunk ...
I plan on finding something to replace the existing O.E. "black paint over rust" swap meet jack that I currently have with something new that meets current scissor jack specs. Many modern / generic scissor jacks that I have looked at are too big to store under the spare ... and to me that is a requirement. In the 37 years I've owned this car, I've never had to change a flat but just want to have all the equipment there. A scissor jack works fine, but you must:
Use only on a hard level surface
Put Parking Brake On & chock at least one other wheel if flat is on back
Break all the lug nuts loose to snug-tight BEFORE jacking the car up
Jack up just high enough to swap the tire
Snug-Tight Lug Nuts only before lowering down, then torque tight once back on the ground
If you can't do it on a hard level surface, call for a flat bed
Most recent flat I changed was on my 1998 Mustang (about 18 years ago) using the O.E. Scissor Jack and Temp Spare ... had zero problems nor any safety concern as I did it per above.
Doug
-
stangs-R-me got a reaction from Shep69 in Fuel Neck Filler Mods?
Also got the INSTALLATION INSTRUCTIONS done over the weekend ... see attached PDF:
Fuel Filler Insert Tool List.pdf
Fuel Filler Insert Instructions-R3.pdf
-
stangs-R-me got a reaction from Shep69 in 1969 GT500 Gas Tank Vent Tube / Fuel Vapor Line
Too bad they don't offer a -4 size (7/16") which is closer to 1/8"NPT. Larger the dia. the harder it is going to be to flatten the radius of the tubing enough to seal.
Doug
-
stangs-R-me got a reaction from Shep69 in 1969 GT500 Gas Tank Vent Tube / Fuel Vapor Line
Fitting in picture looked to be BRASS, so I assumed it went on the inside and had some sort of gasket sealing.
That makes much more sense, but the goal here is to be able to remove fitting so you can get the neck in & out AND to avoid needing to have the whole thing re-plated ... so yes, no welding.
Doug
-
 stangs-R-me got a reaction from RPM in 1969 GT500 Gas Tank Vent Tube / Fuel Vapor Line
Vent tube is still on back order at CJP, but ordered up another filler neck this morning because I had $10 in RPM points expiring today.
The new CJP filler neck I just installed 2 weeks ago with the "unleaded nozzle insert" in it ...
... did not come with a "vent-dent" like it should have so I added one. With this GT500 Vent Tube a neck with "no vent dent" is required, so figured I'd order up another neck before my RPM points were gone.
I've also come up with a solution for installing the 1/8" NPT hose nipple in the filler neck. I plan on using a McMaster Carr 6630K14 1/8" NPT Lock Nut on the inside and either a 2nd lock nut or a washer & gasket on the outside sandwiched between the fitting's hex and OD of filler neck:
Not sure if I will run the hose into the frame rail or let it just drip on the ground like my Fairlane did. Will figure all this out and do the actual install in the Spring when car is not tight against the back of my garage hibernating.
Doug
-
 stangs-R-me got a reaction from Grabber70Mach in Fuel Neck Filler Mods?
Great, I'll add you to the list. Two will be $53.00 delivered via USPS 1st Class Mail.
Thanks,
Doug
-
stangs-R-me got a reaction from RPM in Clearance issue with drag link and oil pan.
I would guess the problem is that a Small Block Ford in a classic Mustang needs a FRONT SUMP PAN !!
Doug
-
stangs-R-me got a reaction from Shep69 in Getting Ya Stripes On
Wow, that really did turn out nice. Gulfstream is a great color and the gold stripes really look good on it.
So many close upshots of different areas you've been working on over the past months that it is a treat to finally see a few shots of the whole car completed.
A job well done !!
Doug
-
 stangs-R-me reacted to MN69Grande in Fuel Neck Filler Mods?
This is just a guess, but I would assume they have a lot of government compliance they have to go through selling primarily fuel related auto/industrial equipment parts vs niche hobby restoration parts. There is probably a lot of liability involved. My guess is they have had issues in the past or great concerns in this area; probably why they would have the type of insurance they do. Just a guess, but the US is a pretty litigious place. So since they probably aren't interested in entering the Austrian market they most likely just have a policy to turn down small purchase requests as the liability of getting sued is well beyond the small earnings potential. Especially if they haven't got through any compliance testing for foreign markets.
-
stangs-R-me got a reaction from Shep69 in Fuel Neck Filler Mods?
Ok ... so far got 4 interested one being an Aussie.
I will check with my local USPS to see what kind of hoops I have to jump through to ship to Australia as well as the cost. As many of you that are on this site, maybe a few could band together and I'd just ship ONE package over which could save some $$.
If we can get 5 more commitments (9 total) I will order them up.
Thanks,
Doug
-
 stangs-R-me got a reaction from Mach1 Driver in seat belt buckles
Deluxe HARDTOP / COUPE with added Grande' rear quarter trim panels. The other member posting pics in here ... Shep69 ... has a Mach 1 though.
Doug
-
stangs-R-me got a reaction from Shep69 in seat belt buckles
Realized just now that me & Shep69 put all this info in a thread that started by the OP asking if the deluxe chrome buckle trim can be swapped onto std. black buckles. Really should have started a new thread appropriately titled "Scott Drake 3-Point Seat Belt Kit", but oh well.
One more tid bit ... the S-D 3-PT Seat Belt Set is made by Seatbelt Solutions in Jupiter, Florida ...
-
stangs-R-me got a reaction from Shep69 in seat belt buckles
Only gripe I've got is that you need to fully extend the FM buckle webbing to get into the console top holsters, and to get it in the right position for use I need to slide it back about 7 inches. I will likely not be putting them in the holsters every time I get out of the car like I used to do ... just when at shows.
4 more pics, 2nd one is SD Buckle vs. O.E. buckle ...
-
stangs-R-me got a reaction from Shep69 in seat belt buckles
Got a set of the Scott Drake 3-Point Belts for Christmas and messed around with them yesterday. Very happy with the quality and fit considering it is a retrofit using the factory 3 mounting points.
As previously mentioned, the factory seat belt shoulder bolts are a bit too big for the replacement seat belts. OE bolts have a 0.496" o.d. shoulder and the SD inner belt & retractor have 0.495 & 0.484" holes so they will need to be reamed out to fit. The swing arm that gets sandwiched between the retractor & inner rocker is OK as it has a .508" hole ... hopefully the 0.501" reamer I've got at work is good enough for opening up the inner belts & retractors.
One other thing, the plastic cover on the retractor is in the way of accessing the OE bolt with a typical T50 socket ... thankfully it pops off easy enough.
Doug
-
stangs-R-me reacted to Shep69 in seat belt buckles
Doug. The buckles fit nicely into the console holsters but I have to take them to the limit as the belts are only just long enough. The factory mounts are way back which doesn’t help. I’m going to mount the retract unit and seat and see how it goes.
-
stangs-R-me got a reaction from Shep69 in seat belt buckles
Interesting ... those male ends are pretty different. Which makes me wonder if these new ones would properly mate up with ANY O.E. Classic Mustang Seat Belt. They do state "vintage styled buckles", but this does not mean that they will mate with a vintage male end or vise versa.
This made me wonder if the new '68-69 repro's might be different too as CJP only shows them buckled up. So went to SD site and they actually show them un-buckled, and they do appear to match the O.E. elongated slot:
http://www.drakeautomotivegroup.com/Store/Product/SB-BK-68-C.aspx?wid=141
So the only way to use O.E. buckles would be to find a place that can sew seat belts (maybe a seat belt refurbish company) to swap out '68-69 style male ends onto the new 3-point kit. Or, if the company that makes these for SD also makes the repro '68-69 ones they might be willing to do a custom set using the '68-69 style buckles.
Doug
-
stangs-R-me got a reaction from Shep69 in Interior panel fit
I agree, the windlace filled that ugly gap quite nicely. Having a hardtop, I'm no expert to sportsroof specific features ... so had I not seen Brian's pic to compare, it looks to me like it could have been a factory installation.
Nice job !!
Doug
-
 stangs-R-me got a reaction from 69RavenConv in Dash Gauges or A Pillar Pod Ideas
I used a plastic Auto-Meter Gauge pod that I mounted to the left dash cluster using the factory lower cluster screw (zero modification) for my voltmeter and it blends in quite nicely at the base of the deluxe cluster ... could easily add a second one on the other side with the other lower screw.
However, this style gauge pod has been NLA from Auto-Meter for a while, but maybe you can find NOS or something similar from a different gauge mfr.
Doug
-
 stangs-R-me got a reaction from Raven R code in ~ 1969 Export Brace Color
The O.E. Ford Service Parts version I bought in the mid 80's is semi-gloss black ... found a pic in my collection that even shows the part number sticker still on it:
-

 stangs-R-me got a reaction from jeannexy69 in Picture of my car is the header of CJP Tire section
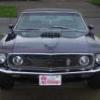
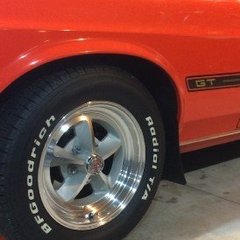
Have been looking at wheels on their site for the past couple of weeks, but thought I'd see what tires they offer, if anything more that what they offer on the drop down menu for the wheels/tire packages.
There is what appears to be an orange Mach 1 at the top of the tire section ... but the closer I looked at the picture, I realized it is MY car / picture that the "GT" emblems have been removed from the center caps as has the L-P bracket !!
http://www.cjponyparts.com/1969-mustang-tires/c/60210080/
Pretty cool !!
Doug
Original picture:
-
 stangs-R-me got a reaction from roxieyi18 in Theft protection of your Mustang
Before I converted my car over to a factory Tach dash, I had a hidden switch tied into the ignition switch of the original non-tach dash harness. If you tried to start the car with the switch ON you would blow a fuse (that was hidden elsewhere), you would then have to find & replace that fuse and turn the switch off before you could start the car. Pretty sure the switch connected the start circuit to ground and the fuse was in the line going to the starter relay.
Don't think anyone ever tried to steal my car, but I certainly went though a lot of fuses as I forgot to turn the switch off myself quite often !!
Did not want to butcher a perfect Tach harness (unlike my original harness that had previous repair work done), so I did not swap the switch / fuse set up over when I converted.
This was back in the mid-80's and I'm pretty sure I got this idea from a magazine article and had a copy of it, but had no luck finding it in my old papers.
Doug
-
stangs-R-me got a reaction from Raven R code in Theft protection of your Mustang
Before I converted my car over to a factory Tach dash, I had a hidden switch tied into the ignition switch of the original non-tach dash harness. If you tried to start the car with the switch ON you would blow a fuse (that was hidden elsewhere), you would then have to find & replace that fuse and turn the switch off before you could start the car. Pretty sure the switch connected the start circuit to ground and the fuse was in the line going to the starter relay.
Don't think anyone ever tried to steal my car, but I certainly went though a lot of fuses as I forgot to turn the switch off myself quite often !!
Did not want to butcher a perfect Tach harness (unlike my original harness that had previous repair work done), so I did not swap the switch / fuse set up over when I converted.
This was back in the mid-80's and I'm pretty sure I got this idea from a magazine article and had a copy of it, but had no luck finding it in my old papers.
Doug
-
stangs-R-me reacted to prayers1 in Need Alignment Specs.
I have been away from this site for a few months due to a loss in the family that was hard to deal with. I'd like to focus back on the Mustang and get it ready for the street.
I need alignment specs but there are sooooooo many opinions on which specs to use. I thought If I give my particular vehicle info that maybe someone can direct me on what to use.
I have a 1969 Fastback with a 408 Cleveland with aluminum heads and an AOD trans. The entire suspension is completely rebuilt. I cut 1/2 a coil off new coil springs. Have the Manual linkage with the Borgensen POWER steering. Welded in shock tower reinforcement Have the Export brace & Monte Carlo bar. 7/8ths sway bar. Did the Shelby drop. 1970 front disc & rotors with pwr brakes. Street/Comp Cross member 215/65R BFG Radial tires OPENTRACKER has this on their site: STREET SPECS * Caster: +2° to +3.5° Manual Steer
+2.5° to +4.5° Power Steer
Camber:
0 to -.5°
Toe:
1/8″ in
STREET PERFORMANCE SPECS *
Caster:
+2.0° to +3.5° Manual Steer
+2.5° to +4.5° Power Steer
Camber:
-.5° to -1.5°
Toe:
1/8″ in
* Caster and camber settings should be the same on both sides for proper handling.
-
 stangs-R-me got a reaction from bigmal in Upper Control Arm Support Tools ...
I thought there was already a topic on these, but did not find anything.
Anyway, after reading that Mustang Monthly article a while back by Bob Perkins, I found the drawing in my Ford Shop Manual and scanned it in / printed off a copy figuring I was going to make a set ... well I finally got around to actually doing it today. Last Friday I needed to jack up the front end and pull both wheels off so I said to myself I'm making the tools this week at work !!
Step 1) Found a length of 3/8" x 4" Cold Rolled Steel sitting here at work so I cut a piece off by 7-3/8" long on the abrasive hot saw.
Step 2) Then scribed down both sides at 1-5/8" wide and made these two cuts as straight as I could on the band saw.
Step 3) The left over piece in the middle was 3/4" (less 2x the band saw width) so cut 2 x 1-5/8" long out of this.
Step 4) Took the remaining 3/4" wide piece and cut it down to 1/4" wide on the band saw, then cut 2 x 1-5/8" long pieces out of that.
Step 5) Tack weld the 3/4" wide pieces to the main pieces 3/4" down from the top using a vice grip clamp to hold in position.
Step 6) Using a small piece of 1/2" thick steel to set the 1/2" gap, clamp the 1/4" wide piece to the main piece and tack weld to the 3/4" wide piece.
Step 7) Finish welding, remove slag / sand & wire wheel corners/edges.
The two small pieces between the two support tools is all the remaining scrap.
Doug