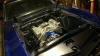
stangme428 33 Report post Posted August 19, 2013 (edited) ok - some progress.. long days.. great friends and family... its gonna be down to the wire but we may make it... we shall see!! lots of small items completed.. fays2 modification to clear glenn's performance sleeper tank is complete and ready to install optima yellow top installed in battery box in trunk gauges installed and tested - GND problems to be resolved this week 6 bulb shelby tail light harness (used) to be spliced into AAW harness - to be finalized this week - not gonna use old harness .. ordered additional housings from AAW starter removed, spaced and installed so not to be eaten by flywheel Mallory MAX-Fire distributor program verified and communication with laptop as well as harness soldered in and ready to go (need hold down clamp) AAW harness GND points completed for lighting in front - headlights, side markers, turn signals Vintage Air correct duct outlets received - needs to be installed AAW turn signal and horn wiring completed - converted from factory Ford connector over to AAW GM style connector arduino for gauge lighting not yet installed ... last item to be installed... lots to do ... the temporary GND point at the rear battery box was just enough to get voltages checked and doesnt provide a good enough GND for current flow to the starter and other areas... i will be installing a GND with the same size positive welding cable from the battery to the engine compartment, fire wall and block, so the summit hi-torque starter can pull enough amps to spin the engine... ordering the drive shaft this week 8/20/13 ordering the subframe connectors this week 8/20/13 the flywheel was hitting the starter and binding, also surface rust may have built up in the cylinder walls while the engine sat for two years inside the garage... very hard to turn over.. the starter was removed, spaced out so it wouldn't hit the flywheel, the spark plugs removed and oil squirted into each cylinder... first starter engagement since 1999 --- we should be ready to fire her up in the next day or two... schedules permitting i may not be present when it happens due to work.. but hey... we have a deadline!!!:thumbup: Edited August 23, 2013 by stangme428 Quote Share this post Link to post Share on other sites
stangme428 33 Report post Posted August 20, 2013 (edited) fays2 progress - test fit the modified fays2 .. looks like it will work perfect!! without changing any routing of fuel lines .. basically the passenger side was extended to create a halo around the sleeper tank AN fittings, the fays2 arms also clear without any issues... :thumbup: also purchased 2 gauge welding cable $$ to run from the battery GND to the firewall and then to the head/block. the engine turns over faster, but still not like a stock turn over etc.. still slow.. we changed the oil.. one of the steps anyway, pump up the oil to the heads with a drill.. and will see how it goes tonight... getting closer... baby steps.. :punk: Edited August 20, 2013 by stangme428 Quote Share this post Link to post Share on other sites
Jayru 17 Report post Posted August 20, 2013 Looking good dude! What electric fan / relay setup did you go with? Quote Share this post Link to post Share on other sites
stangme428 33 Report post Posted August 20, 2013 Looking good dude! What electric fan / relay setup did you go with? the two 12" fans with my Champion Radiator purchase ... im using a generic relay kit to control the fans with input from the Vintage Air switch and thermostat switch at the radiator... :thumbup: Quote Share this post Link to post Share on other sites
buening 63 Report post Posted August 20, 2013 Have you tried taking the battery out of your daily driver and use it in the stang for starting the car? That would eliminate a weak battery as the culprit for slow cranking. It almost sounds like you still have binding with the starter. Quote Share this post Link to post Share on other sites
stangme428 33 Report post Posted August 20, 2013 Have you tried taking the battery out of your daily driver and use it in the stang for starting the car? That would eliminate a weak battery as the culprit for slow cranking. It almost sounds like you still have binding with the starter. have not ruled out more binding at the starter, also need to make sure the T56 is not engaged some way... the new yellow top was charged and we topped it off with a charge over night last night.. we shall see how tonight goes.. with the new ground... it "sounds" stronger when turning over... we will prime the oil up to the heads with the oil changed out.. get it ready to start etc.. we also have another yellow top from the land cruiser we can swap in for testing.. Quote Share this post Link to post Share on other sites
Mike65 475 Report post Posted August 20, 2013 Getting closer. I am jealous. :drool: Quote Share this post Link to post Share on other sites
stangme428 33 Report post Posted August 23, 2013 woo hoo - more progress key milestone -- for me anyway... the drive shaft will be delivered today, 8/23/13. **slow cranking problem resolved** we knew something was binding / hitting, so we did process of elimination until we determined the problem. we picked up a transmission jack from harbor freight .. highly recommended!!! worth every penny of 140.00... we removed the tranny combination at the least 5 times, very efficient time with the transmission jack.. link to video we removed the starter and spaced it out.. didnt really resolve the problem.. but starter face was hitting flywheel -- still cranking slow. removed starter and unbolted bell housing / t56 from block - turned engine over by hand no problem bolted bell housing and clutch up to block - turned over by hand no problem removed clutch and bolted t56 and bell housing to block - binding determined that the t56 vinput shaft was too long and removed .15" off of input shaft- mated t56 to bell housing - turned by hand no binding removed bell housing and t56, installed clutch and mated bell housing back to block with t56 - turned by hand no binding now back to our regularly scheduled programming.... baby steps to resume.. we worked every night this week for a couple of hours, picking off the items on the to do list.... several parts / bolts runs etc.. hope to fire the engine on Saturday 8/24/13.....:thumbup: buening asked a question a good while back ... "did you shorten the T56 input shaft".. remembering that post sped up the troubleshooting..!!:thumbup: also, AAW support has been amazing, i needed two more tail light housings each side for the Shelby rear tail light setup... they shipped them out very quick and added them to an existing order for my T56 harness connectors.. as well as resolving questions i had regarding the fuel pump relay trigger and turn signal indicator harness questions.. Quote Share this post Link to post Share on other sites
rwcstang 201 Report post Posted August 23, 2013 glad the problem was solved! be sure to post a vid of the car running! maybe even a burn out? lol Quote Share this post Link to post Share on other sites
buening 63 Report post Posted August 23, 2013 Wow I totally forgot that I asked you that. Glad I could help! :lol: Quote Share this post Link to post Share on other sites
stangme428 33 Report post Posted August 25, 2013 (edited) a quick video of startup ... more to follow... worked most of the day saturday and fired the engine at 2AM ... :sleep1: ... now its time to tune her .... sooo.. its now almost 5am and time for bed.. thanks for all the motivation from this site!!! oh yeah... Action Machine 3.5" aluminum drive shaft 1350 trans yoke and 1350/1310 hybrid at the pinion.... is installed, gauges are working after grounds resolved, flushed block and installed evans coolant.. installed fan relay kit and fuel pump relay,.... ill think of more that was done after i sleep... :punk: amsoil ATF installed in T56 oil changed lokar throttle cable installed dual fan controller installed and wired with wetherpak connectors fuel pump relay installed evans coolant flush and coolant installed fuel sending unit installed Edited August 25, 2013 by stangme428 Quote Share this post Link to post Share on other sites
Mike65 475 Report post Posted August 25, 2013 WOW!!! sounds great. Quote Share this post Link to post Share on other sites
rwcstang 201 Report post Posted August 25, 2013 wow, sound good! did you finalize what exhaust set up your going with? Quote Share this post Link to post Share on other sites
stangme428 33 Report post Posted August 25, 2013 wow, sound good! did you finalize what exhaust set up your going with? Magnaflow ... 3" i head to the exhaust shop the next day or so to see what they can do fast... i don't think i have time to order a 3" stainless X pipe kit and have it installed in the next few days.. and also have time to work the bugs out of the car etc.. so i have a recommendation of a local shop in Jacksonville that, depending on conversation, will probably do a quick setup with some dumps at the axle for now... ill know my choices when i talk to them. Quote Share this post Link to post Share on other sites
Grabber70Mach 107 Report post Posted August 25, 2013 Congrats the car sounds good, bet it felt great reaching that milestone. Quote Share this post Link to post Share on other sites
69SlowResto 19 Report post Posted August 25, 2013 Sounds and looks great! Congrats on the milestone. Quote Share this post Link to post Share on other sites
stangme428 33 Report post Posted August 26, 2013 thanks everyone.... scheduled with Smitty's Exhaust and welding this week... 3" all the way back... they will also research what is needed to complete the center exhaust.. great conversation with those guys.. they are excited to work on the 69 ... :clap: Quote Share this post Link to post Share on other sites
stangme428 33 Report post Posted August 29, 2013 ok-- sleep deprivation can be fun... lol ... lots of progress... new custom 3" exhaust by smittys exhaust middleburg florida AAW wiring completed million other items... the last week.. ill update after more sleep she needs a bath, alignment and door locks too... installed the tag... almost didn't get the tag due to a forum member on other forums (is it latamud) uses the same name for his car / avatar etc .. but it was available.. and while some will say "its not really a boss" this is true but its my Boss.. :punk: seems the NEW power brake booster sourced local is bad, so no go for driving more than a 100 yards etc.. im contacting MCA judge at the mickyard to see if i can trailer the car and if i can rent a trailer to get it to Mustangs at the Mickyard ... no worries if i cant.. its gonna be a great show with family and friends.. the 3" exhaust with X pipe using in house sourced mufflers based on Magnaflow design ... they ended up fabricating collectors all the way back to the dumps at the axles... great work, very impressed with the craftsmanship and quality of work from Smitty's Exhaust .. hydraulic clutch is working great, its tuff with the new kevlar/kevlar clutch at the moment.. the power and quick rev this engine has is crazy... we have built a monster... the interior door panels, dash pad, misc items needs to be installed... much time was spent troubleshooting the brake system to determine if the brake booster was defective... brakes bled a hundred times, master cylinder bled etc.. the brake pedal is normal and strong but stays where it ends and you have to use your foot to bring it back up ... getting familiar with the T56 is fun, still need to trim more carpet away from the shifter opening... but fun stuff.. thanks for all of the motivation from this site.... some great projects are going on !!! first crank after 3" exhaust with X pipe... need to tighten the loose alternator belt video of my buddy Andy's first drive after our 4 year build in his garage... Quote Share this post Link to post Share on other sites
buening 63 Report post Posted August 29, 2013 Nice! I was wondering if they were dumping in front of the axle or not. Word of caution from my experience, watch the driveshaft clearance to the exhaust x-pipe when you have the body on stands and the rear end freehanging. Mine, with the 1" drop, 4" driveshaft, and relocated motor actually has the driveshaft hanging on the exhaust when the rear end is hanging. In fact I think it won't let the axle drop as far as it could with the exhaust removed. This adds a bit of strain on the muffler hangers. Not sure if you'll have the issue, but something you might check sometime. The hydro clutch with aluminum flywheel definitely takes some getting used to! I still find myself riding the clutch more when taking off from a stop. Quote Share this post Link to post Share on other sites
Tgriffin91 27 Report post Posted August 29, 2013 Are you planning o bring th exhaust all the way back? I'm not sure how they did it on the Shelby mustangs. I like the look of the straight pipes coming out the back. Just curious. Quote Share this post Link to post Share on other sites
69SlowResto 19 Report post Posted August 29, 2013 Great progress....inching closer to the finish Quote Share this post Link to post Share on other sites
stangme428 33 Report post Posted September 3, 2013 ok... lots of work... sleep deprivation...AMP energy drink... and... WE MADE IT!! .... with no sleep Friday night and maybe 7 hours total the last 72 hours before the show... we pulled out of the driveway with the glove box and the passenger side cubby not installed... at 6am Saturday morning.... designated a driver and slept for the 3.x hour drive from JAX to Orlando ... adjusted the tie rods while on the trailer ... pulled off the trailer at Magic Kingdom parking lot and drove it into the speedway via the tunnel and hit registration at 9:25 am... registration ended at 10 am... we took home Bronze in our class with a cool Mustangs at the Mickyard Mickey trophy.. which was totally amazing and not at all expected... amazing cars at this show!! the judges did an amazing job and accommodated all cars no matter what the situation... they judged my car at the Hess station outside of the track on Sunday.... due to not being able to drive it over to the host hotel for judging with several others that remained to be judged .... my strut rods were loose and we had no tools... oops forgot to tighten... glad we made it into the speedway... anyway.. back home now... catching up on sleep... pics of the now black interior (was nugget gold) and more to follow... good times... great support from family and friends.. i think we had 20+ family and friends turn the show into a Disney vacation... :thumbup: Quote Share this post Link to post Share on other sites
Mike65 475 Report post Posted September 3, 2013 Congrats, looks great.:thumbup: Quote Share this post Link to post Share on other sites
stangme428 33 Report post Posted September 4, 2013 thanks mike65 remaining items: like it ever ends.... front end alignment sonoco 100 octane!! reverse switch on T56 install correct fuel gauge install audio system install LED rear tail lights install LED backup lights cant wait to have the front end aligned so i can get it on the road and hit a few gears.... :thumbup: Quote Share this post Link to post Share on other sites
stangme428 33 Report post Posted September 5, 2013 Are you planning o bring th exhaust all the way back? I'm not sure how they did it on the Shelby mustangs. I like the look of the straight pipes coming out the back.Just curious. while at the exhaust shop and the car up on the lift... i talked through routing the exhaust over the axle and around the tank etc .. while oval piping may work.. its very tight.. and the original used a cast aluminum 2" piece... consensus was that if i went to an aftermarket fuel cell .. $$$ that we could work the 3" oval piping around the fuel cell with a custom piece behind the center exhaust ... exhaust shop was against stepping down from 3" > 2".. which i agree so for a while i will be running the dumps before the axle.... Quote Share this post Link to post Share on other sites