stangme428 33 Report post Posted February 23, 2014 ok... i received what looks to be a new Mallory MaxFire distributor.. the 3rd unit seems to be working fine. bud andy came by and picked up the distributor on Friday 2/21 and installed it on 2/22... i just had some major shoulder surgery... so andy is installing and testing everything for me... gonna be a while before i can drive in general let alone the 69 with no power steering... maybe EPAS is in my future... good times!!:punk: Quote Share this post Link to post Share on other sites
stangme428 33 Report post Posted March 3, 2014 ok.. its been over 4.5 years since the 69 has been back home since it left on a trailer set out for a major rebuild.... little did we know how long it would be until it returned under its own power... since i am unable to drive at the moment due to shoulder surgery, andy and cirena drove out in the 69 on Sunday 3/2/14 .... the 2nd replacement distributor made the 122 mile round trip back to the garage...:punk: (unedited video) good times!!!!!! Quote Share this post Link to post Share on other sites
buening 63 Report post Posted March 3, 2014 About time! LOL Car looks amazing man! Hope that shoulder heals soon. Quote Share this post Link to post Share on other sites
stangme428 33 Report post Posted March 6, 2014 About time! LOL Car looks amazing man! Hope that shoulder heals soon. thanks man! Quote Share this post Link to post Share on other sites
Grabber70Mach 107 Report post Posted March 6, 2014 Nice bet it is a great feeling having it back home. Hoping you heal up soon so that you can enjoy it. Quote Share this post Link to post Share on other sites
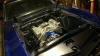
stangme428 33 Report post Posted March 14, 2014 (edited) ok ... not resting on our laurels, we have a few general maintenance items and to prepare for the move to fuel injection... OIL the intake is leaking oil at the front near the distributor, enough to puddle.. so we need to pull the intake and reseal it. a gasket wasn't used, only sealant.. very common to not use a gasket. along the same lines, i have not designed a oil catch or pcv setup, so the oil pushes out of the valve cover breathers onto the valve covers. thinking of having some AN fittings welded on the valve covers and then route over to a billet catch setup. Fuel either the aeromotive fuel pressure regulator is having problems, or the AEM gauge is sticking... not sure, but we set it for 7.5 psi via the gauge and it regulates fine, drive it for a bit and it jumps to 15psi...set it back to 7.5psi and then it drops to 3psi ... we tried opening the gas cap to see if we had build up, it did the same at the chassis dyno no change with or without a gas cap ... we checked the voltage to the fuel pump etc.. but we are still trouble shooting... the demon carb seems to handle it ok but... we dont want to starve for fuel or dump a bunch in and wipe the main bearings.. AC we need to finish up the Vintage Air AC system (currently capped), we have a shop that will crimp the lines, just need to get it to them. ELECTRONICS still need to install the arduino setup for lighting/controlling the gauges, need to install the LED sequential tail lights and LED backup lights.. little things that i can do once i get over my shoulder surgery... started physical therapy this week.. woohoo!! FUEL INJECTION i have all but decided to go with a megasquirt 3 pro setup instead of the FAST II system .... i like all of the features of the megasquirt, and while i built this car to drive, i also want to continue to learn... the megasquirt should give me many options to do so, from traction control to boost control and data logging... granted the FAST II system is a quick, easy and great way to move to EFI. i think my computer/electronics guy control freak is creeping in... being able to tune each individual cylinder.... so, ill need to update my quote from Wilson manifolds to install fuel injector bungs and get the intake ready for EFI. also need to finalize the megasquirt parts needed for a coil on plug setup with crank/cam triggers, and swap out the aeromotive FPS with a EFI model. :biggrin: (so at some point ill have a demon 750 annular carb and a Mallory MaxFire for sale) BODY MODS with the 275/35x18 up front, at full lock the opposite tire hits the front valance, so we need to modify the valance to allow for clearance. Wish i could find a 18x8 in the GT4, i would go to it and a slightly narrow tire. REACTIONS whats cool is when the guys helping me build the 69 (Andy, Ryan, Joey), go for a ride and grin from ear to ear, even the wife... while I'm unable to drive, Andy has taken them out and so far the most common comment is..."she rides great, like a new car, and pulls like hell...and he didn't even get in it too hard":clap: lots of time for bench racing when your under the knife... so you guys that wonder why old dudes have someone else build a car for them... i found out... i tore almost every possible tendon/ligament holding my shoulder together to include my bicep while installing the Viper T56 getting ready for the mustangs at the mickyard show. ... it was just a freak thing, laying on my back with my arm at an odd angle, didn't hurt... just a short pop and i lost all strength in my arm....should have purchased that transmission jack earlier... although Andy swears i did the damage when we had the transmission jack... lol ... so 3 anchors (screw inserts into the bone and reattach everything) rotator cuff clean up, and i should have full mobility and strength within a year... good times!!!:biggrin: Edited March 14, 2014 by stangme428 Quote Share this post Link to post Share on other sites
stangme428 33 Report post Posted April 21, 2014 (edited) i have been out of pocket for a while... recuperating from shoulder surgery and life stuff.... my dad has been diagnosed with pancreatic cancer, so i wanted to take him for a ride in the 69 before he started chemo.... it wasn't easy with one arm (still healing, not allowed to use it yet) and 275/35x18 up front with a T56 6 speed... but i managed and he loved it... i "got on it" after turning around up the road a bit... after he warned me several times on the way up the street to.. not push it.. be careful.. dont screw up your shoulder.... after the quick burn out... he said... "this car is way to lite weight for this motor!!!" .. lol... good times... another positive note... he just got back from MD Anderson in Houston Easter Sunday and they think they can shrink it and kill the cancer.... it will always come back... but.. progress starts tomorrow with chemo...!!! those that have followed my build know what great friends i have!! bud Andy loaded up the 69 on a trailer, drove an hour to my house, dropped off the 69, we ate dinner and he took the trailer and headed out... no way i could have done this build, or take a ride with my dad without my friends and inspiration from this site!!! GOOD Times!! Edited October 8, 2014 by stangme428 cant spel Quote Share this post Link to post Share on other sites
stangme428 33 Report post Posted April 21, 2014 a quick video of my 69 ... nope im not driving... but was still a fun drive! Quote Share this post Link to post Share on other sites
stangme428 33 Report post Posted April 21, 2014 and.... a few pics back at home...!!! been a long time!! 64 1/2 and the 69 cant wait to get the garage built!! Quote Share this post Link to post Share on other sites
Guillaume69 150 Report post Posted April 21, 2014 Nice pics there, Stangme. Is this wooden cabin your home? Looks like the old school Canadian log build. Very nice! Quote Share this post Link to post Share on other sites
stangme428 33 Report post Posted April 21, 2014 (edited) Nice pics there, Stangme. Is this wooden cabin your home? Looks like the old school Canadian log build. Very nice! thanks... yup our log house in the middle of the woods... just cleared some land for a garage.. hope to have a few mustangs in it by mid august.. until then they will be stored in a friends garage... edit 8/17/14 - no garage/addition for now... comp sales are 76 sq ft and building is 91 sq ft ... time for a shop / garage barn raising to work on projects... starting my search for garage / shop plans. Edited August 17, 2014 by stangme428 Quote Share this post Link to post Share on other sites
buening 63 Report post Posted April 22, 2014 Sorry to hear about your father, hopefully they get rid of the cancer with minimal chemo. That is awesome you go to take your father out in it for a ride, I bet you both were grinning from ear to ear the entire rest of the day! Quote Share this post Link to post Share on other sites
stangme428 33 Report post Posted April 23, 2014 Sorry to hear about your father, hopefully they get rid of the cancer with minimal chemo. That is awesome you go to take your father out in it for a ride, I bet you both were grinning from ear to ear the entire rest of the day! yup... smiles all day! battle starts today 4/23/14, chemo treatments begin! :thumbup: i still need to finish up some items as i noted in an earlier post... we never finish these cars... we get to tinker with them and learn new things all the time...lol:punk: Quote Share this post Link to post Share on other sites
stangme428 33 Report post Posted May 17, 2014 (edited) not much work on the little things on the 69 ... but i did manage to get in a 6200RPM late one afternoon...:thumbup::ph34r::punk: from an earlier post -- ELECTRONICS still need to install the arduino setup for lighting/controlling the gauges, need to install the LED sequential tail lights and LED backup lights.. little things that i can do once i get over my shoulder surgery... started physical therapy this week.. woohoo!! update - i found a "ruggedized" arduino setup that i dont have to add external circuitry to adapt to 12v input etc... update 5/19/14 --- ordered the "ruggedized" arduino setup along with a breakout board / terminals should arrive 5/26/14 Edited May 19, 2014 by stangme428 electronics update Quote Share this post Link to post Share on other sites
stangme428 33 Report post Posted June 25, 2014 not much happening ... with the 69 anyway..... shoulder surgery physical therapy, and the company i work for decided to split into two companies... lots of work for IT.. but.. physical therapy is going great... couple more months and i should have close to 100% mobility... and the company split will be complete within the next week... also, i posted a while back my dad was diagnosed with pancreatic cancer... so chemo is working! tumor is reducing in size and producing only 1/2 of the enzymes than before...:yes: so.... i soldered the rugged circuits breakout board for the ruggeduino a few weeks ago... just a few pics.. hope to have it installed when things slow down a bit.. this will control gauge and other led lighting as well as turn signal indicators (gauge flashing when signal on) oh yeah... and trying to add on to my house and build a 36x36 garage with bonus room... trying to build a man cave and home for the mustangs!!!:punk: never a dull moment! Quote Share this post Link to post Share on other sites
stangme428 33 Report post Posted August 15, 2014 (edited) Quick update.. been hanging out with my Dad... So Andy is getting the 69 ready to make the mustang show in Savannah.. Trying to get setup for the track day... So Andy swapped the brembo calipers to the correct side with bleeders straight up!! Still loving the vintage venom kit! intermittent blinker problem is in the NEW turn signal switch... so still working it out. Edited October 8, 2014 by stangme428 2 Xde4hewkew and Ronaldbaf reacted to this Quote Share this post Link to post Share on other sites
rwcstang 201 Report post Posted August 16, 2014 looking good so far! Quote Share this post Link to post Share on other sites
RPM 1,190 Report post Posted August 16, 2014 Nice brakes! Good to hear your dad is doing better. Bob Quote Share this post Link to post Share on other sites
stangme428 33 Report post Posted August 16, 2014 Thanks! Dad is holding his own! taking it day by day.... i picked up some heavy duty flashers that will drive 6 bulbs per flasher... going from the single 1157 dual filament bulb per side in the rear to 3 dual filaments per side... we shall see...crazy part is im trying to get this mechanical switching figured out so i can install the sequential LED kit! then i wont need the heavy duty flashers! at 200 dollars in with 2 new turn signal switches from 2 different vendors... i think its time the community come up with a 3D printed design to resolve the problem :-) anyone... anyone.... bueller... bueller... i am tempted to just setup three position switches and feed the signal a different way!! feeding the signal to a microcontroller would be overkill but hey... who knows.. Quote Share this post Link to post Share on other sites
stangme428 33 Report post Posted August 17, 2014 (edited) so ... i ordered a scott drake 65-68 aluminium recovery tank the first week of July from mustangs unlimited ... it arrived on Tuesday 8/12/14 due to back order. the unit looks very well built and comes with mounting hardware and a nice billet cap. since im not going for the original look etc with my 69 i should be able to mount it in a good location and can then use my canton overflow tank for another purpose... just what im not sure... but i do need a windshield washer reservoir.. a bit of overkill but hey... why not... lol... who knows what the canton overflow tank will be used for. Edited August 17, 2014 by stangme428 Quote Share this post Link to post Share on other sites
Protowrxs 111 Report post Posted August 17, 2014 Looking forward to your Arduino stuff, although I'm gong back old school for the overall, my robotics hobby and Arduino past keep popping in my mind for some little things. What is the 3D printed need? I hoping to design and print some basic gauge adapters for the side gauges instead of the cut up setup I did before. I'm not much of a designer though. :-/ Stephen Quote Share this post Link to post Share on other sites
stangme428 33 Report post Posted August 17, 2014 (edited) Protowrxs -- Arduino stuff me too... have it all planned out and tested out of the car with proper voltages etc. but not in the car as of yet... as for the 3D need it seems we could use a better design for the turn signal mechanism than what was original and is currently being reproduced.. im not sure if its a materials problem of the reproduction, too flexible or too stiff... or if the original design was limited. I do know i am on my 2nd aftermarket unit and its been mechanical problems so far that have caused electrical problems. i.e intermittent contact due to flex of plastic or design limitation. bad rivet holding eyelet.. mechanical connection. etc. i have not researched the different materials from makerbot to understand if i spend time scanning in a broken down version of the turn signal switch... if the material stiffness or flexibility will be any better than what is currently being used... im a electronics/computer geek.. not a mechanical engineer.. :tongue_smilie: so necessity is the mother of invention... maybe we need to all start a thread to jump in and design a better turn signal switch...:thumbup1: lord knows it would take all of us.. none of us have a lot of spare time.... Looking forward to your Arduino stuff, although I'm gong back old school for the overall, my robotics hobby and Arduino past keep popping in my mind for some little things. What is the 3D printed need? I hoping to design and print some basic gauge adapters for the side gauges instead of the cut up setup I did before. I'm not much of a designer though. :-/ Stephen Edited August 17, 2014 by stangme428 Quote Share this post Link to post Share on other sites
stangme428 33 Report post Posted August 20, 2014 (edited) ok - so while im at the hospital with my Dad, Andy troubleshot the turn signal / brake light problem and fed me the info last night. skype works great when you need it so, looks like the new... 2nd turn signal switch plastic deformed due to heat... melted? really.. no fuses blown, 10A fuse. so, lets do the math... according to what i have found online: 1157 filament in circuit is 6 ohms using ohms law to calculate current across each drop: 12v/6ohms=2a so using kirchoff's law basically the sum of the currents are equal to total current. It = I1+I2+I3 6a=2a+2a+2a so, really... the plastic deformed when the brake is applied? hmmm so when both brake lights are on with 6 bulbs thats a 12a load through the turn signal switch ... no blown 10a fuse.? thinking back to when this first happened with the 1st new turn signal switch, it was when they placed a brake lock device on the brake pedal while setting front alignment... brake was on for an hour i think... brake lights worked on the way in... not on the way out... but that turn signal switch had a bad rivet on a wire... very small head on the rivet holding the wire eyelet on. at least thats what i found... maybe the plastic deformed... so i guess i can go one of three routes.... replace with the LED tail light kit i have from mustangproject.com .. go with 1157 led replacement bulbs.. or if im staying with the 1157 bulbs, insert a relay for the turn signal circuit and brake light circuit and switch the relay with the turn signal switch, reducing the load on the turn signal switch. never a dull moment... Edited August 20, 2014 by stangme428 Quote Share this post Link to post Share on other sites
Protowrxs 111 Report post Posted August 20, 2014 Just my two cents but there has to be something else going on here. That design was in service a decade or more. Some unseen issue, overload, or short/semi short seems to be taking it's toll? Brake switch maybe somehow? No clue how to help though. I haven't looked at the wiring schematic / runs for this in a long, long time. Good luck and update us when you get it... and you'll get it. :-) Stephen Quote Share this post Link to post Share on other sites
stangme428 33 Report post Posted August 21, 2014 Just my two cents but there has to be something else going on here. That design was in service a decade or more. Some unseen issue, overload, or short/semi short seems to be taking it's toll? Brake switch maybe somehow? No clue how to help though. I haven't looked at the wiring schematic / runs for this in a long, long time. Good luck and update us when you get it... and you'll get it. :-) Stephen yep .. we will find it.. what is funny is this circuit is so simple .... the switch makes it difficult.. lol.. we are replacing the cam on the ORIGINAL turn signal switch... removing two bulbs a side and testing a few things.. :thumbup1::tongue_smilie: Quote Share this post Link to post Share on other sites