Mike65 475 Report post Posted September 5, 2013 so for a while i will be running the dumps before the axle.... That's going to be very loud. Back in the late 70's & 80's I had a 68 j code GT Coupe & I had headers with straight duals & glass packs & had them dump at the rear axle. It was so loud at part throttle I had to put tail pipes on it to be able to drive it. Quote Share this post Link to post Share on other sites
stangme428 33 Report post Posted September 5, 2013 you are correct.... it is very loud with the 3" exhaust.... i have installed eastwood sound deadening (like dynamat) over the two layers of lizard skin in the back seat area.. also installed eastwood inside the doors on the passenger facing side.. inside outer side has lizard skin ... ill apply more sound deadening material as i have time... currently my passenger side mirror vibrates so much inside the mirror housing... sounds bad.. lol.. gotta figure that out... looks like in my paint job and mods at Mustang Masters my driver side remote mirror was replaced with a standard sport mirror... oh well.. i wanted to do the electronic mirror mod anyway ... Quote Share this post Link to post Share on other sites
stangme428 33 Report post Posted September 6, 2013 well... a big woo hoo! shout out to everyone on this site for the encouragement, motivation, and inspiration .. i know this isn't much, but after a 4+ year build with ups and downs and still more to go.. it was nice to meet other mustangers, judges and enthusiasts after being out of the loop for a long while... and getting any recognition at all was great!! she aint perfect... and she aint a show car... but she is mine... :punk: Quote Share this post Link to post Share on other sites
rwcstang 201 Report post Posted September 6, 2013 hey! Congrats on the win! the car turned out great!! Quote Share this post Link to post Share on other sites
Pakrat 1,043 Report post Posted September 10, 2013 It's been great following this build from start to (almost) finished but like you said, they are rarely ever really done. The car looks fantastic! I can't tell if it's the angle of the pics or just because I can only view the thumbnail right now so I just thought I'd ask are the front tires sticking out further than the rears? Quote Share this post Link to post Share on other sites
buening 63 Report post Posted September 10, 2013 I noticed that too Pak. It appears the car has some hellacious positive camber up front, making it appear like he'll have some fender to tire clearance issues. It should tuck in the fender once he gets it aligned. Quote Share this post Link to post Share on other sites
stangme428 33 Report post Posted September 10, 2013 (edited) yes... the front track is wider than the rear at the moment.. im devising a plan to remedy that... not sure if i will reduce the wheel/tire width in the front and increase the wheel/tire width in the back.. or just increase the wheel/tire width in the back and leave the front alone ... i have no spacers on the rear wheels they are stock fitment wheels for 94-98 mustang. i have room in the rear to increase the wheel width but.. i want to drive it a bit, get the front / rear lips rolled and see how it goes... i probably could better use a 18x8 front wheel and 18x10 rear wheel instead of 18x9 all around.... what sux is they only make the wheels i have in chrome or black now.. not the version i have.. which i bought on close out.. then again a little wider track on the front is a good thing.. check out 99% of all super cars :001_tongue: Edited September 10, 2013 by stangme428 more info Quote Share this post Link to post Share on other sites
buening 63 Report post Posted September 10, 2013 Are you using spacers on the front? Quote Share this post Link to post Share on other sites
stangme428 33 Report post Posted September 10, 2013 Are you using spacers on the front? On the front I'm using what was provided in the vintage venom kit.. nothing on the rear.. Quote Share this post Link to post Share on other sites
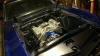
stangme428 33 Report post Posted September 11, 2013 (edited) a few quick phone pics of the interior..... she needs some clean up but.. i didnt take any pics during the install... that i remember..lol ... we did our best to cut holes for the roll bar ... the sides don't match.. but .. we can do another set another day... changed the interior from nugget gold to black using dupli color flat black vinyl / cloth paint ... interior panels were painted with eastwood under hood black then eastwood clear satin .... after a wash down with prep cleaner.. need to paint or powder coat the roll bar in a bad way... and some useless video... sorry its just fun to crank and let it run!!! let it warm up then a quick rev... i took some video while bud andy was in the drivers seat.. still listening for out of place sounds, and looking for any leaks etc.. and another Edited September 11, 2013 by stangme428 Quote Share this post Link to post Share on other sites
buening 63 Report post Posted September 11, 2013 Looks like a comfy ride in that back seat :lol: Congrats on getting it on the road. Hows that 408 clevor and T56 feel?? Bet you can't stop smiling! Quote Share this post Link to post Share on other sites
69shelbycoupe 11 Report post Posted September 11, 2013 What are the front seats you have in there? Quote Share this post Link to post Share on other sites
stangme428 33 Report post Posted September 11, 2013 What are the front seats you have in there? pro car by scat ... picked them up on sale from summit racing... Quote Share this post Link to post Share on other sites
stangme428 33 Report post Posted September 14, 2013 ok -- so i was finally able to take some time and work remote ... rented a U-haul car hauler and trailered the 69 to Emmitts auto repair in green cove springs florida to have it aligned.. geeking out and attending conf calls via skype and a headset while at McDonalds and in the waiting room of the shop... opportunity - long story somewhat short ... after aligning to stock specs, with a ton of positive camber moving forward but flat when backing up ... then aligning to TCP specs for manual rack street use: caster - 2-1/2 - 3 pos camber - 0 - 1/2 neg toe - 1/16" - 1/8" IN we were able to get the passenger side perfect, adjusting the TCP square plates until the lower control arm was in the correct position. but, we were unable to get the driver side perfect, it is within 1 deg which is not acceptable.. so im on the search for a resolution with possibly adjustable lower control arms from The Mustang Shop in Arizona ... i am still doing research to arrive at the best overall solution.. knowing i want to go to a SOT coil over setup in the future... but we need about a 1/2" of adjustment to push the lower control arm out on the driver side... how the lower control arm is 1/2" off compared to the passenger side LCA .. not sure.. maybe the chassis was flexed when we welded in the shock tower reinforcement kit back in 99' ... thought we measured it out.. but who knows.. it is what it is.. on a good note.. the posi unit seems to be working... hehe Quote Share this post Link to post Share on other sites
stangme428 33 Report post Posted October 14, 2013 just a quick note - my day job has been keeping me very busy since my last post, but i did spend some time laying under the car Friday 10/11/13 to check out the lower control arms, cleaned up the ignition wires, installed the hood to cowl vent weather strip...a few weeks ago i posted in the technical section about TCP and alignment and will link this post to it.... what i found: lower control arms are the same length inspecting the installed eccentric eliminator kit from TCP compared to my original kit from pro-motorsports we removed, it looks like the pro-motorsports kit will seat closer to the edge allowing more outward movement by just shy of 1/2" smitty's did a great job on the exhaust -- need to get it coated :-) laying under the car checking everything out is almost as fun as driving it... probably driven it 500 yards at this point.. cant wait to drive it more!! still need to finish the lokar emergency brake install so while i am in training most of the week... during breaks i hope to contact TCP and the alignment shop to work out a plan to get the front end aligned.. never a dull moment!! Quote Share this post Link to post Share on other sites
82firebird 11 Report post Posted October 18, 2013 Those wheels are perfect for showing off those Baer brakes! Quote Share this post Link to post Share on other sites
stangme428 33 Report post Posted October 19, 2013 thanks for the kind comments 82firebird -- back to the alignment ... i ordered a stock cam/bolt kit for the lower control arms, once we verify that it can be aligned via the factory setup, we will create a plate to match... at the least that's the idea in my head... worse case we get it aligned with the factory setup on the driver side and tac weld it.. aka boss 302 modification guide.. Quote Share this post Link to post Share on other sites
buening 63 Report post Posted October 22, 2013 You might look at the dimensions of the eccentric eliminator plates in my signature and compare to the ones you have. Mine are a copy of the Pro Motorsports version. Quote Share this post Link to post Share on other sites
stangme428 33 Report post Posted October 22, 2013 buening - yep ... i still have my pro-motorsports eccentric eliminator kit and compared it against the TCP eccentric eliminator kit that came with the TCP rack ... the pro-motorsports looks like it allows more movement to the outside.. which is what is needed.. so i have two possibilities, verify the camber can be setup correctly with the factory eccentric, and then try the pro-motorsports plate to see if it also works... either way when i go to the alignment shop.. i want to leave with the problem resolved and the front end aligned... You might look at the dimensions of the eccentric eliminator plates in my signature and compare to the ones you have. Mine are a copy of the Pro Motorsports version. Quote Share this post Link to post Share on other sites
buening 63 Report post Posted October 22, 2013 Also remember you can flip the plates over so that the other side faces out, which gives you even more camber options Quote Share this post Link to post Share on other sites
stangme428 33 Report post Posted October 24, 2013 Also remember you can flip the plates over so that the other side faces out, which gives you even more camber options yup yup - went through that with the TCP kit while at the alignment shop, but didnt have my original pro-motorsports kit with me.. only the TCP kit.. so thats why i want to verify myself before i take it back to the alignment shop... test with the factory setup, see if either kit can duplicate it and go with the best solution.. Quote Share this post Link to post Share on other sites
stangme428 33 Report post Posted October 24, 2013 (edited) i mentioned a parts order a post or so back.. parts ordered from CJ Pony parts: APGP - Scott Drake Dual 2-1/16" A-Pillar Gauge Pod for 1969-1970 Mustangs - leave more options with a custom center console instead of the Shelby gauge pod, or just.... more gauges.. :-) NOTE*** - after waiting week after week with the gauge pod on back order, i verified it was in stock at mustangs unlimited and ordered from them... couple days later i had it.. cancelled the a-pillar order from CJ F1515 - 68-73 LWR. CONTROL ARMS TO SHOCK TOWER (8) GRADE 8 CAM BOLTS, RED NUTS & WASHERS - original order was for CA13197A67-73 CAM BOLT/NUT/WASHER - PAIR but was on back order.. so i called and changed it to the AMK version... SBR9B68-73 CP/FB FRONT BLACK 3-POINT RETRACTABLE SEAT BETLS W/ VINTAGE PUSH BUTTON so, awaiting the "cam bolts" kit to work on the alignment, and i now have black seatbelts to install... headed to the Savannah mustang show this weekend 10/26/13.. so no work on the 69 until middle of next week... Edited November 21, 2013 by stangme428 cant spel Quote Share this post Link to post Share on other sites
stangme428 33 Report post Posted November 2, 2013 ah good times... so work has kept me from making it to the alignment shop.. so we double checked the front end to make sure all was tight... took her for a ride down the road for a late night spin.. about 12 miles or more.. and wow.. love it ... that 500+ ft lb of torque puts you back in the seat.. 6th gear at 60 mph is about 1300 rpm ... great for I95 trips for sure... when you let go of the steering wheel she goes straight.. the 275's up front are a handful turning with the manual TCP rack but.. so far so good.. feels great on the road... ill get a better alignment as time permits but i have been so busy no time to drive let alone a trip to the alignment shop... have more opportunity... the turn signal switch that others warned me about is having problems... should be taking it apart asap to see why the passenger side tail light isnt working correctly... not enough voltage.. was working fine. once that is resolved ill install the all LED rear sequential kit. oh yeah... wired the front turn signals too.. need to find some bolts to mount them.. have some blowby... fuel in the oil .. so need to check the rings, compression... also need to check the tune with the wideband 02 sensor setup... never a dull moment... :thumbup: need to install a pcv setup also after a phone call with evans cooling ill probably be moving to a bigger crossflow radiator setup and 70 style pump before next summer... we shall see.. not sure the 3 row champion will suffice with the vintage air kit installed and southern 100 degree :cool2:heat... on a 67 degree fall night after getting on it pretty hard several times.. the temp jumped from a steady 180 degree to 210 and back down... should be ok running a shaw thermostat with evans coolant and flowkooler pump for now..:thumbup: Quote Share this post Link to post Share on other sites
rwcstang 201 Report post Posted November 2, 2013 ah good times... so work has kept me from making it to the alignment shop.. so we double checked the front end to make sure all was tight... took her for a ride down the road for a late night spin.. about 12 miles or more.. and wow.. love it ... that 500+ ft lb of torque puts you back in the seat.. 6th gear at 60 mph is about 1300 rpm ... great for I95 trips for sure... when you let go of the steering wheel she goes straight.. the 275's up front are a handful turning with the manual TCP rack but.. so far so good.. feels great on the road... ill get a better alignment as time permits but i have been so busy no time to drive let alone a trip to the alignment shop... have more opportunity... the turn signal switch that others warned me about is having problems... should be taking it apart asap to see why the passenger side tail light isnt working correctly... not enough voltage.. was working fine. once that is resolved ill install the all LED rear sequential kit. oh yeah... wired the front turn signals too.. need to find some bolts to mount them.. have some blowby... fuel in the oil .. so need to check the rings, compression... also need to check the tune with the wideband 02 sensor setup... never a dull moment... :thumbup: need to install a pcv setup also after a phone call with evans cooling ill probably be moving to a bigger crossflow radiator setup and 70 style pump before next summer... we shall see.. not sure the 3 row champion will suffice with the vintage air kit installed and southern 100 degree :cool2:heat... on a 67 degree fall night after getting on it pretty hard several times.. the temp jumped from a steady 180 degree to 210 and back down... should be ok running a shaw thermostat with evans coolant and flowkooler pump for now..:thumbup: im going to test drive mine tomorrow, I feel like my car will pull be back lol Quote Share this post Link to post Share on other sites
stangme428 33 Report post Posted November 21, 2013 (edited) not much of late... work work... we have been trying to tune the carb some.. i purchased a AEM wideband 02 setup.. that along with the boost/vacuum gauge we attempted to get it set at idle to 14.7... she idles great and no bog but you can smell gas standing behind her.. we knew she was rich... turns out 12.8 rich at idle.... in the end when we get the idle as close to 14.7 as possible 13.8 with the only jets we had on hand... 69's, we go lean as soon as we get into a rev or increase the rpm.. so i picked up a Holley jet kit and 4.5 power valve.. will test/tune as we have time.. but we may take it to a chassis dyno in Jacksonville and work it out.... good times..:punk: 1) AEM gauge with the engine warm 2) Replacing the 78 Jets with 69's to see how she would do at idle 3) Vacuum cold at 15 4) Vacuum warm at 10 5) AEM gauge with the engine warm at idle with the 69's time permitting we will test and tune more, but we may do both at the chassis dyno, calling around today for pricing. Edited November 21, 2013 by stangme428 408 clevor tune time Quote Share this post Link to post Share on other sites