-
Content Count
739 -
Joined
-
Last visited
-
Days Won
17
Posts posted by Machspeed
-
-
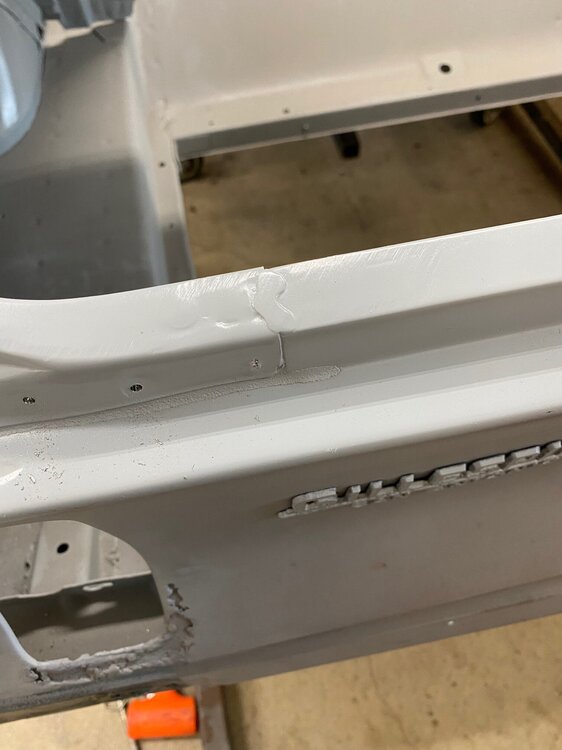
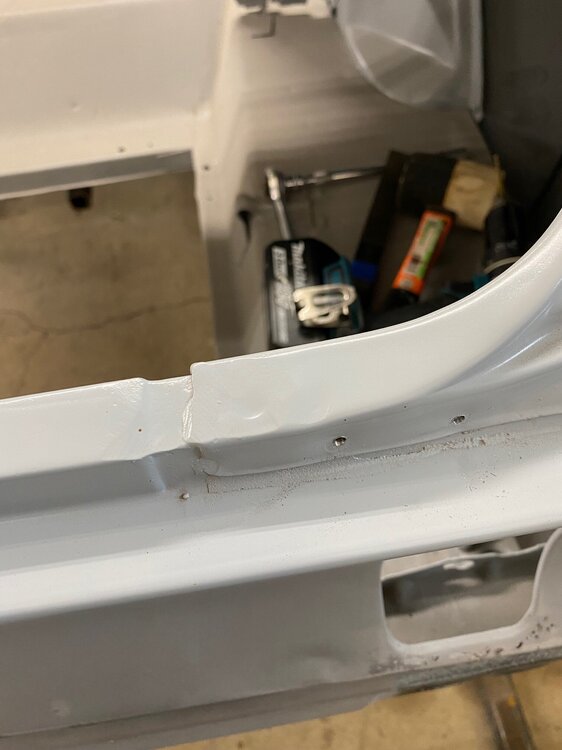
Hey friends, I've got to do a rust repair job on my driver's side door and either need to fabricate a patch or weld in a good piece. See picture below. From what I can tell, nobody stamps this piece out. If they do, I sure can't find it. Before I go seriously taxing my limited metal work skills, wondering if any of you have a scrap door that this piece can be cut out of?
Along similar lines, after the door is repaired, and without cutting it open, how can I best treat the door to limit future issues like this?
Lastly, pictured is the inside of one of my doors. It has a coating on the door skin that is about an 1/16" that is flaking off and exposing the underlying metal in some areas. In some areas it's cracked. I thought it might scrap right out but it does not. It's a very hard substance and I'm certain it was put on when the car was built. I see this as potential for some serious rust problems in the future if I do not address it. Thoughts and advise much appreciated.
-
5 hours ago, BuckeyeDemon said:thank you. i do still have the mustang. it's still my baby :) the 69 mustang just looks so good from any angle.
I totally agree! In fact, I personally think it's the best looking body style ever produced by any of the big three.
BuckeyeDemon and TexasEd reacted to this -
WOW! That's a major life change! Good for you, Mike!!! I don't know how you were working at of that single car garage, so the new shop will be great. I think eventually you'll find it too small though....LOL! Can never build them big enough!
And while I didn't include it in my initial post above as a side track project, I had a piece of rental property that a renter literally destroyed. Took me 14 mo working by myself to fix that house up in order to put it on the market for sale. I literally replaced everything in that house such that I would live in it. Almost didn't want to sell it when I was done but no way I was getting back into the rental business. People trashed my home and left owing me three months rent. I can't believe people sometimes. Never again!
-
19 minutes ago, TexasEd said:So there’s a washer between the end cap and the quarter?
Yes, if you look in my above posted pictures, you'll see it on the rear qtr. There are three per endcap, I left that particular one off, as my endcap was protruding outward and away from the panel. Seemed to fit better without it. I have some adjusting to do.
-
Thanks, gentlemen!
-
Hey friends, regarding the qtr panel upper end caps, is there a rubber seal that goes in the joint of these like the one in the head light buckets?
Also, in fit up tonight I noticed how poorly these align. These are original to the car and I don't recall them being this way. I know Ford didn't put a lot of effort in body gaps and such but I can't leave it this way. Seems I read or say a video sometime back on using fishing line and body filler to clean up the look. I've looked and am not finding it. Anybody familiar with this?
-
My gosh, the Falcon is beautiful too! You don't do anything half-A, man. You still have the Mach?
-
Hey Mike, thought by now you'd be done with your car. Seems you were making fast progress on it when I last saw it. Did you have a sidetrack project too...LOL!
-
-
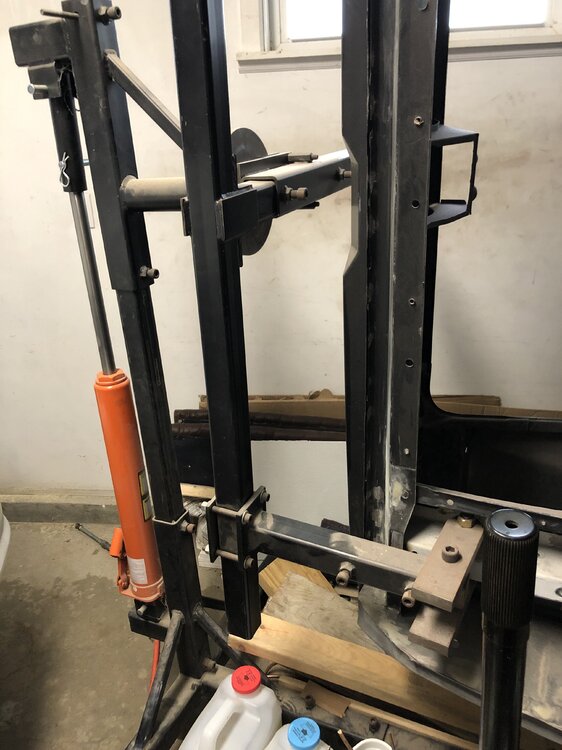
Been some time since I posted, but good to see some of the old gang still here. A few years back.... time slips me, pulled the Mach out of storage where it had been since the late 80's. Built a rotisserie for it using Ridge Runner's plans (Thanks Ridge) and stripped the car down for resto. Had it media blasted and primed it with epoxy and it has not been touched since. Got sidetracked on a couple other projects.
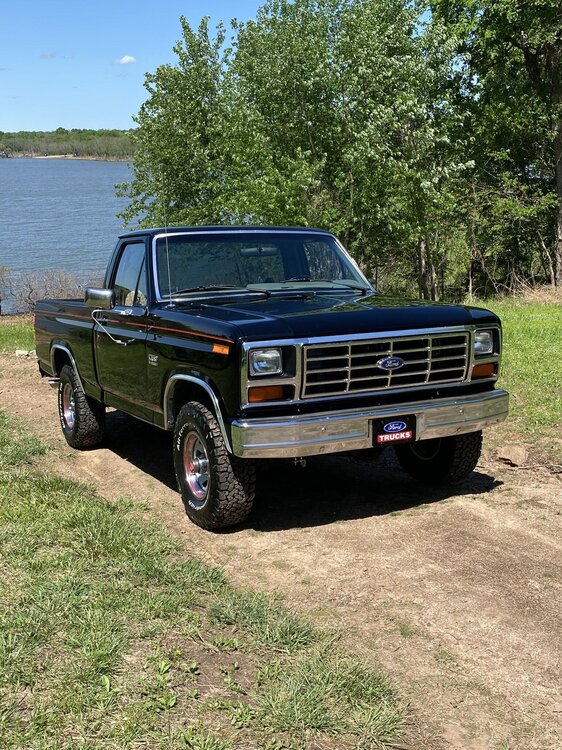
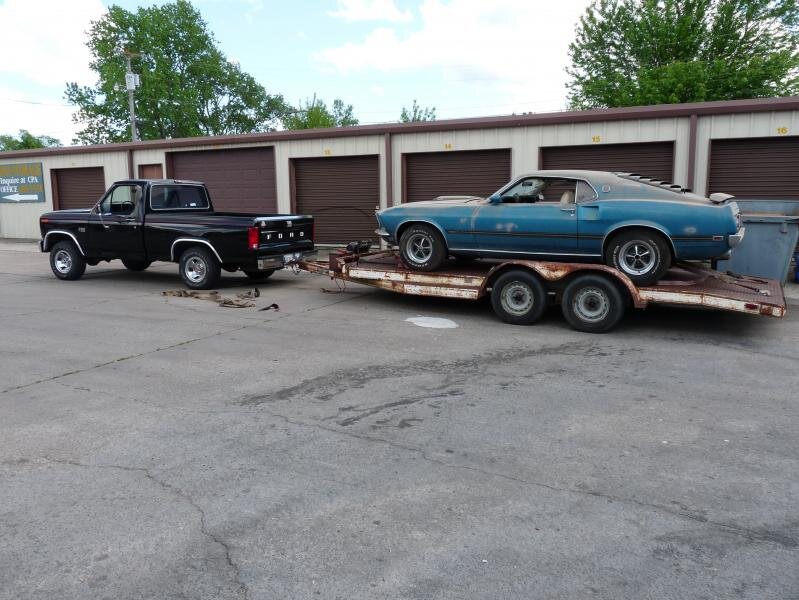
Sidetrack project #1 was my 86 F150, which I bought brand new and had thought to sell for a new truck. Started working on it to prep it for sale but the more I worked on it, the more I realized I could not sell it. What started out as a few mechanical repairs, led to a near full blown restoration including engine bay, interior, and exterior paint and body stuff. Great learning experience with the paint and body work, as I had no experience in this. Anyway, that process took a couple of years and I've now turned my truck into a trophy truck.
Sidetrack project #2 was my daily driver, a 2014 Ford Focus ST which I also bought brand new. Thought to trade it off but with the crazy market, the fact that it was paid off and, that I really liked it, decided to keep it too! Wife was glad, as she didn't want to incur another car payment. Told the wife if I was going to keep it, I was going to add a few go fast goodies on it.... "so open up those purse strings woman!" Go fast goodies were all bolt on and included a Garrett ATP 2867Gen2 turbo, upgraded intercooler, 3" downpipe, Cobb Accessport, tuning....blah, blah, blah. I gotta say, in all the years I've been wrenching, I've never seen such incredible HP gains with mere bolt on's! Keep in mind, I'm old school and knew nothing about Turbo charging technology prior to this project. This little rascal rips and boy is it fun!!! I'm running about 350HP to the wheels and at no sacrifice to fuel mileage.
With that behind me, it's time to get back on the Mach and I'll be hell bent now on having a running car in 2023!!! Looking forward to getting back in the game and more active on the forum!
Merry Christmas, friends!
RPM and Grabber70Mach reacted to this -
4 hours ago, jmlay said:Use the rear tie down mount holes on the frame rail. Plate on one side welded to a square tube that extends rearward.
Yep, exactly what I was thinking. I have 1/4" plate; do you think a single plate on each frame rail will be secure enough? Had thought to go with plate on both sides but then I would need spacers as my square tubing is 2" and the frame is .350" thinner.
21 minutes ago, Maynard said:Thank you, Maynard!
-
-
15 hours ago, aslanefe said:Machspeed, before you remove the tail light panel, weld a 1x1 tube or something as brace from left to right side of the fender where it touches the trunk (6 to 8 inches forward of the area you pictured). This way your trunk gaps on left and right side will stay the same after panel replacement.
aslanefe, thanks for that tip. I actually thought to do that before cutting out the panel but nixed it in case I didn't like the factory setting. I may regret
18 hours ago, det0326 said:I did exactly what u described and made it look pretty, not necessary but just me being particular. Mine was a Dearborn car and it appeared to me that the assembly plant filled those 2 joints and also the 2 where the filler piece and quarters meet with brass/brazing rod.
Yes, they were spot welded in and then brazed on the ends. Destroyed the ends trying to get it all undone, thus the need for rebuilding the ends and my original question. Thanks!
-
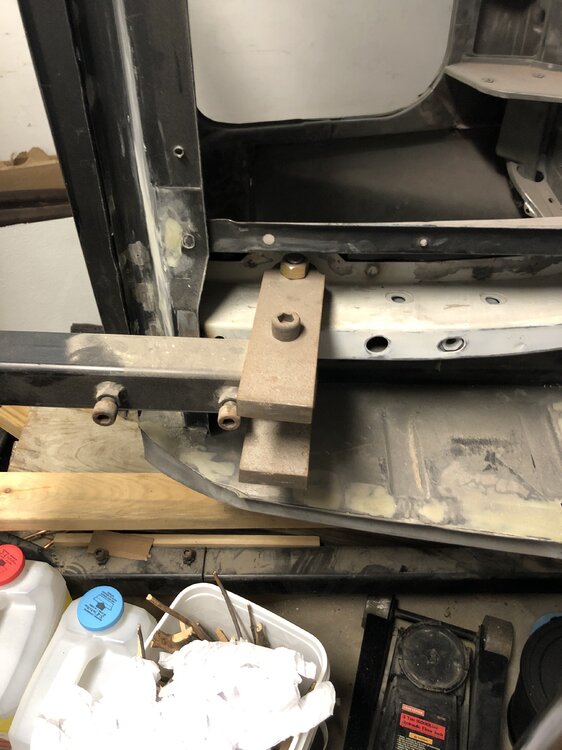
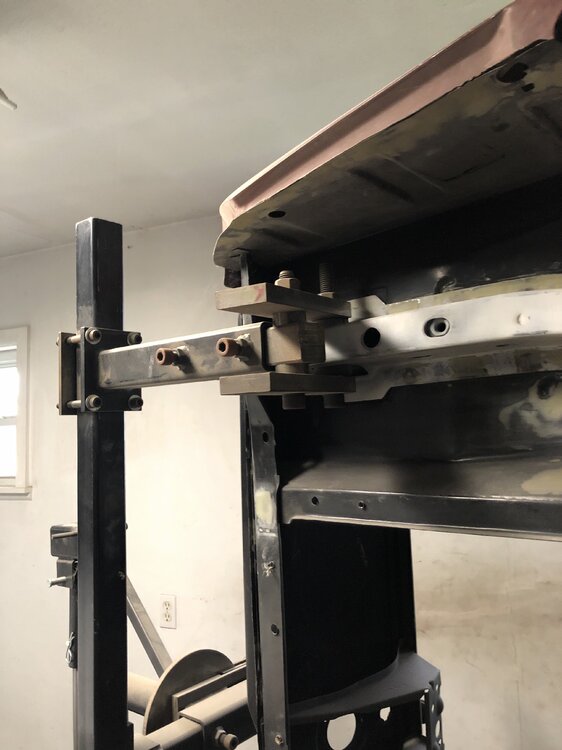
I've been mounting my car on my rotisserie using the rear bumper area and now after reworking the tail panel wish to attach it to the frame. In that, I need to fabricate some new brackets. For those of you whom have mounted your cars on a rotisserie in this fashion, I would really welcome some pictures of the brackets and see how they are attached? Thanks!
-
Buckeye, did you use the same paint color on the undercarriage for the Falcon as you did on the Mustang? I've looked at both undercarriages on those two projects and it is really hard to tell. Photos don't really capture the true color of things. The undercarriage on my Mach was a gray, wondering if I might get that mix formula from you on your Mach? Thanks!
-
22 minutes ago, Ridge Runner said:If you shift it over to match sides it will throw off the tail lights ,i would make sure the lights are same side to side and not worry about that
No Ridge, not going to shift the tail panel but will add metal to the body panel to bring it all the way across and meet up evenly with the tail panel. Thanks fellas!
-
I'm replacing the tail light panel on my Mach. Before I pulled it, I took lots of measurements and photos, as it is the OEM panel. Something I noted and found interesting was the top area of the panel were it first meets up with the body. Note the uneven spacing between the left and right sides. Hopefully my pictures will explain what I'm trying to say. Wondering if this is typical? I have to do a repair in this area and thinking about just fitting it up all the way across.
-
9 minutes ago, stangs-R-me said:My car is Metuchen built and it had the drain plugs. When I pulled mine, they were obstructed with trash and dirt such that water could not drain, thus causing some of the rust issues I had in this area. I suspect your car had them or someone removed them, but it may be a blessing in regards to the integrity of the panel.
-
My friend, you do incredible work!!! You're an inspiration and hope you will continue to post all your projects!
-
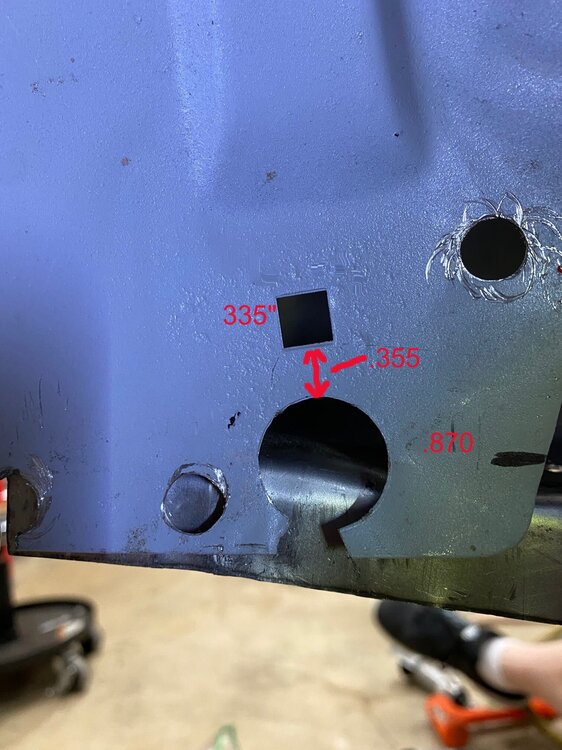
On 12/26/2021 at 6:25 PM, jmlay said:The drop offs in my car were replaced and the holes were not transferred to the new panel. If I may ask, what are the dimentions of the square hole and the larger round drain hole?
Hopefully this helps you. Measurements were taken with a set of vernier calipers. The square is .335"; circular hole is .870"; distance between them, edged to edge is .355".
-
Gentlemen, thank you for the input here!
jmlay, I will get you dimensions either tonight or tomorrow.
-
Thanks for the response, very helpful! It's been a while since I removed the plug but it seems like it was very secure in the panel, as if it was secured in both the square and the round hole. I can't seem to find a picture of the back side of an OEM plug to confirm its fit. Would you have a picture of the back side of the correct plug?
Thanks too for the input on where the bottom of the "patch panel" floor should go, that was important to me as well. Yeah, that "patch panel" is a piece of garbage and I have modified it a bit to shape it more like it is supposed to be. Still not fully content with it and will be working on it more. Is there a better option available today? I bought this several years back.
Thanks again!
-
Hey friends, been some time since I've been here. Life and such caused me to shelve the car for awhile but I'm back now and working on it. I'm doing some work on the lower rear qtrs of my car and seek information on how the drain plugs go in. I know where they go, just not sure how they fit up. As many pictures as I took in the disassembly, I seemed to have missed this. Looking at pictures of the plugs that I've found seem to show just one side.
BTW, this is a real pain in the arse repair. It's one thing to do the outer skin patch but trying to fit up the inner fender patch with all its compound angles is a real challenge. I'm almost there though.
Thanks
-
10 hours ago, mustangstofear said:https://rumble.com/vcps43-hypocrites-democrats-are-straight-hypocrites.html
This is how peaceful the Demorats are LOL
Yep, and they know all about inciting riots too! They think they disgraced President Trump today but ultimately, all they did was disgrace themselves and this country. And those ten republicans that sided with the criminal dems, they won't be forgotten.


Lower Door Repair And Related
in 1969-70 Technical Forum
Posted · Report reply
If it's not too much trouble, I'd be interested in that piece, Ed. Can you cut it out? How much? PM me if need be.
Thanks,
John