

smh00n
-
Content Count
318 -
Joined
-
Last visited
-
Days Won
11
Posts posted by smh00n
-
-
Man that sucks. After all the hard work you done.
That car is like family, watching your kids grow up with it. You gotta keep it till the last one graduates and you take each one in it.
I did the MDL cable clutch conversion on mine and very happy with the fit and quality. Happy to recommend it.
-
Running update.
I changed mufflers as the ones on it were just too loud. They had a real high noise to them and were just not practicable. So I spoke to the muffler guy who I bought the pipes off. He recommended Redback mufflers, which are made locally here. They are a triflow design so have perforated pipes inside with baffles. The flow needs to go in, come back then go back out but at high load the holes allow the gases to basically straight line outta there.
He was pretty impressed with the amount of air coming out of the pipes. He said it was better than the 502 in his 80's something Chev Caprice. That made me feel pretty chuffed. Result is much better noises levels are driving speed, no raspy intake on over run. He tells me as they get more carbon in them it will quieten down at idle.
Pulled the engine temp sender, cleaned off the thread sealer - which was very little - and re-installed.
Next, I had issues with the Sniper. It started running real bad and the AFR was going straight to 36.5. Wouldn't idle, barely revved and was pumping out black crud from the exhaust. This isn't my area of expertise so hitting up the Holley forum for answers, as It started right after I had the mufflers changed, the first question was did you unhook the battery? D'Oh, the shop did not so I was freaking about fried electronics. I was told it was probably a bad WB02 sensor. What was getting me was it would run fine from start, then when it was stopped it would go bad on restart. Looking at the sensor I had managed to place it near flat in the pipe, so I guess moisture was accumulating and killing it. Expensive mistake.
Today, I put a new bung in closer to the collectors and with more of a downward angle. Fitted a Bosch sensor to it. Deleted the file from the Sniper, loaded it all up again using the setup wizard.
Before driving it I also fixed the radio power wiring. I had put it to what I thought was the original radio power wire, but the new unit must take more amps as it kept blowing the little 1AG 4 amp fuse. I bought an aftermarket blade fuse holder and intended to hook it into a wire with switched power. Of course, being 'rebuilt' this was not going to be a simple job. Turns out the aftermarket voltage regulator fitted was just spliced into a wire, no solder or anything, and a bit of electrical tape wound round it. And the tape has falling off the exposed wiring was right next to the dash support bracket that goes to the booster. And the tapped wire was falling off. A bit of work and I had soldered a new wire in, terminated it to a clip plug and ran 2 power wires out to both the voltage reg and the radio. Put a 15 amp fuse in the radio circuit and put it all back together.
Took it for a run, about 6 miles. Temp gauge was working as it should. Thankfully it ran great, no issues, started learning again and was as smooth as a late model car. I really am a fan of the Sniper, it is a smooth system and the engine runs fine. Cold starts and running are nothing like the good old days of pulling a choke and dipping the clutch. The best bit is with the new engine I just enter the CID, cam and ignition type into the screen, tell it what cam it has and hit save and it just runs. Well worth the cost. No going to a dyno, hoping the guy knows what he's doing and worrying about it.
Before the WB02 broke I had started to lean on it a bit. Purely for research purposes Officer. 1st gear it just lights up the rears at will, regardless of road speed. 2nd gear on a rolling launch it will light the rears up. It's a bit grumpy in gear under 1,200 rpm and will shunt, but also happy to take corners in 3rd gear and pull away cleanly. I have not yet taken it on a road with a limit higher than 40mph so not sure what revs it's doing. Hopefully with a bit more running around the suburb I can iron out all the glitches and then take it for a decent run.
The only hassles I have is the power steering pulley is not right, it appears the belt is slipping as I have black dots all overt he front of the engine. It is also very heavy when parking but improves when a few revs are up. Spent a bit of time trying to find an alternate. Borgeson advised they only supply the thin groove pulley - despite (as far as I know) every small block Mustang has a 1/2" wide power steer belt. Why they supply a thinner pulley I don't know. It seems a pulley off a local Falcon is the answer and I am going to a wreckers on the weekend to suss it out. The bolts supplied with the pump are also BS. Saginaw recommends studs for the rear mount pumps as they seal the canister, but Borgeson give you bolts. Along with the shiite bracket to mount it, I am not impressed at all with their set up.
The rear main is also leaking. I am super pissed at this, it's not that much work to change but I really do not need to do it, especially as Scott Drake promotes themselves as high quality parts. Maybe it's me and installed it wrong, but I put enough silicone on both sides of the seal and gasket I would have thought.
Lastly, my new-found power level may be over powering the shocks. Or, I need to adjust to a 50+ year old car handling. It feels as if the car is hauling sideways when giving it hard acceleration and seems to wallow on shallow corners. When you stop accelerating it then moves back the other way. I realise that's not a great description. It has Koni shocks all around, slightly heavier springs in front (along with alloy heads and intake) and standard springs in back. Maybe I am just used to late model cars with steering racks, watts links and sharp suspension.
-
-
1 hour ago, shelbyshelby said:I had a 1970 tbird with a 429 and an oem Saginaw pump. Any chance those would fit?
Could do as the Cleveland/335 pulleys were the same as late Windsor.
I'll try the local option first
-
Thanks. That looks very close. But I see $35 shipping
Had I read my own posts on a local Mustang forum, there is already a local Falcon that may have the correct pulley. About $50 which is cheaper than anything I buy from the US.
-
I am seeking answers on a power steering issue I have.
My car is factory a/c and p/s and has a 1/2" wide belt to drive the water pump and power steer pump.
I've converted to a Saginaw pump which was supplied with a 15/32" grooved pulley; and the belt is slipping.
Is anyone aware of a pulley that will fit the Saginaw press on pump, and has the correct back space and groove width for a 1970 302?
I've seen that a later E350 van may have the right pulley but I cannot confirm it.
My preference is to change the power steering pump pulley, as I like the look of the steel factory pulleys, and I spent a lot of time and money getting them so I'm reluctant to go the aftermarket route unless it proves that is the best/cheapest way to fix my belt slipping issue. I've checked and the Saginaw pulley does not have enough material to machine it out to 1/2" so that's out.
The parts book tells me that every V8 except some big blocks used a 1/2" belt on factory p/s cars. There's gotta be an answer out there.....
-
Folks
My new Scott Drake Boss 302 sump is leaking from the rear main seal. It's basically a new motor with 100 miles on it.
It has a Felpro one piece rubber gasket on it. Late model motor with the one piece crank seal so I could discount that somewhat I think. I used some silicone around the outside edge when I put it in.
When I assembled it, I noticed it leaking with just the assembly oil in it, so I pulled the sump and put Dow Corning silicone on it. Even though Felpro say it doesn't need it, I did think the radius of the seal on the sump itself was a bit off. I used the silicone both sides of the gasket and packed the corners a little bit.
Before I drop it again, is there an issue with the sump pressing? I don't want to just keep adding silicone if it's not going to ever work.
-
Noted.
I will remove the offending product and see what does.
-
So this is an old post, but it (and others on temp gauge issues) has saved me today.
My brand new motor build resulted in no temperature gauge working. After chasing it all down, verifying both senders I had actually did work and had the required Ohms cold, I found out that the alloy adaptor I used to put the gauge sender into the manifold wasn't grounding properly. A wire from the body to the frame confirmed this.
So, now I need to get a steel adaptor for it. But, will the alloy inlet manifold also not allow it to ground? I have used thread sealant on both the adaptor and sender (and also the Sniper temp sender) so maybe this is not the issue?
FWIW, I have 0 gauge earth wires to both block and frame direct to the battery, and the Sniper temperature gauge works as it should, as does the oil pressure gauge and light, so I have good grounds from the lump.
-
That looks good. All that hard work is forgotten as soon as you start it.
-
I just realised this has been converted. Was the vibration there before the conversion? Maybe something is not aligned?
-
-
-
Prequel - before the rebuild.
I've had this thing going on 8 years now and for the first 4 or so it sat not touched.
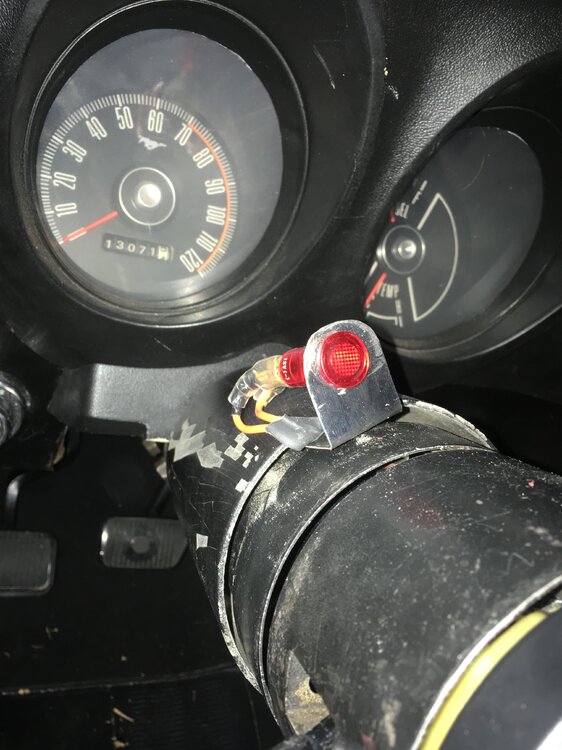
One issue I did have was the tail lights and turn signals. For reasons that escape me, our Bureaucrats have deemed that all cars must have 2 operating stop lights at all times. We can use the red light as per original but not the system where all lights dim for the indicators. Hence, we have orange indicators that work separate to the stop lights on all cars. Even the current Mustang gets special tail lights and even mirrors specific to Australia. I know there are cars out there with the US-style lighting, but they are in breach and I don't want the Po-Lice stopping me and hassling me.
The previous owner had done what is common here - converted the reverse lights into indicators by re-wiring and putting in orange bulbs. I guess y'all know that a single tiny little bulb in a big old 70 tail lights housing doesn't do much in terms of light in daylight, and having the indicators down under the bumper means the jerks following you posting influencer content on their phones can't see. A couple of near-misses when turning made me decide to upgrade the whole thing.
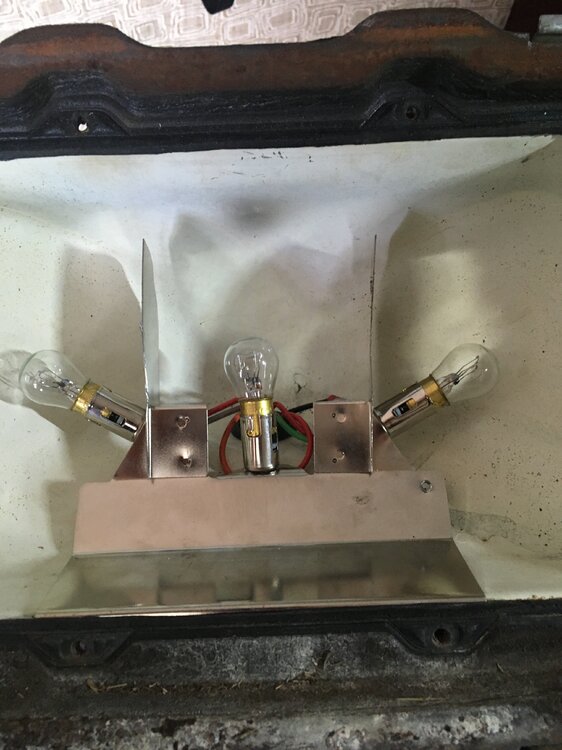
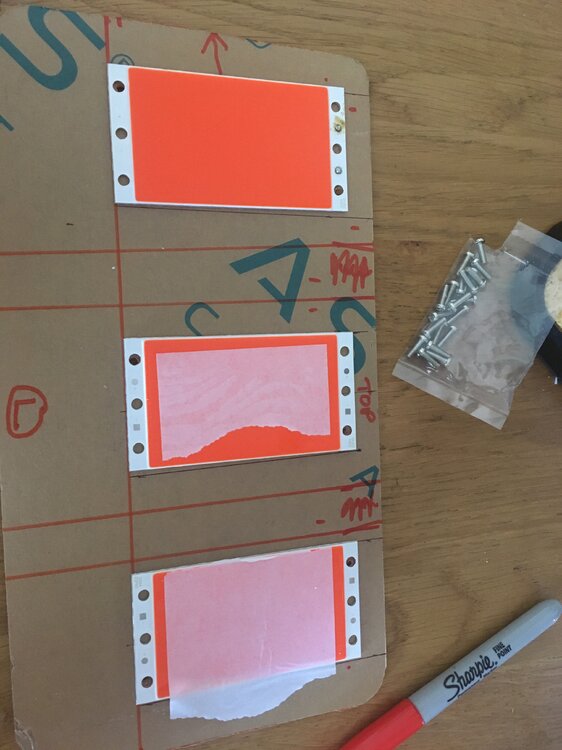
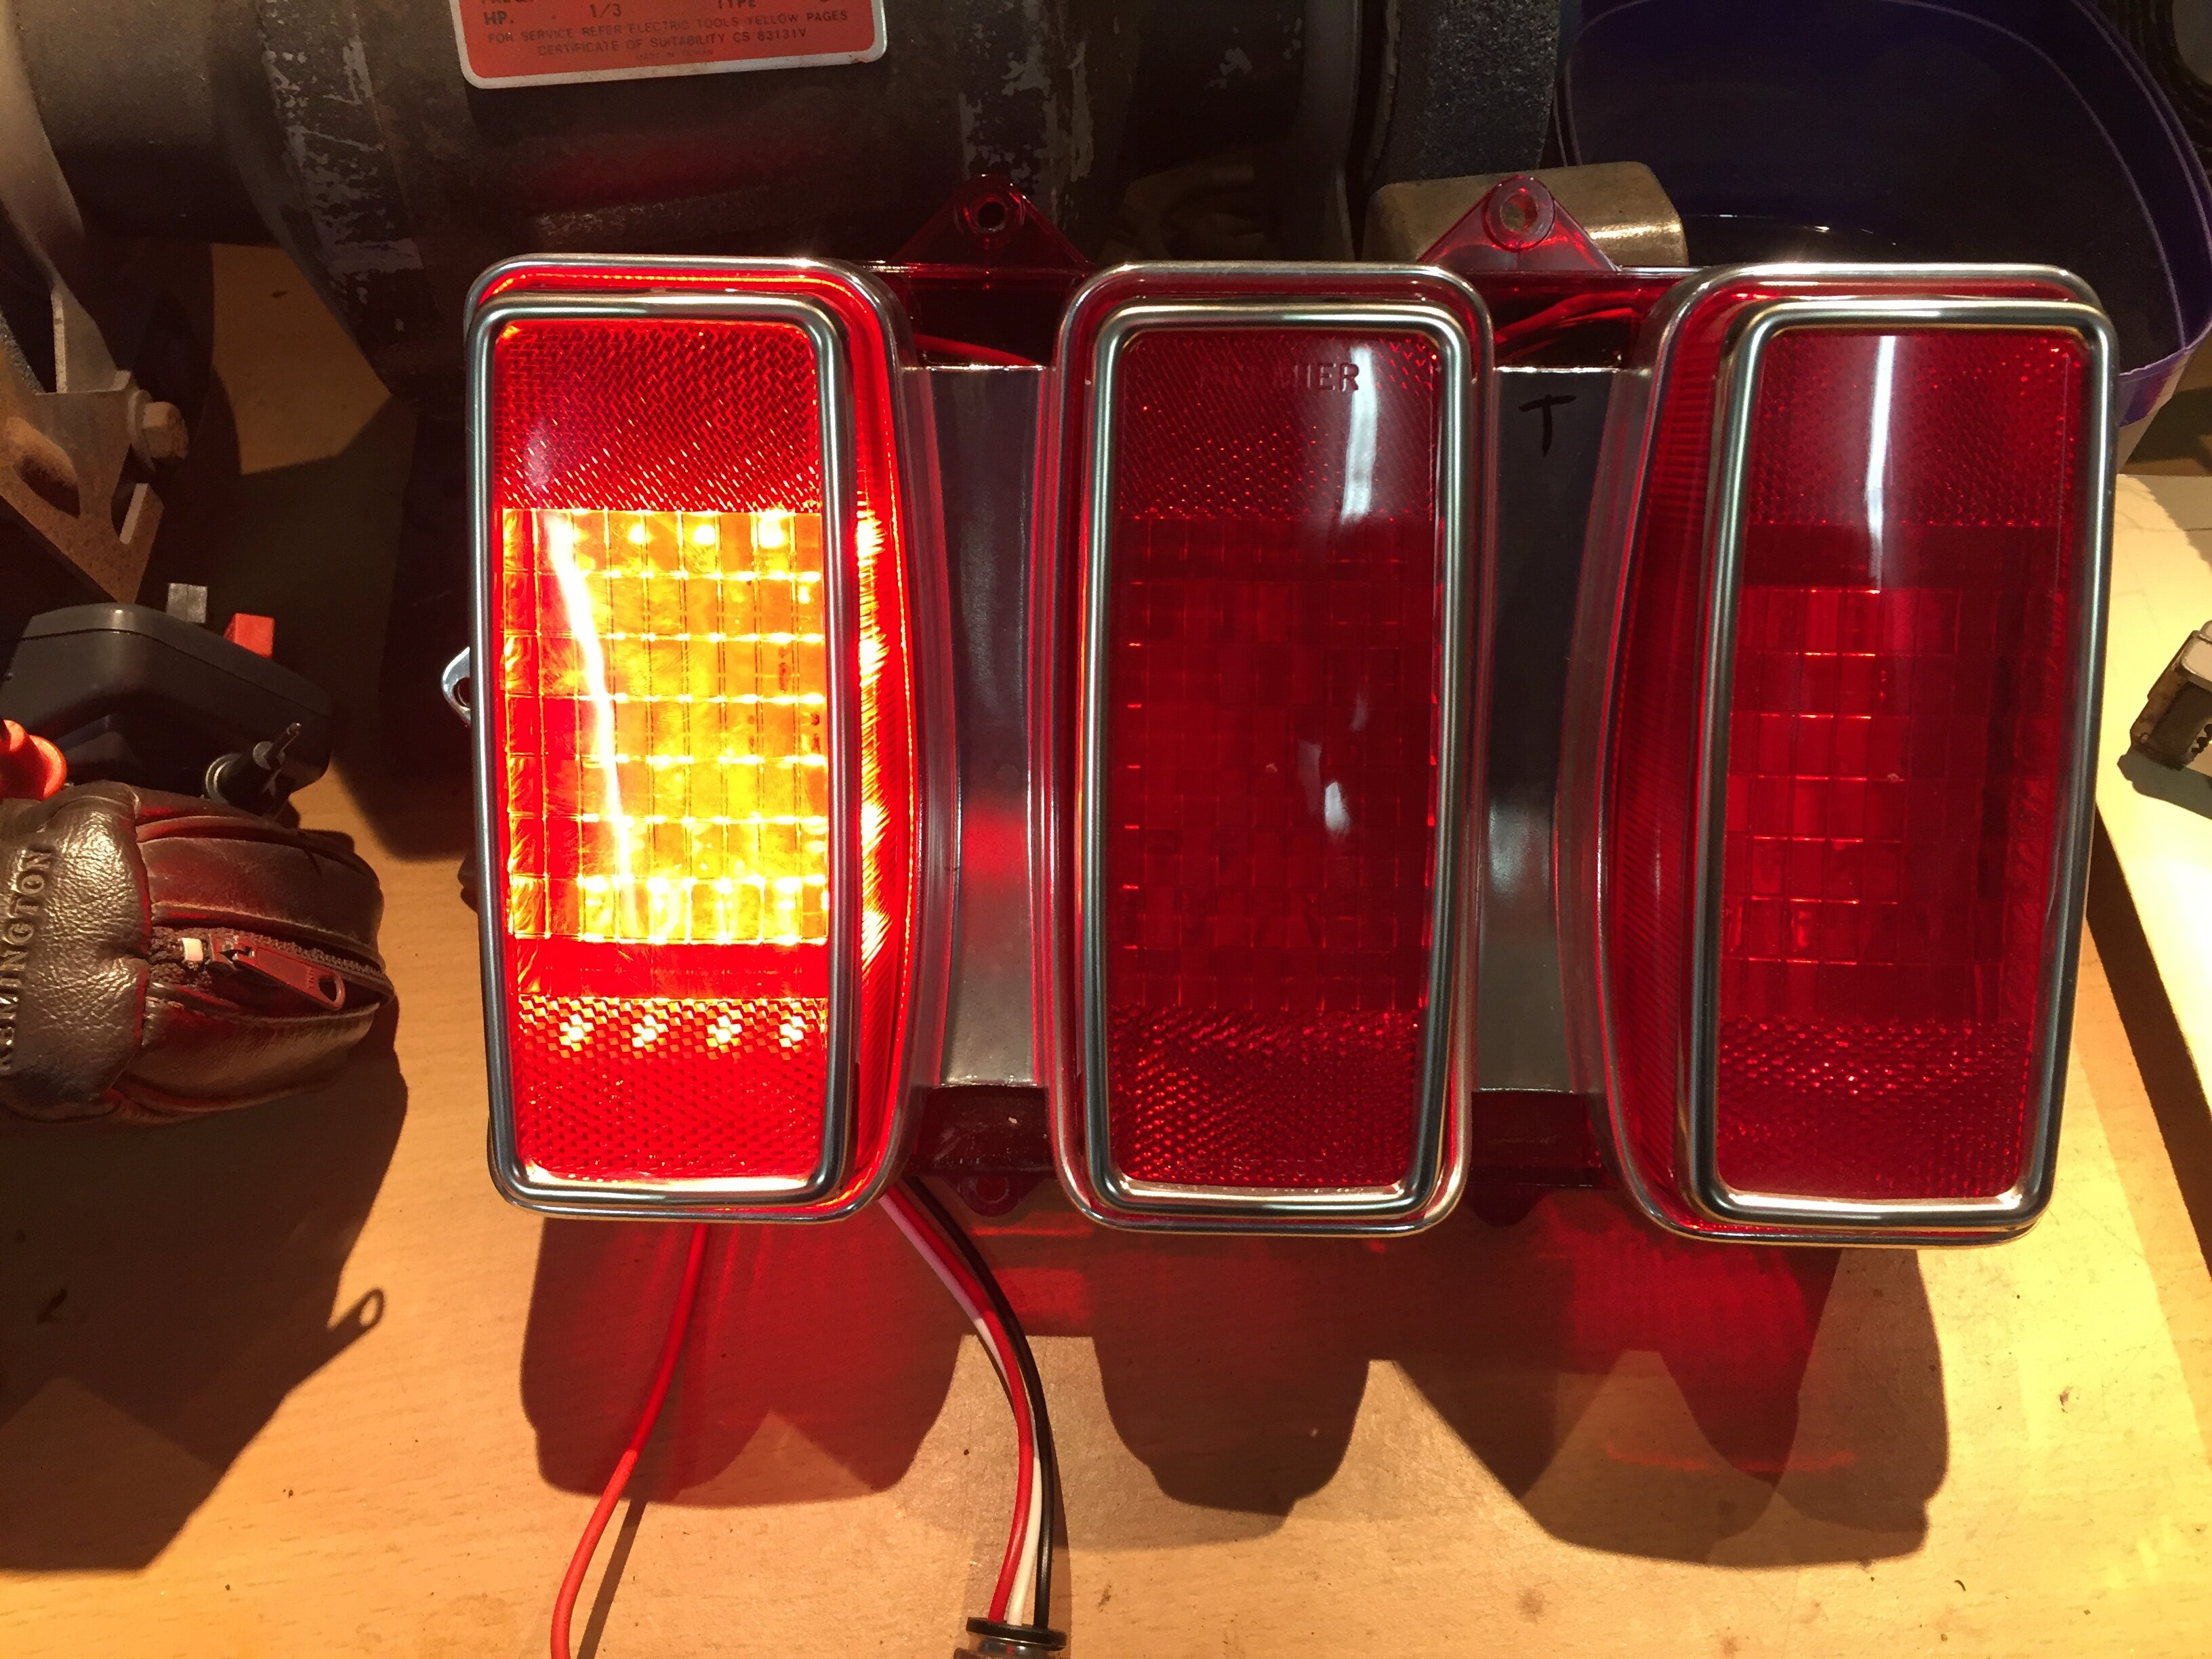
My first effort was buying a 3-bulb conversion which I think are made by Scott Drake. Good in concept, 3 times more light than before. Still the issue of the indictors remained and I wasn't happy. I hacked the wiring so all 3 lights came on for stop and tail. (The wiring had already been hacked during the 'rebuild' so I felt guilt but only moderate). They also do not fit without trimming and coercing so I rate them 3/10.
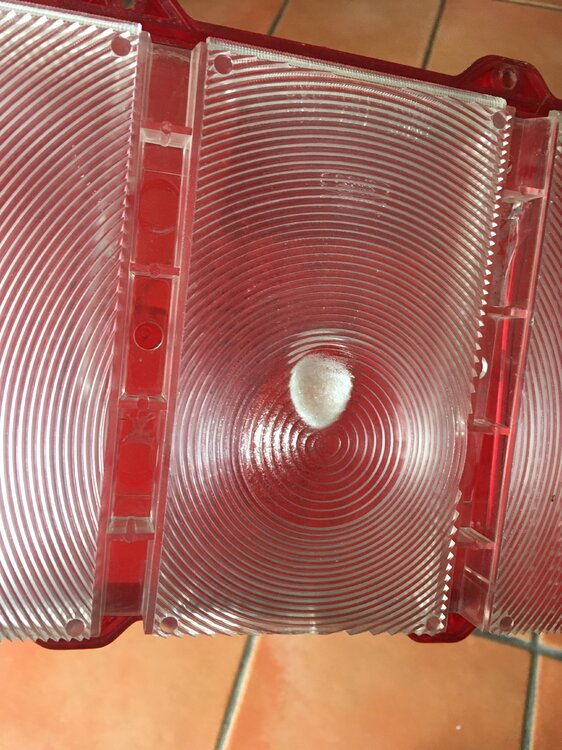
And then, when I pulled them to go to Plan B, they had started to melt the lenses;
I hit the interwebs for inspiration. Some of the things being done were individual LED put on a board and wired up with resistors. Pretty much the same as the ones being offered in the US. I thought that was a good idea, as the US-supplied ones still cancelled the stop lights when indicating, giving me no benefit.
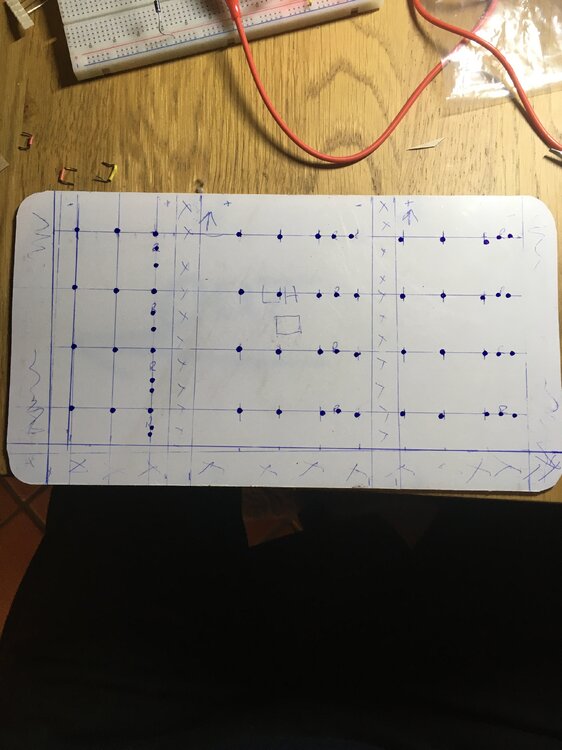
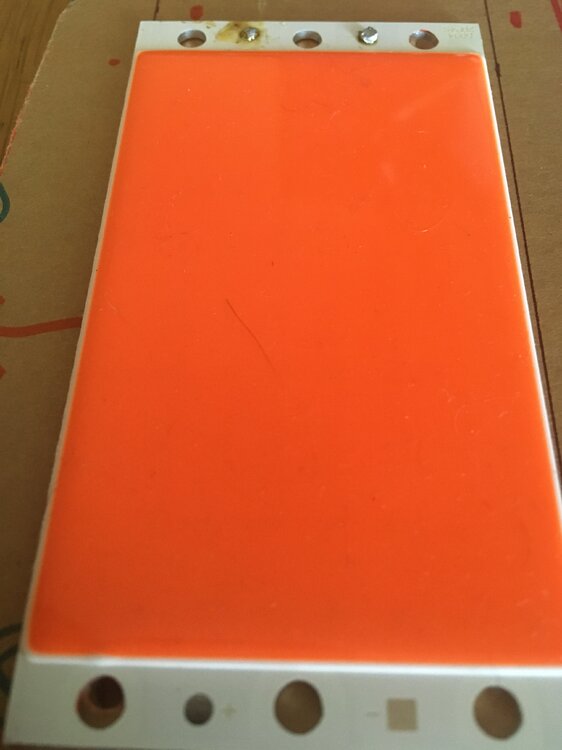
Looking at the US ones, I thought I could build my own panel and have the stop, tail and indicator all in one unit. So I started looking for bright LED that could run on 12V and be suitable. I found a little joint in Tasmania, https://www.ledsales.com.au/ and he was really helpful. He had the LED I needed along with resistors, voltage reducers and other neat things I still needed to learn about.
When I told him my plan was to mount 96 LED on a board, in them in series and have a third used as indicators, I think I won dumbass of the week. For those not in the know, LED need a certain amount of power to run, they have to use all the voltage supplied and they go bright and dim based on the power. Or some chat like that, it still makes my head hurt trying to understand it. Basically, every dot on this template is a solder point, and a tiny one at that.
He rightly pointed out that what I proposed was a lot of soldering, a lot of resistors to run them, and a lot of work. He suggested a COB LED. COB is Chip On Board and they look like this
Now armed with a New Plan, he found these which had the right light volume (LED are rated in brightness, the details escape me right now) and we figured that with the red lens of the original lens, these would produce a decent light. Moving right along, they do.
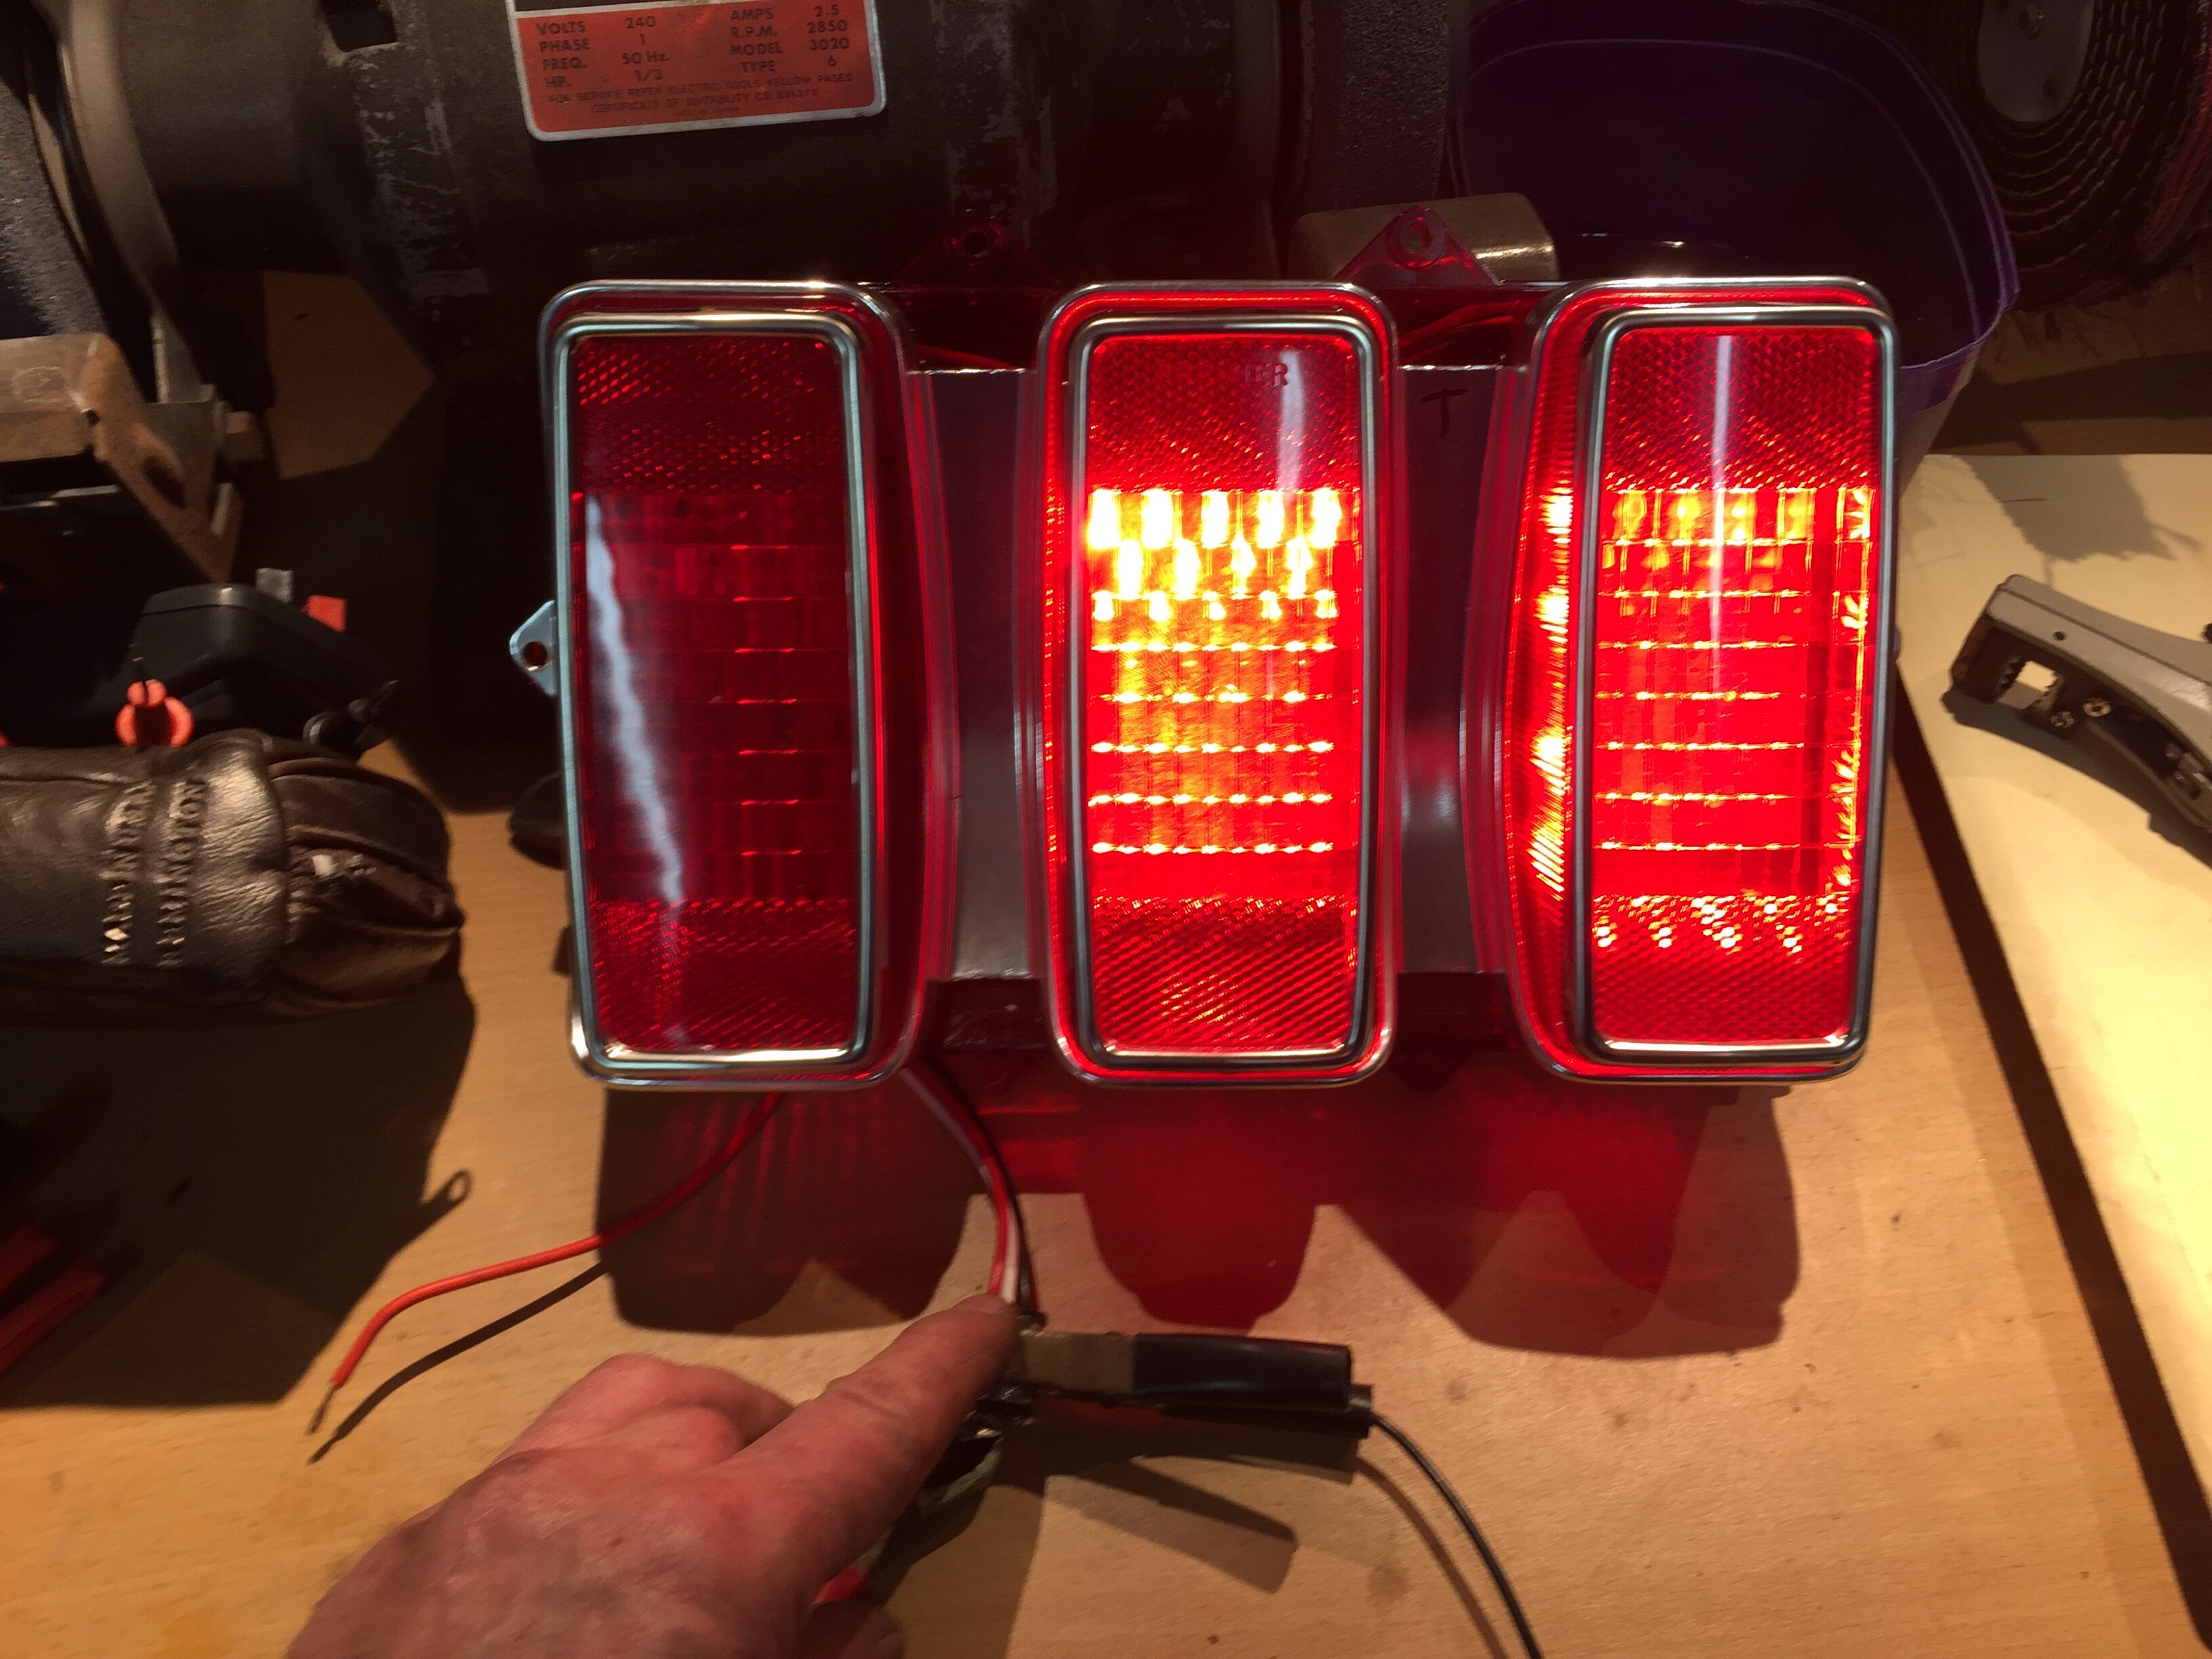
I used 3 COB per light; 2 would be stop and tail, 1 would be indicator. I was hoping to use all 3 panels as tail lights but never did it. Maybe the next upgrade will see it.
The beauty of LED is they go bright with the power you give them. For stop lights I give them the full 12V. For tail lights, about 9V does it. The COB is basically a single LED, so I only needed one resistor per circuit to sort it out, and not 200,000 with individual LED. I spent a lot of time working out what voltage would be the best for each circuit, which is done by the value of the resistor you use;
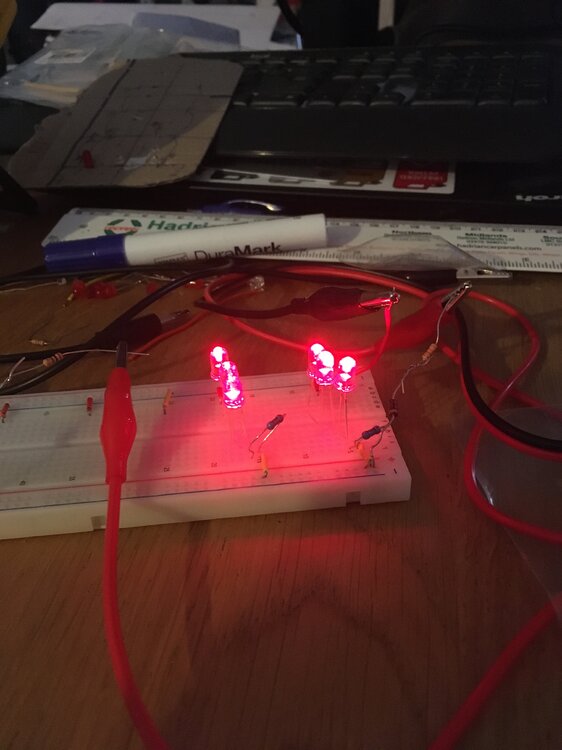
I also used one-way resistors to stop the full power from the brake lights going to the tail light. I thought I was pretty smart on that one.
One issue I had was power fluctuation. As I see the battery voltage on the Sniper dash, I had fluctuations from 11.9 to 13.9. Realising having flickering tail lights would also attract The Law, back to the LED man I went. His solution? A little chip that drops voltage down to a constant value. So I got some 12V ones and worked them into the start of the circuit. Now, regardless of the power being pumped out I would have a steady 12V to the lights.
V1 saw all the resistors and constant voltage things mounted onto the lexan sheet. I don't have a shot of this but I started getting concerned that vibration might affect the soldering, and the fact the entire light needs to be disassembled for service. Enter V2 please.

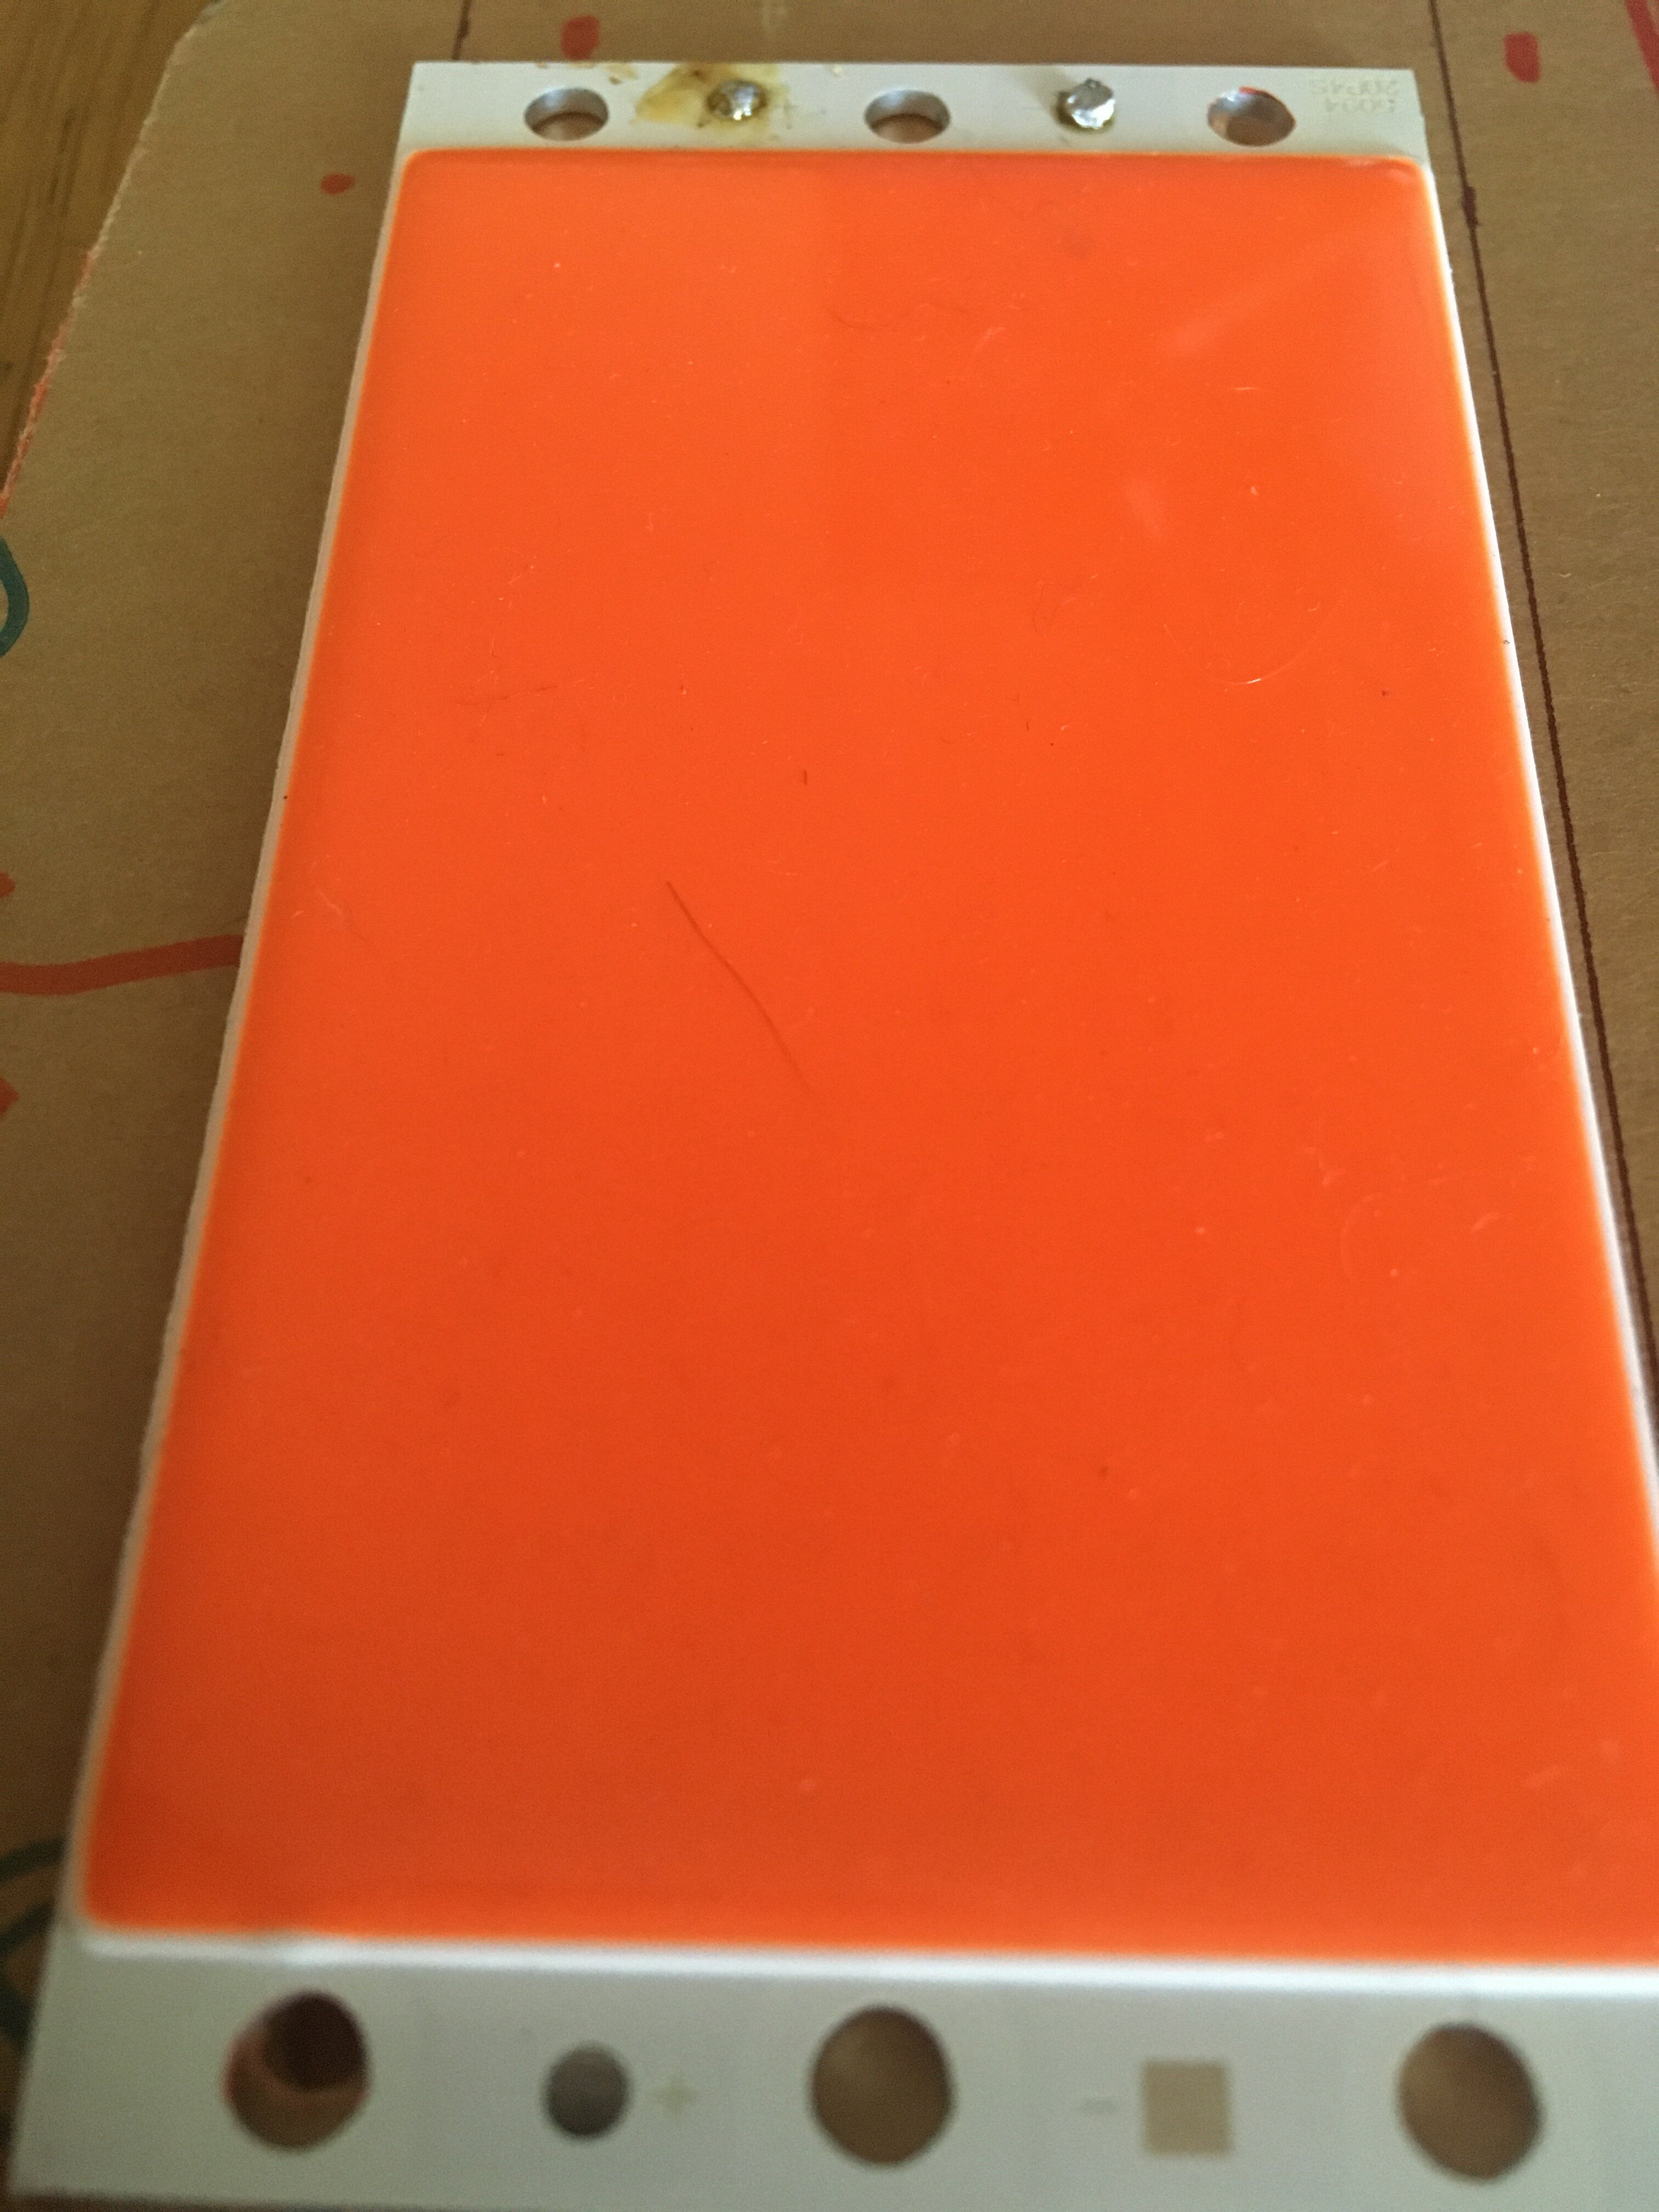
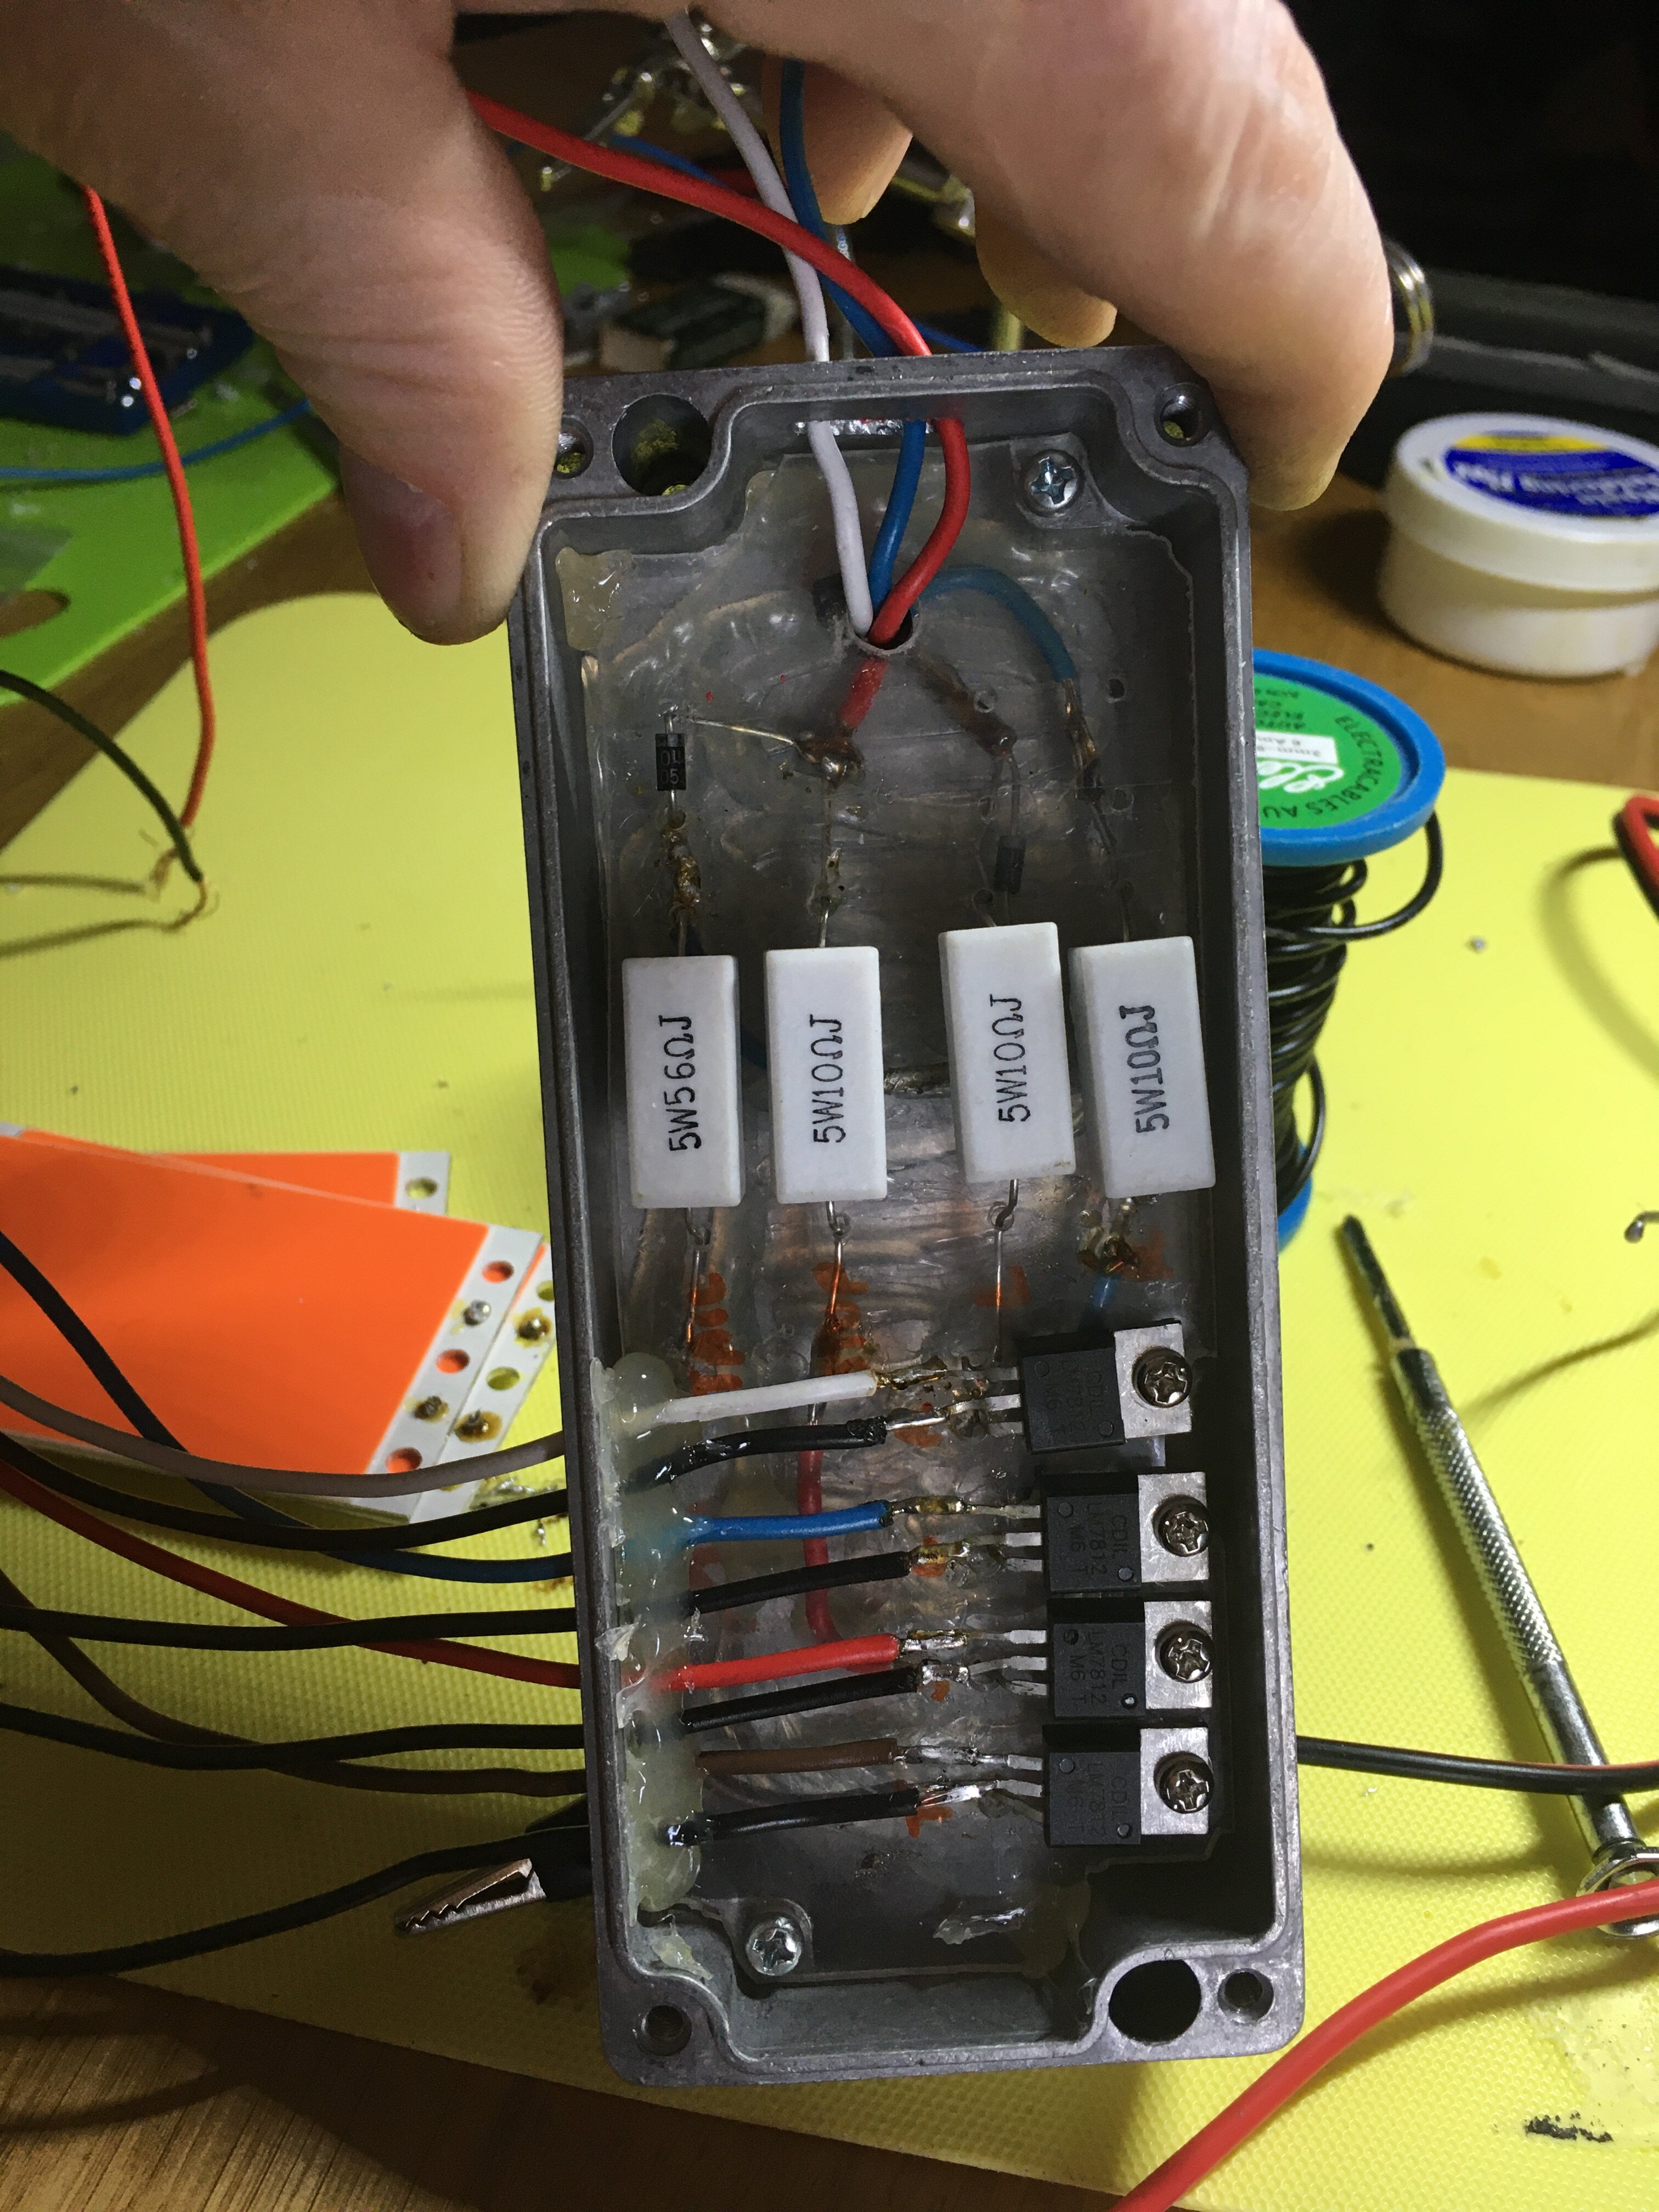
10-odd bucks at the hobby electronic shop later, I had a alloy, waterproof housing. From the bottom;
The 4 light circuits (Stop, tail, left and right indicator) come into the housing, and are plumbed into the constant power resistor things. These are earthed and I have put them all out to a common earth, and the reduced power travels underneath the lexan sheet to the 4 main resistors which reduce the voltage for each circuit. There are 3 rated at 10 Ohms which are the stop and 2 indicators. The single at 56 Ohms is for the tail lights. I have 3 wires coming out; remember the ability to power an LED to adjust the brightness? On the left, you can see the one-way resistor that stops the full beans from the stop lights entering the tail light circuit. With the tail lights on, it receives less power due to the higher Ohm value resistor and when you activate the brake circuit the full power hits the circuit and lights up the LED brighter.
I have chopped up the rear harness even more and inserted a plug into this box. From the box another plug runs the wiring in a new harness to the lights

Here you see the nearly-complete board inside the light housing (professionally marked LH you will see) with the wiring in place. Red wires are stop and tail and go to the 2 inner panels. White is the indicator and goes to the outer panel only. I was concerned about the amount of heat needed to solder the wires to the COB, so my soldering is low rent. For that reason, I didn't run the tail light wires to the outer indicator panel, but perhaps a later upgrade may see that done. I did buy 2 spares so I can test one to destruction if needed.
The finished product does what I wanted; however, I didn't take into account the resistance in the wiring so the lights are not as bright as they were on the bench. Luckily, with this system I just need to unplug the alloy box, and re solder in new resistors.
-
39 minutes ago, RPM said:Dang, that a lot of work you've recently done.
Yep, what was supposed to be a quick easy 2 week job went bad quickly. Some of it I could have just ignored like the Borgeson stuff. Some of it was my fault through not knowing, but this is the first Mustang I have really seen up close let alone work on. I just get pissed when you have to hot rod the supposedly hot-rodded bits you bought.
-
It's alive!
Finished the little chores; new brake hoses made up and put in. The 'rebuild' saw later model hoses fitted which had the wrong brackets and were real tight on full lock so now I have new hoses with the correct Mustang bracket (incidentally, the same as our Falcons up to about 1973). The original bolt holes were flogged out so I pit some 1/4" rivnuts in for UNC bolts, not screws as I think were original. New brake pads, a few minutes pressure bleeding the system.
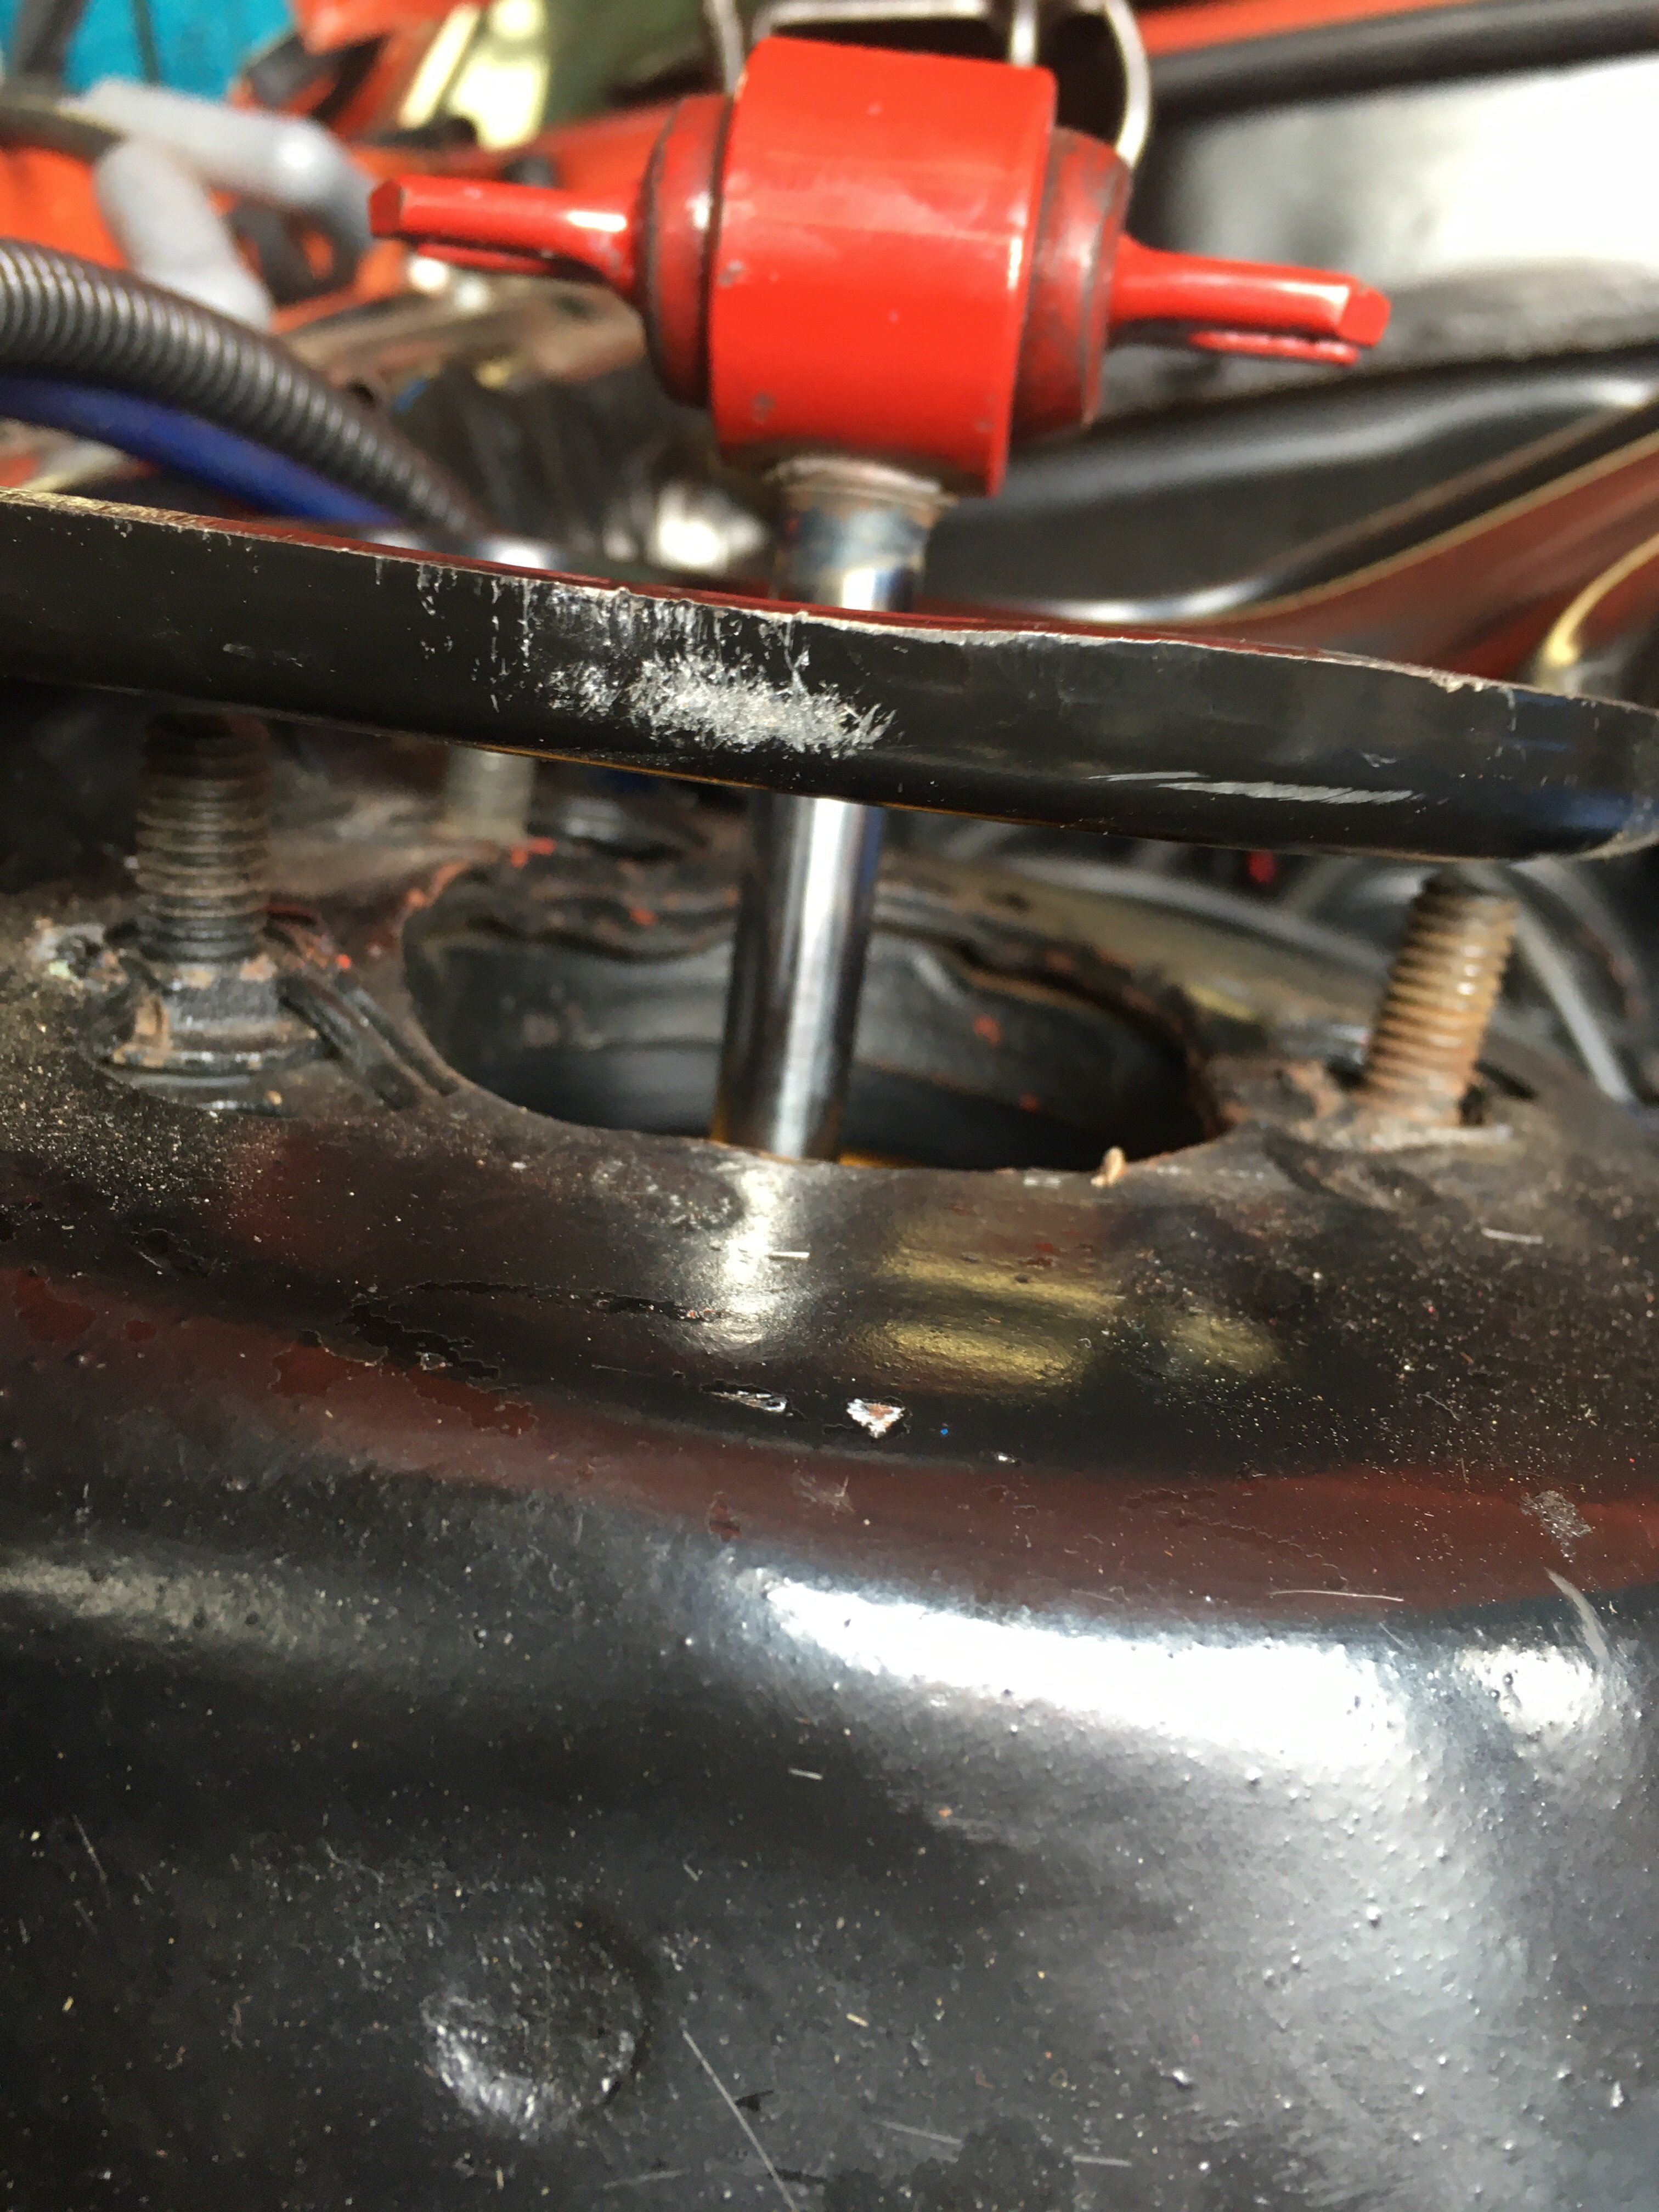
Next, I went to put the export strut brace on. It went well until it didn't;

The frame appears it is twisted or bent. Hardly surprising on a 50+ year old car but still annoying. I have a Monte Carlo brace that does seem to fit so maybe I need to look again at the export brace to see why. I just chucked the 2 piece ones back on and thought no more about it.
I also researched new spark plug leads. I have Dart Pro 1 heads on it with angled plugs, and the original MSD wires with straight boots were hitting the headers, and starting to melt. They were also damn ugly and too long so were all over the place. No one seemed to have anything that worked, until I thought I'd try a local place with a good rep, https://www.iceignition.com/
They had a set of leads with 45° boots that were made to go around the rocker covers. They also recommended a set of pedestals to keep it all tidy. The best news is the leads are 9mm, the pedestal set was cheaper than other shops had them at, and they were on my doorstep at 11am the next day. Best $220 I ever spent.
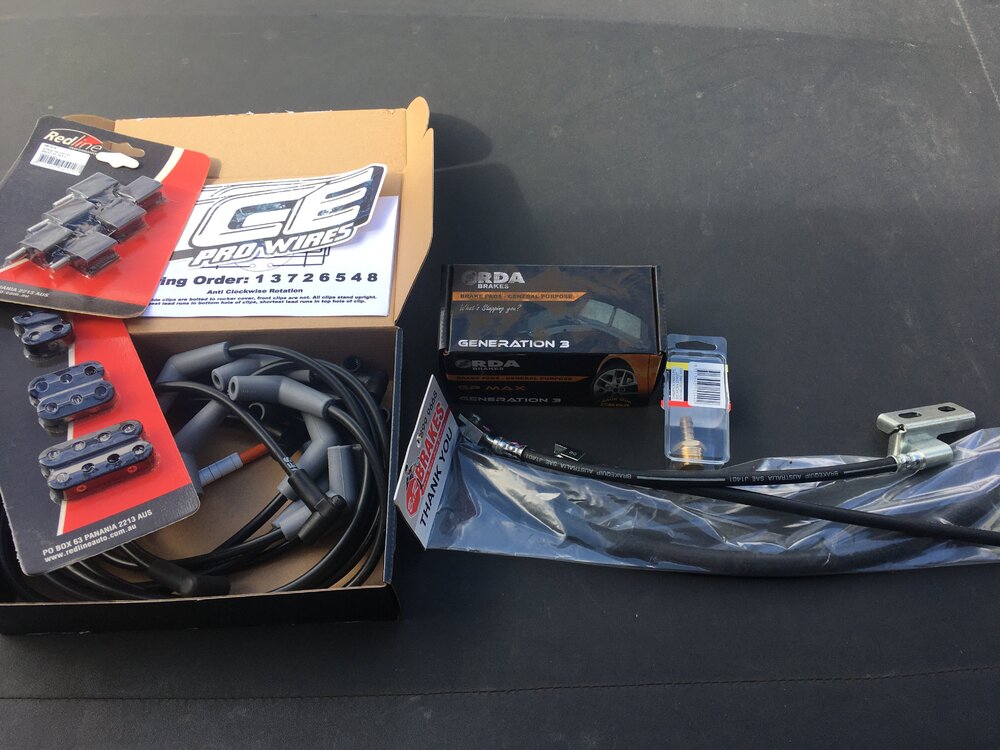
I'm going to miss the near-daily deliveries of bling in the future.

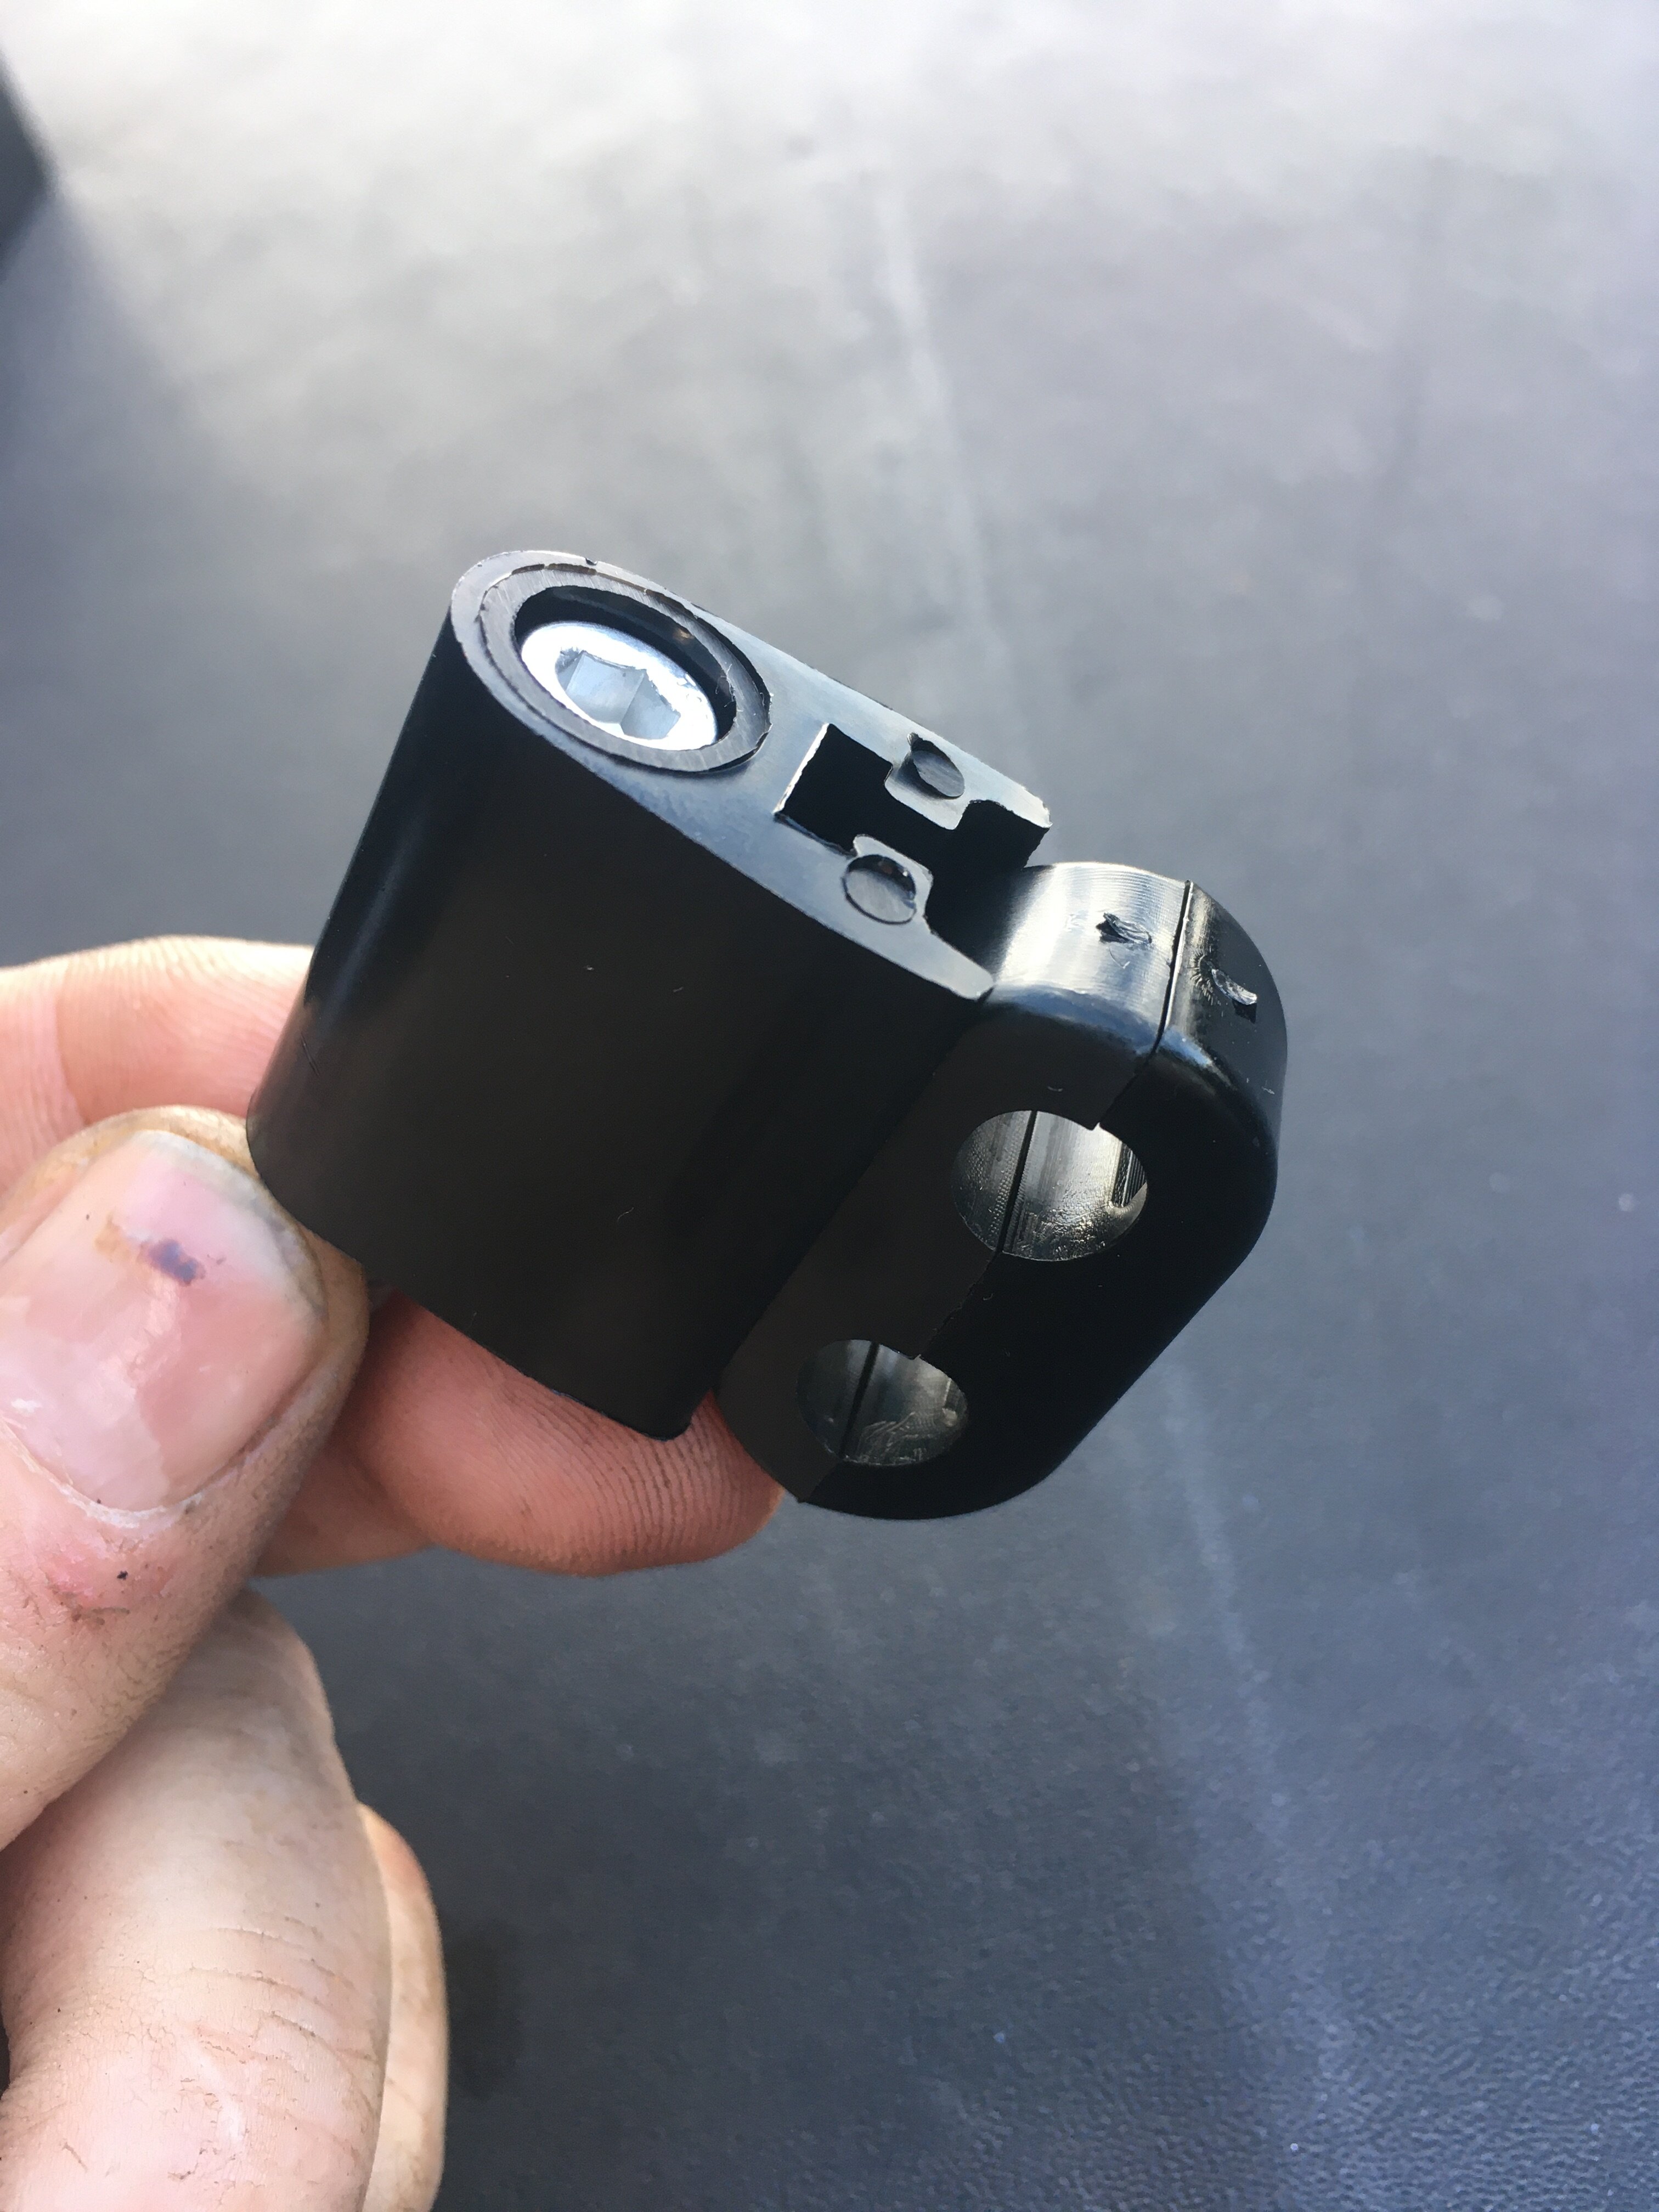
These are a Redline brand wire retainer. Compact, neat and a good design. The only criticism I have is the cap screws are too long for a Ford head, and because they are a decent stainless steel, its hard to cut and clean the threads up. I might yet swap these out for studs as I have studs on all the other holes.

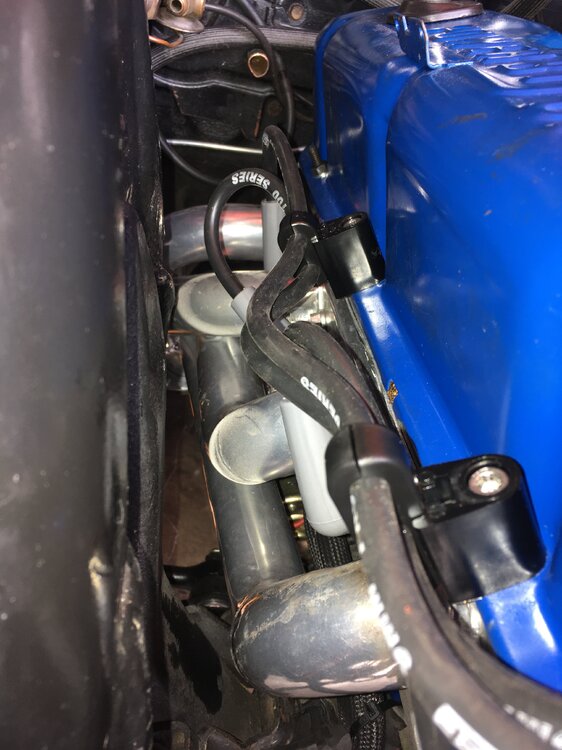
This was the worst side with the MSD wires. In the top right are the brake pipes coming from the brake master cylinder, the wrapped hoses are the power steering hoses and there's not a lot of room.
Passenger side. Appeals to my minor OCD issues.
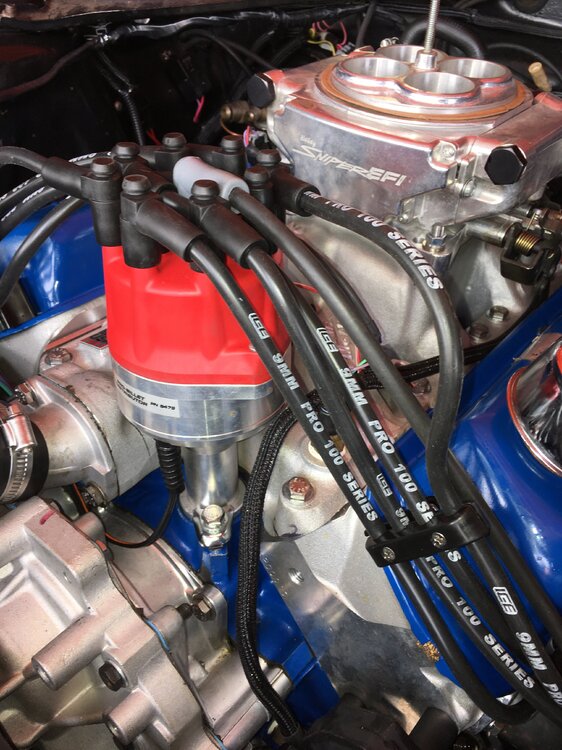
ICE said not to retain the first clamps but I did anyway, as I like to break the rules.
Another benefit of the ICE wires is the plugs to the cap are a lot smaller than the MSD ones, so you can cross the over on the cap and they don't get all jammed up. I am a fan of ICE now and will look at the whole system next time I need one.
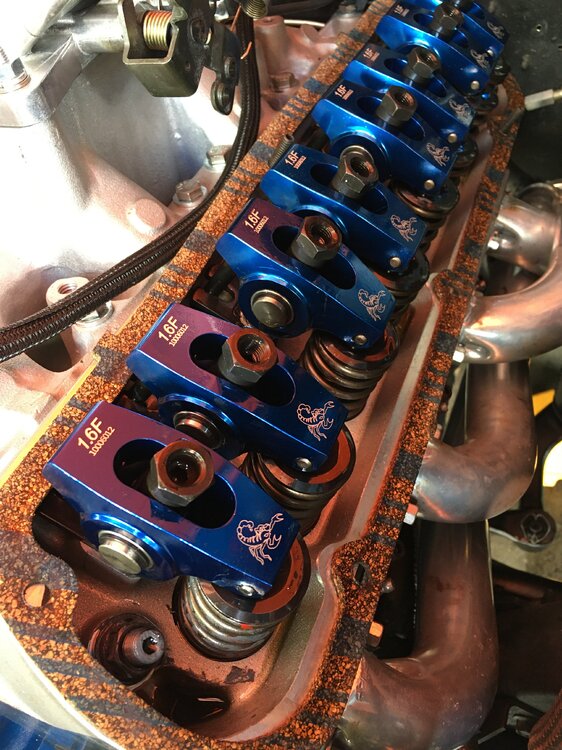
Some under-rocker-cover-action. Coz I can :)
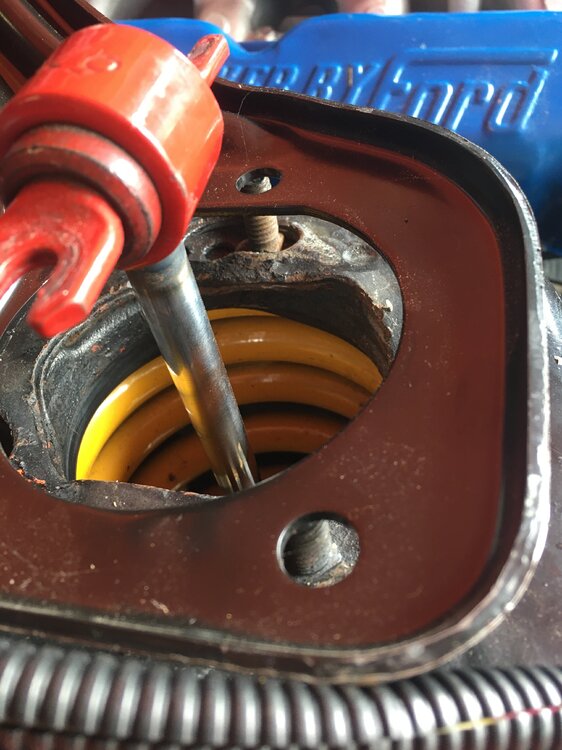
I also hooked up a oil pressure light, as the gauge is very slow to react when it does work. I used an el-cheapo LED light that I mounted on a stainless steel flat that I bent up to bolt to the ignition block and routed up under the shroud. It's a temp thing as I am probably going to get a set of Dakota gauges and maybe a new aftermarket bezel and will mount it into the bezel.
The switch is in the OEM oil pressure hex thingy, I drilled and tapped a new hole and ran a wire through the temp/coil/oil harness.
I've only driven it for about 20 minutes around the district and can offer you these thoughts;
* The Borgeson power steer is a massive disappointment. It is heavy at parking speeds, but with a couple of thousand revs it lightens up. Hard and uncool to do so when you are trying to park. At speed it is nice, a decent weight to it. I will see if I can get a smaller pulley for it. The pump has a minor leak. It looks like I need to put mount studs on it, which are 40 bucks a set over here. Very annoyed they are not supplied with the pump, for the price of a takeaway lunch Borgeson could include them.
* This thing is crisp and likes to rev. With a new engine, gearbox and diff I need to take it easy but with the little bit of running and not putting a load on it, it wants to go. The flywheel is like a NYC pizza pie in thickness but it does have enough torque to lug down to ~1,500 in 4th and still pull cleanly. It has a serious bumpity bumpity bump bump bump idle to it.
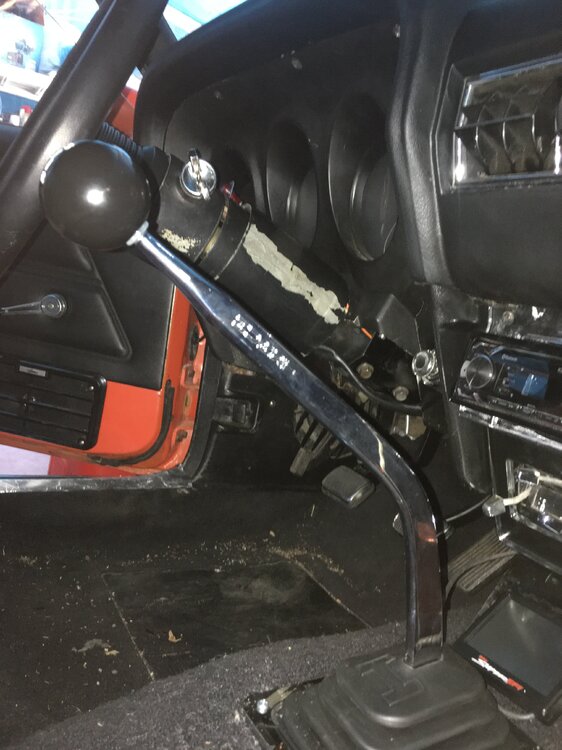
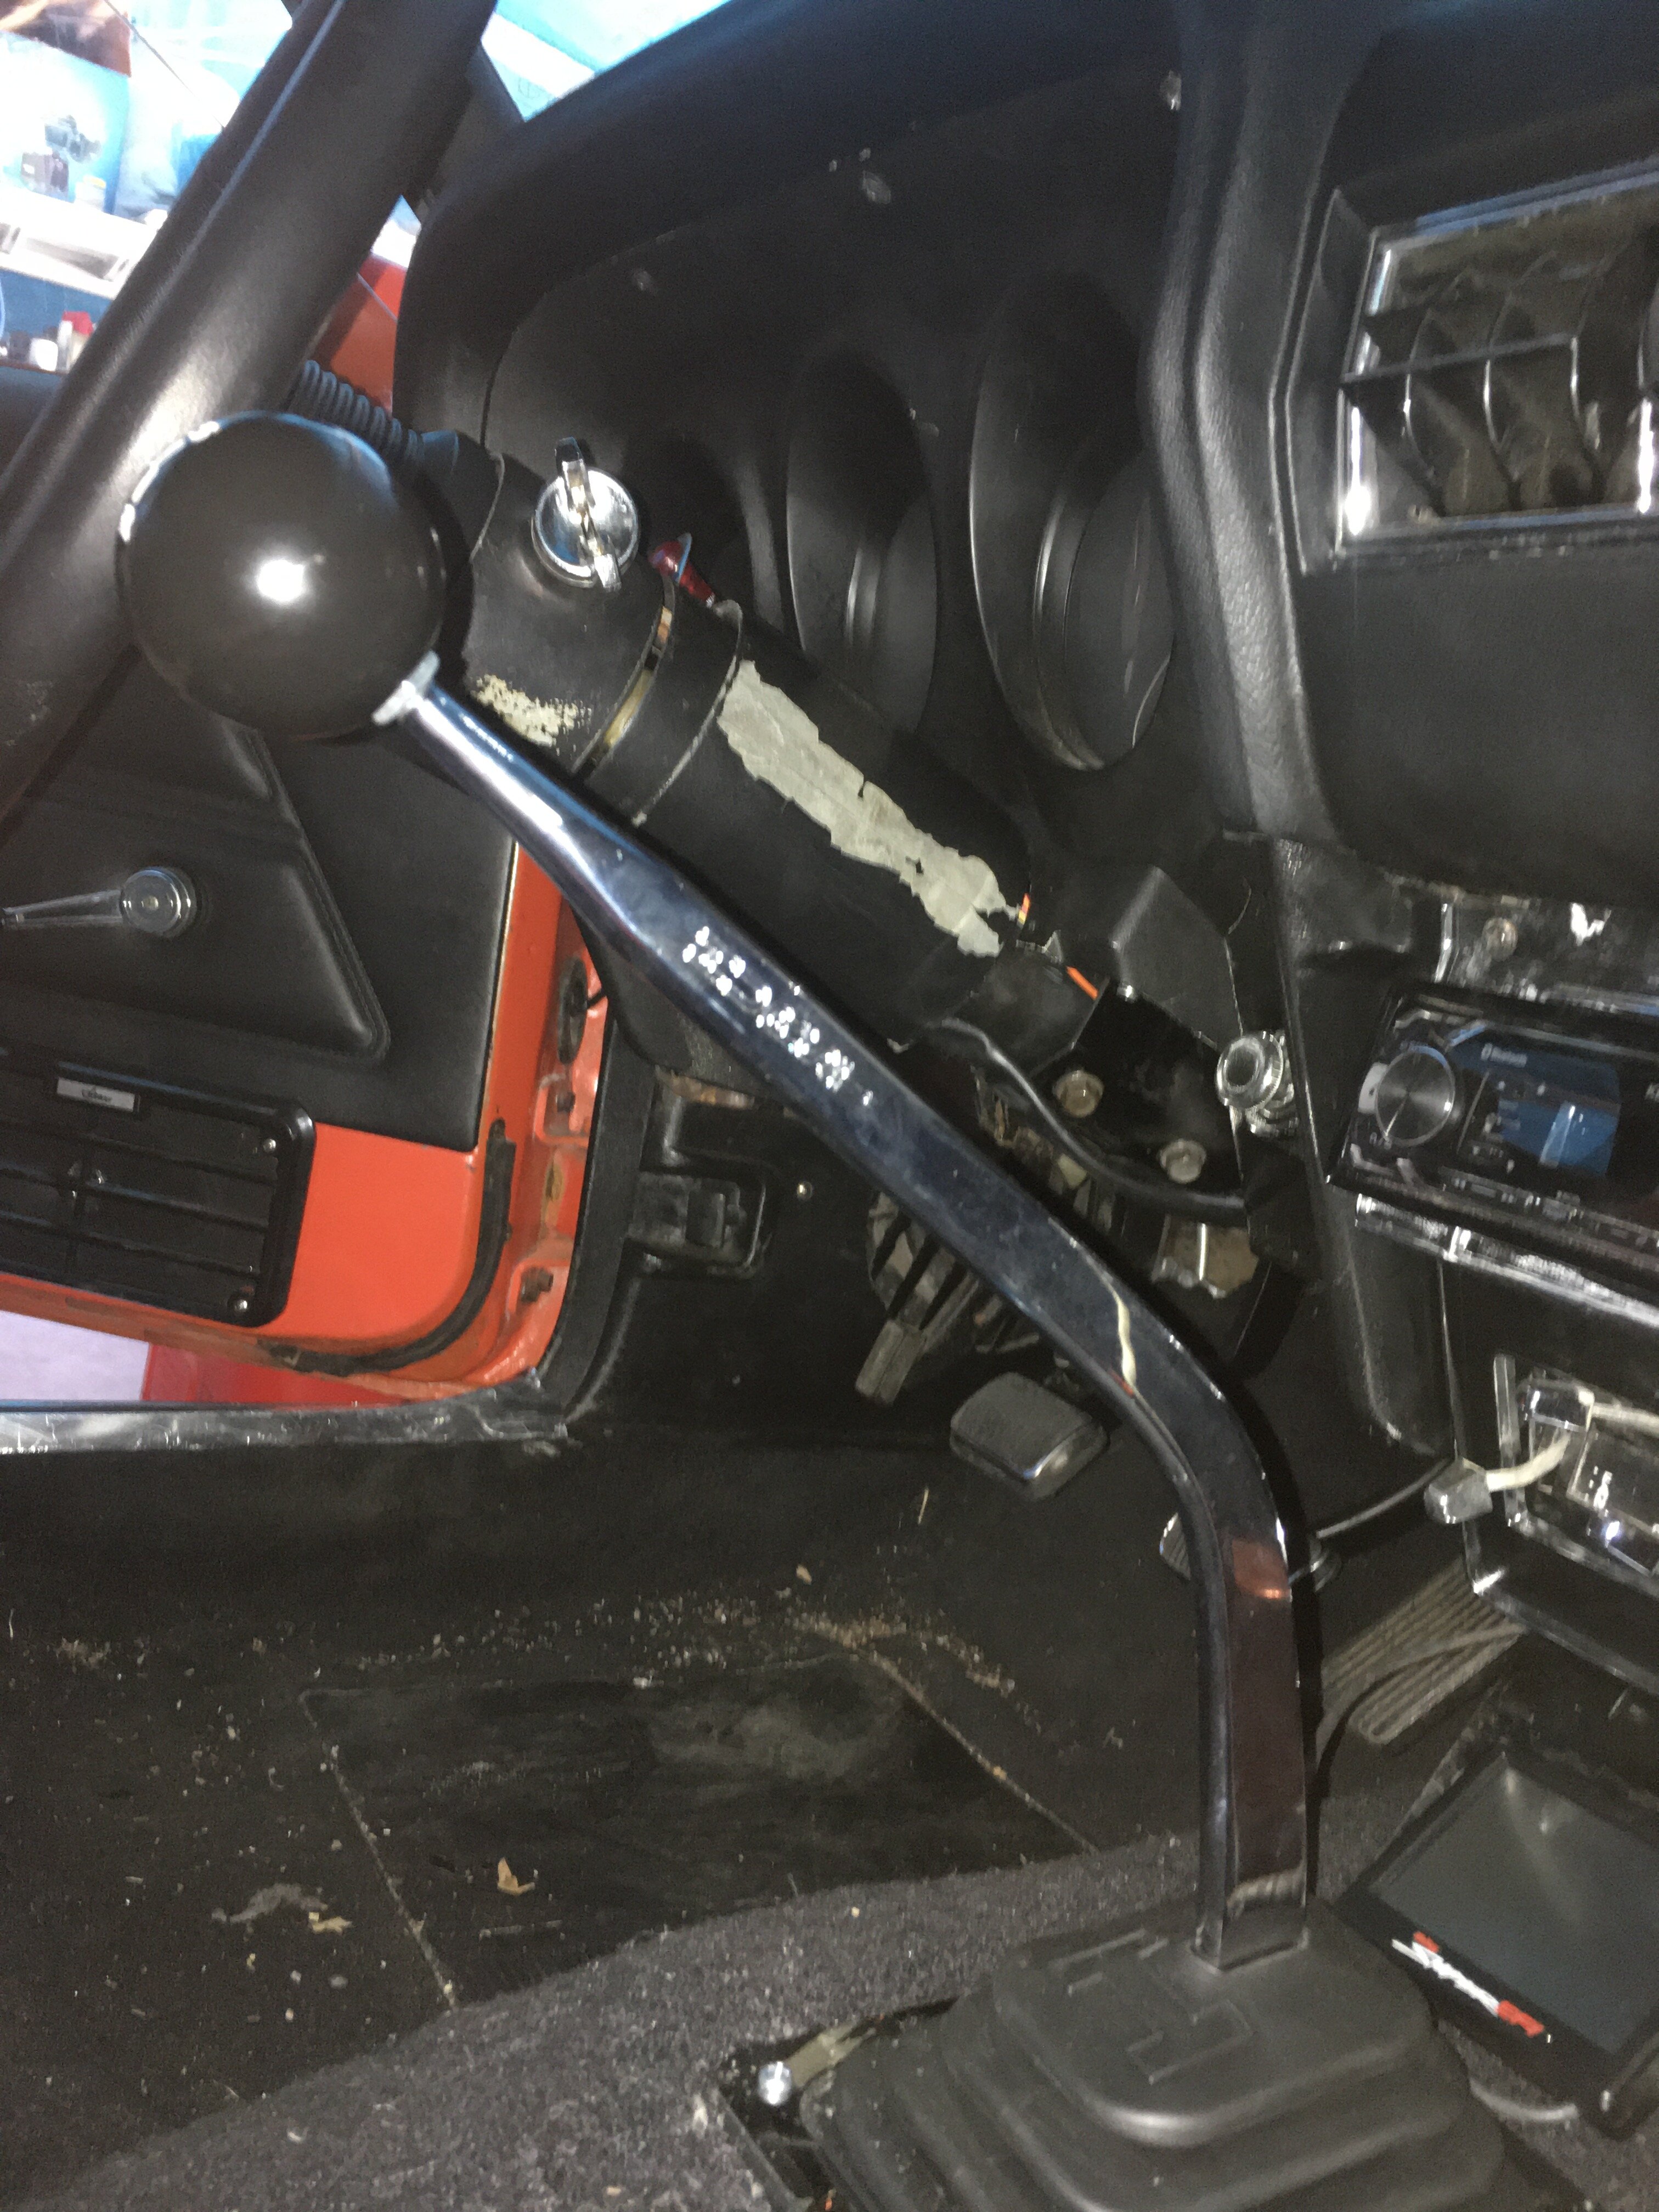
* The TKO600 box is nice. Gearing is great, no big rev drops on changes. Driving a LHD manual transmission car for the first time has it's own challenges but so far so good. I have a Hurst shifter for it which is a bit long and rat-roddish so I may have to investigate alternates.
* 3.50 gears may be a bit low. 5th on this box is only 0.82 overdrive so it will be humming at highway speeds. Maybe 3.25 would be a good compromise but I'll see how it goes. I can't see me doing interstate trips regularly so it may be nothing to worry about. Glad I didn't use the 3.89 I originally bought for it.
* I used a 24" radiator and so far have not seen it top 195° when idling. I have set the fans to come on at 185° and the second one at 190° and it seems to keep it cool. Perhaps my ebay special radiator I last used wasn't as good as I thought, or maybe a new block with no crud blocking the tubes is the reason. Either way, I hope I don't have cooling issues.
* It's loud. Probably too loud and I am going to see if I can get quieter mufflers. Possibly using Flowmaster Super 44's, but I'll take it to the exhaust shop that supplied me all the pipes and see what they have. He rolls around in a 80's Chev Caprice so he is down with hot rodding.
Next step is to get it inspected and re-registered then start rolling it around on longer runs until I know it's reliable and not going to embarrass me.
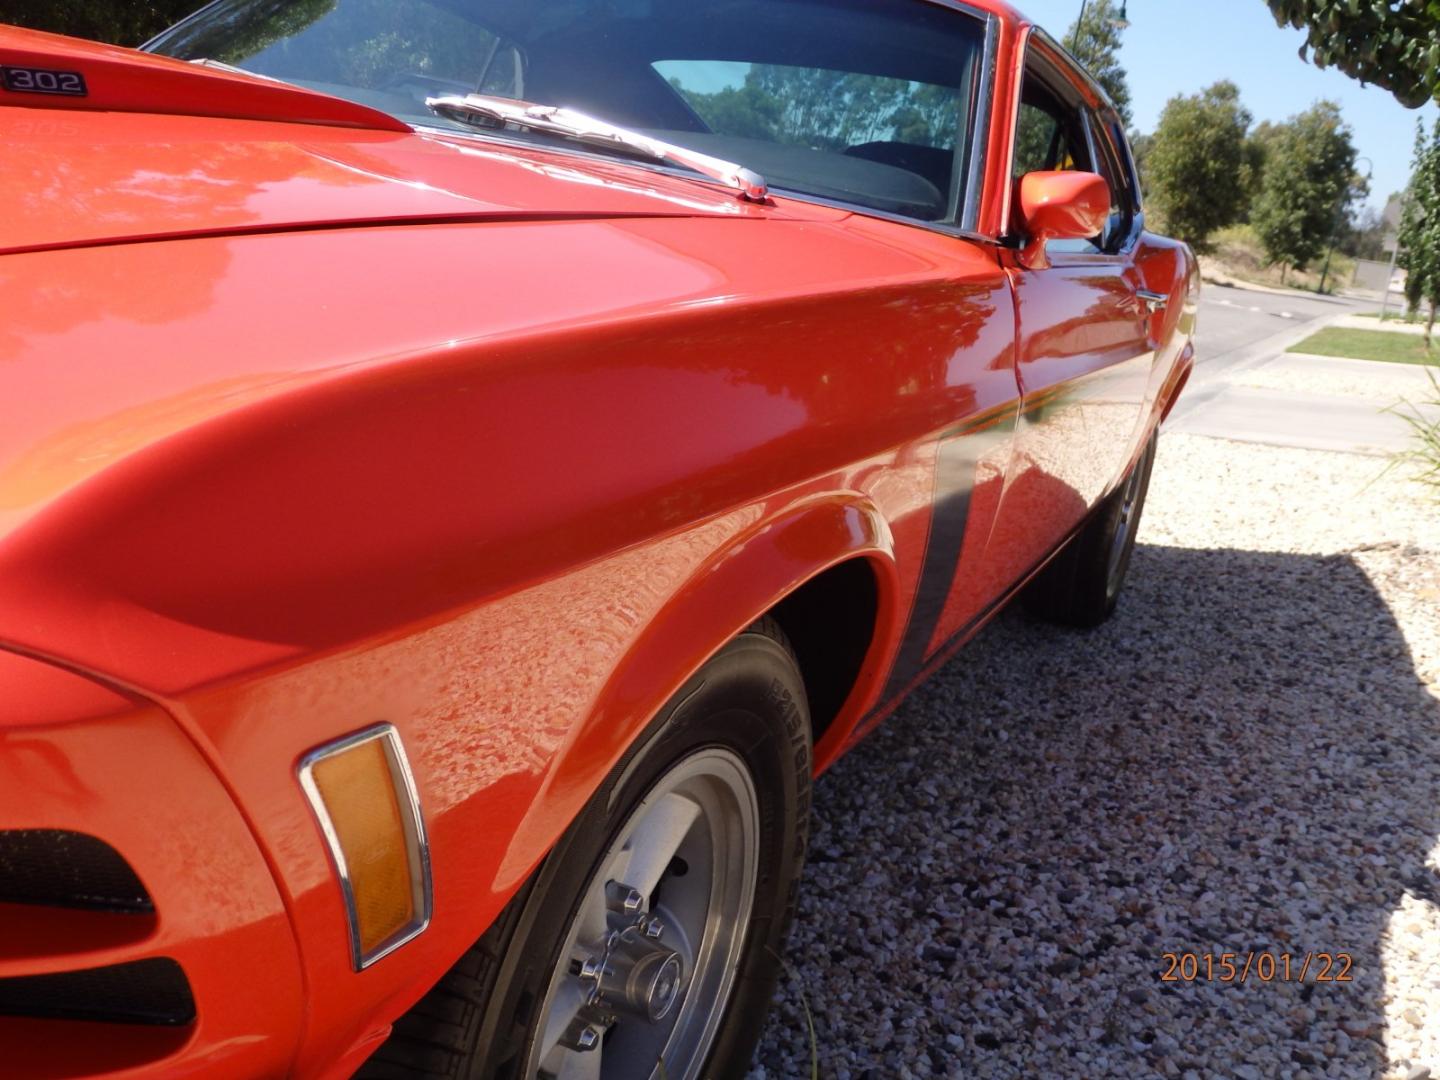
So here it is, idling away. The rear springs will hopefully drop a bit more. The hood scoop is off as I have yet to put in the LED flasher kits and it's got shed (barn?) dust after being tucked up for 4 months, but it's mine and I did it myself.
-
I would spend some cash with another driveshaft place and have them check the shaft. If it is at 2 different speeds it's definitely harmonic. Thinking out loud below;
Have you tried changing gear when you feel it? So keep to 80k but increase engine revs; try both second and first gears. Does applying the brakes change it? If you drop it into neutral is the vibration still present? Can you swap wheels front to back, or if not, side to side to see if that changes it?
Does it feel more towards the rear or the front? Could it be a wheel? Is the vibration a constant rattle or does it cycle from minor to major? Does it do it when cornering or just straight line?
Perhaps take off both rear brake drums, spin it up and see if the axles are true. I still suspect there may be housing damage. A 9" is a big sucker and if you had bent axles it's had some sort of hit in the rear so maybe the tubes are out of alignment?
-
I've just done a Borgeson power steer swap. Not impressed, as heavy as manual steer at parking speed, big and bulky box and a lot of expense. The parking speed weight will probably disappear with a smaller pulley as when I rev it it lightens up, but not what I expected.
-
6 hours ago, Mach1 Driver said:As I recall, with the white wire grounded it doesn't get an RPM signal so the EFI stays off.
Not sure the exact process and what it affects, but it's part of the MSD box so the engine cranks as per normal but just does not fire. The fuel pump runs, the sniper dash lights up, all looks normal. Just an in-built kill switch.
Great idea, except when you forget you switched it and you try starting your car with everyone within a mile radius watching your every move.
-
It might be worthwhile pulling the housing and having it checked for straightness? More of a make sure nothing else is going to stuff you up step.
-
Post-empting the above post, the list is certainly getting smaller.
I gave up on the alloy radiator. I couldn't get top mounts for it without fabricating them, mounting it to the side of the front panel was a pain and the lower mounts were never going to work. Not knowing what to do, except spend another $1,000, the heavens opened and a bright beam of light guided me to a local Mustang forum where a bloke was selling a OEM style brass 24" radiator that had recently been serviced. Score. So I bought that, had it sent and it was put in yesterday. New hoses, a filter and hopefully things are cool.
I finished the exhaust yesterday. Not pretty as I'm not much of a thin wall welder but it is in and no leaks. I invested in some nifty clamps which came in handy with only 2 hands and 3 joins. Prior to that, my welding helmet failed and it was too dark to see. So I buy a new one. Excellent, I can now see in colour and welding is nice. But then they turn to birdshit. Why? I have a half bottle of gas. Except, I can't hear gas flowing. Why? The regulator has failed and shows half a bottle when there is zip. Zilch. Nada. Another 1 hour round trip to the gas shop.
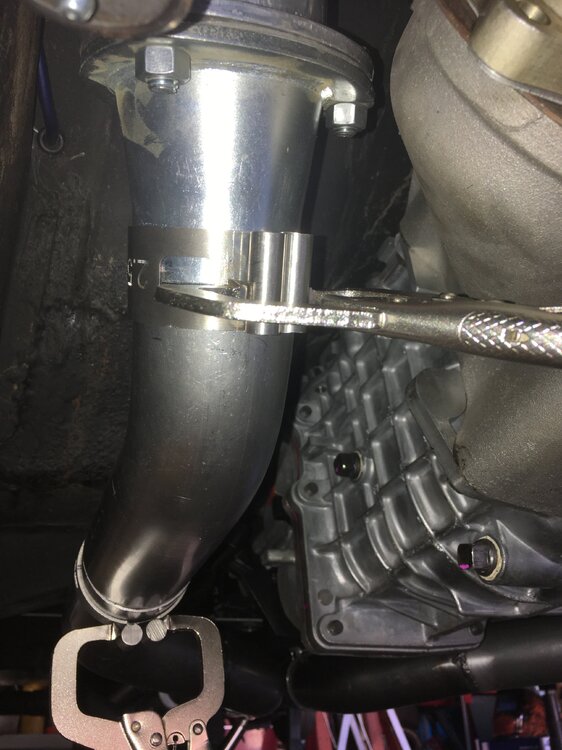
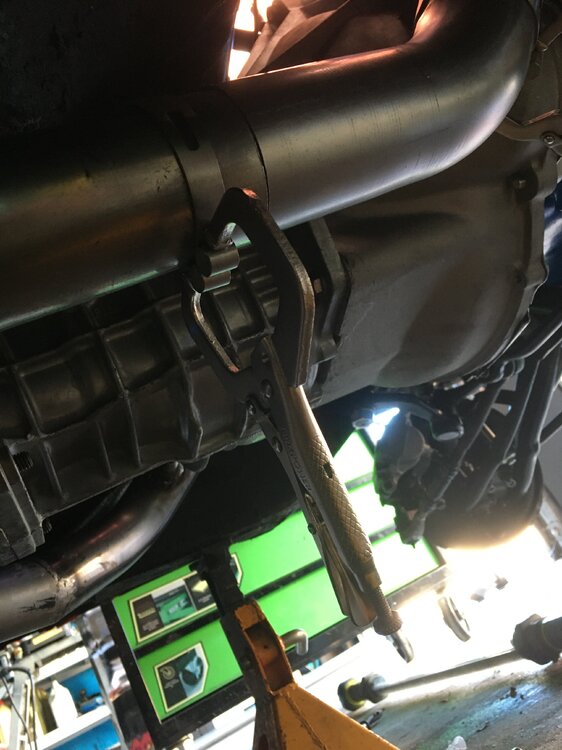
I made a goof many years ago and bought centre entry and exit mufflers. I should have got offset as the main pipes are too close to the driveshaft
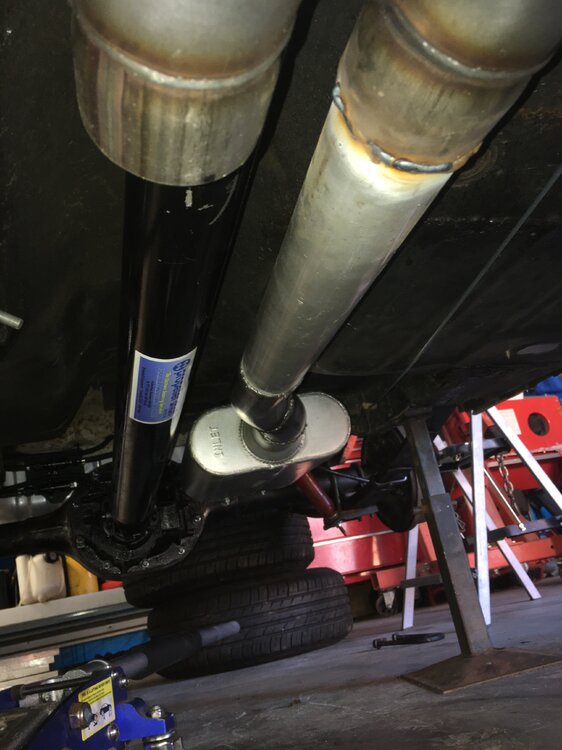
Above is a shot of the X Pipe which I bought pre-fabricated, but as it is a straight inlet and exit, it made for extra cuts and welds. I have tightened up the rear hanging mounts (which are not original ones) but if they work loose then I'll have to go to plan B. In my steel shed it is pretty loud, and while I'm a paid up member of the If its's too loud, you're too old club, I may change to offset mufflers to get a nicer result.
This morning, I ran new fuel lines to the Sniper, plugged all the spark plug wires in, set it at TDC for the timing, filled oil and water and turned the key. With a few bangs and pops it started, filled the shed with smoke from the oil in the cylinders and then settled down. The tappets need to be re-set but there are no leaks. It sure as heck is crisp and revs quick. I had one vacuum port unplugged so hard to gauge the idle lope, but as the video shows it's got a definite lump to it. As it's still on axle stands I put it into first gear and it ran smooth with no noise from gearbox and diff.
Couple of things to fix now, before I can get it re-registered;
Get a new PCV hose as the old one was cracked
New spark plug wires as the current MSD straight plug ends don't like #7 & #8 and I need 90° ends
New front brake hoses made up, as the later Falcon calipers I have put on it need longer ones
New front brake pads
Once all that is done I can do some test runs to make sure all is good and then enjoy it.
-
4 months of work, blood, sweat and swearing. The car fought back lots of times. The bank account went down big time. Wife seriously not happy with every weekend spent in a shed.
But was I happy with this?
F&*K YEAH.
-
Yes, the white wire I have connected to the cigarette lighter. Push it in, grounded. Sneaky, right? Except now the whole world knows....
I am using all MSD ignition; billet distributor, 6AL CDi box all hooked up to the Sniper. Effortless, never had an issue.
Mach1 Driver reacted to this -
I have Holley Sniper and it has a ground wire that I have hooked up. Engine turns over, does what it is supposed to do except fire.


69 Fastback: First car in 1985 - Bought it back in 2011
in Project Progress Forum
Posted · Report reply
3.50 here and a TKO600 with .82 5th.
Not really an overdrive as such but it does drop the revs.
If you can get a T5 gearset with a close ratio setup like a 2.9-2.7 1st or taller and a .6-.7 5th that would be the best of both worlds.