DRASTiK 22 Report post Posted September 29, 2015 So, I've started assembling the car, and I'm having an issue with the gas cap. It's the original standard twist-on type (came with the car). The problem is that it fits so tightly on the filler neck that the outer portion of the twist-on cap actually scratches up the paint on the tail panel when rotating it. I've tried two separate filler necks - the one that came with the car and was likely used with this same gas cap, and a new replacement. No difference made with either. That pretty much leaves the issue as being with the thickness/shape of the replacement tail light panel. I find it hard to believe that it's thicker than the original was, but I don't have the original to compare to anymore. It was trashed. To add to the confusion, I did not disassemble the fuel system from the car, a previous owner did. Therefore I don't have a way to know exactly what was being used before. The car came with one filler neck and one gas cap, so I'm assuming this is what was on the car previously. Both filler neck flanges sit flush with the back of the tail panel. Even if I remove the gasket, the cap it is still too tight. Without modifying the existing tail light panel, I figure this leaves me the option of using a pop-open cap instead of a twist-on. Does anyone have any other suggestions? I don't have pics on me right now, but if anyone wants some, I can take some this evening. Quote Share this post Link to post Share on other sites
RogerC 136 Report post Posted September 29, 2015 Both filler neck flanges sit flush with the back of the tail panel. You're mounting the fill pipe to the exterior side of the taillight panel, right? 1 JayEstes reacted to this Quote Share this post Link to post Share on other sites
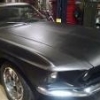
Brian Conway 264 Report post Posted September 29, 2015 Look something like this ? Brian 1 JayEstes reacted to this Quote Share this post Link to post Share on other sites
SA69mach 39 Report post Posted September 29, 2015 You can usually gain any clearance you need with some extra gaskets. When reading your comment in your post that you tried removing a gasket to gain clearance makes me ask a dumb question.....do you have the filler neck flange situated outside the trunk? Extra gaskets will give more clearance off the tail panel. I changed over to a 22 gallon tank, and had to get a new vented cap from a widely known name brand. That cap must have been designed wrong. it was always very tight, stupid tight. It would get stuck on so tight I snapped a rivet. During the rebuild my mechanic and I were bemused to find that the gas cap did not match the original filler neck in terms of 'thread' - the arrangement of metal flanges that are supposed to meet and 'thread' open and closed. weird to see. There are two offset projections of different widths, that are supposed to match and allow them to insert into the filler neck....then twist to lock. Side by side the darn parts looked right, but they should have been mirror image. Epic fail in my opinion. My mechanic looked at me like I had bought cheap junk. We fixed it by rotating it 180 degrees and re-riveting. It actually fit better and worked near perfect. And the pony is still in the correct orientation. Go figure. Worth checking..... Best of luck. Quote Share this post Link to post Share on other sites
69volunteer 84 Report post Posted September 29, 2015 You're mounting the fill pipe to the exterior side of the taillight panel, right? That was my thought too.....mine is actually pretty loose. Original filler and cap Quote Share this post Link to post Share on other sites
DRASTiK 22 Report post Posted September 29, 2015 You're mounting the fill pipe to the exterior side of the taillight panel, right? Nope, I was not. Guess that answers my question, heh. Thanks! Quote Share this post Link to post Share on other sites
RPM 1,190 Report post Posted September 29, 2015 Many hands make light work, or something like that. If you think the filler tube was difficult, try removing the complete windshield wiper assembly 16 years ago and try figuring out how it goes back together today! Quote Share this post Link to post Share on other sites
69RavenConv 286 Report post Posted September 30, 2015 Nope, I was not. Guess that answers my question, heh. Thanks! I cut two gaskets out of cork and put those behind mine as a little extra help. Quote Share this post Link to post Share on other sites
DRASTiK 22 Report post Posted October 1, 2015 This was just a bonehead mistake on my part. Ah well, it happens to the best of us. Many hands make light work, or something like that. If you think the filler tube was difficult, try removing the complete windshield wiper assembly 16 years ago and try figuring out how it goes back together today! It's funny that you mention that. I'm not the one who removed those pieces either. I just finished refurbishing the wiper components and tore through all of the bins and bags of fasteners that the PO gave me. I found everything except 1 dang clip (2 are required, but I only found 1) that holds the wiper motor assembly to the arm linkage. Had to order one, so the cowl panel won't be installed for a few more days. It's coming along though. Subframe connectors are installed, drivetrain is installed, fuel system is 80% plumbed, brake, steering, and suspension systems are complete. Next is wiring harness and the dash, along with several miscellaneous parts and pieces that I'm collecting bit by bit as I find out that I need them. 1 RPM reacted to this Quote Share this post Link to post Share on other sites
JayEstes 172 Report post Posted October 2, 2015 I first reassembled mine the wrong way too (with the flange on the fuel filler tube on the inside). Gas cap rubs. It won't work right that way. Flange for the filler tube has to be on outside. Screws go thru flange and thread into the rear panel from the outside. Sounds like some other folks on here maybe need to check that the flange is on the outside of the rear panel too. Quote Share this post Link to post Share on other sites
DRASTiK 22 Report post Posted October 2, 2015 Well, in my defense, the filler neck does not fit through the hole in the new repop tail panel. That is why I assumed it installed from the inside. The flare on the bottom of the filler tube is larger than the hole that is pre-cut in the panel. Of course, the fix will simply be to enlarge the hole a bit, but in a feeble effort to recover some of my lost pride - I had to add this comment :-) 1 JayEstes reacted to this Quote Share this post Link to post Share on other sites
RPM 1,190 Report post Posted October 2, 2015 That was much more than a feeble attempt :) Quote Share this post Link to post Share on other sites
RogerC 136 Report post Posted October 2, 2015 Don't feel too bad. Mine's been apart so long it will be a miracle if I don't forget how some of it goes back together! Quote Share this post Link to post Share on other sites
RPM 1,190 Report post Posted October 3, 2015 Seeing how the hole in the rear panel wouldn"t allow the filler tube to fit thru it, you did what any other guy would do. Just checked my Jim Osborn assembly manual (which more and more seems like more of a book of drawings than an assembly manual) and I feel you're hardly to blame for any wrong doing. Quote Share this post Link to post Share on other sites
DRASTiK 22 Report post Posted October 5, 2015 Well, the tube's in there correctly now and the cap fits quite well. Only problem is that the threads on the eyelet that hold the cable to the cap are not salvageable. I'd hate to replace this original cap just because of that one little thing, but I don't see how it's serviceable. That will be a project for another day though, as right now I'm trying to get this thing running and moving on it's own power as soon as possible. Quote Share this post Link to post Share on other sites
RPM 1,190 Report post Posted October 5, 2015 Is retapping to larger threads an option? Are the screws self tapping? Quote Share this post Link to post Share on other sites
DRASTiK 22 Report post Posted October 5, 2015 I'm referring to the threaded eyelet that is attached to the twist-on gas cap. It holds the retaining wire to the cap. The eyelet inserts into the trunk and is attached by a nut from the inside. The threads on that eyelet are stripped, so the nut won't tighten properly. The filler tube itself is installed and secure. Quote Share this post Link to post Share on other sites
RPM 1,190 Report post Posted October 5, 2015 Oops. When I reread your post it all makes sense. Sorry bout that. Quote Share this post Link to post Share on other sites
Brian Conway 264 Report post Posted October 5, 2015 Don't worry about it. It seems it is more an anti-theft provision than anything else. My opinion of course. brian Quote Share this post Link to post Share on other sites
JayEstes 172 Report post Posted October 7, 2015 I've got a gas cap on our 71 that no longer has the steel cable. Does anyone repro just the cable with eyelet and bolt? A new cap entirely is like $60-$70. So, if there are options to replace the steel cable and eyelet, let us hear them. It would give Brian and myself a fix. Brian, one more thought. You might be able to use a dye on that eyelet that is stripped, and take it down to the next closest size. Maybe <shudder> a metric size? If you can get some useable threads on there, and buy a new nut for it, that might be a solution in your case. Jay Quote Share this post Link to post Share on other sites
DRASTiK 22 Report post Posted October 7, 2015 Thanks Jay, I've thought about trying to re-thread the bolt, but right now it's not high on my priority list. I'll mess with it after I get the car drivable. I'll likely just use it as something to put on my birthday or Christmas list. A new cap isn't too expensive, so it's something that can come from the kids as a gift. Maybe one of the nice billet looking ones. The car is far from concourse, so originality isn't priority 1, but I do prefer to re-use as many of the original parts as I can for nostalgia. The nut threads onto the eyelet stud, but it won't fully tighten. It just keeps spinning. It's not affecting the use of the cap itself right now. Currently, I'm weeding through a rats nest of a wiring harness. Once I get that completed, it'll be time to try and fire it up for the first time. After that, I'll move on to paint and then address the little things, like the cap. Quote Share this post Link to post Share on other sites