bartzzimpson 18 Report post Posted March 31, 2012 I have '69 Fastback with factory A/C. There are two eyeball vents in the lower dash. I would have thought the eyeballs can swivel so you can direct the air flow but they don't move at all. Are they supposed to? Can someone advise? Thanks. Quote Share this post Link to post Share on other sites
Dangstang 14 Report post Posted March 31, 2012 You are correct they move ,Mine were loose and would not stay in postion,After disaassemby I found out that the foam strip on the outside of the ball was for the most part gone.I replaced with high density type foam strip from a hard ware store and seems to be ok.I have attached a pic of the vents dissasembled with new foam.[ATTACH]10932[/ATTACH] Quote Share this post Link to post Share on other sites
bartzzimpson 18 Report post Posted March 31, 2012 Thanks for the confirmation and the pic. I guess I will attempt my own disassembly and see what happens. Quote Share this post Link to post Share on other sites
JayEstes 173 Report post Posted March 31, 2012 They are a real pain to get out. I had the dash out when I took them out, but that is a big job in itself. I am not sure if you can take these out without the whole dash coming out. Also, I found that the cylindrical steel on the back side of the louver is RIVETED to the front side. It is impossible to get the ball out without drilling these rivets out. It was easy to drill them out - but it was much harder to drill a new hole and get a screw in there to hold it all together after I had refurbished the "felt" that the ball slides against. I found that the remaining - i guess steel - rivet was very hard to drill out, and the soft pot-metal of the front side wanted to wallow out around it. I ultimately got it together, but it's not a trivial job to do. I also found that after I cleaned out the old felt, and the slot it was glued to, that I was able to use a black, stick-on, loop side velcro in that channel. It's fluffy enough to compress down when the ball vent goes in, and after using a little plastic polish on the ball, it slides against it nicely. Have fun, this little refurb will keep you busy for awhile... Quote Share this post Link to post Share on other sites
Dangstang 14 Report post Posted March 31, 2012 I agree replacing the rivets was not simple but If your completely restoring one of these cars it was just another repair.I used small metal screws in place of the rivets. Quote Share this post Link to post Share on other sites
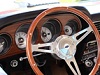
bartzzimpson 18 Report post Posted March 31, 2012 So, Classic Auto Air sell what looks like the 2 pieces that make up the vent. I have attached a picture from their catalog. $71 per side. Apart from the cost, is this a good way to go? Will it make things easier? Are there in fact only 2 pieces? Is there anything else I need? Quote Share this post Link to post Share on other sites
Dangstang 14 Report post Posted April 1, 2012 Money is King that should be all you need Quote Share this post Link to post Share on other sites
JayEstes 173 Report post Posted April 1, 2012 (edited) A little more info for you. There are basically only 2 pieces besides the ball louvre. However, there is one other part that goes over the backside of the front piece and bears against the backside of the dash. You tighten 3 screws against that, and it pulls the forward half up tightly against the dash. That's how it is final installed with no screws showing from the front. I believe though that the part number 19893 has this part with it - it shows the screws which I'm talking about. If you already have the dash out, you can refurb your own in probably 3 hrs work. The relatively high price of a replacement may or many not be worth it depending on your situation. I can tell you though that the original parts - as long as they haven't been bent or rusted - are probably still usable. The front piece might need some paint. However, if the plastic louvre is broken or cracked, just go get a new one to fix it right. To give you an idea of how it looks apart I have attached one pic showing the front and back halves after I cleaned the channel the felt goes in, then a shot of each with the black loop velcro in place. I bought a standard width stick-on velcro and split it lengthwise, putting half in the front piece and half in the back piece. Edited April 1, 2012 by JayEstes Quote Share this post Link to post Share on other sites
bartzzimpson 18 Report post Posted April 1, 2012 Thanks JayEstes, that's a big help. I have a feeling that the previous owner has somehow glued the louvres in place because they are both coincidentally stuck in the exact same orientation. At least, if I end up breaking something, I know where to source a new part. Quote Share this post Link to post Share on other sites
vettist 10 Report post Posted April 2, 2012 on my 69 vert they were loose and cracked i put a autometer watertemp guage in the hole works/looks good. Quote Share this post Link to post Share on other sites
JayEstes 173 Report post Posted April 3, 2012 Well, good luck. Sure seems like most PO's are complete boneheads doesn't it? Quote Share this post Link to post Share on other sites
bartzzimpson 18 Report post Posted September 3, 2012 So, I ended up buying the AC louvers & housing from Classic Auto Air (part numbers 2-125 and 2-126). I was just a little disappointed. The metal housing was excellent and looked like an exact match, down to the Ford logo and part number stampings on the back side. The louver itself (the eyeball piece) was acceptable but was made from thinner, rougher plastic than the original. What should have been chrome on the louvre edges was actually silver paint. The foam that makes the louver float in the housing was 3 small pads of very thin foam that were stuck on poorly. One of the foam pieces actually fell off so I disassembled both louvers and refurbished them with black stick-on velcro. I should have just repaired my originals. Quote Share this post Link to post Share on other sites
LindenBruce 27 Report post Posted September 3, 2012 That's too bad dude. I had Auto Instruments refinish my vent balls. I refinished the outer and inner housings myself using wrinkle paint on the outers. I found some foam insulation at a local home supply box house for the inner foam pad. The foam I got was a little thicker than the original, but it is open celled so it deflects and conforms to the vent ball much better. Also, I drilled and tapped the pop rivet holes to accept small machine screws then used stainless steel screws to reassembly the housings and secure then to the lower dash. They came out very nice. I think you can still find the assemblies used on e-bay. Bruce Quote Share this post Link to post Share on other sites
JayEstes 173 Report post Posted September 4, 2012 Well- even on mine the "chrome" on the louvre ball edges had to be chrome paint. I don't know how the original parts were made, but while I had these balls out, I cleaned and polished them, and the "chrome" remaining was spotty, so I used chrome paint and a tiny brush to restore it. Good job Bruce on drilling and tapping. I tried to do same, but there was some hard metal in there which made drilling and tapping tough. I ultimately got something to work, but it wasn't a-class. Good luck Chris- hope ultimately it comes out looking nice! Jay Quote Share this post Link to post Share on other sites
LindenBruce 27 Report post Posted September 4, 2012 Thank you sir!! The chroming process is vacuum metalizing I believe is what they call it. It is real chrome metal particles and yes, if you use a volt meter, you can get a resistance reading from opposite sides of the same ring of chrome. Mine came out quit well from AI. I was holding my breath with each hole I drilled and then tapped. Needless to say I was blue in the face when I was done. Bruce Quote Share this post Link to post Share on other sites
JayEstes 173 Report post Posted September 5, 2012 (edited) So Bruce- you actually got the chrome restored on the eyeball edges? Based on what you said, I'm not sure if you did it yourself, or had someone do it? I had no idea it was even possible to restore the chrome edges like that.... (and Bruce- tell me true - holding those damn oddball shape eyeball sockets while trying to drill was a bear wasn't it? I wanted to build a jig to hold em and do it on my drill press, but I didn't mess with that....) Edited September 5, 2012 by JayEstes Quote Share this post Link to post Share on other sites
LindenBruce 27 Report post Posted September 5, 2012 Yeah Jay, Auto Instruments will re-chrome plastic parts. There are several other companies doing that type of work as well just do a google search. But I used them exclusively for my parts like the dash bezels which came out better than new IMHO!!! Drilling those housings was a real stressor that for darn sure. But since I was using small screws, I only had to open the holes a tad larger than they were already from the pop rivets. Going deeper to get the tap down far enough to get some threads in there was worse actually. Just take your time and go easy. Clamping them in a vise was out of the question. Bruce Quote Share this post Link to post Share on other sites
Pakrat 1,043 Report post Posted September 5, 2012 I don't have AC so hard for me to say for sure but I think before I assumed they were glued in by the PO or started to take it all apart I would have tried to shoot some deep creep or something in there and see if they loosened up first. I would also be returning those poorly made louvers if I paid good money for a shotty reproduction. Quote Share this post Link to post Share on other sites