
Rich Ackermann
-
Content Count
362 -
Joined
-
Last visited
-
Days Won
30
Everything posted by Rich Ackermann
-
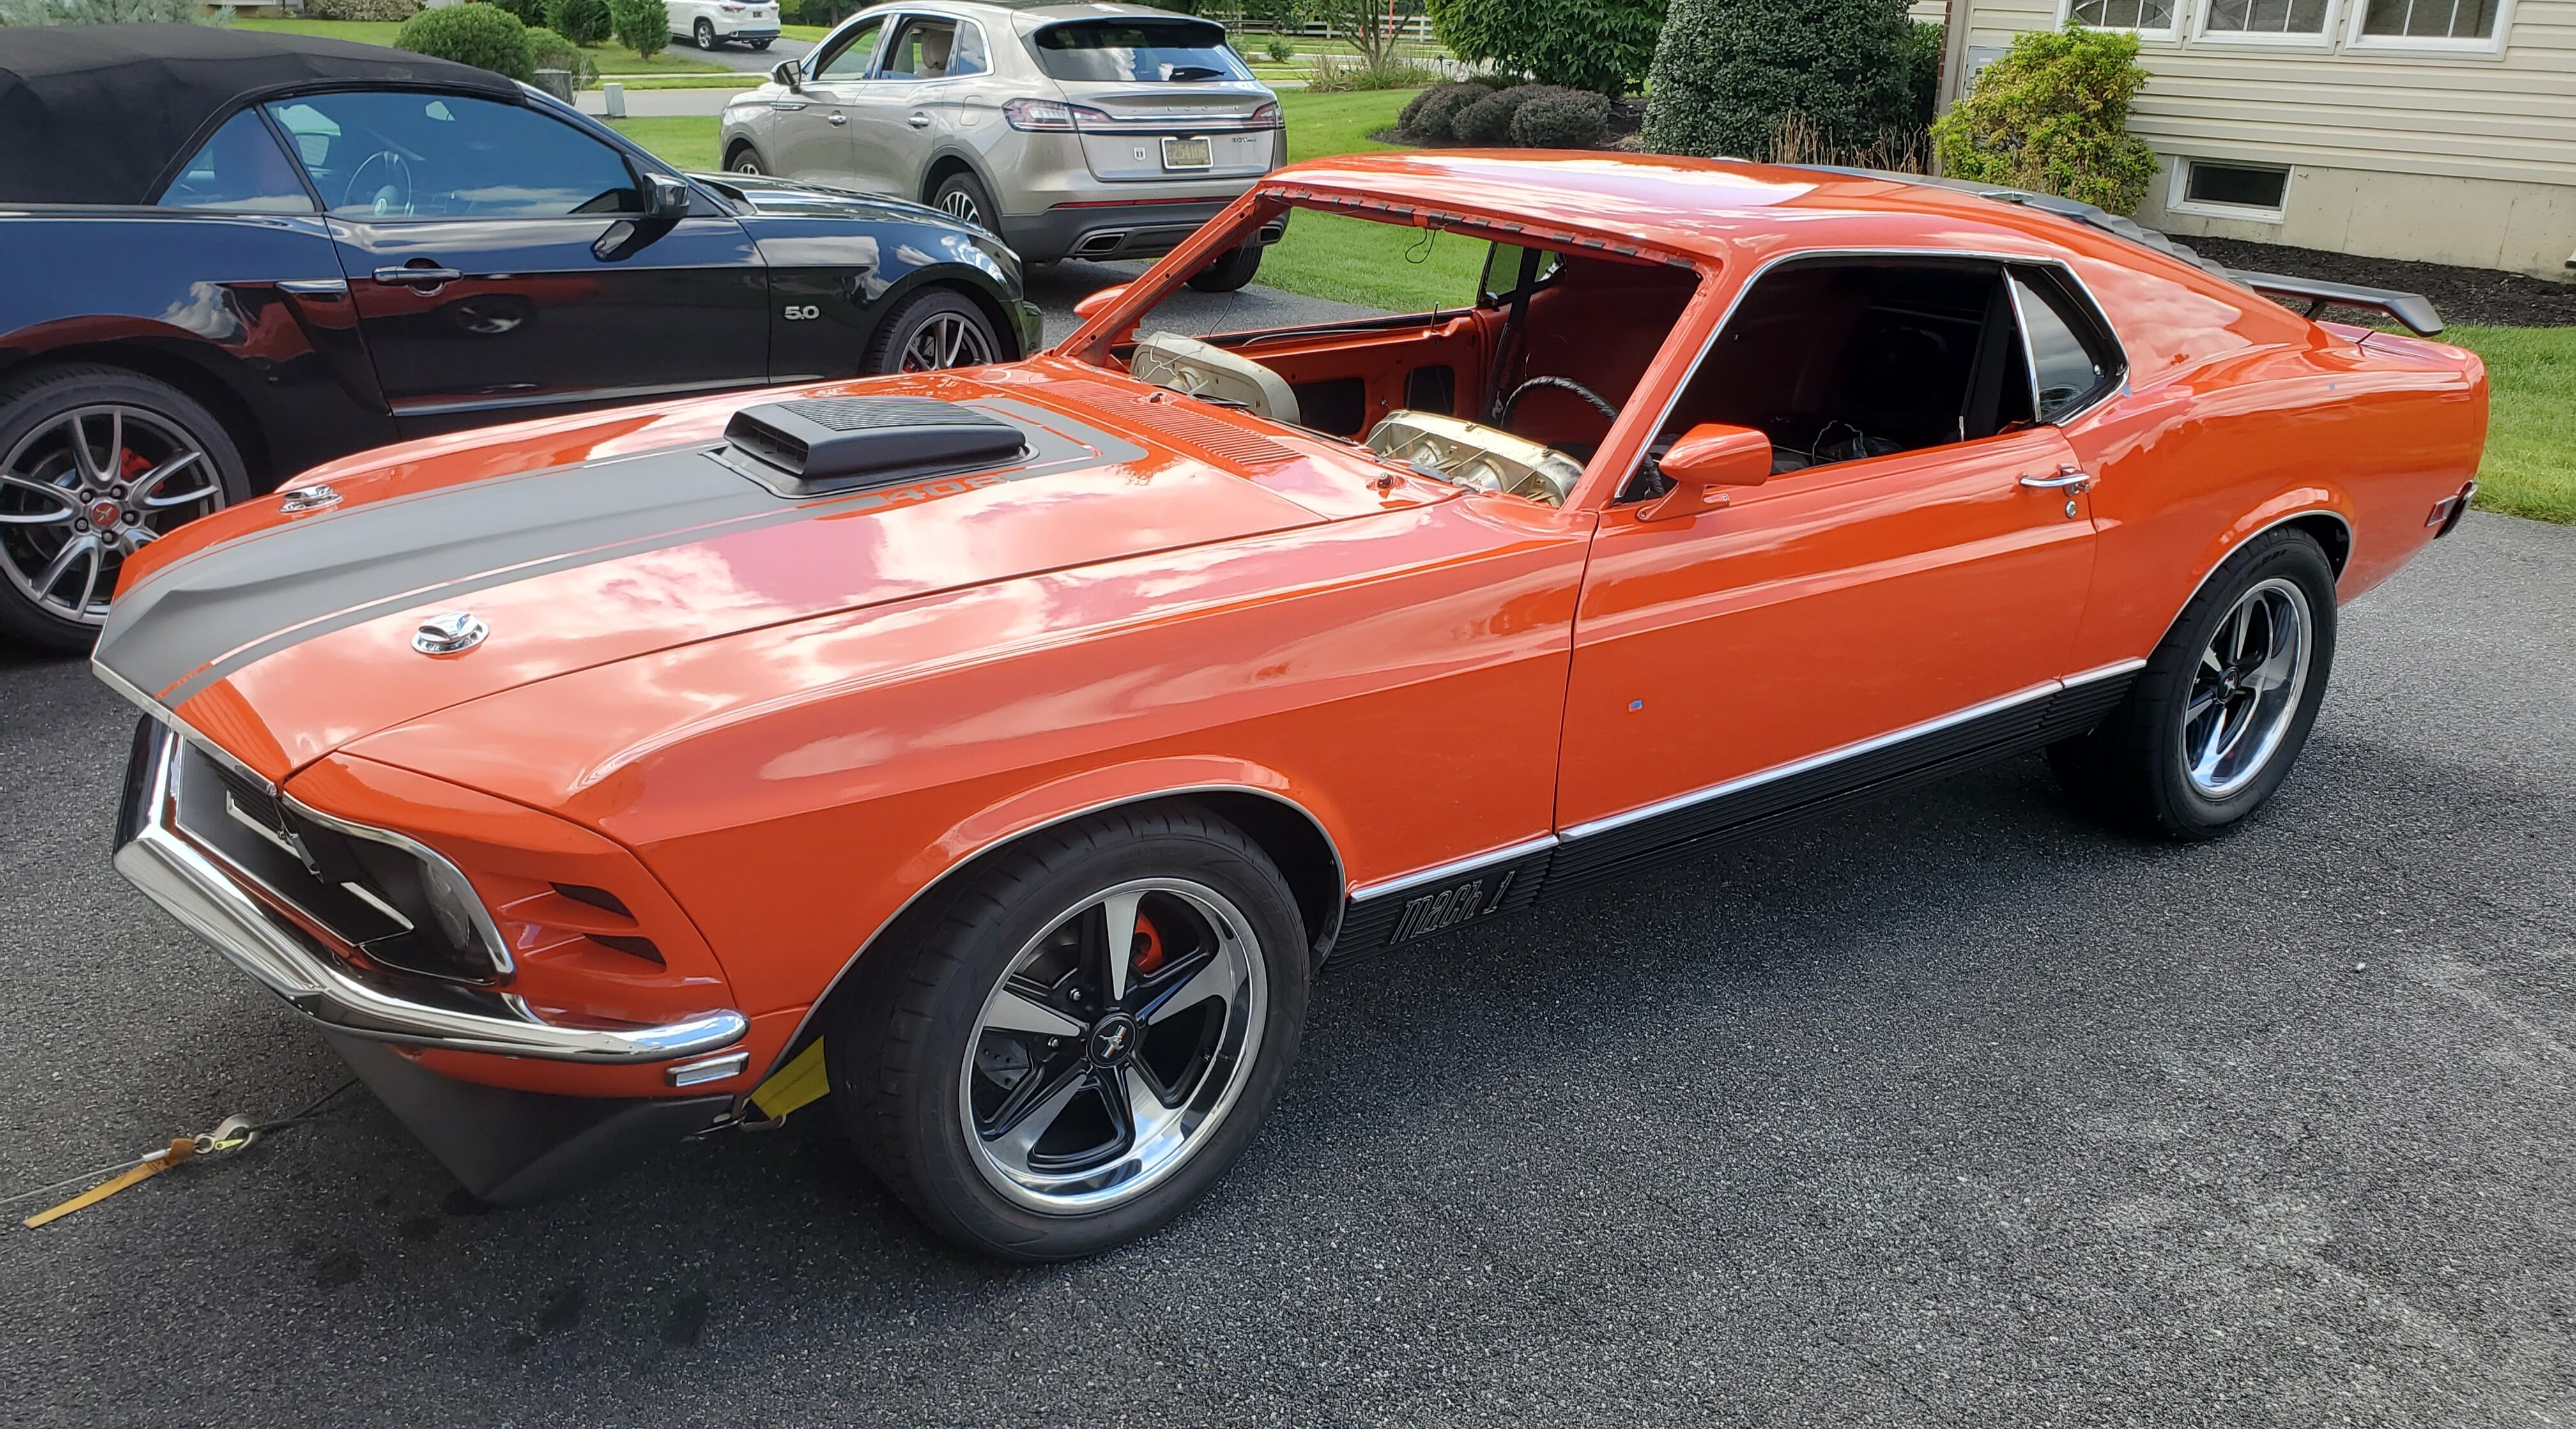
My new 1970 M-Code Mach 1 Project
Rich Ackermann replied to Rich Ackermann's topic in Project Progress Forum
Well, I drop the car off at the painter on Monday. They are going to do a few spray outs. Going threw a little separation anxiety :-) Can't wait to see her all dressed up in Calypso Coral. When I get her back, I'll start on the steering and suspension. -
My new 1970 M-Code Mach 1 Project
Rich Ackermann replied to Rich Ackermann's topic in Project Progress Forum
I transition from the engine bay black to the Lizard Skin and red epoxy right below the firewall where the vertical section of the firewall turns back towards the floor pan (the section called the foot board). In other words there is no Lizard Skin on the vertical section of the firewall. -
My new 1970 M-Code Mach 1 Project
Rich Ackermann replied to Rich Ackermann's topic in Project Progress Forum
I am guessing it will have a similar sheen like the Red epoxy, since its the same product just a different color. If so, I think it may be a bit shinier than the Eastwood/factory black, but I am only extrapolating from what I see with the Red epoxy. For this reason, I decided to just use the rest of my Red epoxy on the engine bay and then Eastwood chassis black over it. Using the rattle cans makes it easy to touch up later if need be. I also lightly sprayed a rattle can red oxide primer over some of the undercarriage where the red would remain visible to cut down the sheen from the red epoxy. Just knowing that I have the impermeable epoxy protecting it underneath gives me comfort. -
My new 1970 M-Code Mach 1 Project
Rich Ackermann replied to Rich Ackermann's topic in Project Progress Forum
I like SPI Epoxy, its good stuff. I don't think you will be disappointed with it. As a matter of fact, if you look at some of the pictures in my post you can see I sprayed the entire undercarriage and the engine bay with SPI Epoxy Red. My only complaint about the red is it is a bit shinier than what Ford originally used on our cars. I bought a gallon of it and it went a long way. So I can imagine the black epoxy would be great as well. I like the finish the Eastwood Chassis black has and it hold ups real well. I sprayed it over the SPI Epoxy Red on the engine bay. Not sure anything is totally impermeable to brake fluid. I also used SPI's 2K gray primer, it was very easy to apply and sand. -
My new 1970 M-Code Mach 1 Project
Rich Ackermann replied to Rich Ackermann's topic in Project Progress Forum
Thanks Much! More to come... -
My new 1970 M-Code Mach 1 Project
Rich Ackermann replied to Rich Ackermann's topic in Project Progress Forum
More pics. -
My new 1970 M-Code Mach 1 Project
Rich Ackermann replied to Rich Ackermann's topic in Project Progress Forum
Going to paint on Monday! Well the time is finally arrived! Applied the Lizard Skin and painted the engine compartment Eastwood Chassis Black. Can't wait to see it get a nice coat of Calypso Coral. I still need to touch up the red oxide just a bit underneath. -
My new 1970 M-Code Mach 1 Project
Rich Ackermann replied to Rich Ackermann's topic in Project Progress Forum
I like the tinman subs. They look somewhat stock. Also they were easy to weld a tab to them and bolt (2 bolts on each side) it thru the floor and the one piece floor pan to add some more rigidity to the chassis. I used raptor bedliner on the inside of the floors, wheel wells, quarters, and cowl and on the outside of the wheel wells and fender aprons. I painted the undercarriage with SPI epoxy red primer. Next I am going to spray the inside the doors and front part of the quarters and wheel wells, as well as, selected undercarriage areas and with the lizard skin sound deadner. -
1970 Mustang Exterior Lights (turn signals)
Rich Ackermann replied to Mach1 Driver's topic in How to's
Got it. Thanks for the further explanation. Maybe a thin flexible sheet of diffusing material that is red tinted would solve both the transparency and light hotspot/orange color issue? I have seen a product callled "Rosco lux Red Cyc Silk, 20x24" Sheet of Light Diffusing Material". -
1970 Mustang Exterior Lights (turn signals)
Rich Ackermann replied to Mach1 Driver's topic in How to's
I always thought the taillight lens are already designed to defuse the bulb light. I dont think the stencil film will help any more than the stock lens. I know white or clear led bulbs make a red lens glow orange. I doubt the stencil will fix the color issue, but you can use red leds to compensate for this. Have you looked at what these folks have to offer?.... I have heard good things about their kits. I plan on trying them when I am ready. https://www.hipoparts.com -
My new 1970 M-Code Mach 1 Project
Rich Ackermann replied to Rich Ackermann's topic in Project Progress Forum
Making good progress. Done with welding sheetmetal and finished fitting panels. Painted undercarriage with a red Epoxy primer. Going to spray Lizard skin sound deadener on the floor pans then start block sanding. -
My new 1970 M-Code Mach 1 Project
Rich Ackermann replied to Rich Ackermann's topic in Project Progress Forum
Well, I am 5' 7" so I dont usually have an issue. I am many months away from paint and installing the drive train, and then I'll do the interior. I'll let you know when I get to that point, but thanks for the heads-up! Pardon the pun. -
Steering Column Plus Rack n pinion set up
Rich Ackermann replied to 70Mach1rb's topic in 1969-70 Technical Forum
Check with CPP they have steering conversion kits. Also Borgesson has steering conversion kits. As alternative to rack N pinion, you might consider a conversion kit that is like the stock 71 and later years which is way better than the stock power steering used in 69-70. Not sure about an aftermarket column. A stock 70 column is completely different than a 69 column (ei 69 ignition key on dash panel), but its the same as a cougar of the same year. For a stock column try west coast classic cougar they will have it, may even one with a tilt. -
My new 1970 M-Code Mach 1 Project
Rich Ackermann replied to Rich Ackermann's topic in Project Progress Forum
Very informative. Thanks -
My new 1970 M-Code Mach 1 Project
Rich Ackermann replied to Rich Ackermann's topic in Project Progress Forum
This one is for a torino. It looks different on the top where the rubber mounts. Mine is centered and bolts on, this one is offset. -
My new 1970 M-Code Mach 1 Project
Rich Ackermann replied to Rich Ackermann's topic in Project Progress Forum
Also have an original one on my 73 Mustang vert. I thought all 69-73 mustangs had them. -
My new 1970 M-Code Mach 1 Project
Rich Ackermann replied to Rich Ackermann's topic in Project Progress Forum
It was on the car. I am sure it was factory as was the original 3.25 open 9" rear. I had the Yukon nodular case pinion support machined so it will fit on it. -
My new 1970 M-Code Mach 1 Project
Rich Ackermann replied to Rich Ackermann's topic in Project Progress Forum
In the meantime I had the rear center section built... A Yukon case with a Eaton True Trac and 3.70 gears. I stayed with the 28 spline axles. -
My new 1970 M-Code Mach 1 Project
Rich Ackermann replied to Rich Ackermann's topic in Project Progress Forum
Tackled to part that scared me more than anything I done so far... Fitting the rear quarter panel skins. Decided to use the Dyancorn panel as is, (I did trim the front top edge under the quarter window) and trim the original quarter to meet it. I bought a HFT air flange tool and flanged the original quarter edge. You can see the flanged edge in the previous picture. Fit the panel to the flanged edge and screwed the panel down all the way around.... to the door jamb, wheel well lip, drop down, rear tail panel. The panel laid nice and flush into the flange on top. I checked the fit against the end caps. So far so good... what relief. Now the next worry....to stitch weld it to the original quarter. -
My new 1970 M-Code Mach 1 Project
Rich Ackermann replied to Rich Ackermann's topic in Project Progress Forum
Floor and one piece seat support is in and bolted up. I applied a coat of Raptor bed liner. Yes I chose "Caution Orange" instead of black for the floors. My thinking is I will lightly cover it again with the body color Calypso Coral and orange would be easier than covering black. Sure is bright! Looks more like that late sixties GM Hugger Orange. I went with Raptor in black in and around the wheel wells and outside of the front aprons. -
My new 1970 M-Code Mach 1 Project
Rich Ackermann replied to Rich Ackermann's topic in Project Progress Forum
It's been awhile since I updated the project forum. Been making good progress, so here goes... Modified the console since I plan on adding Shelby style console mounted Oil and alt gauges and power windows. Also cut the back off the rear console ash tray and glued a dual 12 volt USB port inside. Getting down to business.... Chassis reinforcement plans... One piece seat support pan, Shock tower and cross member plates, cowl to export brace. Last pic show the TinMan sub-frame connectors in place. I welded plates on each connector as I plan to bolt them thru the floor pan and back edge of the one piece seat support pan. Hoping it adds some more chassis rigidity. Will it? Not sure, but I figured it can't hurt and it might just help. -
Where to get toe pans
Rich Ackermann replied to BoulevardofRustedDreams's topic in 1969-70 Technical Forum
I used the complete firewall assembly for 1969-1970 CJ's Part Number: M139. Turned I did not need to replace the entire firewall so I cut the passenger and drivers side to panels out of it. They fit perfectly. -
Need Parking Brake Bracket Location Dimensions
Rich Ackermann replied to Rich Ackermann's topic in 1969-70 Technical Forum
Perfect! Thank you! -
Need Parking Brake Bracket Location Dimensions
Rich Ackermann replied to Rich Ackermann's topic in 1969-70 Technical Forum
Thank you.

