

flight96
-
Content Count
627 -
Joined
-
Last visited
-
Days Won
1
Everything posted by flight96
-

My 69 Vert Project...Let The Games Begin
flight96 replied to flight96's topic in Project Progress Forum
Well I didn't get a chance to work on the 1/4 yesterday, I thought I would get the back pan,under the back seat, fixed first. And I had to go to the family diner for an Easter feast. So todays project is the 1/4. I did get the valve covers on the engine though and Its looking great !! Can't wait to hear it run !! -
Heres a pic I took while doing my steering wheel mod. Is the plastic piece in the pic the one your looking for ? If so I may still have my old one....
-
Heres a pic I took while doing my steering wheel mod. Is the plastic piece in the pic the one your looking for ? If so I may still have my old one....
-
My 69 Vert Project...Let The Games Begin
flight96 replied to flight96's topic in Project Progress Forum
And I had a visitor at the shop today...A Peacock !!! How weird is that !! -
My 69 Vert Project...Let The Games Begin
flight96 replied to flight96's topic in Project Progress Forum
And I had a visitor at the shop today...A Peacock !!! How weird is that !! -
My 69 Vert Project...Let The Games Begin
flight96 replied to flight96's topic in Project Progress Forum
Clamshells and 1/4 panel dry fit....Tomorrow they get welded.... -
My 69 Vert Project...Let The Games Begin
flight96 replied to flight96's topic in Project Progress Forum
Clamshells and 1/4 panel dry fit....Tomorrow they get welded.... -
My 69 Vert Project...Let The Games Begin
flight96 replied to flight96's topic in Project Progress Forum
Getting serious now... :shifty:... I have the new leaf spring and shock in on the drivers side. I have the frame rail all stripped, etch primed and painted. And I have the LH trunk floor welded in. I also have the clamshells in place and I hung the 1/4 panel just to check the fit. It seems to be OK, there are a few minor issues. The 1/4 skins ya buy are actually for a coup so there is some mods that need to be done. But all things considered the parts all seem to fit together nicely. I hope to have it all welded up tomorrow. I also hope to have the valve covers on the motor tomorrow. -
So I have the engine painted and I am picking up the valve covers today (See Pics...). I want to get the covers on so there is no chance of moisture getting on the springs. My questions are... * I painted the complete block to keep it sealed, do I need to remove the paint where the gaskets are gonna go ?? (ie water pump, headers oil filter...) * The machine shop has some 'oil' (For lack of a better word) on the valve springs. Should I put some more oil on them before I put on the valve covers ? Just to keep them lubed ??? * I have a new Powerbond Balancer, can you paint the balancer? I want to paint it black with white timing markings . The engine won't be going back in for 4 to 6 weeks so I want to keep it protected. Thanks for your responses !!!
-
My 69 Vert Project...Let The Games Begin
flight96 replied to flight96's topic in Project Progress Forum
It didn't have the drain plug. It looks like it was replaced at some point. It had the usual '69 stang' written on it in yellow paint pen...The kind the wrecking yards like to use. And yes Pak, I believe your right....It's probably a good thing to get a new tank and sending unit. As for the blue, I thought it looked a little light as well, however it darkened up a bit after it dried. The pics were taken as soon as I sprayed it. As for the car, I started back on the LH 1/4 panel and tail light panel. I fixed the rust on the piece that the 1/4 and tail light panel meet up to. I am replacing the rear springs and shocks so I have decided to do that while I have it all open. So starting tonight I am hoping to get that job started. Any advice on this ???? Anything I should be aware of ????? I will post pics when I have them. -
My 69 Vert Project...Let The Games Begin
flight96 replied to flight96's topic in Project Progress Forum
Yes....Sweet indeed, until you find out that the tank is being held together with bubble gum !!! As it turns out, there ia a hole in the tank that someone plugged up with who knows what....So now a new gas tank is on order !!!! piss me off !!! AND, as if that weren't enough, I'm gonna nee a new tail light panel.....:surrender:.....Oh well...Ya gotta love this hobby !!!! On the good side, I painted the motor and the trans should be done this week. I have 2 weeks off in April that Im dedicating strictly to the car...My time line is a bit off and my budget is blown to crap but hey....It will be very nice when its done.. -
I went with the Laurel Mountain suspension kit and it worked great. I did however install the Randall's Rack and pinion setup. But the Kit I got from Laurel Mountain was easy to set up. I am just about to do the rears but the front was easy.
-
Wanting: 1969 or 1970 fastback mustang
flight96 replied to Fastbackmustang's topic in Cars for Sale / Wanted
I have owned every generation of Mustang ever made. To me the 69/70 is the nicest looking of the cars. But they were never made particularly well...The same could be said for the Camaro's... They were cheap cars back in the day. Because of that they have issues....Floor pans were never rust proofed, inner fenders were prone to rusting...Its just the way they were back then. They were very basic cars. That's what makes them so easy to work on. When ya open the hood on a 69 you can actually see the engine. It doesn't look like a plumber convention moved in under there. That's the beauty of these cars. They will nickel and dime you to death for a couple of reasons... (1) Their old and things break....Believe me, I'm old...and thing are breaking on ME !!! (2) Their fun to play with....There's nothing like a new toy for the Old Stang. Like Pak said earlier, this is a hobby. Any hobby is expensive. But the payoff is great !! Driving that car down the road on a mid summers night, hearing the rumble of that V8, and seeing the heads turn to look at the classic Stang is a great feeling. And knowing your built that car makes it even better !! Oh, and one last thing....The chicks (Young and older) love these old Muscle cars !! Oh....As for the question about the shocks and the electric bill.... Definatley the shocks. The wife can pay the power bill !!:tongue: -
My 69 Vert Project...Let The Games Begin
flight96 replied to flight96's topic in Project Progress Forum
Ahhh...The place I work at does tank cleaning so its a freebie....:whistling: -
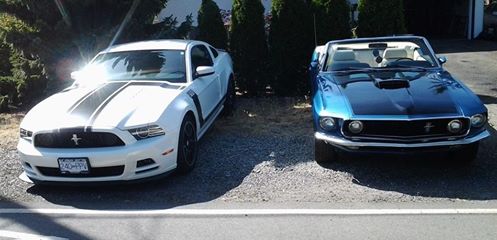
Very nice !! I had a 70 Boss 302 when I was 17....Man I wish I still had that car !! Be sure to keep that ride man !!!
-
My 69 Vert Project...Let The Games Begin
flight96 replied to flight96's topic in Project Progress Forum
Oh...I look forward to beating them down !! A little frustration venting !!! I figured that since I have the gas tank out I may as well get it cleaned. After its steam cleaned I should probably re-seal the tank. Does anyone have any suggestions for a good gas tank sealer ? -
OK... I gave up on trying to pull the pins on the rams...almost impossible....So what I did was disconnect the wire that goes to the power top switch on the dash. Then I got my battery charger and hooked up the positive clamp to that wire and the ground clamp to the body. I set the charger to 12v/2amp and it worked perfectly !!
-
My 69 Vert Project...Let The Games Begin
flight96 replied to flight96's topic in Project Progress Forum
Well I have almost all the rust cut out on the drivers side. I still have to cut the trunk floor out but I want to wait until I have the new one before I cut it. In the mean time I have dry fit the inner wheel house and it fits quit nicely. Hopefully the trunk piece shows up soon. I'm getting anxious to see the 1/4 panel back on... -
OK...I must be brain dead...how, on Gods green earth.... do ya get at the Clevis pin ?? Its behind the brace ? It's impossible to get at it from the top.....:helpsmilie:
-
Are we talking about the cyliders along each side ? If so, how do ya access them to remove the tops ? They are behind the side brackets.
-
My 69 Vert Project...Let The Games Begin
flight96 replied to flight96's topic in Project Progress Forum
HAHAHAHA....Ya...That would be me....My neighbors REALLY love that tool !! It works great for a quick cut....My kingdom for a plasma cutter !! As for the housings, I was just gonna replace the outer one and repair the inner, but after more cutting (With a zip wheel), I will definately have to replace both of them..... :-( -
Ahhh...OK, I will have a look. My trouble light burnt out on me last night so I couldn't really see into the well where the rams are. I will have a closer look tonight.
-
????