
RPM
-
Content Count
6,454 -
Joined
-
Last visited
-
Days Won
240
Posts posted by RPM
-
-
The rear stuff looks well made. Good luck.
Bob
-
I'll try the moronic way of posting pics with a link to my photobucket. Is it possible to caption the photos or add text?
http://s782.photobucket.com/user/robertpmcdougal/library/?sort=3&page=1
Got the brake lines pretty much installed, may have to redo the lines out of the matter cylinder of they're too close to the headers. Need to attach some more line clips and put some brake fluid in the system.
Bob
-
Hmm...it figures, I was looking for info on how to install the unique brake line clips and came across the exact pics I was originally searching for. Sheesh. Seems I'm always a day late and a dollar short.
http://www.1969stang.com/mustang/forum/showthread.php?t=12691
http://69mustangrestoration.blogspot...placement.html
Bob
-
Hey Tony, just out of curiosity where are you located that requires stock radio for collector plates status?
Bob
-
WOW!!!! that is simply beautiful. I noticed the lips around the holes for the gauges sparkles is that chrome or did you paint it because mine is a pukey beige . Is mine missing something?Very nice work.
Ditto! B u tiful.
Bob
-
Thanks all y'all. You guys are da best! Hope I can repay you someday.
Bob
-
I think the cowl/firewall tube bracing is an excellent idea, and really needed with the export brace. Especially so since all those panels are around 19ga. I bet you're loving those clecos by now. Nice work, as usual.
Bob
-
That would be cool B. Thanks for your time.
Bob
-
Thanks Wycked, yes it does help. Any chance you might have a pic of where it passes the trans crossmenmber? If not, no worries as my mach is far from stock. Nice work you've done on you car.
Bob
-
C'mon maannn... Somebody's got to have it :) The body assembly manual helps some, and shows the rear line mounts at two spots on the trans x member, but the pics really help. Kinda wordy just to bump it up eh?
Bob
-
Sorry about the brain hurt :biggrin: but I probably should round out things by showing the formula for half elliptic leaf springs. That would be:S = 1E7 * (L * W * T)^3 / LL^3
Where S = spring rate in psi
L = number of leaves
W = leaf width
T = leaf thickness
LL = leaf length
Just basic physics. Pay no attention to anyone who tells you there are online tools to do the calcs.:clown:
? Are you kidding me? We're gear heads, not engineers! Jk, never knew there was a formula for it. But then again I was a criminology major, not a math major. Thanks.
Bob
-
From the department of redundancy department, can someone direct me to the thread showing the routing and connection points please? I can see the thread and pics in my minds eye. For some reason the search window closes when I start to type. I bookmarked it on a computer which bit the dust. I now email important hyperlinks to myself. Thanks guys.
Bob
-
I would only worry about the door brace if you were going to replace the floors/rockers/frame rails. If the doors are providing structural support you've got some major problems. I made my rotisserie back in the 90's before I saw any pics on the internet. The front mounted the usual way to the front bumper threaded holes in the frame rails. I mounted the rear to the four bumper mount holes in the rear panel. If I were to build it today, I would probably mount to the rear rails. However I have had the body on the rotisserie several times for long periods without issue.
Bob
-
Gotta keep the KISS theory in check.
Ha! I gotta remind myself about the kiss principal every day!
Bob
-
So... I guess Vintage Air now makes a unit for the 69? Haven't checked in a few years, but last I checked 68 was the newest year.
Well, just checked for myself. Great, mas dinero.
Bob
-
Wow, what a project, and progress! What a wonderful thing to do for and with your father. I hope for the best for you both. I pity the fool who rags on you for putting in a factory available and highly desired 428. Very nice work so far, especially the jig/ fixture fab. Good luck, and welcome (6 months late) to the forum.
Bob
-
Welcome AW! Looks like a good starting point. Post the info from the data plate on the divers door jamb and we'll help you let you know most of what the car came with.
Bob
-
Your front sits pretty high parked. I'd start by cutting half a coil till you don't have the space between the top of the tire, and the apex of the wheel opening. Shocks dampen the quick rise and fall of the springs. Yours may be worn out. If you think they need replaced or can't remember the last time you replaced them, or you haven't replaced them since you bought the car, I'd replace them. Shocks need replacing if they're leaking, or they keep bouncing.
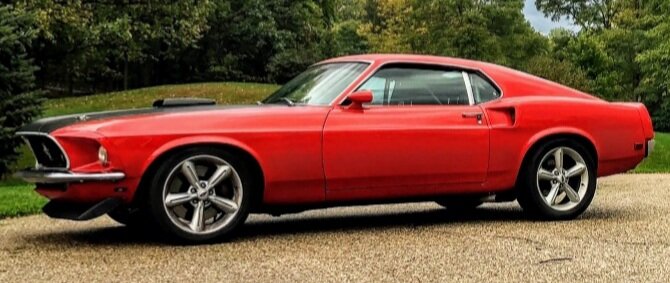
Nice looking car btw.
Bob
-
I used neither lator. I made my own out of I think 14 ga sheet I had sheared. I used Shaun's as a guide. Had about $50 in materials compared to the price of buying them. I suppose no floor would ease the pain of installation. Every time I post I try to add pics, don't know how I lucked out last nite. Shoulda kept posting pics.
-
When I read about Shaun's convertible inner rocker install over at VMF, I was hooked and decided to do it along with the one piece seat riser. I had already removed the stock seat risers because the NPD Ventura phone sales guy said the conv and sportsroof were the same height. This after I axed him to compare the two. I found out otherwise when I went to pick them up. You don't need a tape measure when they're side by side. Because the conv seat riser raises the seats by one inch, I figured I could just splice in the center hump piece which goes over the tunnel. After measuring twice I cut into it. A the center piece is 1" higher than the stock risers, I made several relief cuts in it and bent down the hump ends and tacked them. Surprisingly I only had to add one small filler wedge piece on each side.
The inner conv rockers were fairly easy to install, just time consuming. I can't imagine doing them without a rotisserie. The fun part was welding a zillion plug and tack welds.
Crap, shoulda uploaded all my pics when I had the chance :(
Bob
-
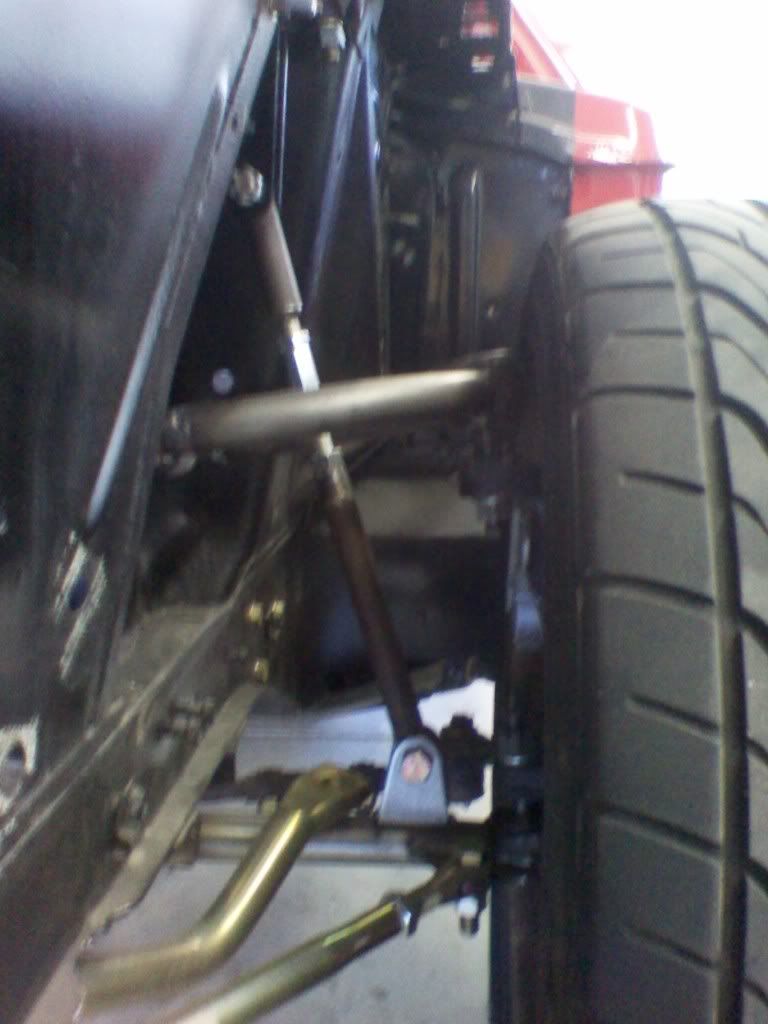
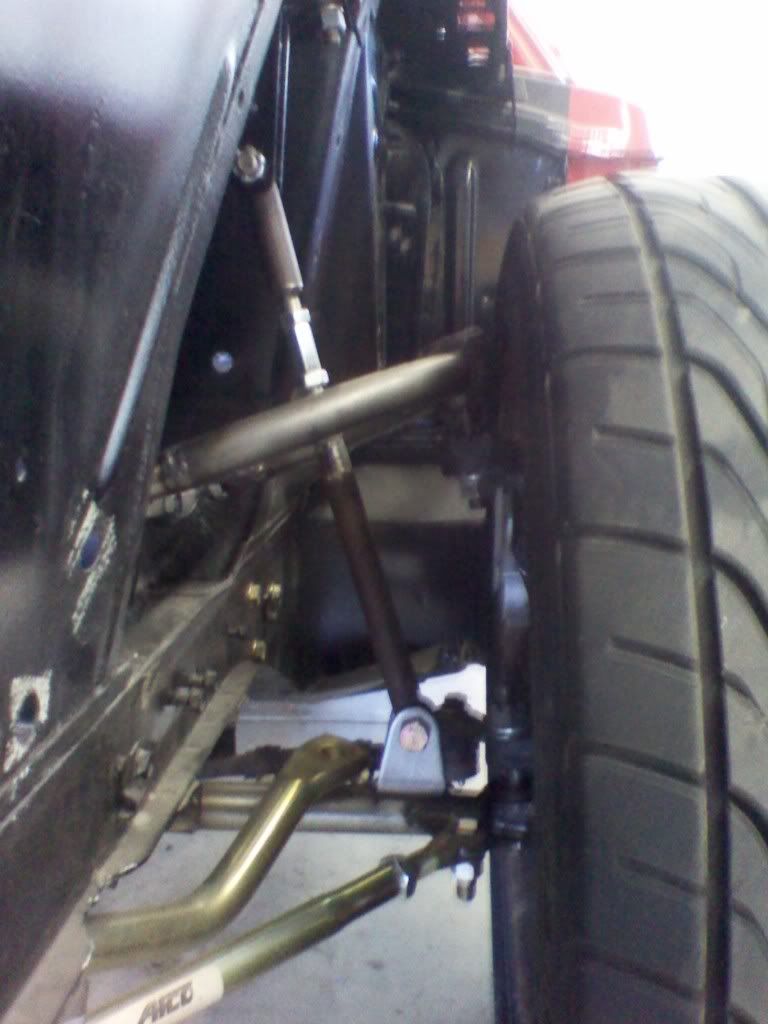
Let me see if I've got this pic thingy fingered out again.
First pic should be upper control arm dropped 1", and 2nd pic is upper arm dropped 2". Pro Motorsports said the 69 could take up to 2" of drop. I checked the bump steer for both and the 1" worked out best. At full compression
(2-1/2") it was 1/16" toe out. The rest of the suspension travel was dead nuts on. These pics were from over a year ago. If it works for me, I've got a few more pics to post.
-
Start with the passenger’s side cross member channel bracket with the panard bar bracket welded on. Slide channel over the rail and push forward until the bracket touches the axle snubber flange. See arrow.He doesn't have an axle snubber flange from which to measure.
Bob
-
Heck, make your own. If I can, anybody can. When I was 21 I made a set to fit 65 Mustang Kelsey- Hayes to fit my 56 F-100. About a year ago I made a set to fit 13" Cobra disc's for my 69 Mach.
Bob
-
Is it already installed and the edges are peeling up? If so, I'd use the rubber cement that has a brush lid. But I'd try using a q- tip to apply the cement.
Bob


starting sheet metal replacement
in 1969-70 Technical Forum
Posted · Report reply
Hey we have a Lichfeldian on board! Welcome Silverfox, and we need pics of your Mustang!
Bob