69gmachine 15 Report post Posted July 19, 2008 I'm adding some of the Shelby options to my Mach 1 and need more info on some of the little details. 1) what two lights are on the lower dash between the ignition switch and wipers? Pics would be greatly appreciated. Were they always the same 2 lights or did it depend on what options were ordered? 2) I've seen several different gauges on e-bay claiming to be from a '69 Shelby. Some have 80 psi oil gauges some have 100. Some have a red pointer and some have a white pointer. Again pics of original gauges would be nice. 3) I'm adding a low fuel light to my car. So far I have the sending unit, the signal wire that runs from the sending unit to up under the dash on the driver's side, and the relay. Apparently the main under dash harness has the wires that connect to the trunk feeder, the relay and the light. I will probably have to cut these out of a Cougar under dash harness, but if anyone has pictures of what it should look like I would greatly appreciate it. Thanks in advance for any help anyone can give! Quote Share this post Link to post Share on other sites
69gmachine 15 Report post Posted July 19, 2008 I'm adding some of the Shelby options to my Mach 1 and need more info on some of the little details. 1) what two lights are on the lower dash between the ignition switch and wipers? Pics would be greatly appreciated. Were they always the same 2 lights or did it depend on what options were ordered? 2) I've seen several different gauges on e-bay claiming to be from a '69 Shelby. Some have 80 psi oil gauges some have 100. Some have a red pointer and some have a white pointer. Again pics of original gauges would be nice. 3) I'm adding a low fuel light to my car. So far I have the sending unit, the signal wire that runs from the sending unit to up under the dash on the driver's side, and the relay. Apparently the main under dash harness has the wires that connect to the trunk feeder, the relay and the light. I will probably have to cut these out of a Cougar under dash harness, but if anyone has pictures of what it should look like I would greatly appreciate it. Thanks in advance for any help anyone can give! Quote Share this post Link to post Share on other sites
bnickel 10,004 Report post Posted July 20, 2008 what's up G-machine? i can help you with some of this. 1. the 2 lights you are referring to are the park brake warning and seat belt lights, park brake will be on bottom and belts will be on top. 2. the correct gauges for a 69 shelby would be Stewart Warner and i'm pretty sure the oil pressure was 80 PSI. 3. even though i now own a 69 cougar i can't help you with that one since it doesn't have the low fuel option, however you should check out www.westcoastclassiccougar.com for the rest of the parts you need and they also have a new kit that replaces everything you have so far and is more reliable. most of the cougar guys are upgrading to this one. Quote Share this post Link to post Share on other sites
bnickel 10,004 Report post Posted July 20, 2008 what's up G-machine? i can help you with some of this. 1. the 2 lights you are referring to are the park brake warning and seat belt lights, park brake will be on bottom and belts will be on top. 2. the correct gauges for a 69 shelby would be Stewart Warner and i'm pretty sure the oil pressure was 80 PSI. 3. even though i now own a 69 cougar i can't help you with that one since it doesn't have the low fuel option, however you should check out www.westcoastclassiccougar.com for the rest of the parts you need and they also have a new kit that replaces everything you have so far and is more reliable. most of the cougar guys are upgrading to this one. Quote Share this post Link to post Share on other sites
69gmachine 15 Report post Posted July 21, 2008 what's up G-machine? i can help you with some of this. 1. the 2 lights you are referring to are the park brake warning and seat belt lights, park brake will be on bottom and belts will be on top. 2. the correct gauges for a 69 shelby would be Stewart Warner and i'm pretty sure the oil pressure was 80 PSI. 3. even though i now own a 69 cougar i can't help you with that one since it doesn't have the low fuel option, however you should check out www.westcoastclassiccougar.com for the rest of the parts you need and they also have a new kit that replaces everything you have so far and is more reliable. most of the cougar guys are upgrading to this one. Thanks for the reply bnickel. I searched all over the web for pictures and none of them had enough detail to tell which lights they were. I think the 80 psi gauge is correct as well, and I'm pretty sure it has a red pointer, but I would like to see a pic of an original so I can compare it to what comes up for sale from time to time. I've bought a couple of items from West Coast Classic Cougars already. I wish I'd known they made a replacement kit for the low fuel option before I invested so much time and effort in collecting the pieces I have so far! I even rebuilt an original sending unit using the guts out of a new one from CJ Pony Parts. Thanks for the info, it may be easier to give up on what I have so far and just use their kit. Going to check it out now... Quote Share this post Link to post Share on other sites
69gmachine 15 Report post Posted July 21, 2008 what's up G-machine? i can help you with some of this. 1. the 2 lights you are referring to are the park brake warning and seat belt lights, park brake will be on bottom and belts will be on top. 2. the correct gauges for a 69 shelby would be Stewart Warner and i'm pretty sure the oil pressure was 80 PSI. 3. even though i now own a 69 cougar i can't help you with that one since it doesn't have the low fuel option, however you should check out www.westcoastclassiccougar.com for the rest of the parts you need and they also have a new kit that replaces everything you have so far and is more reliable. most of the cougar guys are upgrading to this one. Thanks for the reply bnickel. I searched all over the web for pictures and none of them had enough detail to tell which lights they were. I think the 80 psi gauge is correct as well, and I'm pretty sure it has a red pointer, but I would like to see a pic of an original so I can compare it to what comes up for sale from time to time. I've bought a couple of items from West Coast Classic Cougars already. I wish I'd known they made a replacement kit for the low fuel option before I invested so much time and effort in collecting the pieces I have so far! I even rebuilt an original sending unit using the guts out of a new one from CJ Pony Parts. Thanks for the info, it may be easier to give up on what I have so far and just use their kit. Going to check it out now... Quote Share this post Link to post Share on other sites
69gmachine 15 Report post Posted July 21, 2008 New Electronic Low Fuel Indicator for the 1967, 1968, 1969 & 1970 Mercury Cougar. Wish Your Low Fuel Light Worked? Part #: ELFI Price:$109.00 Option(s): Year: Description: This solid state unit replaces the need for the thermistor located on the fuel sending unit. The thermistor activated your "low fuel" light when the fuel level receded below its mounting position on the fuel pick up tube. This new unit illuminates your low fuel light by sensing the position of the needle on your fuel gauge. You no longer "have" to use the three prong low fuel type of sending unit as this unit works with both the one and three pronged sending unit. Great for the person who cannot stand to have non functioning options in his classic and far superior to the thermistor system that burns up if you happen to run your car low on fuel on a regular basis. Comes with very detailed instructions on how to install on the backside of your instrument cluster and a three year warranty. I just checked out the Classic Cougar website. What they offer is a replacement for the sending unit for cars already equipped with the low fuel light option. I'll have to save my pennies and buy the under dash harness from them and just cut out the wires and connectors I need. Since the Mustangs normally didn't come with this option, my guess is that Ford used the same '68 red light that went with the 'safety and convenience' group as the Seat Belt and Park Brake lights. I'm planning to add a small LED to the fuel gauge just to the left of the "E" so it's intuitive that it's the low fuel light and not drill a hole in the lower dash. Quote Share this post Link to post Share on other sites
69gmachine 15 Report post Posted July 21, 2008 New Electronic Low Fuel Indicator for the 1967, 1968, 1969 & 1970 Mercury Cougar. Wish Your Low Fuel Light Worked? Part #: ELFI Price:$109.00 Option(s): Year: Description: This solid state unit replaces the need for the thermistor located on the fuel sending unit. The thermistor activated your "low fuel" light when the fuel level receded below its mounting position on the fuel pick up tube. This new unit illuminates your low fuel light by sensing the position of the needle on your fuel gauge. You no longer "have" to use the three prong low fuel type of sending unit as this unit works with both the one and three pronged sending unit. Great for the person who cannot stand to have non functioning options in his classic and far superior to the thermistor system that burns up if you happen to run your car low on fuel on a regular basis. Comes with very detailed instructions on how to install on the backside of your instrument cluster and a three year warranty. I just checked out the Classic Cougar website. What they offer is a replacement for the sending unit for cars already equipped with the low fuel light option. I'll have to save my pennies and buy the under dash harness from them and just cut out the wires and connectors I need. Since the Mustangs normally didn't come with this option, my guess is that Ford used the same '68 red light that went with the 'safety and convenience' group as the Seat Belt and Park Brake lights. I'm planning to add a small LED to the fuel gauge just to the left of the "E" so it's intuitive that it's the low fuel light and not drill a hole in the lower dash. Quote Share this post Link to post Share on other sites
bnickel 10,004 Report post Posted July 21, 2008 I just checked out the Classic Cougar website. What they offer is a replacement for the sending unit for cars already equipped with the low fuel light option. I'll have to save my pennies and buy the under dash harness from them and just cut out the wires and connectors I need. Since the Mustangs normally didn't come with this option, my guess is that Ford used the same '68 red light that went with the 'safety and convenience' group as the Seat Belt and Park Brake lights. I'm planning to add a small LED to the fuel gauge just to the left of the "E" so it's intuitive that it's the low fuel light and not drill a hole in the lower dash. actually on the cougars there was a plate with the convenience light option that mounted above the ac vent in the dashpad. it had the low fuel, door ajar and the other 2 i can't remember. it sounds like hooking up an led next to the in the fuel gauge would be the way to go for you. if you don't mind could you post a how to with a parts list on it when you're done? i'd like to do the same thing with my cougar and i'll have the XR7 rocker switch panel so won't be able to use the convenience light panel because they mount in the same location Quote Share this post Link to post Share on other sites
bnickel 10,004 Report post Posted July 21, 2008 I just checked out the Classic Cougar website. What they offer is a replacement for the sending unit for cars already equipped with the low fuel light option. I'll have to save my pennies and buy the under dash harness from them and just cut out the wires and connectors I need. Since the Mustangs normally didn't come with this option, my guess is that Ford used the same '68 red light that went with the 'safety and convenience' group as the Seat Belt and Park Brake lights. I'm planning to add a small LED to the fuel gauge just to the left of the "E" so it's intuitive that it's the low fuel light and not drill a hole in the lower dash. actually on the cougars there was a plate with the convenience light option that mounted above the ac vent in the dashpad. it had the low fuel, door ajar and the other 2 i can't remember. it sounds like hooking up an led next to the in the fuel gauge would be the way to go for you. if you don't mind could you post a how to with a parts list on it when you're done? i'd like to do the same thing with my cougar and i'll have the XR7 rocker switch panel so won't be able to use the convenience light panel because they mount in the same location Quote Share this post Link to post Share on other sites
69gmachine 15 Report post Posted July 21, 2008 if you don't mind could you post a how to with a parts list on it when you're done? i'd like to do the same thing with my cougar and i'll have the XR7 rocker switch panel so won't be able to use the convenience light panel because they mount in the same location Certainly. Now I'm going to have to do some research on the convenience light panel though! I also have the switch and most of the wiring for the 'door ajar' light. I see the 'Parking Brake' and 'Seat Belt' lights on eBay frequently. Quote Share this post Link to post Share on other sites
69gmachine 15 Report post Posted July 21, 2008 if you don't mind could you post a how to with a parts list on it when you're done? i'd like to do the same thing with my cougar and i'll have the XR7 rocker switch panel so won't be able to use the convenience light panel because they mount in the same location Certainly. Now I'm going to have to do some research on the convenience light panel though! I also have the switch and most of the wiring for the 'door ajar' light. I see the 'Parking Brake' and 'Seat Belt' lights on eBay frequently. Quote Share this post Link to post Share on other sites
bnickel 10,004 Report post Posted July 21, 2008 that would be a cool write-up, thanks. the convenience panel on the 69 stang isn't exactly what you think it is. it doesn't use any round lights at all. the normal blank plate in the cougar is the same thing as the convenience panel just without the wiring, so 4 small rectangular lights Quote Share this post Link to post Share on other sites
bnickel 10,004 Report post Posted July 21, 2008 that would be a cool write-up, thanks. the convenience panel on the 69 stang isn't exactly what you think it is. it doesn't use any round lights at all. the normal blank plate in the cougar is the same thing as the convenience panel just without the wiring, so 4 small rectangular lights Quote Share this post Link to post Share on other sites
9350 10 Report post Posted July 22, 2008 My gauges are 2" for oil pressure and alternator. They were made by Thomas & Farina Corp. Uncasville Conn, USA stamped on the top of gauges. The two small lights in the lower dash are for seatbelt and parking brake. Quote Share this post Link to post Share on other sites
9350 10 Report post Posted July 22, 2008 My gauges are 2" for oil pressure and alternator. They were made by Thomas & Farina Corp. Uncasville Conn, USA stamped on the top of gauges. The two small lights in the lower dash are for seatbelt and parking brake. Quote Share this post Link to post Share on other sites
9350 10 Report post Posted July 22, 2008 Here's a closer picture of the company name on the gauge. Quote Share this post Link to post Share on other sites
9350 10 Report post Posted July 22, 2008 Here's a closer picture of the company name on the gauge. Quote Share this post Link to post Share on other sites
69gmachine 15 Report post Posted July 22, 2008 My gauges are 2" for oil pressure and alternator. They were made by Thomas & Farina Corp. Uncasville Conn, USA stamped on the top of gauges. The two small lights in the lower dash are for seatbelt and parking brake. Excellent!! Thanks 9350. Can you give me measurements to locate the holes for the dash lights? I'm really hesitant to drill in my pristine lower dash assembly. Of course if I add the parking brake light I'm going to have to make the parking brake functional:tongue_smilie: As for the seat belt light, mine will work a little different than the stock version. I'm using Schroth 4 way lap belts with an electronic inertia reel. With power on they function like a normal inertia reel. Switch the power off and they lock in place for open track driving. I'm going to have the light come on when power to the reel is OFF so I know they are locked in place. The inertia reels attach to a custom roll bar made to look like the Shelby bar, but it's made from 0.120 wall DOM steel and extends all the way to the floor pan. Quote Share this post Link to post Share on other sites
69gmachine 15 Report post Posted July 22, 2008 My gauges are 2" for oil pressure and alternator. They were made by Thomas & Farina Corp. Uncasville Conn, USA stamped on the top of gauges. The two small lights in the lower dash are for seatbelt and parking brake. Excellent!! Thanks 9350. Can you give me measurements to locate the holes for the dash lights? I'm really hesitant to drill in my pristine lower dash assembly. Of course if I add the parking brake light I'm going to have to make the parking brake functional:tongue_smilie: As for the seat belt light, mine will work a little different than the stock version. I'm using Schroth 4 way lap belts with an electronic inertia reel. With power on they function like a normal inertia reel. Switch the power off and they lock in place for open track driving. I'm going to have the light come on when power to the reel is OFF so I know they are locked in place. The inertia reels attach to a custom roll bar made to look like the Shelby bar, but it's made from 0.120 wall DOM steel and extends all the way to the floor pan. Quote Share this post Link to post Share on other sites
9350 10 Report post Posted July 23, 2008 69gmachine, My car is being painted and assembled in another state. When I go down there, I'll try to take accurate measurements. I've been waiting since March to get a JMC hydraulic clutch kit for my Tremec 3550. I saw that you made your own...... got any extras? Do you have pictures of your firewall master? Do you have part #'s of the slaves or know who might have a similar kit? I don't want to go with a hydraulic TO bearing. The car is all done but I can't drive it to try out my new 392 stroker until I find something. Your car looks great. I plan on autocrossing and open trakin' also when I'ts all done. Thanks, Tom Quote Share this post Link to post Share on other sites
9350 10 Report post Posted July 23, 2008 69gmachine, My car is being painted and assembled in another state. When I go down there, I'll try to take accurate measurements. I've been waiting since March to get a JMC hydraulic clutch kit for my Tremec 3550. I saw that you made your own...... got any extras? Do you have pictures of your firewall master? Do you have part #'s of the slaves or know who might have a similar kit? I don't want to go with a hydraulic TO bearing. The car is all done but I can't drive it to try out my new 392 stroker until I find something. Your car looks great. I plan on autocrossing and open trakin' also when I'ts all done. Thanks, Tom Quote Share this post Link to post Share on other sites
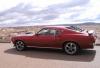
Pakrat 1,043 Report post Posted July 24, 2008 Hey GMachine, not to side track your topic but I see you have the late model mach type rims in staggered sizes on your car. Did you get them at the same place and if so, where? Now that I see they are available in 17x9 as well as 17x8 I have been reconsidering them but I can't seem to find anyone who offers both. I know 8 is original and the 9 seems to be made by wheel replicas but I can't tell if only the center cap is different or not. Thanks. Quote Share this post Link to post Share on other sites
Pakrat 1,043 Report post Posted July 24, 2008 Hey GMachine, not to side track your topic but I see you have the late model mach type rims in staggered sizes on your car. Did you get them at the same place and if so, where? Now that I see they are available in 17x9 as well as 17x8 I have been reconsidering them but I can't seem to find anyone who offers both. I know 8 is original and the 9 seems to be made by wheel replicas but I can't tell if only the center cap is different or not. Thanks. Quote Share this post Link to post Share on other sites
69gmachine 15 Report post Posted July 24, 2008 Hey GMachine, not to side track your topic but I see you have the late model mach type rims in staggered sizes on your car. Did you get them at the same place and if so, where? Now that I see they are available in 17x9 as well as 17x8 I have been reconsidering them but I can't seem to find anyone who offers both. I know 8 is original and the 9 seems to be made by wheel replicas but I can't tell if only the center cap is different or not. Thanks. The 17x8 front rims are genuine Ford that I bought from Tire Rack with the tires already mounted. The 17x9 rears are replicas. I bought a set of the running pony center caps so they all appear factory. The rears came chrome with painted centers. The Ford rims are all chrome. I painted the centers myself and it shows. I'm planning to have them painted professionally so they match the rears. Quote Share this post Link to post Share on other sites