

foothilltom
-
Content Count
771 -
Joined
-
Last visited
-
Days Won
2
Posts posted by foothilltom
-
-
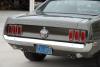
Am interested in opinions on how to make best use of my Coupe "parts car".
It has served its purpose: I've taken everything I needed from it to build up the father-son-mobile while providing a template for putting stuff back together. It has been invaluable for that latter purpose...saving me lots of hours of frustration.
But now it's time to get it out of my driveway. My question to y'all:
Should I just try to sell this to someone outright or part it out to folks building up their own projects?
Some quick facts:
It has a "salvage" title history, hence resale will probably be bad.
The roof was gone due to rust under the vinyl top. I crafted a fiberglass replacement roof. It looks like hell, but it works. I didn't want to spend the money on a vinyl top, but it would cover up my handywork.
The 302 2V, C4 tranny runs fine. Starts, idles, runs cool, and drives. I've repaired all the rust issues. Single, crappy exhaust.
It's a whole car, but most panels have an odd ding and dong here and there. It just needs a real body man (and he I am not) to make them perfect. No major body work, however.
Electrically, it's perfect, though I've stolen the light fixtures.
If it were you, would you put it up for sale or what?
I'm really interested in the ideas here. I think it'd be poetic justice if I could sell some of the more useful parts to folks here that have helped me at a very fair price.
Thanks for your thoughts.
Tom
Oh, and this is the car in question:
http://picasaweb.google.com/tdayton/MustangStuff#5172921627988976546
-
Um, this is embarrassing. Today, I'm standing in the driveway about ready to hand the proverbial keys to my son to drive his Mustang down to a friends for the very first time and I realize that we somehow managed to lose the door key over the course of the year since this thing arrived.
(I have a separate trunk key as I replaced that lock already).
So, my question today is:
Is it feasible to have a key made for the existing door cylinders or is it more cost-effective to just replace the lock cylinders in the door?
I'm kind of sheepish about tearing the door panels off (again), but if I must, I'll do it. Oh, and a related question:
How hard is it to replace these? The trunk like was simple as pie, but I'm not sure about the doors.
To finish my story, I sent my boy down the driveway with strict instructions to not lock his car!
Tom
-
Hey guys, thought I'd share a photo of the money-pit, er, project, my son and I started a year ago tomorrow:

-
Doh, my bad. I misread. You don't want molding.
-
If I'm not mistaken, VA Mustang has what you're looking for:
http://www.virginiaclassicmustang.com/catalog/shop/item.asp?itemid=ER570R
$20.
-
I did this little project and, for me, it was a bit more than I had thought it would be. After all, I was pretty good at changing light bulbs in my house :)
Removing the dash pad is always fun, depending on how yours fits. Be careful not to destroy it on the way out (or in). There's always a screw that you've missed, so don't pull too hard.
Removing the little sockets really is just a twist and turn as MadNC says, but you should really verify if your LEDs are actually working in your existing sockets. I found that the little metal tabs inside my connectors were "stretched out" a bit and corroded. I had to sand them and gently push them back together to get a snug fit on the silly little bulb. Only about 50% worked w/out this treatment.
I also found that re-installing the socket is tricky as the connection to the circuit board isn't always the best. The little metal tabs on the outside of the socket were also mildly corroded and didn't "seat" too well against the copper tracks on the circuit board. Again, I bent this a bit to improve the fit and sanded them. I tested all the bulbs before replacing the dash pad.
The result is great, but if I was to just twist, replace, and twist, I would have had many dark spots on my dash.
Hope this helps.
Tom
-
I had a similar problem, though I swear it's a blur as I had so many electrical problems at the same time. I recall this:
My RH turn signal indicator and RH turn signal light would stay lit when the switch was pulled to parking lamp position. Both would go out with the switch in the 2nd (full) position. Putting the turn lever to the RH position would cause it to blink. It was odd.
I recall separating the double-connector to the parking lamp and to the harness. It has a blue-white wire that controls the hood turn signal lamp. I wanted to be sure I didn't have it backwards. During that time, I cleaned the contacts and put everything back together. I know you'll hate this, but everything worked after that. So, I either had the connector on backwards or just dumb-blind luck finally hit me.
I'm sorry I can't be more specific, but I did have a similar problem.
Tom
-
I think Jerry's on the right track here. If the actual systems work and the indicator lights do not, your problem is NOT with the wiring or a short. I think the best thing you could do is to pull the dash pad, remove the offending bulb sockets from behind the instrument cluster (you can do this carefully w/out removing the cluster) and make sure they're good (put 12V across them and see if they light). If so, lightly sand the copper contacts and bend them back into shape to engage the copper on the circuit board. It's possible the bulbs are out, so that solution should be obvious.
Good luck.
Tom
-
Hey Marc, I don't think I'm going to be very helpful except to say the wire going to the floor shifter is probably the light which means you should be able to determine its partner by measuring 12V when you pull the light switch out to the first position.
My coupe doesn't have A/C, so I wouldn't have a clue how that is wired.
That said, I can consult my wiring diagram to confirm the red/white is for the shifter light.
Tom
-
Hey Jeff, sounds like you're ready to make the buy. I get most of my stuff at VA Mustang, but I'm sure they all get them from the same source. I was suggesting that you rule out other problems by testing with 12V on the printed circuit to get the gas gauge to come up off E. If you don't have a 12V source, you can put a meter across the connector that goes to the printed circuit (you'll need to know which wire, of course) and see if you get some voltage with the key on ACC.
I guess I'd feel better knowing what's wrong before buying stuff, but $50 might put your mind at ease with a new printed circuit.
Good luck!
Tom
-
Hey Jeff, I'm sorry to hear about your troubles. Considering how flimsy/brittle the printed circuit ribbon is and how easy it is to mutilate one of the connections to the main connector, I'd suspect some inadvertent damage when you pulled the connector out originally to replace the bulbs assuming you removed the entire dash cluster (as I did).
A simple test would be to locate the area on the printed circuit that goes to the fuel gauge and put 12V across it. You should see it go to full if the gauge is working and the printed circuit is undamaged. If not, then you may have damaged the printed circuit.
If so, then your problem is probably just a poor connection to the printed circuit. Inspect both sides, make sure the connector is "pushed out" to make good contact with the printed circuit ribbon.
It's highly unlikely that your sending unit would take this time to fail, but stranger things have happened.
Hope this helps.
Tom
-
You were exactly right, gents. My pal is a GM guy and he'd never quite seen a float/needle/seat arrangement like on this 2150 Motorcraft. After much messing around and following the leads here, the boy and I actually saw that the little "hinge pin" that the float pivots on was not "locked into place" at all and the lid of the carb didn't press it into place either. We noted that the little coat-hanger-gizmo that keeps the hinge-pin from shifting back and forth needed to be also attached to the seat itself -- locking the whole assembly in place.
I'm probably not explaining this well, but the bottom line was the pressure of the fuel was simply blowing the pin right out of the seat despite the proper setting of the float. When we locked the assembly down with that little wire gizmo (it wasn't obvious to us for sure), all was well, she ran w/out barfing gasoline and we were giddly like school girls.
So, in short, our rebuild was a bit sloppy and we learned a great lesson in fluid pressure. Oh, and I singed most of the hair off my left calf. That's a story for another time. It was a hoot.
Thanks very much for your help, gents. Another good ending to a good mystery.
Tom
-
Hey 69Raven, thanks very much for the info. I'm 100% sure the gas is coming from the bowl. I had my boy start the car today and I watched carefully (with extinguisher in hand). The gas just roils out of the mouth after a few seconds, so it sounds like the first thing you described. There is no fuel at all leaking from the front of the carb. Fuel filter connection is dry as a bone.
I'll take a look at that link and see what I can do!
Thanks again,
Tom
-
Howdy gents,
A friend of mine (who, believe me, is much more of a gear-head than I) volunteered to rebuild my 2V carb (it's a 2150, much like the stock 2100 but apparently has some altitude compensating gizmo) and I just put it back on the coupe last night. The carb absolutely needed rebuilding as it was completely choked with gunk after 7 years of sitting in the side yard of the previous owner.
In any case...the engine fired right up, sounded mean (still just open headers), and promptly flooded and died. From my vantage point, I could see gas flowing up out of the mouth of the carb (like a volcano) and getting all over the manifold. I can't tell precisely where the gas is coming from as I didn't feel comfortable with that much gas and potential for a fiery end of the evening.
I've googled quite a bit and I haven't been able to identify a strong suspect. So I turn to my brethren (and sistren?) here to see if anybody has had such a problem and perhaps could offer up what I could look for.
This friend of mine has been so helpful, I'm trying to bootstrap myself and cut back on how much I bug him, but this car isn't going anywhere until I resolve this.
Any info is MUCH appreciated.
Tom
-
Thanks for all the info, fellas. The boy and I just now have to decide if spacers are in the cards or if he can live with the smaller meats. As always, I've learned a lot and I hope I can pay it forward.
Tom
-
It sounds like you're going the whole enchilada, but if you can get by with replacing just the shock tower and frame support, I have a driver's side -- brand new -- that I'll sell you for $20 + shipping. I paid $119 from VA Mustang about 6 months ago. I had bought both sides but only replaced one side.
Let me know if this is interesting, but I doubt it since you're going with the whole dang assembly.
Tom
-
Hey Gents,
Despite hours of effort, I just can't make a good fit between the door and 1/4 glass weatherstripping. There's an oh-so-small-but-totally-significant gap between the two and I just don't know what other adjustments I can make.
I've replaced the rubber with new aftermarket stuff (VA Mustang) today.
I've jimmied around with the 1/4 glass roller brackets though I don't know if the front glass can be "adjusted" much. The gap is small (like 1/16th of an inch), but it's just enough to let in water from a good washing. Seems like a bummer to come this far and have that.
It would be awesome if the rubber strip was WIDER. It would forgive more sins.
Just wondering what folks have done about this, if they've encountered similar issues.
Tom
p.s. I've replaced ALL the weatherstripping, the felts, the rubber, everything.
-
Hey Pak, I think I'm starting to get this.
The backspacing on my new Cragar 14"s is 4.25". The 235 60's rub like no tomorrow as I've said on these rims.
The BS on the donor rims is 3.75" and they have 215 60's mounted. They fit with about 1/2" (maybe a bit more) of clearance from the nearest thing that will rub (don't know what it's called, but it's the suspension piece that attaches to the wheel itself with a trailer-hitch-looking knob.
So, according to the chart above, 15x7's with 4.25" BS *should* fit 225s, which makes me wonder what the maximum should be for 14x7's.
But if I just apply some public-school math, I have 1/2" difference in the BS between the old and new rims and what looks like just over 1/2" of clearance with the 215s mounted on the old rims. If I install 215s on the new rims with 4.25", it should just fit, with a little bit to spare.
Does this reasoning sound pretty solid?
Finally, did I hose myself by buying 14"x7" wheels in the first place? I was trying to AVOID rubbing/fit problems, but it appears I've actually created them. Whooda thunk that?
Thanks for your last follow-up here, Pak.
Tom
-
Hey Pak, thanks for the excellent response. Just like you said: everyone sells the rubber (and I actually bought it already thinking it would come with the strip), but not the stainless piece.
The good news is I have a donor car with the stainless trim intact on both sides. So before I go out with a chisel and ruin something, can you offer any advice on how easily the trim piece comes off the front glass?
It appears like I could just gently tap on it and knock it toward the rear of the car and remove it, but then again, I can't see what's going on at the bottom of the glass too well even with the window fully rolled up. I'm guessing it's not GLUED onto the glass?
In short, I don't want to break a window or ruin the stainless piece that I can steal from the donor car.
I think I understand that LUBE is essential for re-installing the new rubber onto the trim as discussed in other threads here.
Thanks in advance for any follow-up advice.
Tom
-
Howdy gents, hoping you can sort me out on two things:
My project car is missing the driver's side stainless "channel" that should hold the weatherstrip between the rear of the front glass and the front of the 1/4 glass. I'm looking all over the place (VA Mustang, CJ Pony, etc.) and I cannot find a single thing that fits the bill. Anybody know where to get one of those?
And finally, is there a piece of weatherstrip that actually attaches to the 1/4 glass or is the strip that attaches to the front glass (per above) all there is between these two pieces?
There's so many references to 1/4 glass weatherstripping, I feel like I'm missing something.
This is for a coupe. Thanks mucho for any advice on where to get this item.
Tom
-
Howdy, I'm quite certain you've put the wavy washer on the wrong side. I just put two of these in my little project and the washer sits between the knob and the handle. The "t stud" goes in from the opposite side all by itself.
FWIW, mine spin just like you'd expect, so I'm 99% sure that's the trouble.
Tom
-
Hi gents,
I've searched through previous posts about wheel/tire size and it seems everybody is putting huge wheels on their Mustangs. I have much more modest requirements, but still I think I've managed to screw up. Hoping you can help a brother out.
Bought 14x7x4.5" wheels from Summit Racing. They're neat. So far, so good, according to what I've read so far.
I put 235 60 R14's on these wheels and DANG IT if they tire doesn't rub on the front suspension (the control arm or whatever that is). There seems to be plenty of room in the rear, but the fronts rub. The original crappy tires are 205 70 R14s and even they have *barely* any room between the inside of the tire and the suspension.
Have I hosed myself? I was trying to understand "back spacing", but can't really say I do at all. Is there a different wheel hub I need? Tires just too big?
The boy is looking at me with that sad face again...so close and yet so far.
Thanks for your kind help!
Tom
-
Sounds like tranny fluid level may be low. When I drained my tranny months ago after taking it out, I had problems with delays between gears and continually added a bit of fluid each time. The dipstick registered "full", but after it ran, the fluid would circulate and drop as a result. Eventually, it was really full and the delays disappeared.
Silly, but my experience.
Tom
-
Assuming you're talking about PakRat's parking/indicator lights, I just installed mine last night and the fit isn't great, let me tell you. I think it's just a combination of an imprecise design with the front valance not fitting perfectly, the bumper arms not fitting perfectly, etc.
Both of my coupes have a slight "bend" in the bracket of the parking lamp assembly to accommodate this crappy fit. It looks like they put it in a vice and bent it about 15 degrees "upward". If the bracket was just flat, the lamps would not sit right in the valance.
As it is, I still have to jimmy the valance a bit just to get to one of the screw holes in the face of the lamp.
In short, I don't believe a perfect fit is in the cards. So long as the lamp is visible and you can get to the face plate to replace the inevitable bulb, you're ahead of the game.
My $.02,
Tom
Purpose of kick-down linkage
in 1969-70 Technical Forum
Posted · Report reply
Hey gents, I have another (in a year-long series of) dumb questions:
What is the purpose of the kick-down linkage? Is it a crucial element?
Long story short, I replaced a crappy late-70's carb that was on my coupe after cleaning it, rebuilding it, etc. The motor just wouldn't run right with that Jimmy Carter-era carb. Replacing the carb with another 2V a friend had lying around (don't even know what it is yet) was like night and day: the car runs great, idles, everything.
But now I have two problems:
1. There is no choke at this point (the heat choke was removed when we installed headers) and I need a solution there
2. There is no accommodation for the kick-down linkage on this non-stock carb
If the kick-down linkage isn't crucial, I would consider getting an electric choke for this current carb and calling it good.
If the kick-down linkage IS crucial, I would consider pulling the stock 2100 carb off of my parts car and installing that. Obviously, the linkage would be there and would just have to solve the heat-choke vs. electric choke question on the coupe with headers.
I would really appreciate input here. I have a 3 hour one-way drive to the folks for T-giving dinner, so I'll have lots of time to noodle on this and eagerly await your thoughts.
Happy Thanksgiving all!
Tom