Ash 145 Report post Posted July 28, 2017 Time well spent on the engine, it looks very tidy. I love those rocker covers too, I once had a similar set on a 351C that had "CLEVELAND" embossed in the top. 1 bigmal reacted to this Quote Share this post Link to post Share on other sites
bigmal 225 Report post Posted August 6, 2017 End of day 40. Engine and tranny in. Exhaust hooked up. Radiator in. Plumbing from steering to pump conected. Have had some troubles with the kick down rod. Will only allow the throttle to about 1/2 way. Finished off the front suspension. Now trying to hook up the transmission cooler lines. They are going to need a bit of modification to get past the steering rack. I bought a used tail shaft as mine was too rusted. It is 12mm longer than the origianal and won't fit. Need to get another. I'm sure the place I bought it will exchange it without a problem. Just a hasle to get there. Lost of little things causing grief. All solvable but they are slow going. Quote Share this post Link to post Share on other sites
MAC390 327 Report post Posted August 6, 2017 Great work there Mal, there is always something extra to rework . 2 bigmal and RPM reacted to this Quote Share this post Link to post Share on other sites
Ash 145 Report post Posted August 6, 2017 All looking very tidy, Mal. The time spent it showing. 1 bigmal reacted to this Quote Share this post Link to post Share on other sites
stangnet33 88 Report post Posted August 6, 2017 Coming along great ! At least the metal is behind you. 1 bigmal reacted to this Quote Share this post Link to post Share on other sites
bigmal 225 Report post Posted August 6, 2017 Thanks guys. It's all fun stuff from here. Quote Share this post Link to post Share on other sites
bigmal 225 Report post Posted August 31, 2017 End of days 41, 42 and 43. Took another 3 days off work so I could finish it off. When will I learn. Got side tracked and tackled the rust in the rear chasis rails. It's been bugging me for a while so I got stuck into it and hopefully no more mess in the garage. Fitted the Lokar throttle and kickdown cables. New speedo cable. Hooked up all the engine bay wiring. Fitted an overhauled tail shaft. Bought a second hand one which was 1/2" longer and wouldn't fit. Had it shortened, new unies and a balance. Went to hook up the braided steel power steering hoses and couldn't get clearence between the pump and exhaust mainfold. Solved with a 90deg elbow. Modified and fitted the transmission cooler lines. New heater and radiator hoses and topped up all the fluids. Attacked the instrument panel. New circuit board, LED lights and KMPH decal. I find the LED lights which are very blue and a little dull. I may go back to white but will see how it goes on the road. Attached a battery charger to see how the wiring worked. So far so good. Tested the lights and all seem OK. I still have to source the power for the rear blinkers which have been separated from the brakes. Will do that a little later. Started to install the instrument panel. Bugger!!! The speedo cable goes directly where the steering column bracket is. I marked where I thought it was and cut a small section out. Got it wrong. Made a doubler and cut a bigger piece out. Now the cable hits the doubler. No alternative but to take the braket out and remake it completely. Another day. Getting late and thought I would at least hit the starter and make sure it fires. Here goes.......................nothing. Bugger bugger bugger. Bypassed the solenoid and the starter works. Now to start trouble stooting. With so much work having been done it was too daunting to start last night. Maybe on Sunday. Very disappointing but all in all some good progress this week. Quote Share this post Link to post Share on other sites
Ash 145 Report post Posted August 31, 2017 You've made a lot of progress, Mal. Nice work. Is that the end now of the rust repairs? I bet that feels great if it is. Quote Share this post Link to post Share on other sites
bigmal 225 Report post Posted September 1, 2017 2 hours ago, Ash said: You've made a lot of progress, Mal. Nice work. Is that the end now of the rust repairs? I bet that feels great if it is. Yep, end of the rust repairs. And very glad to be. Quote Share this post Link to post Share on other sites
Ash 145 Report post Posted September 1, 2017 Good stuff. I can only imagine how rewarding that feeling is. 1 bigmal reacted to this Quote Share this post Link to post Share on other sites
MAC390 327 Report post Posted September 1, 2017 Lots of progress there, good to finish the rust. How hard was it to set up the lokar kick down cable. 1 bigmal reacted to this Quote Share this post Link to post Share on other sites
bigmal 225 Report post Posted September 1, 2017 53 minutes ago, MAC390 said: Lots of progress there, good to finish the rust. How hard was it to set up the lokar kick down cable. The cable was very easy to set up. The bracket that attaches to the trany is at a right angle. Needs to be bent to align with the kickdown lever. As the bracket for the throttle cable was bodgy I didn't use the Lokar kickdown bracket. I found it easier to make a combined bracket. Quote Share this post Link to post Share on other sites
bigmal 225 Report post Posted September 2, 2017 Wasn't going to touch it today but had a spare hour and really wanted to see why it wouldn't start. I had an epiphany last night and was sure it was the Selector safety switch (or what ever it's really called). So being confident I tweaked it and hit the starter. Bugger!!!!. I decided to disconnect the field wires from the solenoid and connected the battery charger and it turned over. I then hooked up the multimeter to the field wires and it turned out I had them reversed. Problem solved and it turns over. Having drained the tank and disconnected the fuel lines it took a while to get the fuel through but it started. Woo who!!!!. Now the issues start. No oil pressure. I had filled the filter so wasn't expecting other than an indication error. Put a meter on the sender and there is PX, so a gauge issue. Turns out none of the gauges are working. This will be fun to trouble shoot as I have changed the circuit board and moved so much wiring. Now to check for leaks. Yep. Steering line. Just a nip and it's good. Tried selecting gears and nothing. Suspecting low fluid and that was it. I had my foot on the brake and the brake light came on. Got out and a puddle under the car. My worst fear is a leak from somewhere I can't get to without removing the engine. Turned out to be the flare under the master cylinder. Shouldn't be to hard to fix but a pain in the arse. Oh, and not charging. Will look into that shortly. It turns out I have never had a functioning 'Alternator Fail' light. No idea how to look into this one as I have never had that issue before. Maybe another day, or month. Well at least it started. So now to fixing the bugs. Quote Share this post Link to post Share on other sites
MAC390 327 Report post Posted September 2, 2017 Just teething troubles,and fun and games. Quote Share this post Link to post Share on other sites
bigmal 225 Report post Posted September 3, 2017 Attacked the brake leak. Was able to re-flare the line to the master cylinder without too much trouble abd problem solved. I had a look at the charging and found there is no power to the alternator field wire. I also found there is only 4 volts to the coil. I can't beleive it runs with this. I have'nt looked into it too much yet but thought I would change the regualtor to start with even though it has nothing to do with the power to the coil. Happy for any suggestins on this. Quote Share this post Link to post Share on other sites
Ash 145 Report post Posted September 3, 2017 Is your engine ignition still wired up originally? Is the pink wire still in use as a trigger or has it been bypassed to get a full 12 volts? Off the top of my head originally it only got 5v(?), not 12v, which could explain why yours is running on 4v. Quote Share this post Link to post Share on other sites
bigmal 225 Report post Posted September 3, 2017 6 minutes ago, Ash said: Is your engine ignition still wired up originally? Is the pink wire still in use as a trigger or has it been bypassed to get a full 12 volts? Off the top of my head originally it only got 5v(?), not 12v, which could explain why yours is running on 4v. Hi Ash, I have'nt changed any of the wiring for the engine other than the routing. I will have to check about the pink wire. Talking about it in the office the concencus is that there is a resister in the system and the 4 volts is normal. That explains why it runs OK. Quote Share this post Link to post Share on other sites
Ash 145 Report post Posted September 3, 2017 That's sounding like it then. The wire itself is the resister. This is the hurdle when swapping to a later ignition that requires 12v, it wont work using the original wire. You need to run a direct 12v instead. 1 bigmal reacted to this Quote Share this post Link to post Share on other sites
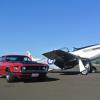
bigmal 225 Report post Posted September 17, 2017 I gave up on the instrument circuit board. Still unable to get the oil, temp and fuel gauges to work. Spoke to Midlife and he is sending me his hard wired replacement. Once I get this i will get back to it. I did sort the alternator problem. Was checking continuity of the field wire and found it broken at the regulator cannon plug. Was not expecting ot to be that easy. Yesterday I backed it out to give the garage a good clean out. Sick of working in filth. Felt good to have it move under it's own steam. Quote Share this post Link to post Share on other sites
RPM 1,190 Report post Posted September 17, 2017 25 minutes ago, bigmal said: I gave up on the instrument circuit board. Still unable to get the oil, temp and fuel gauges to work. Spoke to Midlife and he is sending me his hard wired replacement. Once I get this i will get back to it. You certainly won't regret that decision. Quote Share this post Link to post Share on other sites
Midlife 814 Report post Posted September 17, 2017 What's with all of the cabling in front of the car? And is that a striped cable on the left side of the outside cowl (Just forward of the A pillar)? Quote Share this post Link to post Share on other sites
bigmal 225 Report post Posted September 18, 2017 7 minutes ago, Midlife said: What's with all of the cabling in front of the car? And is that a striped cable on the left side of the outside cowl (Just forward of the A pillar)? The cabling at the front is for the lights/blinkers etc. Until I fit the guards I won't know where I need to secure them. I am not sure I have the routing right at this stage. On the cowl that is not wiring. I have moved the wiper motor to the outer end of the cowl to facilitate the changes for the aircond unit and the RHD wipers. Rather than weld the cowl in place i wanted it removeable so have used bolts. Quote Share this post Link to post Share on other sites
MAC390 327 Report post Posted September 18, 2017 Looks great, i am hanging to get mine to move under it's own power. When you clean out the garage it's amazing how much crap you have been rolling in. Getting close now, well done. 1 bigmal reacted to this Quote Share this post Link to post Share on other sites
bigmal 225 Report post Posted September 25, 2017 Amazing the little things that need to change when swapping from left to right. The heater cable works in reverse direction so I had to change it. I made a bellcrank setup which seems to do the job. The best part is the cable length has worked out that I only need to shorten it about 1/2" which is easilly done. Great to have a simple fix. Quote Share this post Link to post Share on other sites
MAC390 327 Report post Posted September 25, 2017 Nice work there. Quote Share this post Link to post Share on other sites