MN69Grande 203 Report post Posted March 9, 2015 Well it was in the mid Forties up here and fifties predicted for the next 10 days or so. I'm thinking the snow won't last through Wednesday. So after that all I need is a good rain to clear the salt and I can get on the road.. Maybe At any rate spring is almost here and I'm thinking it's time to get a few projects wrapped up. This weekend I started doing a leaf spring swap. I didn't finish for 2 reasons: 1.) the front bolt was rusted into the sleeve inside the bushing (I'm assuming the other side will be the same) and 2.) Dad the taxi driver and two little girls with their activities. I did get one side done following Mike Campell's how to. It worked out about how he said. It just took me forever to cut through that front bolt twice. Here's a little tip. Get a new blade that is rated for metal you are cutting. A dull blade for metal 10% the thickness you are cutting doesn't work. You'll just sit there looking like an idiot (probably because you are) with the saw going for 1/2 and hour and no progress. So much for avoiding getting in the car and driving to the store. Also does anyone have any good tips on getting the retaining plate on the bottom of the U-Bolts on? I ended up using a C-Clamp and flat screw driver to force things to work my way. It wasn't the worst thing ever but if some has a better idea I can try it out on Friday. Hopefully within a couple weeks I can try these new springs out! Quote Share this post Link to post Share on other sites
Tgriffin91 27 Report post Posted March 9, 2015 What exhaust do you have? That sounds amazing! I was looking through the thread and couldn't find anything about it. Quote Share this post Link to post Share on other sites
MN69Grande 203 Report post Posted March 11, 2015 What exhaust do you have? That sounds amazing! I was looking through the thread and couldn't find anything about it. The exhaust is kind of a happy accident. So I originally bought a full dual exhaust kit from Mustangs Unlimited with Flowmaster 40 series (these are less aggressive): http://www.mustangsunlimited.com/itemdy00.asp?T1=MF52572+01 Intending to just match it with the stock manifolds. I sat on the parts for a couple years then when I pulled the manifolds found one was cracked. Not knowing what I was doing I went out looking for headers thinking... A little upgrade would be nice. And found these Headman Headers on sales: http://www.summitracing.com/parts/hed-88406/overview/year/1969/make/ford/model/mustang Finally I had bought dual tips and the rusted quickly so I thought I'd look around for something else and found these: http://www.summitracing.com/parts/hed-17120 strangely enough what sold me on the tips was that a lot of motorcycle riders were using them to deepen the sound of their bikes. So that is the parts. Now I had to get a shop to chop and rebuild the h-pipe. We also had to weld some reducers in since the pipes were 2 inch and the headers are 3 with a reducer to 2.5 (didn't use this reducer found some that worked). It wasn't that big of a job. I've been told if you call Mustang unlimited they have some that will match up to short headers to a similar exhaust kit. Then the exhaust pipes from MU are built for the Tips they sell. So these were just slightly bigger on the inlet side. So we had to weld them on, it was just loose enough that brackets would work. If I was to do it again. I would: 1.) Get the correct H-Pipe 2.) Order the 2.25 inch kit 3.) Order bigger tips to match the 2.25 kit But I am extremely happy with results. It rumbles at idle and slow cruise but when I get up to highway speeds it is more musical than anything. So driving for hours doesn't give you a headache from loud resonating exhaust. I know I know long answer to a short question. Quote Share this post Link to post Share on other sites
Tgriffin91 27 Report post Posted March 11, 2015 No thank you! That's exactly what I wanted to hear. That is the best sounding exhaust I've heard in a long long time. Congrats too on finishing up! Unfortunately $1000+ dollars is a little high for me right now. I'm looking at buying a used setup for $100, minus headers. Bent up and everything. One can dream though. Quote Share this post Link to post Share on other sites
MN69Grande 203 Report post Posted March 11, 2015 No thank you! That's exactly what I wanted to hear. That is the best sounding exhaust I've heard in a long long time. Congrats too on finishing up! Unfortunately $1000+ dollars is a little high for me right now. I'm looking at buying a used setup for $100, minus headers. Bent up and everything. One can dream though. Yeah I get that. The pain for me was spread out! And the prices seem to have really gone up in the last 5 years. First I got the exhaust kit and at the time it was closer to $300. Then later the headers - again on sale. The tips aren't that much. Honestly I don't know if you can get the pipes much lower, but I'm sure if you hit Craig's List enough you can find the Mufflers. And if you don't need the the headers or new manifolds that's 1/2 the cost. Quote Share this post Link to post Share on other sites
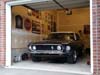
Footcutter11 23 Report post Posted March 18, 2015 Nice build. Love the color. Quote Share this post Link to post Share on other sites
MN69Grande 203 Report post Posted April 4, 2015 @Footcutter11 - Thanks for the compliment, it's a little more subdued than that beast you're build. That is going to be a wild one for sure. Just for fun I thought I'd throw some pics from the leaf spring swap. Not the biggest job, but it made a huge difference. I took the car out yesterday for an hour or so and it went through corners 100 times better than with those week old Grande springs. Probably the most bang of the buck upgrade I've done. If anyone is not going crazy on the rear suspension but still wants a better than stock the 5 leaf kits from CJ are great for the money. Also hunted down an annoying short in the dash that was crashing all my gauges, and got 2 dings taken out using a local PDR company. Amazing for $50 they took 2 super annoying dings out of the driver's door. After spending too much on body and paint I was so pissed when I got 2 digs within a month of bringing the car home. I figured it was going to cost a ton to get them fixed. $50 bucks! I can't stop grinning about that. Quote Share this post Link to post Share on other sites
Footcutter11 23 Report post Posted April 5, 2015 That looks like it will make things better! Quote Share this post Link to post Share on other sites
Machspeed 219 Report post Posted May 7, 2015 Nice build and I love the color combination and package......aggressive but yet classy. Thanks for sharing your build, both the highs and lows. I long for this day with mine. John Quote Share this post Link to post Share on other sites
MN69Grande 203 Report post Posted May 19, 2015 Nice build and I love the color combination and package......aggressive but yet classy. Thanks for sharing your build, both the highs and lows. I long for this day with mine. John -Machspeed - you'll get there and you've got a great car to start with! We'll see you on the road when you do! Quote Share this post Link to post Share on other sites
MN69Grande 203 Report post Posted May 19, 2015 Took the Stang to it's first show/rally/cruise this weekend. Tenvoorde Ford in St. Cloud, MN claims to be the oldest ford dealership in the country and last weekend was their 10th annual Mustang Show/Run. It's a great event this is the third year I've gone and the first year I had the car ready (pretty much). There was a little rain and another all Ford show on the same day, so only 8-9 classic Mustangs showed (a 1967 blue fastback one). But there were plenty of Fox Bodies, SN-95s, S-197s, and ready for sale 2016s. It was a lot of fun including some adult sized tricycle races, grill for lunch, bbq for dinner, show, and a 100 mile or so cruise with 2 good stops. We didn't win any trophies but I won because I convinced my wife to come on the cruise and she loved it. The car did get some good attention and more votes than I expected - so I got that going for me which is nice. Plus the folks and my girls got to watch the parade of dozen of Mustangs head out on the cruise. Anyway other MN members should put the 11th on their calendar for next year. Next up Power Tour! www.tenvoordeford.com/ http://www.mnmustangrun.com/ Quote Share this post Link to post Share on other sites
9RO1M 12 Report post Posted May 19, 2015 Nice car mate. Quote Share this post Link to post Share on other sites
MN69Grande 203 Report post Posted June 1, 2015 I'm going to decide that this is a funny story.... I haven't driven the Mustang at night since it came back from paint last year. In fact it hasn't been driven at night in over a decade. So I wasn't too surprised that I had some headlight trouble 2 weeks ago in my first after dark drive. I didn't mean to drive at night I just was held up a couple hours and ended up being out later. So I turned the lights on and there was almost no light on the road. There was a weird line of light on the drivers side and a spot a few feet in front of the car on the passenger side. I hit the dimmer switch and nothing, no click, no change. I thought to my self, 'the next 1/2 hour isn't going to be fun'. Next what little light I had started to go out and on intermittently. Ugg... I tried pulling over and messing with the dimmer switch - No help. Long story short I made it hope with a lot of help from my wife in the SUV. So I replaced the dimmer switch, that was no big deal. And then I had a friend come over to help aim the lights. This is where it gets sad/funny/frustrating. First thing we notice the driver side low beam is in sideways. So we pull the light and bucket out. Sure enough the bucket installed on the drivers side is the for the passenger side! So I'm thinking crap they gave me another customer's wrong bucket. But then we started aiming the high beams and notice the the passenger side bulb isn't flush in the ring. So we take the bulb out and sure enough that buck is a low beam buck for the driver's side. Sigh - Then we couldn't get the low beam aimed on the pass. side... Took it apart it was the driver's low beam. Ugg. For awhile I was freaking out because we are heading to power tour Friday and if I needed to get a missing bucket it wasn't going to happen in time. Luckily after taking 3 of 4 out we had them all. Just 75% of them were in the wrong places. Now I always thought installing headlights was idiot proof. I guess I was wrong. The good news. No parts needed, lights seem to work, and hopefully they are aimed better. But am I going to give the painter shit for this! Quote Share this post Link to post Share on other sites
MN69Grande 203 Report post Posted June 19, 2015 Well I've been posting on a thread under up coming events for Power Tour but I think it's time this story moved back here. The short version is that I attempted to do 3 days of the Hot Rod Magazine Power Tour 2015 and only got through 1.9 days.. With 20 miles to go on the 2nd day I had a wheel bearing go out and the next morning we investigated ticking noise in the engine and found metal in the oil. As I have a Ford crate motor with a 24 month/24,000 mile warranty I had a mechanic in Illinois pull, crate, and send the motor to Ford. When he did that he found one of the cylinder walls severely scarred. Today I got notice that they will cover the motor under warranty... But the bad/mixed news is they don't make that version of the motor anymore because they were having a hard time finding cores to recondition or some other non-sense. So now they build the same motor but with a new casting, re-engineered, 4 bolt main Boss based 302 block. And they can't just give that $#!7 away. So right now they have given me 2 offers. Both offers they are going to clean, inspect, and reuse my heads (GT40x). Then they will use either the new basic short block for a charge of $1000 or the 347 stroker short block (I believe using the Boss 4 bolt main) for $1700. So I'm a little mad they want some money, but both those short blocks have better internals than the motor that crapped out on me and are Boss based which is a nice upgrade. I'll know more about the offers tomorrow. While the motor is out I'm also swapping the Torque converter for 2400 stall TCI. Of course with the labor and upgrade charge for the engine failure it looks like the new rear end will have to wait until next season. Quote Share this post Link to post Share on other sites
MN69Grande 203 Report post Posted July 15, 2015 The warranty motor shipped yesterday. Went with the 347 option. Why the hell not. Hopefully I'll be back on the road in a couple weeks. Upgraded motor and better matched torque converter should be slight compensation for the down time. Quote Share this post Link to post Share on other sites
RPM 1,190 Report post Posted July 15, 2015 - so I got that going for me which is nice. Classic line from a great movie! Sorry to hear about your troubles, but at least you don't have to foot the majority of the bill. Quote Share this post Link to post Share on other sites
MN69Grande 203 Report post Posted July 29, 2015 Well History is repeating itself and my car is getting bumped behind other projects at the mechanics again. I guess I might have to kiss another part of the short season goodbye. Why is it so hard for shops to keep their schedules? Grumble Grumble Grumble. Missed 2 shows already now it looks like I'm miss the last one I wanted to be in that happens in a few weeks. Quote Share this post Link to post Share on other sites
RPM 1,190 Report post Posted July 31, 2015 Well History is repeating itself and my car is getting bumped behind other projects at the mechanics again. Unfortunately I think that's the rule rather than the exception. Quote Share this post Link to post Share on other sites
MN69Grande 203 Report post Posted October 7, 2015 Well. FINALLY I have a big smile on my face. Took the car out today and got a successful test drive. Hopefully this just gets better with some tuning but this motor get up and goes. A hell of a lot more torque on the low end. Anyway the mechanic in Illinois got everything back together the first week of August. So my dad and I flew down to get the car. For some idiot reason I thought I'd drive it home. We made it 50 miles. In that time a serious oil leak appeared and the car was just running too hot for my comfort. So we rented a Uhual and trailer to bring it home. I didn't have a lot of time to work on it as my lovely wife and family had things scheduled pretty much through mid-September. So bills mounting and no running car. Pretty much my normal luck. So first thing first the oil leak. It was pretty simple once in the garage. The extension tube for the Oil Sending Unit was leaking. The shop had built one out of pipe fittings because the original style one doesn't fit on the block. The new ford Boss casting have a larger fitting than the original block so if you step it down you have an adapter that adds and inch+ to the length of the whole thing. The fittings they used were defective and not sealing well. In the attached pics, the fitting used by the shop is the longest one. They made it longer to gain clearance to the PS pump. But the added length adds vibration and they used 2 adapters to step the fitting down. Finally they used a pipe wrench to tighten it and I doubt they got it tight enough. Either way it leaked. After about a dozen trips to 4 hardware stores I had a fitting I liked better. The one on the right. The bonus for me is the last fitting cold be tightened with a socket allowing me to properly torque the fitting (Ford says over 40 ft lbs and you can crack the block around this fitting). Ok Oil problem solved. Next I added a Tach to the column and digital temp gauge under the dash. I just didn't feel I was working with enough information. The car was idling at about 193 and went up to 199 at 2000 rpms for 120+ seconds. I didn't like that at all so I replaced the T-Stat. No help. I added a fan shroud. No Help. Took it for a test drive to see if it was at least a stable temp. Nope 217 on a 10 mile drive and it looked like would have continued to climb. Side note, we changed over to Evans waterless coolant. One thing people don't tell... IT STINKS... I mean it smells bad. So messing around with the radiator, t-stat, and temp sensor SUCKS. So I pulled the plugs and it looked like the car was either running real lean or the advance was WAY off. Here is where I find out that they put an adjustable timing pointer on the pass side of the car. There is literally only one angle to see it from, and they painted only 3 marks on the balancer to time by... So I ordered a new 2 o'clock pointer for the drivers side. I assumed (and we know what assume means) that because the FRPP 306 I had only had marks on the passenger side I thought I should get some timing tape. The problem now is that the FRPP motors use a balancer that is different sized than any of the tapes you can make. So I spent a week figuring out how to use MS- Word to make timing tape. I also ordered a nifty new tool to help find TDC (it's basically a stopper with hole, some rubber hose, and a whistle and it works great) and went to it. Well as it turns out the new balancers have marks that line up for 2 and 10 o'clock timing so I wasted a lot of time making the tape! But the tool proved the TDC marking on the balance and the new pointer matched up. Checked the timing and it was WAY off. Well at least I had a theory on the heat problem. Too much advance. Next I thought well lets check the make up of the Dizzy. I'm running a Motorcraft with the Igniter 3 and a flame thrower 2 coil. I had a Billett MSD ready to run, but it crapped out on me and it is out to service. Talking to tech support they said that because the new motor has a compression of 10.2:1 they didn't want me going over 34 degrees of advance. I started reading up on Ford Dizzies and the most common setup was to have 26 or 30 degrees of mechanical advance. This doesn't jibe with an initial advance of 14 as recommend as the total would be 40 or 44 degrees. I found some info about power tuning a Ford dizzy on the cheap (some of it on this site) and pulled apart the unit. The reluctor arm was a typical 13l meaning 26 degrees of advance. Another issue I found is someone did a crap job recurving. The heavy spring was not engaging at all and the light spring was very light. So I was pretty much getting full advance within a few hundred RPMs. Not cool. I modified the reluctor arm by adding material to change the mechanical advance to 18/19 degrees. Fixed the heavy spring. Put it all back together, and reset the time to around 13 degrees. FRPP said 14 but it sounds better at 13. After I run it a while I might go file some of the additional material out of the reluctor to gain more advance (right now I'd have 13-31/2 degrees). But right now I'm really happy with the way the car ran. I reset the idle mixture on the carb (Holley 4150 650 cfm) and went for a drive. It is running consistently now between 188-191 degrees through the whole RPM range which I think will be OK. And it had a ton more torque on the low end then it had in the other test drives. Took me 7 weeks to get these few things done but at 90 minute a week intervals... well I'm sure most people on the site can relate. Next step. Re-jet all around and respring the secondaries on the Carb then adjust the vacuum advance. One thing that is nice is that a month ago I knew very little about timing and felt beholden to mechanics. While I'm no master now I feel I can make many of the adjustments myself. Still learning the ins and outs of Holley tuning. Not sure I can learn that as fast as distributor curving and advances. Sorry for the long post just wanted to put it all out there. Quote Share this post Link to post Share on other sites
MN69Grande 203 Report post Posted October 8, 2015 Also wanted to add the great instruction on the Distributor rebuild. http://www.reincarnation-automotive.com/Duraspark_distributor_recurve_instructions_index.html It has a handy chart that tells you what size the slot needs to be in the reluctor arm for how many degrees of advance. Also a step by step guy to tear down and rebuild the distributor. Quote Share this post Link to post Share on other sites
MN69Grande 203 Report post Posted February 5, 2016 So old cars am I right? At the end of the season last year I had the car running decently. The new motor pulls like crazy. Big grin on my face. I needed to take it down to get the hood realigned (mechanic took it off and couldn't get it to line up again - do I get a discount for that?). So I took it on one last test cruise. Look down at the passenger side floor and it is full of coolant. HAH! What a 47 year old heater core gave out! I don't believe it. So I've spent the last couple months rebuilding the HVAC system. All new gaskets and foam, vacuum motors, a new evaporator, new heater core, fixed the fiberglass box (the nipple for the drain had been broken off), and cleaning up some other parts. Hopefully I can put the dash back together by the end of March. Now I just wonder. What is left to break in that old car. On the Plus side I found a used Gear Vendors over drive with all the electronics and C4 adapter with less than 3k miles on it. So I scooped that puppie up! Oh dreams of spring, car cruises, smoking tires, and hitting the road. Quote Share this post Link to post Share on other sites
MN69Grande 203 Report post Posted February 5, 2016 Forgot to mention I replaced the Clock and Instrument Bezel, the lights for the instrument panel with LEDs, and the Crusty circuit board. Now I'm working on freshening the center console. So many projects... So little time... at least time where the wife and/or work aren't demanding something. Just in Case someone hasn't had the fun of replacing some of this stuff here are a few pic: Quote Share this post Link to post Share on other sites
MN69Grande 203 Report post Posted February 16, 2016 So this beauty (see pic of Gear Vendor OD/UD) arrived last week. I really hope it's in as good of condition as promised. The price was neither good or bad, still a huge savings over new. Probably be mid-summer before I can install it. I also want to swap 3rd members at the same time.. So now the internal debate is 3.55 or 3.80? Going to just keep the 8 inch housing but I am going to go TrueTrack. Man I can't wait for spring! Quote Share this post Link to post Share on other sites
RPM 1,190 Report post Posted February 16, 2016 Dude, throw a heater in that shop! :) Me thinks you'll have more fun with the 3.80's. Heck, you could probably start off in 2nd gear if you thought the 3.80's were too high. My brother had a 289 '65 coupe with 3.91's in it. Quote Share this post Link to post Share on other sites
MN69Grande 203 Report post Posted February 16, 2016 Dude, throw a heater in that shop! :) Me thinks you'll have more fun with the 3.80's. Heck, you could probably start off in 2nd gear if you thought the 3.80's were too high. My brother had a 289 '65 coupe with 3.91's in it. Yeah I go back and forth and back and forth on the Gear Ratio. I bought one of those Hot Dawg heaters. Needs to be installed, but the car is in the way. So I need the heater to work on the car but need to finish work on the car to install the heater! Quote Share this post Link to post Share on other sites