stangme428 33 Report post Posted October 1, 2012 (edited) picked up my 69 shelby center exhaust, now does anybody have a template to modify the rear valance? im still searching the interweb....:tongue_smilie: the first pic is my center exhaust, the rest i took at a car show in Jacksonville, FL in 2011 Edited October 1, 2012 by stangme428 Quote Share this post Link to post Share on other sites
stangme428 33 Report post Posted October 1, 2012 gotta love forums!! found this over on the shelby forums ... March 4th, 2008, 10:27 PM #5 DJR Re: Valance cutout for exhaust on '69 GT500 OK going off of the centre of the valence. The screw hole between the two plate insert square holes. 1. Measure 1" down. Make mark. 2. Measure 6" each side of mark. 3. Measure 5 3/4" down from the marks you just made. 4. Connect the dots and you should cut out a rectangle 5 3/4 X 12". 5. The rectangle will be in the centre of the valence 1" down from the middle screw which holds the valence to the car. Quote Share this post Link to post Share on other sites
LindenBruce 27 Report post Posted October 2, 2012 That's sweet. How does the license plate bracket bolt on? Could it be used with a non-Shelby rear taillight panel? Bruce Quote Share this post Link to post Share on other sites
stangme428 33 Report post Posted October 2, 2012 That's sweet. How does the license plate bracket bolt on? Could it be used with a non-Shelby rear taillight panel? Bruce the license plate bracket bolts where the gas filler is, it now resides behind the license plate bracket. it would be interesting to see a non shelby panel with the center exhaust setup.. Quote Share this post Link to post Share on other sites
LindenBruce 27 Report post Posted October 2, 2012 Ok, so the Shelby tail light filler panel is not part of that equation? Bruce Quote Share this post Link to post Share on other sites
70Mach03 12 Report post Posted October 2, 2012 the license plate bracket bolts where the gas filler is, it now resides behind the license plate bracket. it would be interesting to see a non shelby panel with the center exhaust setup.. Very Sweet!! Always loved the look. Be careful though when refueling. Seems like in the late 60's/early 70's there were warnings about gasoline spilling out on hot exhaust tips and causing fires. Make sure you've got a good gas cap. On hard acceleration it might have what appears to be an afterburner behind it. :thumbup1: Quote Share this post Link to post Share on other sites
LindenBruce 27 Report post Posted October 2, 2012 (edited) Yeah, I've heard those stories too. Hey stangme, do you have some pics of how the shelby system attaches to the tail pipes? B Edited October 2, 2012 by LindenBruce Quote Share this post Link to post Share on other sites
stangme428 33 Report post Posted October 3, 2012 70mach03 / lindenbruce - yeah i have read those stories... i plan on making sure the gas cap is nice and tight under the license plate bracket. . and also looking into a ceramic coating, but i would think the aluminum center exhaust would dissipate heat rather quick.. we shall see. most gas pumps have better cut off and control now days.. at this point i do not plan on installing the Shelby aluminum 2 1/4" exhaust that routes to the center section ($400+). i have one to borrow and work off of as a template. i plan on having a friend make me an attachment from the Magnaflow 3" stainless exhaust to a base plate that mounts to the center section similar to the pic attached. if this takes some dr.gas 3" oval tubing equivalent etc then so be it, this will be one of the last items of the build so when i get to that point ill post more... we know we have lots of challenges ahead of us, especially when the Fays2 watts link is installed, let alone the 3" exhaust by itself... but if it was easy... everybody would be doing it!!!:sweatdrop: :thumbup1: Quote Share this post Link to post Share on other sites
LindenBruce 27 Report post Posted October 3, 2012 Truer words have never been spoken!!! That 3" system is going to be an extremely tight fit. I'm going 2 1/2" myself. I think Buckeye did 3" didn't he? It makes sense that you could make your own adapter at the back. A piece of steel plate and weld on the tubing after doing some fitting and she would work. Don't see why not. Yes, post some pics when you get it done. I would be very interested in seeing what you came up with. I might do the same with my non-Shelby Mach 1. The only thing would be coming up with a light for the license plate. Let me think on it????? B Quote Share this post Link to post Share on other sites
buening 63 Report post Posted October 3, 2012 My two cents, unless you already bought the 3" exhaust I'd go with the 2.5". The larger exhaust has no benefit when you have a restrictive exit like that shelby piece. You may look into oval exhaust to make routing through the watts link a bit easier (routing underneath the axle is common) Quote Share this post Link to post Share on other sites
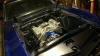
stangme428 33 Report post Posted October 3, 2012 My two cents, unless you already bought the 3" exhaust I'd go with the 2.5". The larger exhaust has no benefit when you have a restrictive exit like that shelby piece. You may look into oval exhaust to make routing through the watts link a bit easier (routing underneath the axle is common) yeah im not using the Shelby piece on the center section only the outside mount which is wide open.. also have over 520hp @ 5400rpm Quote Share this post Link to post Share on other sites
LindenBruce 27 Report post Posted October 3, 2012 Stangme428, I assume you are using a 351W block for the clevor build right? If so, which head gaskets did you go with? Did you use the Aussie heads or Ford 2v heads? Which rotating assembly? Thanks, Bruce Quote Share this post Link to post Share on other sites
stangme428 33 Report post Posted October 3, 2012 Stangme428,I assume you are using a 351W block for the clevor build right? If so, which head gaskets did you go with? Did you use the Aussie heads or Ford 2v heads? Which rotating assembly? Thanks, Bruce lindenbruce - i took a 69 351W block installed AFD 2V aluminum cleveland heads with a original B&A track boss intake. a scat stroker 408 forged rotating assembly. i ended up with FEL 1046 Head Gasket, i had some water seal problems (not near combustion chamber) when i took the engine to the engine dyno for break in due to the water pressure on the dyno being 35+ psi.(he built round track motors) i find out then that the engine builder had not decked the block for various reasons..said it was close enough... but, running at a lower psi i had no problems.. and had no compression or ping problems... hit 516hp/520tq @ 5400rpm i believe... comp cam runs out at 6500.. now if i had to do it over... i would probably go with a set of CHI 3V 225CC street assembly 8005A heads ready to bolt on with a CHI intake and use a modified water neck adapter. why.. because you can now at a price similar to what i have in my setup, and i did and am doing a cash only project .. if i don't have the cash i don't purchase it ... but, at the time i purchased my heads i already had a 550 $ intake and the CHI 3v heads and intake cost more at the time.. do i like the AFD heads, yes.. do i have too much money in them now.. yes.. i let you read my build progress for that long answer... :biggrin: guess that was a long answer for a head gasket question.. lol Quote Share this post Link to post Share on other sites
LindenBruce 27 Report post Posted October 4, 2012 Thanks Stangme428, yes that was a long answer. Felpro head gasket #1021 because it supposedly has a notched sealing ring to accommodate notching of the block for the Cleveland canted valves. I guess I don't need to worry about that. Thanks for the info. Bruce Quote Share this post Link to post Share on other sites
stangme428 33 Report post Posted October 4, 2012 (edited) Thanks Stangme428, yes that was a long answer. Felpro head gasket #1021 because it supposedly has a notched sealing ring to accommodate notching of the block for the Cleveland canted valves. I guess I don't need to worry about that. Thanks for the info. Bruce yes the builder followed the gasket and added the notch, the gaskets had it built in... :thumbup1: its hard to see in the pic, but it was done, follow the relief in the piston over to the block.. Edited October 4, 2012 by stangme428 added pic Quote Share this post Link to post Share on other sites
427Stang 23 Report post Posted October 4, 2012 3" is extremely tight. 2-1/2" would work just as well with less problems. I built my collector out of 3" stainless and some stainless plate. less restrictive than the factory cast piece. Depending on your planned use you could install motorized cutouts ahead of the transitions around the fuel tank to reduce flow restriction. Quote Share this post Link to post Share on other sites
Powershift 19 Report post Posted October 4, 2012 All that comes to mind after seeing those pics.... is.... WOW! SOHC...... awesome. Quote Share this post Link to post Share on other sites
stangme428 33 Report post Posted October 4, 2012 EXACTLY... WOW... thats what i was thinking... the cut outs are a bonus! thanks for the idea, inspiration ........very very nice!:thumbup1::tongue_smilie::punk: Quote Share this post Link to post Share on other sites
427Stang 23 Report post Posted October 4, 2012 Forgot to mention I purchased the rear valence from Shelby Parts and Restorations http://s247533021.onlinehome.us/catalog/ It may be expensive but the problem I encountered in cutting one out was the aftermarket valences are junk to begin with and too thin. When you cut out the hole for the pod the valence is so thin the remaining metal cannot support itself and bends if you pick it up wrong. Shelby Parts and Restorations valence is a quality piece made from heavy gauge steel with the hole cut with a plasma cutter. Very little work was needed on mine to get it to fit perfect. Quote Share this post Link to post Share on other sites
LindenBruce 27 Report post Posted October 4, 2012 Stangme428, those notches are very slight. That's reassuring to know. Thanks. 427stang, I love how you did your system. I think I know what I'm going to do now that's for sure. Stainless is expensive, but like you say it's corrosion resistant as hell. I might go steel and do a ceramic coating. How does the rear plate attach? Is it bolted to the rear valance along with the body at the top? Thanks. Bruce Quote Share this post Link to post Share on other sites
427Stang 23 Report post Posted October 4, 2012 Stangme428, those notches are very slight. That's reassuring to know. Thanks. 427stang, I love how you did your system. I think I know what I'm going to do now that's for sure. Stainless is expensive, but like you say it's corrosion resistant as hell. I might go steel and do a ceramic coating. How does the rear plate attach? Is it bolted to the rear valance along with the body at the top? Thanks. Bruce The plate uses the same mounting hardware and points as the stock Shelby cast pod does. It basicly sandwitches two rubber bushings between the body panel. Positive retention with some vibration dampening. I can take some pics with more detail if you are interested. Quote Share this post Link to post Share on other sites
stangme428 33 Report post Posted October 4, 2012 427stang - any you would like to share would be great! thanks:thumbup1: Quote Share this post Link to post Share on other sites
cobrakidz 10 Report post Posted October 5, 2012 wow--this build will be awesome....... Quote Share this post Link to post Share on other sites
LindenBruce 27 Report post Posted October 5, 2012 Yes, share away dude!!! B Quote Share this post Link to post Share on other sites
buening 63 Report post Posted October 5, 2012 Keep in mind fellas, 427stang has room because he is using a narrower-than-stock fuel cell out back. No way would that fit using a stock gas tank. Excellent work btw 427stang, you definitely have a lot of time into that build and it shows! Quote Share this post Link to post Share on other sites