RPM 1,190 Report post Posted December 20, 2015 So nice! I'm digging those flush 1/4 scoops a lot You may be secretly thanking that idiot "driver" on the track who started this journey :) Quote Share this post Link to post Share on other sites
fvike 173 Report post Posted December 21, 2015 You may be secretly thanking that idiot "driver" on the track who started this journey :) Nope, I still hates his guts! LOL. Anyway, gonna send in my rimblow wheel for restoration, but before I do, I need to get the seat height on the Viper seats right. So I'm installing the lower dash, and steering collumt to check that. Firs I'm gonna measure where I sit in the original Hi-Back, because that was perfect for me. Then I'm gonna measure the Viper seat, and see if I have to modify the floor seat riser. Quote Share this post Link to post Share on other sites
fvike 173 Report post Posted December 23, 2015 Good to have the seat, dash and steering in, even if it's just for mock up. First time I've had the manual pedals in the car. Measured from the bottom of the Rimblow wheel to the seat, and also took notice where in the car I sat, lengthwise. This is me sitting in the original hi-back bucket seat. This is the perfect seating position for me. My Mustang always fit me like a glove. And here I'm sitting in the Dodge Viper seats. I sit perhaps 3/4" - 1" higher. Actually, my ass sits as low as it did in the original seats, but the thigh support is higher. But there's still room under the steering wheel. I have to decide if it's ok, or if I need to modify the seat floor riser. Amazingly the Dodge Viper seats have the exact track width as the original seats. Almost bolts right in. Just need to align the back mounts, as the Viper had longer tracks. These seats don't tilt forward, because the Viper just has wall and backlite there. But when moved as far forward as they go, and with the back in the upright position, rear seat access is ok. Quote Share this post Link to post Share on other sites
fvike 173 Report post Posted December 30, 2015 Early in the project, I wanted to restore the front suspension components. Didn't happen because the suspension was put back on the car to move it back and forth from the body shop at the time. But now I've got them dissasembled, ready for paint removal. But I still haven't figured out what to do with them. Idealy, I'd like to have them powdercoated like the Suspension TCP sells today, but I've been unable to find anyone in Norway that does powdercoat in that finish. Started with removal of the balljoints. Then got them washed. Then I removed the hardware. Then another round in the parts cleaner. Almost clean! Still need to clean the threads on some pieces. Quote Share this post Link to post Share on other sites
Alan_Mac 48 Report post Posted January 2, 2016 My TCP front suspension has the same blue color. I was thinking of changing it to satin or matte black. Quote Share this post Link to post Share on other sites
fvike 173 Report post Posted January 30, 2016 Have got all the parts minus the hood back. Starting to assemble the car, to see if all fits like it should. For example the Dynacorn front valence has never been on the car because of the rotisserie. The repro bumpers gotta be modified, they don't fit well. They could not be mounted before, with the rotisserie in place. Rear valence looks good. The exhaist cutouts have was modified for larger tailpipes when I got the car, but a lot of bondo filled the gap and lousy welds. This time around the gap was left in place and welds are smoothed out. I'll try to get a better picture of it. The repro left quarter extension does not fit well against the tail panel. Anyone got a original pot metal to sell? My right is OEM. Final fitment of the radiator before paint. Also need to fab a bracket to the Setrab oil cooler. It must be placed a bit differently form my old oil cooler, because of the larger radiator. Quote Share this post Link to post Share on other sites
fvike 173 Report post Posted February 2, 2016 Doors on, fenders on. Not fully alligned yet. Just mock up to see how much work the bumpers need. Quote Share this post Link to post Share on other sites
Alan_Mac 48 Report post Posted February 3, 2016 Looks like your head is at the same height and location with the new seats. If you can get in and out ok, I would leave it as is. LOOKING GOOD. Quote Share this post Link to post Share on other sites
fvike 173 Report post Posted February 9, 2016 Alan_Mac: I did sit a tiny bit higher, but not so much that I need to cut up the floor I think. I'll try it like it is. If it doesn't work, I can always modify it later. I had good room between the seat cushion and steering wheel rim, so moving in and out of the car won't be a problem. Front valence and stoneguard mounted for the first time. These are Dynacorn parts, but they fit well. My Taiwan front bumper didn't fit at all. It's a lot wider, ca 1-1/2 inch on both sides. So it's gonna be cut up, but I had expected that. My car has never had an OEM bumper, do they fit snugly? Should I invest in one, instead of putting time and money into getting the Taiwan bumper to fit? The Dynacorn bumper brackets need to be tweaked at the bumper end. Here you can see that they aren't horizontal at the bumper mount surface. Quote Share this post Link to post Share on other sites
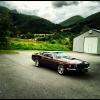
fvike 173 Report post Posted February 10, 2016 Front spoiler is on. Looks right, it really changes the attitude of the car. Tried to modify the front bumper. It's garbage. It bends way to easy, just soft steel. Need to buy originals. 1 SWPruett reacted to this Quote Share this post Link to post Share on other sites
fvike 173 Report post Posted February 13, 2016 Test fitted some trim today. Corvex mouldings is POS. Don't waste your money on it. I don't know why CJ Pony Parts even sell this shit. The inner trim was ok. Radiator support/grille shield looks to fit nice. The Pony is back on! Quote Share this post Link to post Share on other sites
Kris 90 Report post Posted February 15, 2016 Where did you get the radiator / grille shield from? Quote Share this post Link to post Share on other sites
fvike 173 Report post Posted February 15, 2016 National Parts Depot - https://www.npdlink.com/store/products/mustang_shield_radiator_to_grille_upper-147093-2908.html They have them in clear anodized aluminium and polished finish too. Quote Share this post Link to post Share on other sites
rwcstang 201 Report post Posted February 16, 2016 Where did you get the radiator / grille shield from? under cover innovations sells them, good product. http://undercoverinnovations.com/product/69-70-mustang-show-panels/ @fvike.. Seeing defect trim, made me go WTF... lol I bought drip rail trim from CJPP and it was all bad... pointless, its best to buy original parts and get them re-chromed or something. Quote Share this post Link to post Share on other sites
fvike 173 Report post Posted February 21, 2016 About the Dynacorn front valence. Needs a little bit of work to fit perfectly. Had to use a file to make room for the fasteners on the marker lights on both sides. They were a little tight. Quote Share this post Link to post Share on other sites
fvike 173 Report post Posted February 24, 2016 Got the hood on today. First time in 4 years that the car has had all it's sheetmetal on it. Got a NOS quarter extension panel today. Fitment wasn't as good as my original which is like the LH panel. It's a little bit better than the repro, but not by much. It did fit a lot better on the duck tail area. My repro had to be bondo'd to get the right shape. Quote Share this post Link to post Share on other sites
Mike65 475 Report post Posted February 25, 2016 Looking good. For the trim I bought all used Ford pieces & I will just polish them up wen it is time to install them. Quote Share this post Link to post Share on other sites
Total Control Products 24 Report post Posted March 1, 2016 Wow, Frode! I had not checked on your car in a while. I logged in today and I see that you have made a lot of progress. It's looking great! Quote Share this post Link to post Share on other sites
fvike 173 Report post Posted April 4, 2016 Thanks guys. I haven't done much the last month, but I did start restoring my heater box, and other misc parts for the car. Also today, my Tremec T-56 Magnum close ratio 6-speed showed up. ...aaaand American Powertrain forgot to send me my bellhousing, so I won't be able to mount it to get the specs for the driveshaft just yet. Kinda sucks when you wait 4 months for a part to show up. Well, at least the clutch pump and linkage was present, so I can mount them on my firewall. Need to drill some holes I guess. Quote Share this post Link to post Share on other sites
TexasEd 188 Report post Posted April 4, 2016 Looks great. Did you paint the grille or leave it bare plastic? Several people have reported it should be a matte finish. I can't tell if that is a shine on it or just reflected light. I need to get a Grille shield on my car, that part is missing. Quote Share this post Link to post Share on other sites
fvike 173 Report post Posted April 4, 2016 It's not painted, it's shinier than the images show. It's the Daniel Carpenter repro. I also have an original chrome grille, but I haven't decided what I'll use yet. Gotta see when there's paint on the car. The grille shield in not original. It's an aftermarket piece. It's a nice piece dough. Quote Share this post Link to post Share on other sites
fvike 173 Report post Posted April 22, 2016 The Bellhousing came in the other day. So I testfitted that. Good thing, because I was going to order a 11" 164-tooth flywheel and clutch, quickly learned (using my auto trans 164-tooth flywheel) that the Quicktime bellhousing only accepts up to 10.5" 157-tooth flywheels. Saved me some dollars and frustration there. Other than that, I had to open up the holes for the dowel pins a bit on one side to make it slide on. I was hoping to be able to clock the bellhousing using my old flywheel, that was a NO-GO when it was to large for the bellhousing. I also installed the clutch master cylinder. It went ok, but I need to move the pedal mounting hole for the MC rod to clear for binding. Won't do that until I have the seat back in the car, which I won't put in until I get my Rimblow wheel back, so that I can position myself correctly in the car, and get the pedal rod length I feel is best for me. The Rimblow wheel is in the US undergoing restoration. Which makes me wonder; my Powermaster XS clockable starter should fit a 157-tooth flywheel too, right? It was nice to have the 351W out on the floor again. It's been stuck in a corner far to long. It's a good looking engine actually. Quote Share this post Link to post Share on other sites
RPM 1,190 Report post Posted April 22, 2016 That's a bad a$$ looking motor! Quote Share this post Link to post Share on other sites
fvike 173 Report post Posted April 24, 2016 I installed the rear suspension today, was going to install the engine and transmission too so that I could measure and order the drive shaft. Unfortunately, of all things, the driver side motor mounts brackets wouldn't fit the Dynacorn shock towers. A weld was in the way, so that stopped progress today (It was getting late). Quote Share this post Link to post Share on other sites
SM69Mach 68 Report post Posted April 25, 2016 Making good progress. That is a great looking motor. Quote Share this post Link to post Share on other sites