Silver_69_Coupe 31 Report post Posted June 14, 2011 (edited) This weekends progress. Clutch Slave Cylinder. The springs look a little off because the fork is pull all of the was back. They don't touch the boot when the fork is aligned. The master and slave cylinder are from an older Nissan Pickup and cost a total of $3.00 From the scrap metal yard. The Time involved in making it this fit was about 2 Hours including running for the springs. I Could not drill the fork with a twist bit. I used a 3/8" Masonry bit and it worked great. Edited June 14, 2011 by Silver_69_Coupe Quote Share this post Link to post Share on other sites
Silver_69_Coupe 31 Report post Posted June 14, 2011 (edited) Engine in. The Engine is dirty from sitting but will clean up with it where it is. Look at the reflection in the paint... Ohhh shiny things... Edited June 14, 2011 by Silver_69_Coupe Quote Share this post Link to post Share on other sites
Silver_69_Coupe 31 Report post Posted June 14, 2011 Transmission Painted. Not much to say here. Cleaning it for paint took a long time with a toothbrush and grease remover. Ignore the mess in the background. Quote Share this post Link to post Share on other sites
Big Secz 26 Report post Posted June 14, 2011 I love how you smoothed out the engine compartment, it looks great. But stupid question, what is your plan for latching the hood? Quote Share this post Link to post Share on other sites
Silver_69_Coupe 31 Report post Posted June 14, 2011 (edited) I am using the original for a safety latch and then adding two pin type latches like you find on Acura legends. The original latch still bolts in in front of the radiator but I have a piece still left to build that goes between the radiator and the grille. It will cover the top of the radiator and go out to the grill. The grille will mount to it. It is really hard to explain but hopefully you get the idea. Similar to this piece. The two holes on the outside edges of this will be latches and pins will be mounted to the bottom of the hood that go into them. Basically in the place that the hood stops are now. Edited June 14, 2011 by Silver_69_Coupe Quote Share this post Link to post Share on other sites
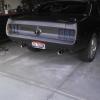
Silver_69_Coupe 31 Report post Posted August 20, 2011 (edited) I have been working on the fun stuff. Brakes in bled and working. The wiring for start and run done. Battery mounted in trunk. Main 185 Amp Breaker 2/0 Wire to the starter Alternator wire in, Main Fuse box in (Box For 12V Constant) Secondary Fuse box in (Box for Ignition. This box is ran off of a 100Amp Relay) Hydraulic clutch working, The Fuel Pump pumping Exhaust done. E-Brake installed (Center Pull from a 99 Mustang) HEI Distributor installed. It started on the first try after the motor sat for 2.5 Years. I drove it around the block. That was about the limit since the radiator is not quite hooked up yet. Plumbed but I have to get the brackets and pullies for the accessories. It is gonna be a fun car. I could tell already!!! Here are some pics. They do not cover everything but they do highlight a good portion of it. This is one FAT cable. I shouldn't have any issues getting enough juice to the gear reduction starter. They driveline will get painted or replaced. Seat Brackets still need paint also. I may add a heat shield where the fuel line crosses the exhaust. I need to add some extra support to the fuel pump bracket. it wiggles a little bit. the extra hole is for the wipers and brake fluid warning light. The FAT Cable will get a grommet and sealant once I find the right grommet. E-Brake cables are from a 96 Cobra And the lever inside is from a 99 Mustang. Edited August 20, 2011 by Silver_69_Coupe Quote Share this post Link to post Share on other sites
Silver_69_Coupe 31 Report post Posted August 20, 2011 (edited) I have been working on the fun stuff. Brakes in bled and working. The wiring for start and run done. Battery mounted in trunk. Main 185 Amp Breaker 2/0 Wire to the starter Alternator wire in, Main Fuse box in (Box For 12V Constant) Secondary Fuse box in (Box for Ignition. This box is ran off of a 100Amp Relay) Hydraulic clutch working, The Fuel Pump pumping Exhaust done. E-Brake installed (Center Pull from a 99 Mustang) HEI Distributor installed. It started on the first try after the motor sat for 2.5 Years. I drove it around the block. That was about the limit since the radiator is not quite hooked up yet. Plumbed but I have to get the brackets and pullies for the accessories. It is gonna be a fun car. I could tell already!!! Here are some pics. They do not cover everything but they do highlight a good portion of it. This is one FAT cable. I shouldn't have any issues getting enough juice to the gear reduction starter. They driveline will get painted or replaced. Seat Brackets still need paint also. I may add a heat shield where the fuel line crosses the exhaust. I need to add some extra support to the fuel pump bracket. it wiggles a little bit. the extra hole is for the wipers and brake fluid warning light. The FAT Cable will get a grommet and sealant once I find the right grommet. E-Brake cables are from a 96 Cobra And the lever inside is from a 99 Mustang. Edited August 20, 2011 by Silver_69_Coupe Quote Share this post Link to post Share on other sites
69SlowResto 19 Report post Posted August 20, 2011 Nice work! Quote Share this post Link to post Share on other sites
69SlowResto 19 Report post Posted August 20, 2011 Nice work! Quote Share this post Link to post Share on other sites
Rudolph Schenker 14 Report post Posted August 21, 2011 Very nice work! :cool2: Quote Share this post Link to post Share on other sites
Rudolph Schenker 14 Report post Posted August 21, 2011 Very nice work! :cool2: Quote Share this post Link to post Share on other sites
MustangChuck 16 Report post Posted August 23, 2011 The other Side I promised. The Subframe center connector is removable and will get an intergrated drive shaft loop. I will also add a front loop. Once I get everything lined up underneath. 8.8 out of a 96 Cobra. Axle is 1" wider which makes my 17" Cobra R wheels fit perfect after removing the outside rubber nubbers. They will be moved inwards and be bolt in style. I LOVE that subframe connector! Is it custom made? VERY nice work! The 8.8" rear also looks great! Whose spring perches did you use? I am (hopefully) about to buy the TinMan subframe connectors to get installed along with the new floors. I like yours MUCH more. Looks like a lot of extra strength. I will also be installing an 8.8" out of a 94 GT, so if you could share any gotchas you ran across, I would greatly appreciate it. I will be running 17" rims from a '97 GT, so I am not worried about the axle being wider. It will actually allow me to remove the 1" spacers I've been using the last 8 years or so. M/C Quote Share this post Link to post Share on other sites
MustangChuck 16 Report post Posted August 23, 2011 The other Side I promised. The Subframe center connector is removable and will get an intergrated drive shaft loop. I will also add a front loop. Once I get everything lined up underneath. 8.8 out of a 96 Cobra. Axle is 1" wider which makes my 17" Cobra R wheels fit perfect after removing the outside rubber nubbers. They will be moved inwards and be bolt in style. I LOVE that subframe connector! Is it custom made? VERY nice work! The 8.8" rear also looks great! Whose spring perches did you use? I am (hopefully) about to buy the TinMan subframe connectors to get installed along with the new floors. I like yours MUCH more. Looks like a lot of extra strength. I will also be installing an 8.8" out of a 94 GT, so if you could share any gotchas you ran across, I would greatly appreciate it. I will be running 17" rims from a '97 GT, so I am not worried about the axle being wider. It will actually allow me to remove the 1" spacers I've been using the last 8 years or so. M/C Quote Share this post Link to post Share on other sites
MustangChuck 16 Report post Posted August 23, 2011 (edited) This weekends progress. Clutch Slave Cylinder. The springs look a little off because the fork is pull all of the was back. They don't touch the boot when the fork is aligned. The master and slave cylinder are from an older Nissan Pickup and cost a total of $3.00 From the scrap metal yard. The Time involved in making it this fit was about 2 Hours including running for the springs. I Could not drill the fork with a twist bit. I used a 3/8" Masonry bit and it worked great. Another awesome adaptation! Do you remember what year and model of Nissan Truck? I go junk yard hopping often and would like to try to acquire those parts. I am installing the transmission from a 94 GT, which should be physically the same as your 95 Cobra. What size springs did you use and where did you get them? Also, what are you using for a master cylinder? Thanks, M/C Edited August 23, 2011 by MustangChuck Quote Share this post Link to post Share on other sites
MustangChuck 16 Report post Posted August 23, 2011 (edited) This weekends progress. Clutch Slave Cylinder. The springs look a little off because the fork is pull all of the was back. They don't touch the boot when the fork is aligned. The master and slave cylinder are from an older Nissan Pickup and cost a total of $3.00 From the scrap metal yard. The Time involved in making it this fit was about 2 Hours including running for the springs. I Could not drill the fork with a twist bit. I used a 3/8" Masonry bit and it worked great. Another awesome adaptation! Do you remember what year and model of Nissan Truck? I go junk yard hopping often and would like to try to acquire those parts. I am installing the transmission from a 94 GT, which should be physically the same as your 95 Cobra. What size springs did you use and where did you get them? Also, what are you using for a master cylinder? Thanks, M/C Edited August 23, 2011 by MustangChuck Quote Share this post Link to post Share on other sites
MustangChuck 16 Report post Posted August 23, 2011 One last thing. You installed the hand brake from a '99. That should be pretty similar to the '94 I want to install. Do you have pictures of what you did? Many, many thanks! M/C Quote Share this post Link to post Share on other sites
MustangChuck 16 Report post Posted August 23, 2011 One last thing. You installed the hand brake from a '99. That should be pretty similar to the '94 I want to install. Do you have pictures of what you did? Many, many thanks! M/C Quote Share this post Link to post Share on other sites
DRASTiK 22 Report post Posted August 23, 2011 I'd love to see some pics of the firewall-smooting process if you've got any. That looks very impressive! Quote Share this post Link to post Share on other sites
DRASTiK 22 Report post Posted August 23, 2011 I'd love to see some pics of the firewall-smooting process if you've got any. That looks very impressive! Quote Share this post Link to post Share on other sites
Silver_69_Coupe 31 Report post Posted August 23, 2011 I LOVE that subframe connector! Is it custom made? VERY nice work! The 8.8" rear also looks great! Whose spring perches did you use? I am (hopefully) about to buy the TinMan subframe connectors to get installed along with the new floors. I like yours MUCH more. Looks like a lot of extra strength. I will also be installing an 8.8" out of a 94 GT, so if you could share any gotchas you ran across, I would greatly appreciate it. I will be running 17" rims from a '97 GT, so I am not worried about the axle being wider. It will actually allow me to remove the 1" spacers I've been using the last 8 years or so. M/C The center section of the sub=frame connector will not get installed Everything runs into it. I made it out of 3/16 Wall 2x2 Square tubing. Quote Share this post Link to post Share on other sites
Silver_69_Coupe 31 Report post Posted August 23, 2011 I LOVE that subframe connector! Is it custom made? VERY nice work! The 8.8" rear also looks great! Whose spring perches did you use? I am (hopefully) about to buy the TinMan subframe connectors to get installed along with the new floors. I like yours MUCH more. Looks like a lot of extra strength. I will also be installing an 8.8" out of a 94 GT, so if you could share any gotchas you ran across, I would greatly appreciate it. I will be running 17" rims from a '97 GT, so I am not worried about the axle being wider. It will actually allow me to remove the 1" spacers I've been using the last 8 years or so. M/C The center section of the sub=frame connector will not get installed Everything runs into it. I made it out of 3/16 Wall 2x2 Square tubing. Quote Share this post Link to post Share on other sites
Silver_69_Coupe 31 Report post Posted August 23, 2011 One last thing. You installed the hand brake from a '99. That should be pretty similar to the '94 I want to install. Do you have pictures of what you did? Many, many thanks! M/C The 94 is pretty much the same. If you can cut the thicker mounting parts from the donor car. Also there are 2 brackets. Make sure you make notes on the spacing between the 2 and get it the same on the retrofit. Quote Share this post Link to post Share on other sites
Silver_69_Coupe 31 Report post Posted August 23, 2011 One last thing. You installed the hand brake from a '99. That should be pretty similar to the '94 I want to install. Do you have pictures of what you did? Many, many thanks! M/C The 94 is pretty much the same. If you can cut the thicker mounting parts from the donor car. Also there are 2 brackets. Make sure you make notes on the spacing between the 2 and get it the same on the retrofit. Quote Share this post Link to post Share on other sites
Silver_69_Coupe 31 Report post Posted August 23, 2011 I'd love to see some pics of the firewall-smooting process if you've got any. That looks very impressive! I don't have any pictures of the process. It is all new sheetmetal. And it was a long project. I probably have about 80 hours into it all together. Not to mention all of the other snags I have run into while putting everything together. I did this primarily to make the Hydroboost fit and because when I went to fill the holes that were already in it the metal basically fell apart. With my welder on the lowest setting I was blowing 1/4 holes in the firewall. Quote Share this post Link to post Share on other sites
Silver_69_Coupe 31 Report post Posted August 23, 2011 I'd love to see some pics of the firewall-smooting process if you've got any. That looks very impressive! I don't have any pictures of the process. It is all new sheetmetal. And it was a long project. I probably have about 80 hours into it all together. Not to mention all of the other snags I have run into while putting everything together. I did this primarily to make the Hydroboost fit and because when I went to fill the holes that were already in it the metal basically fell apart. With my welder on the lowest setting I was blowing 1/4 holes in the firewall. Quote Share this post Link to post Share on other sites