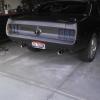
Silver_69_Coupe 31 Report post Posted February 26, 2011 Keep in mind this is mock up. Noting is "DOLLED UP" Yet. I This is the form fit and function stage. Quote Share this post Link to post Share on other sites
Silver_69_Coupe 31 Report post Posted February 26, 2011 More Pictures... Quote Share this post Link to post Share on other sites
82stangracer 10 Report post Posted February 26, 2011 :thumbup1: Wow thats great work! Just now seeing this thread. What did you use to eliminate/kill/stop rust. Love all the mods! Quote Share this post Link to post Share on other sites
Silver_69_Coupe 31 Report post Posted February 27, 2011 I sandblasted the whole thing. Then coated it all with Epoxy. There were only 5 spots and they were very minor. Both Lower Quarters on the back I will replace the metal here Floor pan under pedals. (About 2" x 2") Sandblasted and treated with SEM. Filled 3 tiny pin holes with JB Weld Bottom front of the doors. Sandblasted and will replace the metal Top of gas tank. Someone had a piece of carpet on it and it was rusted to the tank. Sandblasted and SEM on this also. Small Hole about the size of a pencil in the rear window. Removed metal and welded a washer in its place. Then filled the center of the washer with a weld. The Doors an quarters will be done after the mock up and test drive period. I haven't decided on replacing both rear quarters or using lower quarter patches. Quote Share this post Link to post Share on other sites
rc4mike 10 Report post Posted February 27, 2011 Where did u get the seat belts? Love the idea of retracting them Quote Share this post Link to post Share on other sites
Silver_69_Coupe 31 Report post Posted February 27, 2011 96 Mustang. If you get some and need some help with how to make them fit let me know. You have to align them just right or they will not retract Quote Share this post Link to post Share on other sites
82stangracer 10 Report post Posted March 2, 2011 I sandblasted the whole thing. Then coated it all with Epoxy. There were only 5 spots and they were very minor. Both Lower Quarters on the back I will replace the metal here Floor pan under pedals. (About 2" x 2") Sandblasted and treated with SEM. Filled 3 tiny pin holes with JB Weld Bottom front of the doors. Sandblasted and will replace the metal Top of gas tank. Someone had a piece of carpet on it and it was rusted to the tank. Sandblasted and SEM on this also. Small Hole about the size of a pencil in the rear window. Removed metal and welded a washer in its place. Then filled the center of the washer with a weld. The Doors an quarters will be done after the mock up and test drive period. I haven't decided on replacing both rear quarters or using lower quarter patches. What is SEM? Quote Share this post Link to post Share on other sites
Silver_69_Coupe 31 Report post Posted March 2, 2011 http://semproducts.com/?home=1 They are a Body Shop Product line. A Lot of shops in my area use these products. Quote Share this post Link to post Share on other sites
82stangracer 10 Report post Posted March 3, 2011 Cool thanks! They are only a little over an hour from me. I'll check them out. Quote Share this post Link to post Share on other sites
Silver_69_Coupe 31 Report post Posted May 15, 2011 Engine compartment getting there... I replaced the inner fenders and radiator support. Converted the clutch over to hydraulic. Got all of the brake lines routed (Mocked up) Ready for final primer then final blocking on the engine compartment today after I finish building the re-enforcement plate for the Clutch and Brakes. Here are a few pics I will post more today or tomorrow. Quote Share this post Link to post Share on other sites
Silver_69_Coupe 31 Report post Posted May 16, 2011 (edited) Did not get quite as far as I wanted to this weekend. With the exception of a few minor fixes on the engine compartment body work and cutting the steering column hole. Paint is in the near future. By next weekend I hope. Edited May 16, 2011 by Silver_69_Coupe Quote Share this post Link to post Share on other sites
Silver_69_Coupe 31 Report post Posted June 7, 2011 (edited) it took a little longer than expected. Here it is. I still need to do the black around the bottom. But the top is pretty much done. See All of the Pictures here Edited June 7, 2011 by Silver_69_Coupe Quote Share this post Link to post Share on other sites
Silver_69_Coupe 31 Report post Posted June 7, 2011 (edited) it took a little longer than expected. Here it is. I still need to do the black around the bottom. But the top is pretty much done. See All of the Pictures here Edited June 7, 2011 by Silver_69_Coupe Quote Share this post Link to post Share on other sites
Silver_69_Coupe 31 Report post Posted June 10, 2011 Bottom Half is painted. Clutch master cylinder and proportioning valve polished. Quote Share this post Link to post Share on other sites
Silver_69_Coupe 31 Report post Posted June 10, 2011 Bottom Half is painted. Clutch master cylinder and proportioning valve polished. Quote Share this post Link to post Share on other sites
70mstang 11 Report post Posted June 10, 2011 This is sweet! Lots of effort in there. Quote Share this post Link to post Share on other sites
70mstang 11 Report post Posted June 10, 2011 This is sweet! Lots of effort in there. Quote Share this post Link to post Share on other sites
unfrozen1969 11 Report post Posted June 10, 2011 Awesome photos, love the color Quote Share this post Link to post Share on other sites
unfrozen1969 11 Report post Posted June 10, 2011 Awesome photos, love the color Quote Share this post Link to post Share on other sites
Fordrevhead 29 Report post Posted June 10, 2011 I like the color too. But with all of that effort I would have welded the shock tower wings prior to sealing and painting. Quote Share this post Link to post Share on other sites
Fordrevhead 29 Report post Posted June 10, 2011 I like the color too. But with all of that effort I would have welded the shock tower wings prior to sealing and painting. Quote Share this post Link to post Share on other sites
Silver_69_Coupe 31 Report post Posted June 11, 2011 (edited) I like the color too. But with all of that effort I would have welded the shock tower wings prior to sealing and painting. Are you referring to the holes for the shelby drop? I left the uppers there just in case I need to use them. Whatever ones that I don't use are getting rubber plugs. Edited June 11, 2011 by Silver_69_Coupe Quote Share this post Link to post Share on other sites
Silver_69_Coupe 31 Report post Posted June 11, 2011 (edited) I like the color too. But with all of that effort I would have welded the shock tower wings prior to sealing and painting. Are you referring to the holes for the shelby drop? I left the uppers there just in case I need to use them. Whatever ones that I don't use are getting rubber plugs. Edited June 11, 2011 by Silver_69_Coupe Quote Share this post Link to post Share on other sites
69SlowResto 19 Report post Posted June 11, 2011 That looks fantastic! Quote Share this post Link to post Share on other sites
69SlowResto 19 Report post Posted June 11, 2011 That looks fantastic! Quote Share this post Link to post Share on other sites