Silver_69_Coupe 31 Report post Posted June 26, 2010 (edited) Got some Priming Done today... Lots of it. Went fairly well but I got a boo-boo on the undercoating inside the right fender. the fender slipped on my cart when I was moving it over a little. I should have left it where it was. Easy fix but it will not look quite as good. Lower front cowl is pretty rough and may just get replaced. I haven't decided yet. I see now that the sandblasting did a little (Mashed Potato) damage to the headlight buckets. The damage is so minor that High build primer will take care of it on the final Primer and blocking stage. The goal is epoxy everything and get it all mocked up. Once it is all epoxied drive it for a few week,. then Body and paint. There will be some remove and re-install at the body and paint stage but I will know that I do not need to modify anything else at that point. All of the pictures are here. Edited June 26, 2010 by Silver_69_Coupe Quote Share this post Link to post Share on other sites
Silver_69_Coupe 31 Report post Posted June 26, 2010 (edited) Got some Priming Done today... Lots of it. Went fairly well but I got a boo-boo on the undercoating inside the right fender. the fender slipped on my cart when I was moving it over a little. I should have left it where it was. Easy fix but it will not look quite as good. Lower front cowl is pretty rough and may just get replaced. I haven't decided yet. I see now that the sandblasting did a little (Mashed Potato) damage to the headlight buckets. The damage is so minor that High build primer will take care of it on the final Primer and blocking stage. The goal is epoxy everything and get it all mocked up. Once it is all epoxied drive it for a few week,. then Body and paint. There will be some remove and re-install at the body and paint stage but I will know that I do not need to modify anything else at that point. All of the pictures are here. Edited June 26, 2010 by Silver_69_Coupe Quote Share this post Link to post Share on other sites
Silver_69_Coupe 31 Report post Posted July 18, 2010 It has been a little while. Went to play over the 4th. Here are the latest updates. I rounded up all of my bumper brackets. Found some seats (1998 Mustang Seats.) I will redo in black and dark gray 2 tone. I got my rack and pinion installed. I still need to get the column mounted to it but the rack is in. I will eventually do a write-up on making the brackets. I am using a GM J car rack. I found another hood that is not cut for the scoop. It needs a couple hours of body work but the price was very good. Quote Share this post Link to post Share on other sites
Silver_69_Coupe 31 Report post Posted July 18, 2010 Some more pics of the rack and pinion. Quote Share this post Link to post Share on other sites
Silver_69_Coupe 31 Report post Posted July 26, 2010 Updates Drivers seat and brackets installed. Bracket are not primed painted or undercoated yet. I was not comfortable with it just mounted to the floor pan. It felt flimsy when I sat on it. Seat will not stay this color. Also brackets for the front drive shaft loop will hook into this structure. Quote Share this post Link to post Share on other sites
unfrozen1969 11 Report post Posted July 26, 2010 Great progress, thanks for all of the awesome photos. Quote Share this post Link to post Share on other sites
Silver_69_Coupe 31 Report post Posted August 20, 2010 I got the other seat installed. Steering Rack and column built and installed. Drivers Side seatbelt installed and the passengers side seat belt pocket started but not fully fitted. Here are the pictures. http://www.resurrectedrides.com/kilgorq/10.08.19/index.html Quote Share this post Link to post Share on other sites
unfrozen1969 11 Report post Posted September 2, 2010 Your progress is good, what kind of vehicle are your seats from. Quote Share this post Link to post Share on other sites
unfrozen1969 11 Report post Posted September 2, 2010 Your progress is good, what kind of vehicle are your seats from. Quote Share this post Link to post Share on other sites
Silver_69_Coupe 31 Report post Posted September 2, 2010 1996 or 97 mustang gt Quote Share this post Link to post Share on other sites
Silver_69_Coupe 31 Report post Posted September 2, 2010 1996 or 97 mustang gt Quote Share this post Link to post Share on other sites
468stang 11 Report post Posted September 4, 2010 Looking good. Are you going with no door handles? Quote Share this post Link to post Share on other sites
468stang 11 Report post Posted September 4, 2010 Looking good. Are you going with no door handles? Quote Share this post Link to post Share on other sites
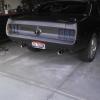
Silver_69_Coupe 31 Report post Posted September 4, 2010 (edited) No Handle and no mirrors. The mirrors will be a 3 Point infrared camera system. Camera will be mounted on each side of the front bumper and one in the rear license plate frame. Also the rear quarters will be custom. Something close to this. Referring the the areal right behind the door. I am still up in the air about the hood. Can't decide if I should go scoop-less, 69 small block or, 68 Shelby style. Similar to this one. I am not planning on side skirts or an air dam. I have given some thought to a rear spoiler but not sure yet. I like the swept back like the Shelby has but a little more subtle. or one like on the 69 Mach Ones. I am also going to try my luck with making the marker and tail lights flush mount with no trim around them. The grille will be the same as in the picture. Currently it is just the insert zip tied to the original but when it is done it will be all metal. I wasn't sure if I would like it but. I think it looks very good. The grille will be black chrome. All of the molding will also be black chrome. If i end up going with stripes they will either be a slightly darker shade of gray or black. Probably rally stripes. The 2 wider stripes with the thin stripe on the side of each stripe. The nice thing about going resto-mod is that it gives me a chance to play a little and make it uniquely mine. Edited September 4, 2010 by Silver_69_Coupe Quote Share this post Link to post Share on other sites
Silver_69_Coupe 31 Report post Posted September 4, 2010 (edited) No Handle and no mirrors. The mirrors will be a 3 Point infrared camera system. Camera will be mounted on each side of the front bumper and one in the rear license plate frame. Also the rear quarters will be custom. Something close to this. Referring the the areal right behind the door. I am still up in the air about the hood. Can't decide if I should go scoop-less, 69 small block or, 68 Shelby style. Similar to this one. I am not planning on side skirts or an air dam. I have given some thought to a rear spoiler but not sure yet. I like the swept back like the Shelby has but a little more subtle. or one like on the 69 Mach Ones. I am also going to try my luck with making the marker and tail lights flush mount with no trim around them. The grille will be the same as in the picture. Currently it is just the insert zip tied to the original but when it is done it will be all metal. I wasn't sure if I would like it but. I think it looks very good. The grille will be black chrome. All of the molding will also be black chrome. If i end up going with stripes they will either be a slightly darker shade of gray or black. Probably rally stripes. The 2 wider stripes with the thin stripe on the side of each stripe. The nice thing about going resto-mod is that it gives me a chance to play a little and make it uniquely mine. Edited September 4, 2010 by Silver_69_Coupe Quote Share this post Link to post Share on other sites
stangme428 33 Report post Posted September 4, 2010 wow! great build!! on the seats.. i have a 96GT and had a 96 Cobra (totaled.)... the power seats on the 96 GT would bind moving front/back after a while due to the mounting bracket (what bolts to the floor) that the assembly slides on not being braced. basically somehow the mounting brackets skew where they bolt to the floor which causes a bind. requiring the bolts to be loosened, brackets spread apart, and tightened back up. on the 96 cobra they have a bar welded in between the mounting brackets near the floor which prevents the bind. i would make sure the brackets are square as you have them bolted in and test the power fwd/back for no bind and then weld a small bar etc between the brackets so they cant move to cause bind. hopefully that makes sense...:tongue_smilie: Quote Share this post Link to post Share on other sites
stangme428 33 Report post Posted September 4, 2010 wow! great build!! on the seats.. i have a 96GT and had a 96 Cobra (totaled.)... the power seats on the 96 GT would bind moving front/back after a while due to the mounting bracket (what bolts to the floor) that the assembly slides on not being braced. basically somehow the mounting brackets skew where they bolt to the floor which causes a bind. requiring the bolts to be loosened, brackets spread apart, and tightened back up. on the 96 cobra they have a bar welded in between the mounting brackets near the floor which prevents the bind. i would make sure the brackets are square as you have them bolted in and test the power fwd/back for no bind and then weld a small bar etc between the brackets so they cant move to cause bind. hopefully that makes sense...:tongue_smilie: Quote Share this post Link to post Share on other sites
Silver_69_Coupe 31 Report post Posted September 4, 2010 I think I follow. Is the bracket on the floor side or the seat side. With the bracket I have underneath they would be hard pressed to move. The pipe I used is just shy of 3/16" thick and mounted to the sub-frame The pedestals that mount the seat to the brackets are over 1/4" Thick and the bolts I am using to mount them are 3/8" Grade 8 bolts. That covers the floor side anyway. I could add a piece of flat bar if it does wander. Quote Share this post Link to post Share on other sites
Silver_69_Coupe 31 Report post Posted September 4, 2010 I think I follow. Is the bracket on the floor side or the seat side. With the bracket I have underneath they would be hard pressed to move. The pipe I used is just shy of 3/16" thick and mounted to the sub-frame The pedestals that mount the seat to the brackets are over 1/4" Thick and the bolts I am using to mount them are 3/8" Grade 8 bolts. That covers the floor side anyway. I could add a piece of flat bar if it does wander. Quote Share this post Link to post Share on other sites
Fordrevhead 29 Report post Posted September 5, 2010 I like the 68 Shelby style hood on there, very different... although it's a little more subtle than the real thing in the Photoshop image that you show. Quote Share this post Link to post Share on other sites
Fordrevhead 29 Report post Posted September 5, 2010 I like the 68 Shelby style hood on there, very different... although it's a little more subtle than the real thing in the Photoshop image that you show. Quote Share this post Link to post Share on other sites
stangme428 33 Report post Posted September 5, 2010 I think I follow. Is the bracket on the floor side or the seat side. With the bracket I have underneath they would be hard pressed to move. The pipe I used is just shy of 3/16" thick and mounted to the sub-frame The pedestals that mount the seat to the brackets are over 1/4" Thick and the bolts I am using to mount them are 3/8" Grade 8 bolts. That covers the floor side anyway. I could add a piece of flat bar if it does wander. ah that's cool, it may not be able to move then.. so you'll know what to check if it does bind..:tongue_smilie: cool build cant wait to see it progress.!!! Quote Share this post Link to post Share on other sites
stangme428 33 Report post Posted September 5, 2010 I think I follow. Is the bracket on the floor side or the seat side. With the bracket I have underneath they would be hard pressed to move. The pipe I used is just shy of 3/16" thick and mounted to the sub-frame The pedestals that mount the seat to the brackets are over 1/4" Thick and the bolts I am using to mount them are 3/8" Grade 8 bolts. That covers the floor side anyway. I could add a piece of flat bar if it does wander. ah that's cool, it may not be able to move then.. so you'll know what to check if it does bind..:tongue_smilie: cool build cant wait to see it progress.!!! Quote Share this post Link to post Share on other sites
Silver_69_Coupe 31 Report post Posted February 26, 2011 Quick update. I have not had much time to get on and post. We moved to a new house and I spent a whole bunch of time setting up the new garage. Now I can't find anything. It is too organized and I cant remember where I put everything. My Baby is on the ground now. It rolls... I found a set of 17" Torque Thrust Style wheels. And a complete T5 out of a 95 cobra (Now I have and extra T5 for parts). I got my clutch kit and the part to modify the pedal assembly to change over to a cable style clutch with the quadrant. The front end is mock up is done. Minus the tie rod ends that I am waiting for. Steering rack is in and works good. Cobra brake upgrade is done. I still need to finish up hooking the brake lines into the Master Cylinder. I am getting excited. I have about 2 months until it starts getting nice out and I may just be able to get it to the mock up test drive stage in time. I have my fingers crossed. Once I get it to this point then I will be about 75% Done. I will get some pictures of my progress and post them sometime this weekend. Left to do for stage 1 (Test Drive) Mock Up... Exhaust Radiator Install Clutch and Transmission Button up Brake lines Install Tie Rod Ends. Engine Electrical. Plumbing for power steering and hydro booster. Brake Lights. Wiring for headlights. Modify Pedal for clutch cable. Fuel Lines Windshield The list is getting shorter. Just don't remind me how much time each of these can take... Quote Share this post Link to post Share on other sites
Rudolph Schenker 14 Report post Posted February 26, 2011 Looking forward to more progress pics! :thumbup1::thumbup1::thumbup1: Quote Share this post Link to post Share on other sites