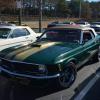
70mstang 11 Report post Posted August 24, 2008 I have owned this Mustang since 1986 and can finally take some time to put work into it. I am doing everything I possibly can myself. So I am learning to weld, align panels, suspension and anything else that comes up. I'll hopefully have her all done next year, but I have been really working on the car for the last 2 years. Hopefully the attachments come out okay. Quote Share this post Link to post Share on other sites
unfrozen1969 11 Report post Posted August 25, 2008 Welcome to the forum. I am at the similiar stage of restoration as you are. I noticed that you had your car sand blasted, did you do this yourself? I have been considering renting or buying a unit, but I don't think my 5hp compressor will provide enough power for the sprayer. Anyways, feel free to post some before, during and after pictures of your car. Regards, Bill from Canada Quote Share this post Link to post Share on other sites
Pakrat 1,043 Report post Posted August 25, 2008 (edited) Hey, I was thinking about your window regulator roller issue this weekend when I was thumbing through my VC catalog, go to this link and type "in114" into the search field. http://www.virginiaclassicmustang.com/catalog/shop/ The one on the bottom is listed in my catalog as 65-73 replacement, does not have the stud though which I think you were missing too? The one on top for the 67-68 is brand new and was not even in my 2008 catalog but looks like it maybe could be adapted as well to work. Might be worth a $4 investment if you are still hitting a brick wall on this. Good Luck. Edited August 25, 2008 by Pakrat Quote Share this post Link to post Share on other sites
70mstang 11 Report post Posted December 16, 2008 I found a 70 regulator that came with the roller attached. Very interesting that some companies sell the regulator without the roller and there is no place to buy a replacement! I tried the $4 part that all the supliers "claimed" was what I needed. LOL It was completely worthless. I did do all of the sandblasting myself. I actually borrowed a little unit that held 15 pounds of sand in the hopper and did the entire car an inch at a time. It took 4 months easily to get the sand blasting done but it didn't cost 800 bucks! Here are some pics of putting in new floor pans under the seat risers. I found the floor pans were pretty rusty while blasting under the car and peaking up through the hole for the seat bolts. So I figured, what the heck! Just waiting on funds to have someone beef up the door jams cause the metal around the hinges has a little rust on them. Quote Share this post Link to post Share on other sites
unfrozen1969 11 Report post Posted December 17, 2008 I was fortunate enough to find a guy who had a mobile commercial sand blasting truck, and for $400 and 4 hours later, she silica blasted the whole car. It turned out great, and I ahve since apoxy rimed the whole car. It will have to be blasted again when the day comes to start working on it, but it is preserved for a long time now. Bill Quote Share this post Link to post Share on other sites
70mstang 11 Report post Posted December 18, 2008 That kind of luck doesn't come my way LOL It was a really good learning experience and now I know every inch of my car top to bottom. I'll have to wait to see what the new year brings as far as someone to help with the rear fenders. I'm really darned scared to try them myself. I'll be cleaning and testing the elctrical while it's still cold and saving up funds. Quote Share this post Link to post Share on other sites
70mstang 11 Report post Posted March 28, 2009 I finally saved up a few dollars and found a local fella to help me with the body work on my 70. Getting the rear quarters, outer wheel housings, trunk well panels and tail light panel in place. Thinking it might be another week. Found a Mustang slavage yard over near Stone Mountain that has a drivers side door pillar, a little expensive but it's about all the metal I need now :clap: Just need to get around to the other side of ATL to get it LOL. Added some pics! Ed Quote Share this post Link to post Share on other sites
70mstang 11 Report post Posted April 3, 2009 One of my quarter panel extensions has some hidden damage where the pot (sp?) metal is broken. I know I can't weld it back together, right?:blink: Does anyone know how to properly fix these? Since 70 convertibles are not in the main stream they don't remanufacture these pieces and I don't want the filler to fall off after I get it painted. Thanks! Ed Quote Share this post Link to post Share on other sites
70mstang 11 Report post Posted April 6, 2009 A little more progress =) Quote Share this post Link to post Share on other sites
Pakrat 1,043 Report post Posted April 6, 2009 One of my quarter panel extensions has some hidden damage where the pot (sp?) metal is broken. I know I can't weld it back together, right?:blink: Does anyone know how to properly fix these? Since 70 convertibles are not in the main stream they don't remanufacture these pieces and I don't want the filler to fall off after I get it painted. Thanks! Ed Well, for an economic solution ther eis always JB weld and for a more expensive and I can only assume better solution there is muggy welding. http://www.muggyweld.com/potmetal.html I have never tried that yet but they say it's the way to go. I have a broken tab on one of my headlight buckets that I am going to try to JB weld but if it doesn't work then I plan to splurge for the muggy and try that. The other option to consdier is splurging a little and upgrading to Shelby end caps and trunk lid. My tail panel and driver qp ext. were damaged in the accdient and replaced and I decided to upgrade but keep the stock tail panel. Because the 69 has a curved panel I had a lot of custom glassing to do but on a straight 70 panel it may just bolt right up and only require alignment tweaking. Quote Share this post Link to post Share on other sites
70mstang 11 Report post Posted April 16, 2009 I went with the JB weld and then bondo to smooth everything out. I do like the idea of the Shelby trunk lid and fender extensions. Has anyone done this on a 70? Here's some more pics I got last night. The tail light panel and the rear quarters have been welded on. Just need to pretty 'em up, grind down some welds. After the tail section is the door pillar post and getting the old metal out of there with a section I got from Prestige Mustangs across town. Then I am gonna take a shot at pulling off my shock towers because they had some pretty bad cracks in them and I read in another thread the only way to be safe is to replace them. Anyone have reccomendations for a vendor for those or are they all made in China and just resold here? Quote Share this post Link to post Share on other sites
70mstang 11 Report post Posted April 16, 2009 I went with the JB weld and then bondo to smooth everything out. I do like the idea of the Shelby trunk lid and fender extensions. Has anyone done this on a 70? Here's some more pics I got last night. The tail light panel and the rear quarters have been welded on. Just need to pretty 'em up, grind down some welds. After the tail section is the door pillar post and getting the old metal out of there with a section I got from Prestige Mustangs across town. Then I am gonna take a shot at pulling off my shock towers because they had some pretty bad cracks in them and I read in another thread the only way to be safe is to replace them. Anyone have reccomendations for a vendor for those or are they all made in China and just resold here? Quote Share this post Link to post Share on other sites
Pakrat 1,043 Report post Posted April 16, 2009 I went with the JB weld and then bondo to smooth everything out. I do like the idea of the Shelby trunk lid and fender extensions. Has anyone done this on a 70? Oh sure they have, this 70' was modded with 69' headlight buckets but you get the idea. Quote Share this post Link to post Share on other sites
Pakrat 1,043 Report post Posted April 16, 2009 I went with the JB weld and then bondo to smooth everything out. I do like the idea of the Shelby trunk lid and fender extensions. Has anyone done this on a 70? Oh sure they have, this 70' was modded with 69' headlight buckets but you get the idea. Quote Share this post Link to post Share on other sites
70mstang 11 Report post Posted April 16, 2009 That's HAWT! those fender extensions almost look like Mach 1 extensions, I thought the Shelby fins were higher. I really like the look of this one! Have any more pics of this one? <<Drool>> Quote Share this post Link to post Share on other sites
70mstang 11 Report post Posted April 16, 2009 That's HAWT! those fender extensions almost look like Mach 1 extensions, I thought the Shelby fins were higher. I really like the look of this one! Have any more pics of this one? <<Drool>> Quote Share this post Link to post Share on other sites
Pakrat 1,043 Report post Posted April 16, 2009 I think there might be one more pic in the OK corral at Mustang Depot, that's where this pic originally came from but I found it now in one of my old fiberglass threads. The shelby fins are not higher, that is them the same as on my car, the Maier version designed for a stock mustang tail panel is higher, that's why I chose the road less travelled. Quote Share this post Link to post Share on other sites
Pakrat 1,043 Report post Posted April 16, 2009 I think there might be one more pic in the OK corral at Mustang Depot, that's where this pic originally came from but I found it now in one of my old fiberglass threads. The shelby fins are not higher, that is them the same as on my car, the Maier version designed for a stock mustang tail panel is higher, that's why I chose the road less travelled. Quote Share this post Link to post Share on other sites
70mstang 11 Report post Posted April 23, 2009 working on the Door pillar now:tongue_smilie: And I got in all must stuff from the 45th Anniversary already .. headers, shock towers, all the weather stripping! Ed Quote Share this post Link to post Share on other sites
70mstang 11 Report post Posted April 23, 2009 working on the Door pillar now:tongue_smilie: And I got in all must stuff from the 45th Anniversary already .. headers, shock towers, all the weather stripping! Ed Quote Share this post Link to post Share on other sites
Fordrevhead 29 Report post Posted April 25, 2009 That "green" sure looks like PPG DP40 2k epoxy? :) Good stuff. Fun area to fix there. How's the cowl? Quote Share this post Link to post Share on other sites
Fordrevhead 29 Report post Posted April 25, 2009 That "green" sure looks like PPG DP40 2k epoxy? :) Good stuff. Fun area to fix there. How's the cowl? Quote Share this post Link to post Share on other sites
Legion 10 Report post Posted April 26, 2009 definitely a fun area to repair ;)...I've been working on the drivers side door post up to about a 1/4 of the way up the a-pillar. Almost ready to move to the passenger side. Quote Share this post Link to post Share on other sites
Legion 10 Report post Posted April 26, 2009 definitely a fun area to repair ;)...I've been working on the drivers side door post up to about a 1/4 of the way up the a-pillar. Almost ready to move to the passenger side. Quote Share this post Link to post Share on other sites
70mstang 11 Report post Posted April 27, 2009 Yep 2K epoxy primer, right on the money. Good stuff .. need more LOL The cowl had a little surface rust in the bottom but was not quite all the way rusted through, I ground it down and patched a little spot that looked weak. The top of the cowl however had to get new metal put in where the windshield had leaked over the years. I tried to do that piece myself by fabricating metal together but after some friends looked over my work I had to get that professionally done. But it was good to try! Yesterday I worked on my seat tracks to add 3 inces of metal to my original tracks so I could retrofit my 1999 seats. I'll get some pics loaded up. Quote Share this post Link to post Share on other sites