

fvike
-
Content Count
949 -
Joined
-
Last visited
-
Days Won
33
Reputation Activity
-

 fvike got a reaction from MAC390 in Crashed my Fastback - The rebuild thread
So, I'm in the middle of another T-56 Magnum transmission swap, but this time as a helper on my brothers 1970 Plymouth 'Cuda. So not much has been done with the Mustang lately. But I did get the Spal dual fans fitted to the radiator yesterday. It was a bit taller than the registry of the radiator, so a little bit of cutting had to be done. I also had to make pockets in the shroud for the hoses and the petcock drain. All in all I'm very satisfied with the installation. Maybe I'll paint the bolts black, but they are galvanized.
Cutting line for the upper portion. This ridge rests on the weld between the tank and registry on the radiator. So does the bottom one. You can see the hole in the shroud for the upper hose.
Done. The shroud fits very well, and is mounted solid. The radiator is an DeWitts. I'm very happy with the appearance of the radiator. Looks stock.
Mounted in the car, I got just under 1/2" clearance to the alternator pully, but the rubber in the mounting cradles are still a bit tight, so I have some fitting to do with those yet. The upper one don't fit at all.
-
fvike got a reaction from MAC390 in Crashed my Fastback - The rebuild thread
Thanks guys.
Me and my friend Roger installed the Scott Drake needle bearing clutch pedal kit yesterday. Earlier I had acid washed the pedal support bracket and the old bushings fell out by themselves, so I didn't need to hack them out which I have read is a real PITA.
The part has been painted, and the one side has been installed. Under the bracket there is a new brake pedal shaft that follows the kit. It doesn't have a groove for the securing clip, but a hole for the redbrown pin to the left. I wanted to use the original shaft, because nothing was wrong with it. and it is OEM. That would cause us some trouble later. Tuned out that the needle bearings was to wide for the securing clip to be mounted, so we put it in a vice, and got it on. The pedal binded and was slow. So what we did was removing the bearing from the carrier, and grounded it down 1 mm which is what we needed on that side. We then installed it again, and the pedal moved free. A little modification to get it to function properly, but the evening went. Sometimes small jobs take up a lot of time to get the right result.
The pin got a new home on the brake pedal.
Perhaps I should totally restore the securing clip?
The complete pedal assambly.
-
fvike got a reaction from MAC390 in Crashed my Fastback - The rebuild thread
Total Control Products. I had it powdercoated.
-
 fvike got a reaction from SWPruett in Crashed my Fastback - The rebuild thread
So, I'm in the middle of another T-56 Magnum transmission swap, but this time as a helper on my brothers 1970 Plymouth 'Cuda. So not much has been done with the Mustang lately. But I did get the Spal dual fans fitted to the radiator yesterday. It was a bit taller than the registry of the radiator, so a little bit of cutting had to be done. I also had to make pockets in the shroud for the hoses and the petcock drain. All in all I'm very satisfied with the installation. Maybe I'll paint the bolts black, but they are galvanized.
Cutting line for the upper portion. This ridge rests on the weld between the tank and registry on the radiator. So does the bottom one. You can see the hole in the shroud for the upper hose.
Done. The shroud fits very well, and is mounted solid. The radiator is an DeWitts. I'm very happy with the appearance of the radiator. Looks stock.
Mounted in the car, I got just under 1/2" clearance to the alternator pully, but the rubber in the mounting cradles are still a bit tight, so I have some fitting to do with those yet. The upper one don't fit at all.
-
 fvike got a reaction from RPM in Grandpa's Mustang
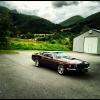
Nice car. I wonder what a detailer could do with that paint. Probably magic.
-
fvike reacted to MAC390 in Mach 1 resto in Australia
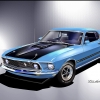
That is such a crap pic, i had to take better ones.
-
fvike reacted to 69ShelbyGT350H in FMX Shifting Issue after Shift Kit
Have you tried adjusting the downshift rod from the carb to the trans? Sounds like its too far back making the trans think the car is hard accelerating.
-
fvike reacted to MAC390 in Mach 1 resto in Australia
Replaced the rear float and needle and seat in carby.
Corrected a few rear brake issues, basically reassemble correctly and adjust.
Fitted up the mildly restored rim blow and the horns work.
Adjusted the door glass and assembled the deluxe door trims and installed to doors
Put the engine id on the shaker..
Ordered some console pieces from NPD.
-

 fvike got a reaction from 70Mach351 in 70' Mach 1 351c
Good luck on your project. Looks like you got a solid car.
-
fvike reacted to latoracing in 1970 Grabber Green Project
I removed 1" from the part I cut off, figured it would be "easier" to line up the outside first.
I tried to remove a section from the middle of the bumper end, (black sharpie marks) but that just made a mess. So, I continued to cut pieces off of it, all the flanges and the inner section became scrap. I took some 11ga and got to forming the fill-in areas for the sides. Lots of beating and bending, tack welded and hammered on it some more. After a while i had something resembling a bumper end. Once I kinda liked the shape I went and welded it together and rough trimmed it in place.
In fitting it to the quarter and end cap, I made it really close so I don't have to guess where it fits. I plan on opening the gap up a little later on. I've had this end on and off countless times, I might tack weld it in place once I get to fitting the inner portion. A little grinding and it is looking a little better.
I'm not totally sold on the way this is looking, the end cap to bumper doesn't flow, but there is a little more to add to the profile. Guess I'll continue in this direction. Where the valance to quarter fits, the bumper has a rather large hump that I don't like either. In fitting all this stuff really tight, and what I'm fixing to do to the quarter extensions, I'm probably going to weld the rear valance to the car. Not my favorite thing to do, but it would blend much better...
I have some more forming to do to get the inner portion of the bumper fabricated, starting from flat sheet should be fun!
More metal madness to come...
-
fvike reacted to Vicfreg in 1970 Convertible Restoration
I am posting this wiring diagram tidbit based on a discussion on grounding I was having...
For my AAW wiring install, I did not ground my front lighting yet. On page 13 of the thread, I installed some "intermediate" connectors for the front lighting that I will use to finish my headlights, parking/directional, and front led (fog lamp feed) later after the car is painted.
For these cars, the original wiring diagrams show the ground points, and generally (not always) the ground wires are a number "57".
You can see that on the attached pictures, where there is a common ground point for the front lights, and a single ground for things like washer pump. The AAW kit doesn't come with this common ground, so Mike65 and I were exchanging on the idea of installing a front grounding block, similar to what I did in my trunk.
Actually a good idea, and allows you to run a main ground wire to a solid ground point somewhere, rather than drilling holes in your sheetmetal and hoping for the best.
-
fvike reacted to Vicfreg in 1970 Convertible Restoration
Got my ignition box installed. Ran the wiring up to the radiator support where it will be combined with my other wiring on the passenger side which will be run in conduit through the fenderwell and then into the passenger compartment
Black terminal block in pictures is my “front” power distribution point, which is fed from inside the car. The front power point feeds my 2 electric fans, ignition box, and transmission cooler.
Picture of outer fenderwell shows the power feed wire from the front power point (big red wire) and the ignition box wires (black flex conduit)
-
fvike reacted to Vicfreg in 1970 Convertible Restoration
Made some good progress today, trying to get my in car wiring to the point where I can move to the fenderwells and front of the car.
First pic is my connector for the interface between my wiring that runs in the drivers side door channel to my PWM Fan controller, located in the trunk.
2nd pic is the controller with the harness run to it. The controller location is temporary until I can get over a friends house and double check the possible interferences with any of the top hardware in that area. If not, that is where it will go.
3rd pic is view of this location through my trunk access door
4th pic is a new harness/plug assembly I made that runs from the drivers side of the car, through the dash area, over to the passenger side of the car. It is for the interface between my PWM fan controller, the Vintage Air System, and the Trinary Safety Switch, which will be mounted on the radiator support on the drivers side. The wiring will continue through the passenger side fenderwell. Just not ready for that right now. So, the connector is a good interface point for later.
5th picture is my passenger side door channel wiring, which is done. Has mostly battery related wiring, including starter wire, and some dedicated ground wires, along with courtesy light for the trunk area.
6th and 7th picture is a dedicated ground terminal block that installed (attached to the Vintage Air system bracket) that will be used for all my digital accessories. This includes the VHX dash hardware, the EFI computer, and the ignition computer. I did this to minimize the chance of noise getting on these systems due to using a chassis ground. The terminal block has a wire that runs directly to the negative battery connection, where I also have a ground terminal block mounted. These are nice and compact, and I got mine from Blue Sea, which sell marine grade electrical hardware. It comes with a cover to protect any accidental contact with the terminals.
Last picture is my drivers side door channel wiring, which is also done.
Moving to the fenderwell wiring in a week or so.
Happy Holidays!
-
fvike reacted to Vicfreg in 1970 Convertible Restoration
Underdash wiring is finally done!. Will put steering column, brake pedal and accelerator pedal in next. I am going to leave dash out when the car goes to paint.
Moving to under the car for my transmission speed sensor and backup light switch wiring, then to the trunk, then engine goes in!
-
 fvike got a reaction from Shep69 in Heater core
About the clips that hold the two halves together; when assembling the heater box, DO NOT just pop them in place. They may damage the fiberglass. Hold them in place in one groove in the heater box, then use a flat head screwdriver in the "pocket" of the clip an lift the clip in place in the other grove.
-
fvike reacted to 1969_Mach1 in Full body paint - Yes or No
Tough decision. Consider the cost now to color match. If the budget isn't there for a full repaint I would seriously consider the path of color matching. If you are going through a body shop, you will easily have 8 to 10K in paint.
Lastly, I would say most of us have more invested in our cars than they are worth. It's the nature of this hobby and not like what is seen on television. Most of us don't consider our cars a money making investment.
-
 fvike got a reaction from Footcutter11 in Crashed my Fastback - The rebuild thread
Time for an update. Have got the heater, lower dash, and American Autowire electrical harness in the car. It took me days to get an overview of the electrical harness, lots of planning and pondering there. I've always heard that wiering a car is such a massive job, and I think I know what they mean.
Started off with the heater. 1/2" Dynaliner behind it on the firewall.
Fusebox is in next. The clutch pedal is out at the moment to fix a minor problem with the locking clip engagement. Basically a washer inside it is too wide.
The wires to the lights, horns, fans, etc will be routed outside the engine bay.
Wire harness laid up on the lower dash. Now the next job is to rout everything where it needs to go, and then start doing connections.
Also, the splash shields had to be modified to clear the Boss 429-style brace I added. My friend Roger did that, while me and my brother worked on the harness.
-
fvike got a reaction from SWPruett in Crashed my Fastback - The rebuild thread
Time for an update. Have got the heater, lower dash, and American Autowire electrical harness in the car. It took me days to get an overview of the electrical harness, lots of planning and pondering there. I've always heard that wiering a car is such a massive job, and I think I know what they mean.
Started off with the heater. 1/2" Dynaliner behind it on the firewall.
Fusebox is in next. The clutch pedal is out at the moment to fix a minor problem with the locking clip engagement. Basically a washer inside it is too wide.
The wires to the lights, horns, fans, etc will be routed outside the engine bay.
Wire harness laid up on the lower dash. Now the next job is to rout everything where it needs to go, and then start doing connections.
Also, the splash shields had to be modified to clear the Boss 429-style brace I added. My friend Roger did that, while me and my brother worked on the harness.
-
-
fvike reacted to Cruzzar in Electric fuel pump mounting
Try to mount it in a rubber isolated mount. I did this and you could still hear it at idle and I had a relative loud exhaust system. If you mount it directly to the metal body you will probably not be happy. Just my $.o2 worth.
-
 fvike got a reaction from sixt9stang in Crashed my Fastback - The rebuild thread
I've gotten the lower dash, steering column and fold down seat parts painted. After 2 weeks of paint curing, I started to assemble the dash.
-
fvike got a reaction from SWPruett in Crashed my Fastback - The rebuild thread
I've gotten the lower dash, steering column and fold down seat parts painted. After 2 weeks of paint curing, I started to assemble the dash.
-
 fvike got a reaction from BillC in '70 Tach problem
When the transformator inside the tach burns out, the car won't start.
-
-
fvike reacted to bigmal in Advice on painting rocker covers
Thanks for the suggestions. I went down the wrinkle black path and it looks great.