

fvike
-
Content Count
949 -
Joined
-
Last visited
-
Days Won
33
Everything posted by fvike
-
Awesome story Caseyrhe! The car turned out great!
-
Welcome! Looks like a solid project.
-
Hey, just try it. If it's too sensitive, replace it with a bigger MC. Worst case you'll just spread your investment.
-
I'm running a 1-1/8" MC with my Hydraboost. The total caliper piston area governs how large MC you need. But for big brake kits 1-1/8" MC is the way to go. http://www.hydratechbraking.com/FAQ.html
-
Use a chain block. The Mustang got a long nose.
-
I have some pictures when I did mine. I have Dynacorn shocktowers, so they came with the Big Block braces installed. There's a plate on the inside of the tower also. The Boss 429 type braces I made out of cardboard first, then steel. Not much info, but I hope the pictures will help.
-
replacing remote & cable for driver side sport mirror
fvike replied to Rindelmach1's topic in 1969-70 Technical Forum
Just press down the adjuster knob to release tension, and remove the cables. -
Yeah, it's the Chevy 350 that need reduced base circle cams (on strokers I think), because they have no room inside the block.
-
1970 Mach 1 Trim Needed - Looking for Deals And Help
fvike replied to 70Mach1rb's topic in 1969-70 Technical Forum
I see Marcus Anghel has the fender pieces NOS. http://anghelrestorations.com/parts.html He would also be the guy to talk to about how to restore the items you do have, and any questions about the two types you have observed. You could also find good info over at concoursemustang.com. -
Welcome to the forum! Is there some kind of special equipment on the car since it got 2 vacuum canisters?
-
I've had Percy Seal-4-Good gasket for years. Reuasable, had them on and off a couple of times. The're multilayer aluminum. I think they are now Taylor Cable brand. It carries the same part number, and looks the same as Percy. https://www.summitracing.com/parts/php-66014 I linked the Windsor gasket. Is that a Cleveland gasket you got there? As for torque, usualy you can only work with wrenches, so I go as much as I can without slipping with that 3/8s wrench. Then retorque after a day, and again the next day after that. I've always used ARP bolts.
-
Flowmaster Super 44 mufflers on my 351W Mach1
fvike replied to rays69mach1's topic in 1969-70 Technical Forum
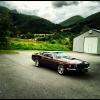
That's a mint Mustang! Sweet sound too. -
They are fill panels for Fastbacks without fold-down rear seat.
-
This is my car mounted on 315/30/19s. Borrowed wheels, so I don't remember the BS or width on the rims. No tubs, original, but modified wheel houses. The car is not on the ground here, but there was a wee bit clearence. When the car sat on the ground, the wheel moved outward, and the clearing was incresed. Rolled freely. The modifications done to the wheelhouse is a wedge laid into the front of the wheel house. They are very narrow in the front, but are plenty big enough otherwise. The best thing about this mod is that it does not move the brackets for the rear fold down seat or interior panels. The rear seat mount is welded because my car had them offset to one side. No gap between the panel and seat on one side, and 1/2" gap on the other. You can se the top slide lock has not been touched. Edit: Rear seatbelt anchor is still in place between the wheelhouse and frame rail. Will have to go if you tub it all the way. Panel mount is untouched. This picture shows how narrow the front of the wheel house is. There is plent of space towards the frame rail.
-
1. Yeah, it's legit. 2. Thanks to the Gulf stream for keeping Norway habitable.
-
Thanks. I shot the picture on 06.27.2020. As you can see by the snow on the inside of the corner, the track is true to it's name. It's called the Arctic Circle Raceway, ACR for short. The track is located 19 miles south of the Arctic Circle. I live some 71 miles south of the Raceway. There was a lot of snow this winter, and the racetrack is situated over an old quarry up in the hills. I don't remember the elevation right now. At my brother's flickr account you can see all the pictures I took that day. https://www.flickr.com/photos/joakimvike/ The northernmost corner is also the highest corner on the track. It's called the North Pole. Pictured here. In the bottom of that corner, a little left of the half-nude man (LOL) is the place where I had my crash with my Mustang.
-
I got my Hydroboost at Hydratech. BEST customer service I have ever met! Period! I did have the PS pump and tank beforehand, so I just got a -6 AN weld-ing bung for the tank. Get the biggest bore MC you can find. 1.25" bore is what I run.
-
I'm making progress on the Mustang again. Probably gonna make a post on my buildthread again soon. My brother's 'cuda is doing great. Got some track time a month ago, first time with the Tremec T-56 and the Edelbrock Pro-Flo EFI, so that was fun. The car worked great all day, but had powerloss at the top end. So we're chasing that one. Think the fuel pump just ran out of juice (electrical that is), so we're trying another relay with much heavier gauge wires.
-
Jerry, the tandem is just an inline dual resorvair MC, and uses an proportion valve instead of a bias bar to balance out the rear brakes (so that you don't get overamplification). I do not think the tandem MC provides more force output over the dual MC. I would either go for a manual setup or a Hydraboost setup, but you'll need a new MC either way. A small bore MC for manual brakes, and a the biggest bore MC you can find for a Hydraboost. I've ran Hydraboost, and it's great, but it adds a lot of stuff to the engine bay in form of hydraulic lines, and preferebly a cooler.
-
I had a Griffin before my crash. It was an "Direct-fit", not the Exact-fit, so I had to dent the underside of the hood to clear the cap. I had dual slim spal fans. It cooled great, but for my rebuild I wanted a OEM appearance and a perfect fit, so I went with DeWitts with dual spal fans in a shroud. Have not run the car with that setup yet. Only thing you need to go to the 24" radiator is removing the drivers side block off plate, and adding the bolt in lower radiator cradles. And new hoses of course.
-
I think the problem is the radiator. I did some research on popular Mustang radiators. While it is easy to think that a 3-row should be sufficient, it may not be the case. The tube size is the important factor in a radiator. The larger the tube, the more contact surface it has th the cooling fins. Popular Mustang radiators has the following tube sizes: Griffin Thermal Products p/n 7-70164 has 1.25" tube size (2-row) Total tube surface diameter = 2.5" Be Cool p/n 62187 has 1" tube size (2-row) Total tube surface diameter = 2" DeWitts Radiator p/n 32-1238007M has 1" tube size (2-row) Total tube surface diameter = 2" Champion Radiators p/n CC338 has 0.63" tube size (3-row) Total tube surface diameter = 1.89" Scott Drake p/n 338-3HF has 0.5" tube size (3-row) Total tube surface diameter = 1.5" So, as the chart shows, a 3-row radiator does not have more cooling surface than a 2-row. It has less. A shroud will help, and powerful fans too, but in slow traffic you get problems with charging with the fans going full bore all the time.
-
Got this one aso. Click on it for high-res.
-
I got this picture, but it is without measurements. But you can at least feel for the embossment that they are on.
-
Same handle as here on 69stang. So flickr.com/fvike. I have a SportsRoof tho..
-
I'm a bit embarrassed that it's been 16 months since my last post. A lot have happened since then, but not so much with the Mustang. But there is some progress. In October last year I became a father for the second time, so now I got two boys that keeps me away from the garage. It's how it goes. With the Mustang, I've been chipping away at the ole' block that is the wireing harness. It's just that when I'm away from it a while, I kinda gotta start from scratch the next time to get the overview. Anyway, here's some pictures. Programmed the instrument panel contact Placed the Autocoolguy fan controller behind the drivers headlight splash shield. Mounted the fenders and headlight buckets to get the placement of them for the headlight wireing. Also did the blackout on the part of the headlight buckets which is behind the grille. I've done some more minor stuff too, bet not everything is photographed. I hope to move forward at a steadier pace than what I have been.

