


Darkman
-
Content Count
21 -
Joined
-
Last visited
Posts posted by Darkman
-
-
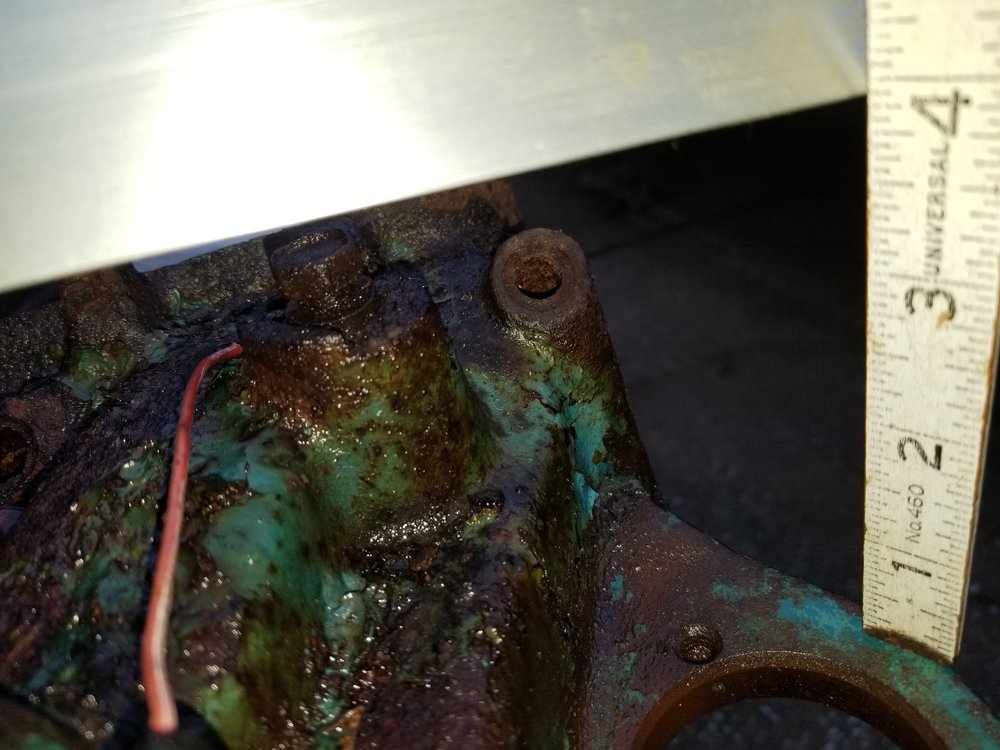
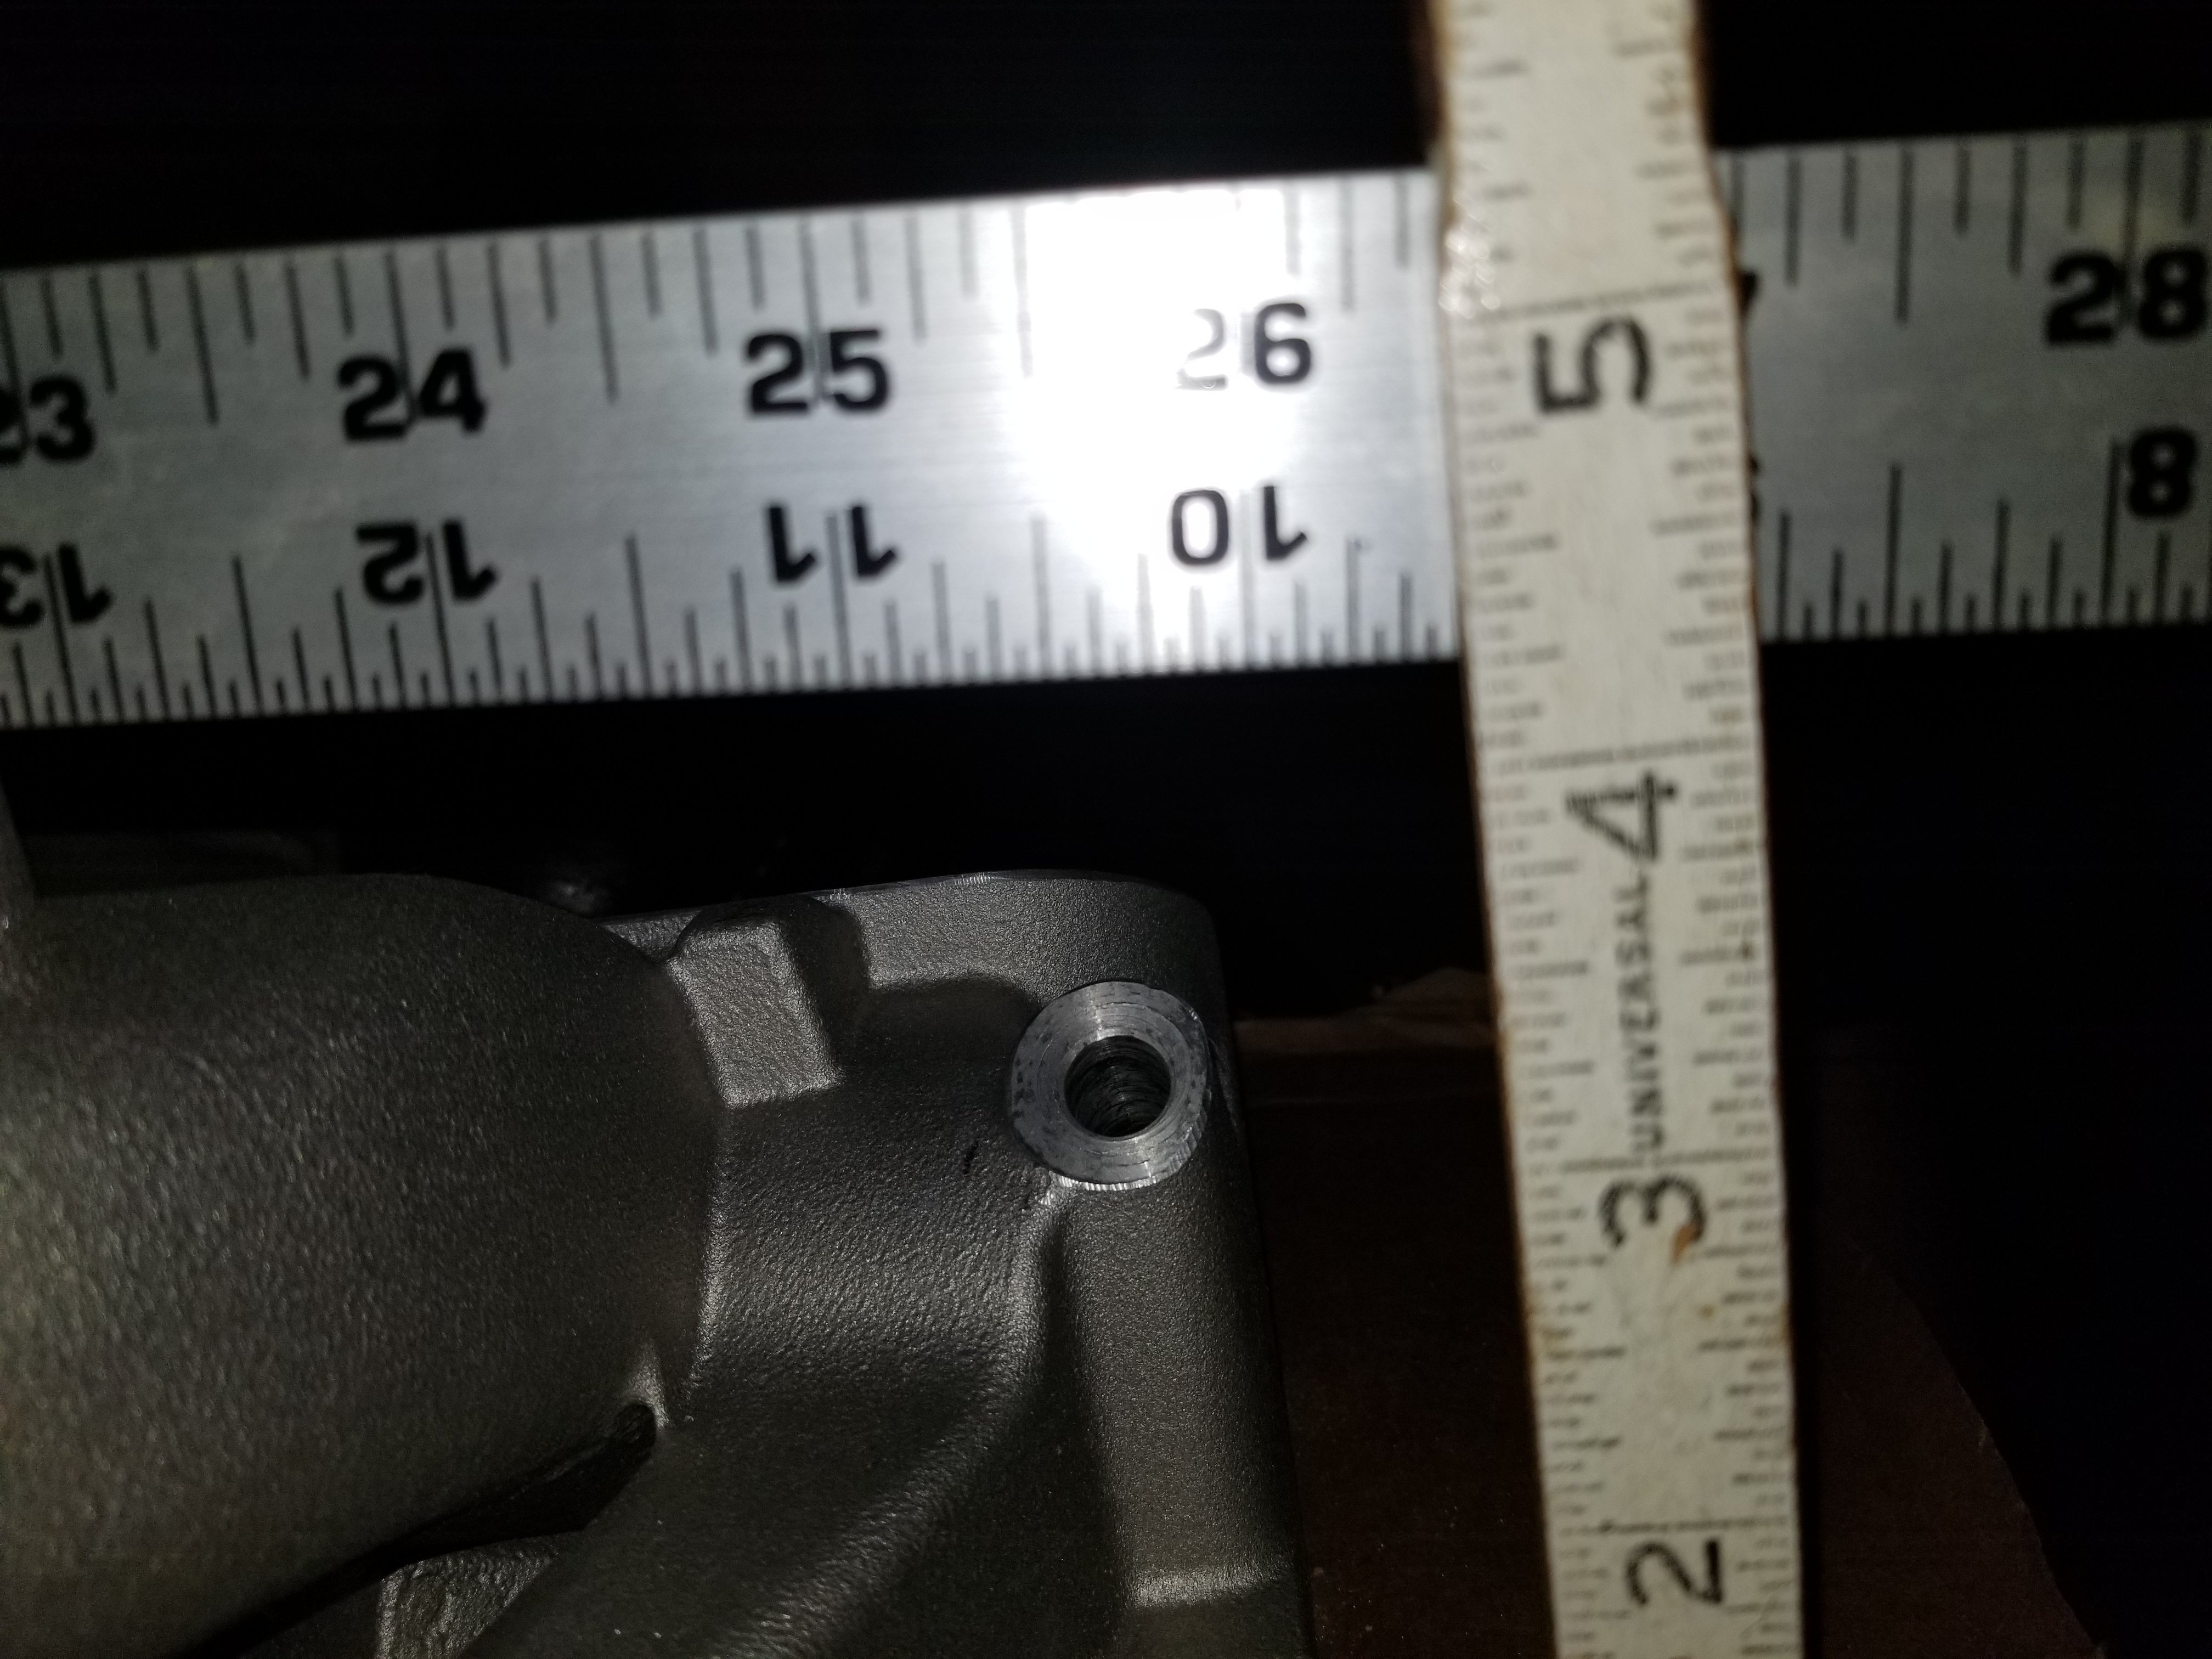
This afternoon I made some critical measurements. I measured the height of a plane formed by the intake manifold carb base where it intersected a vertical line from where the distributor base rest on the intake. The distributor base is a constant since it dictates the depth of the distributor gear engagement with the camshaft. The CJ intake is a Ford casting and the Tunnel Wedge intake is a BBM that is a cast reproduction of an original Ford intake. It stands to reason the distributor base height is standardized.
I measured the CJ intake at 3 15/16 but it had the 1/4 spacer that was stuck and did not want to turn loose. These measurements are based on the final height of how much the Shaker assembly will move up. With that in mind it will not effect the accuracy of the measurements.
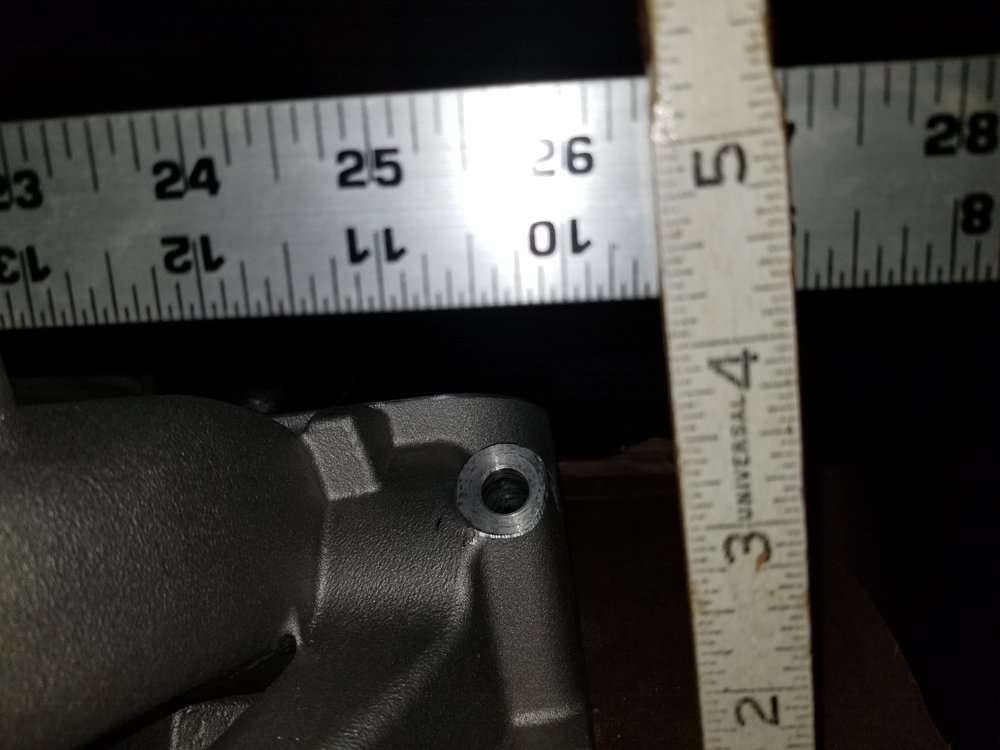
I measured the Tunnel Wedge intake at 4 1/4 flush with the aluminum. That's gives a height difference of 5/16". My builder will use a 1/2 spacer under the carbs. That gives a final height difference of 13/16" from the base of the carbs between the CJ and the Tunnel Wedge intake.
When I did my mock up the other day I used a full inch spacer between the top of the air cleaner base and the Shaker intermediary plate. I was able to close the hood with the Shaker fitting properly but it was a tad high and IMHO it really looked aggressive. The original Shaker was a thing of Beauty but when lifted only an inch it really takes on a new identity. A mean , loud and boisterous entity that befits the CJ nicely. Of course I may be a little bit biased!These new measurements continue to confirm the 2x4 Shaker will definitely work.


-
Ok I did some mocking up today and while it doesn't answer all the questions it certainly raises the probability factor substantially IMHO. As if I had any doubt! LOL
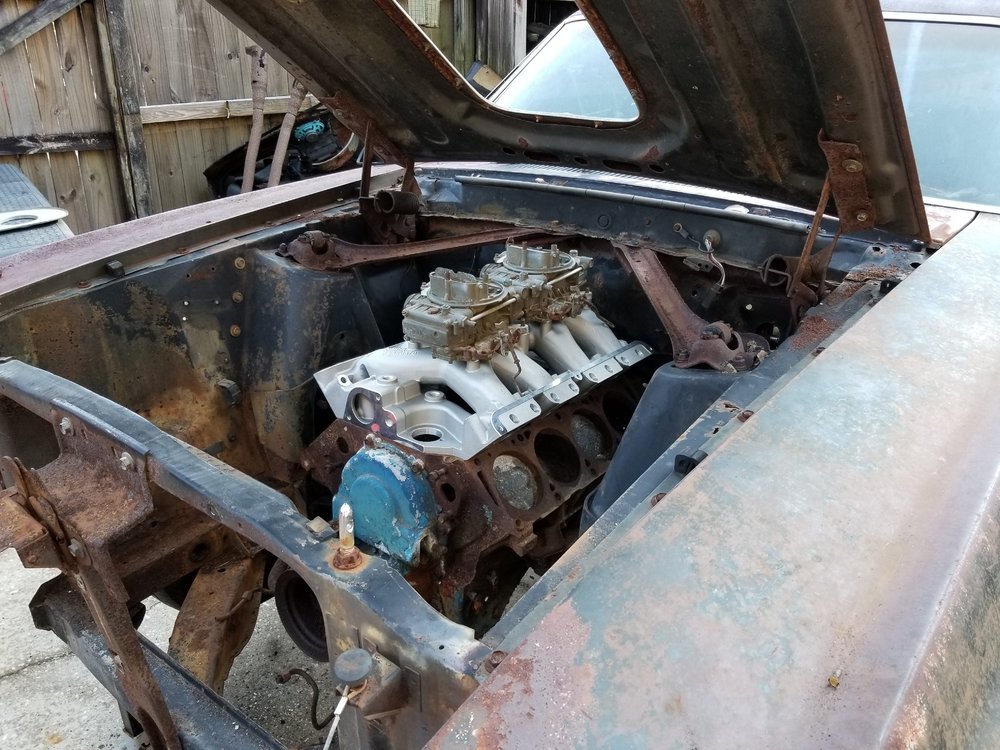
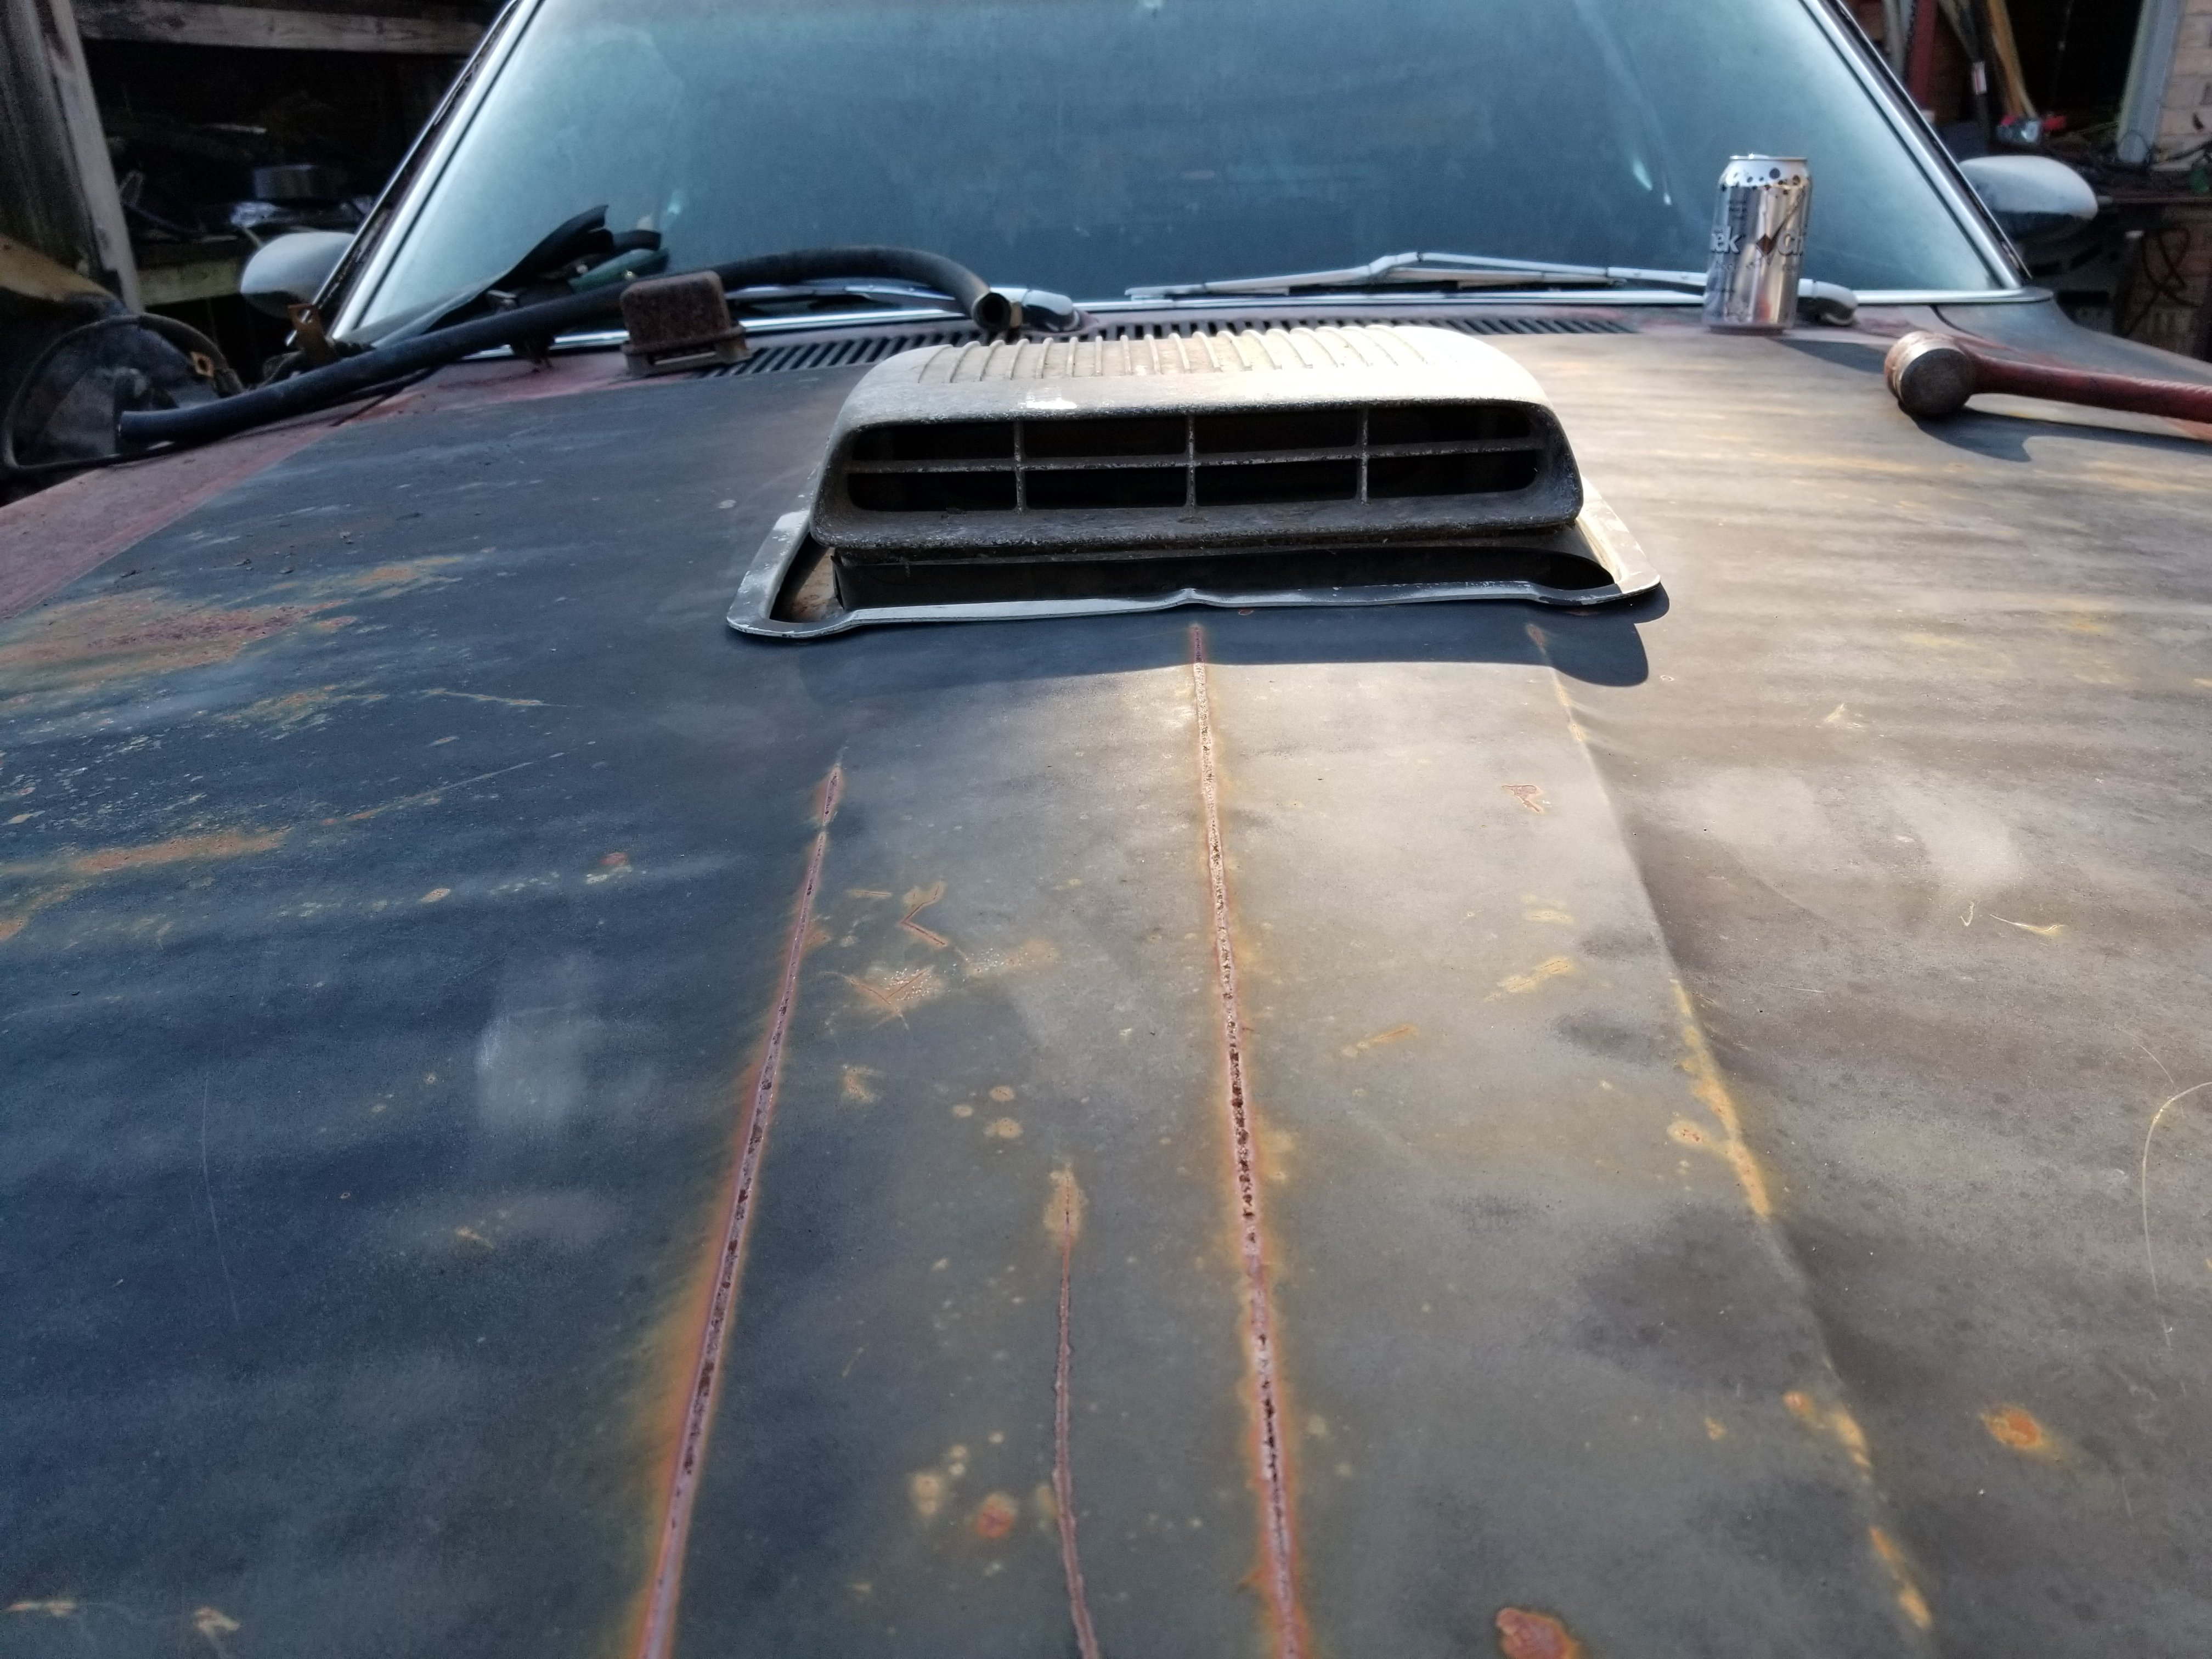
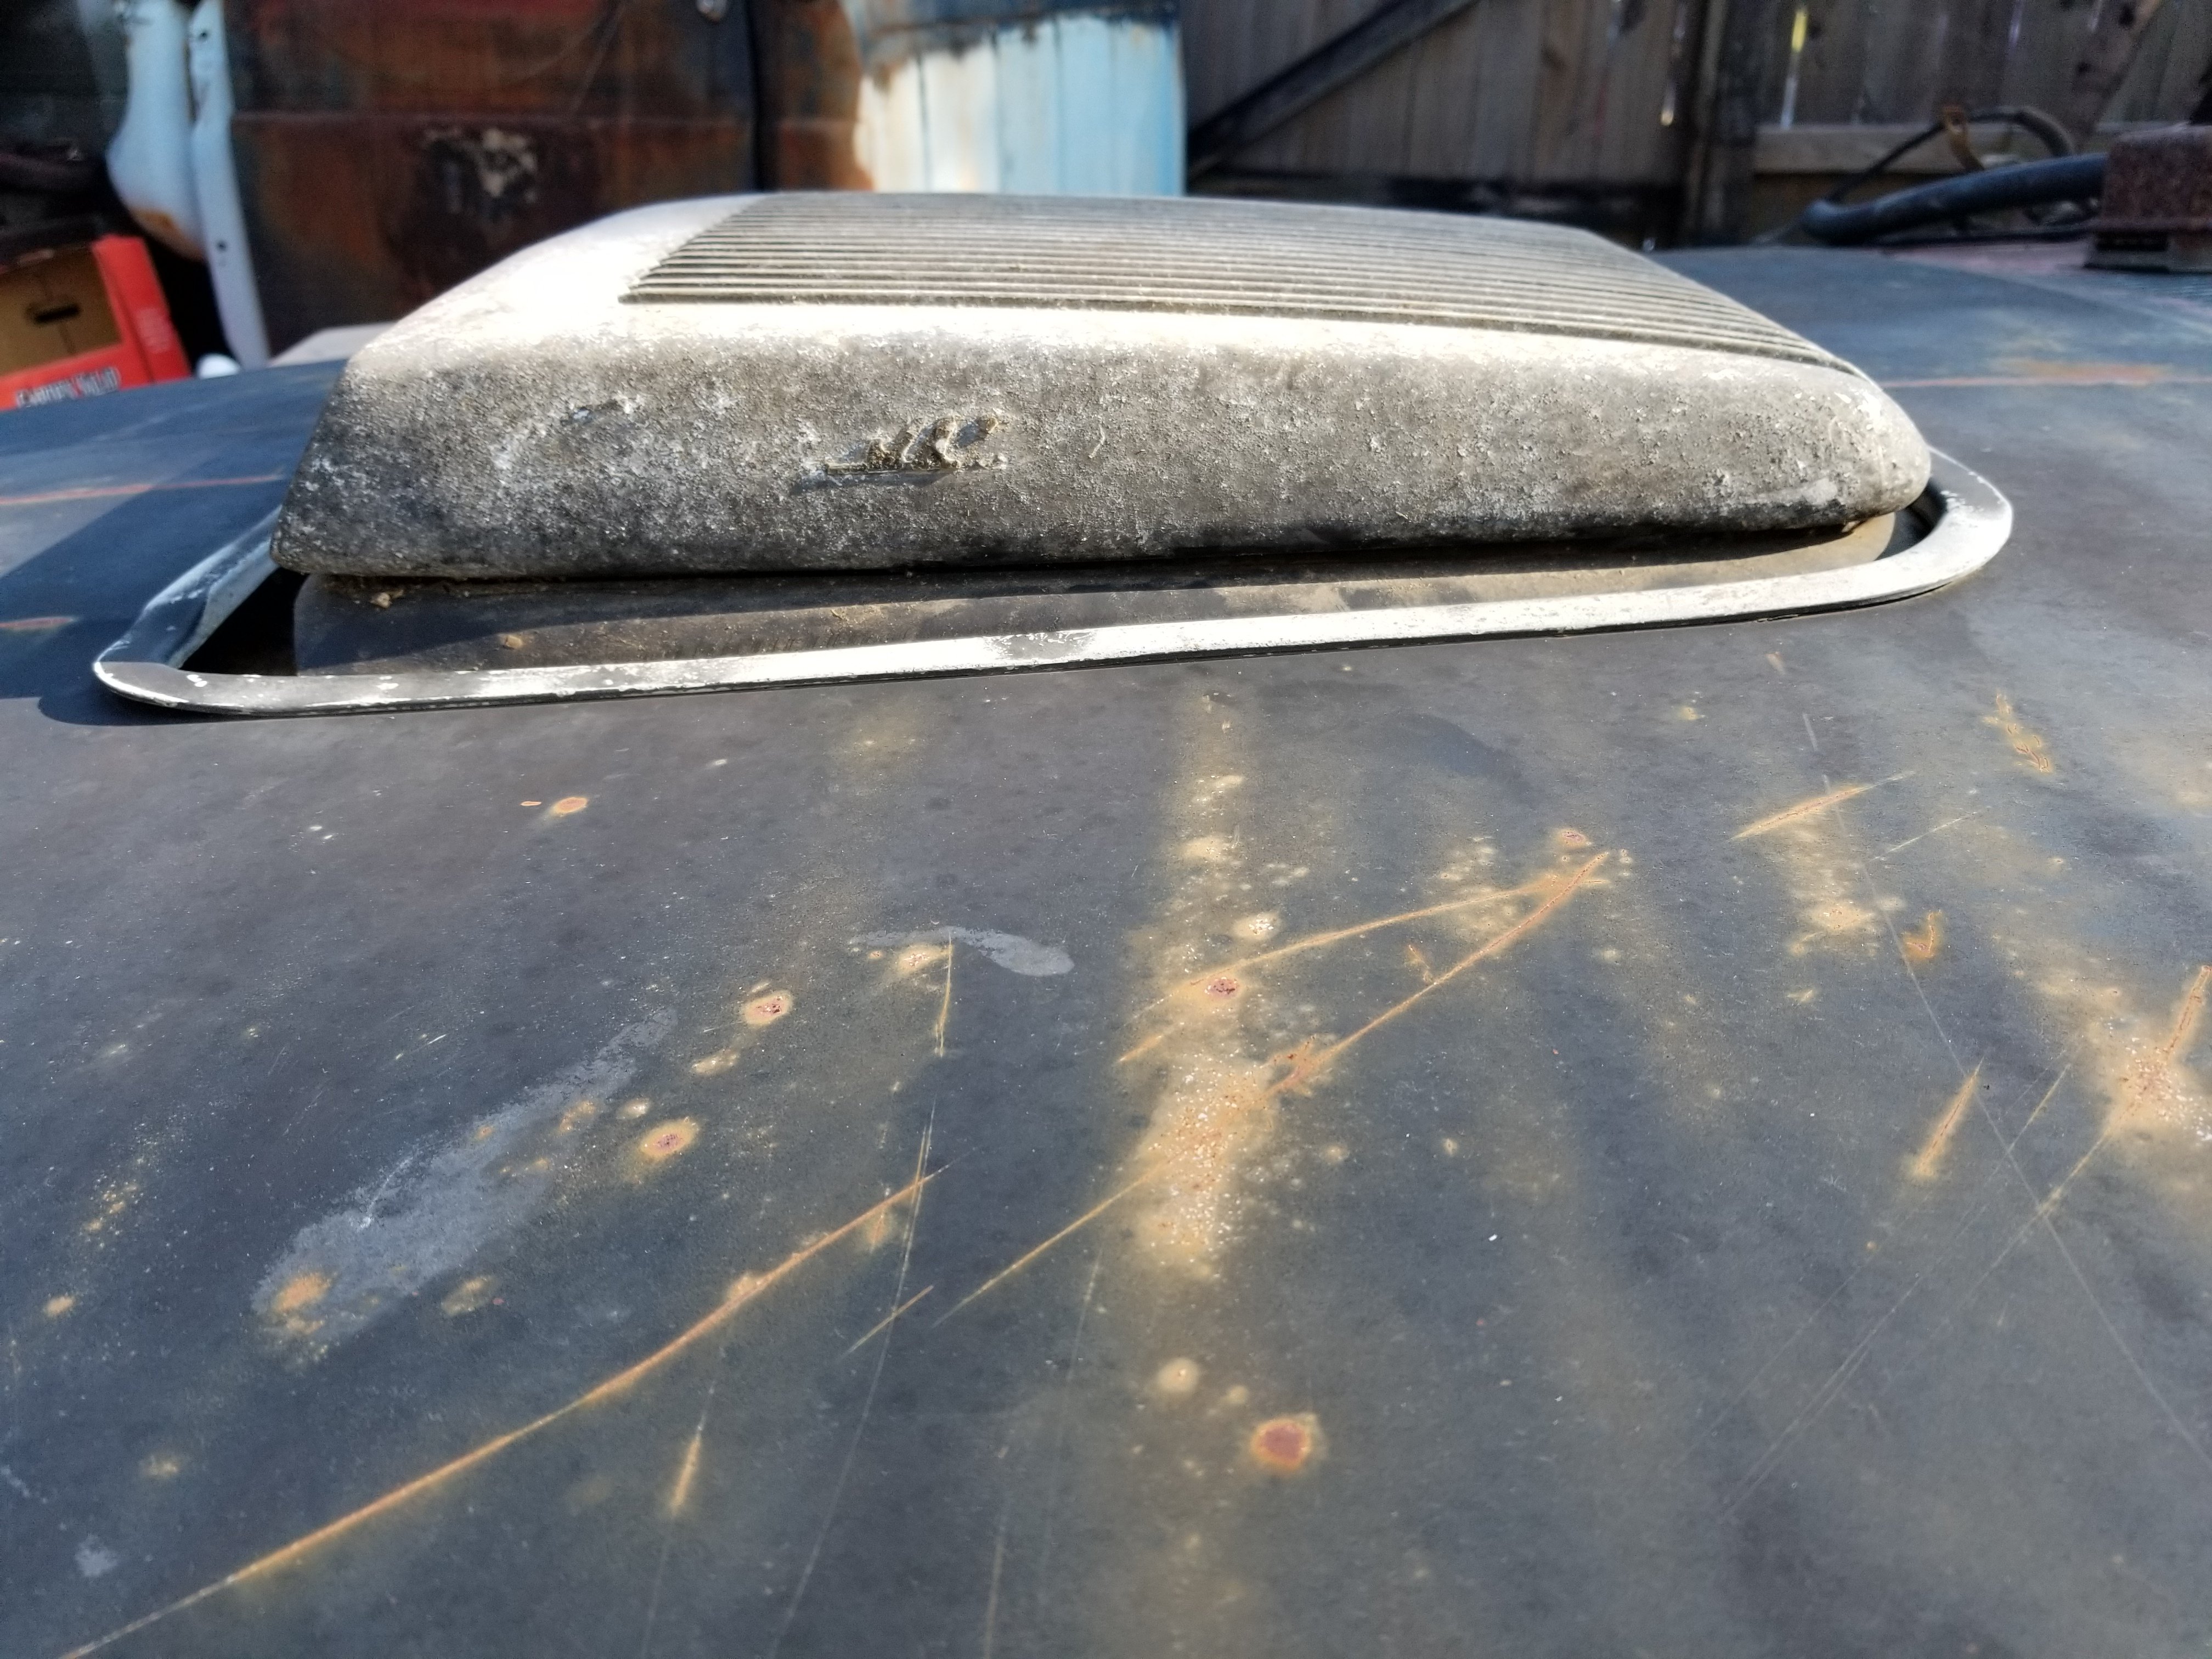
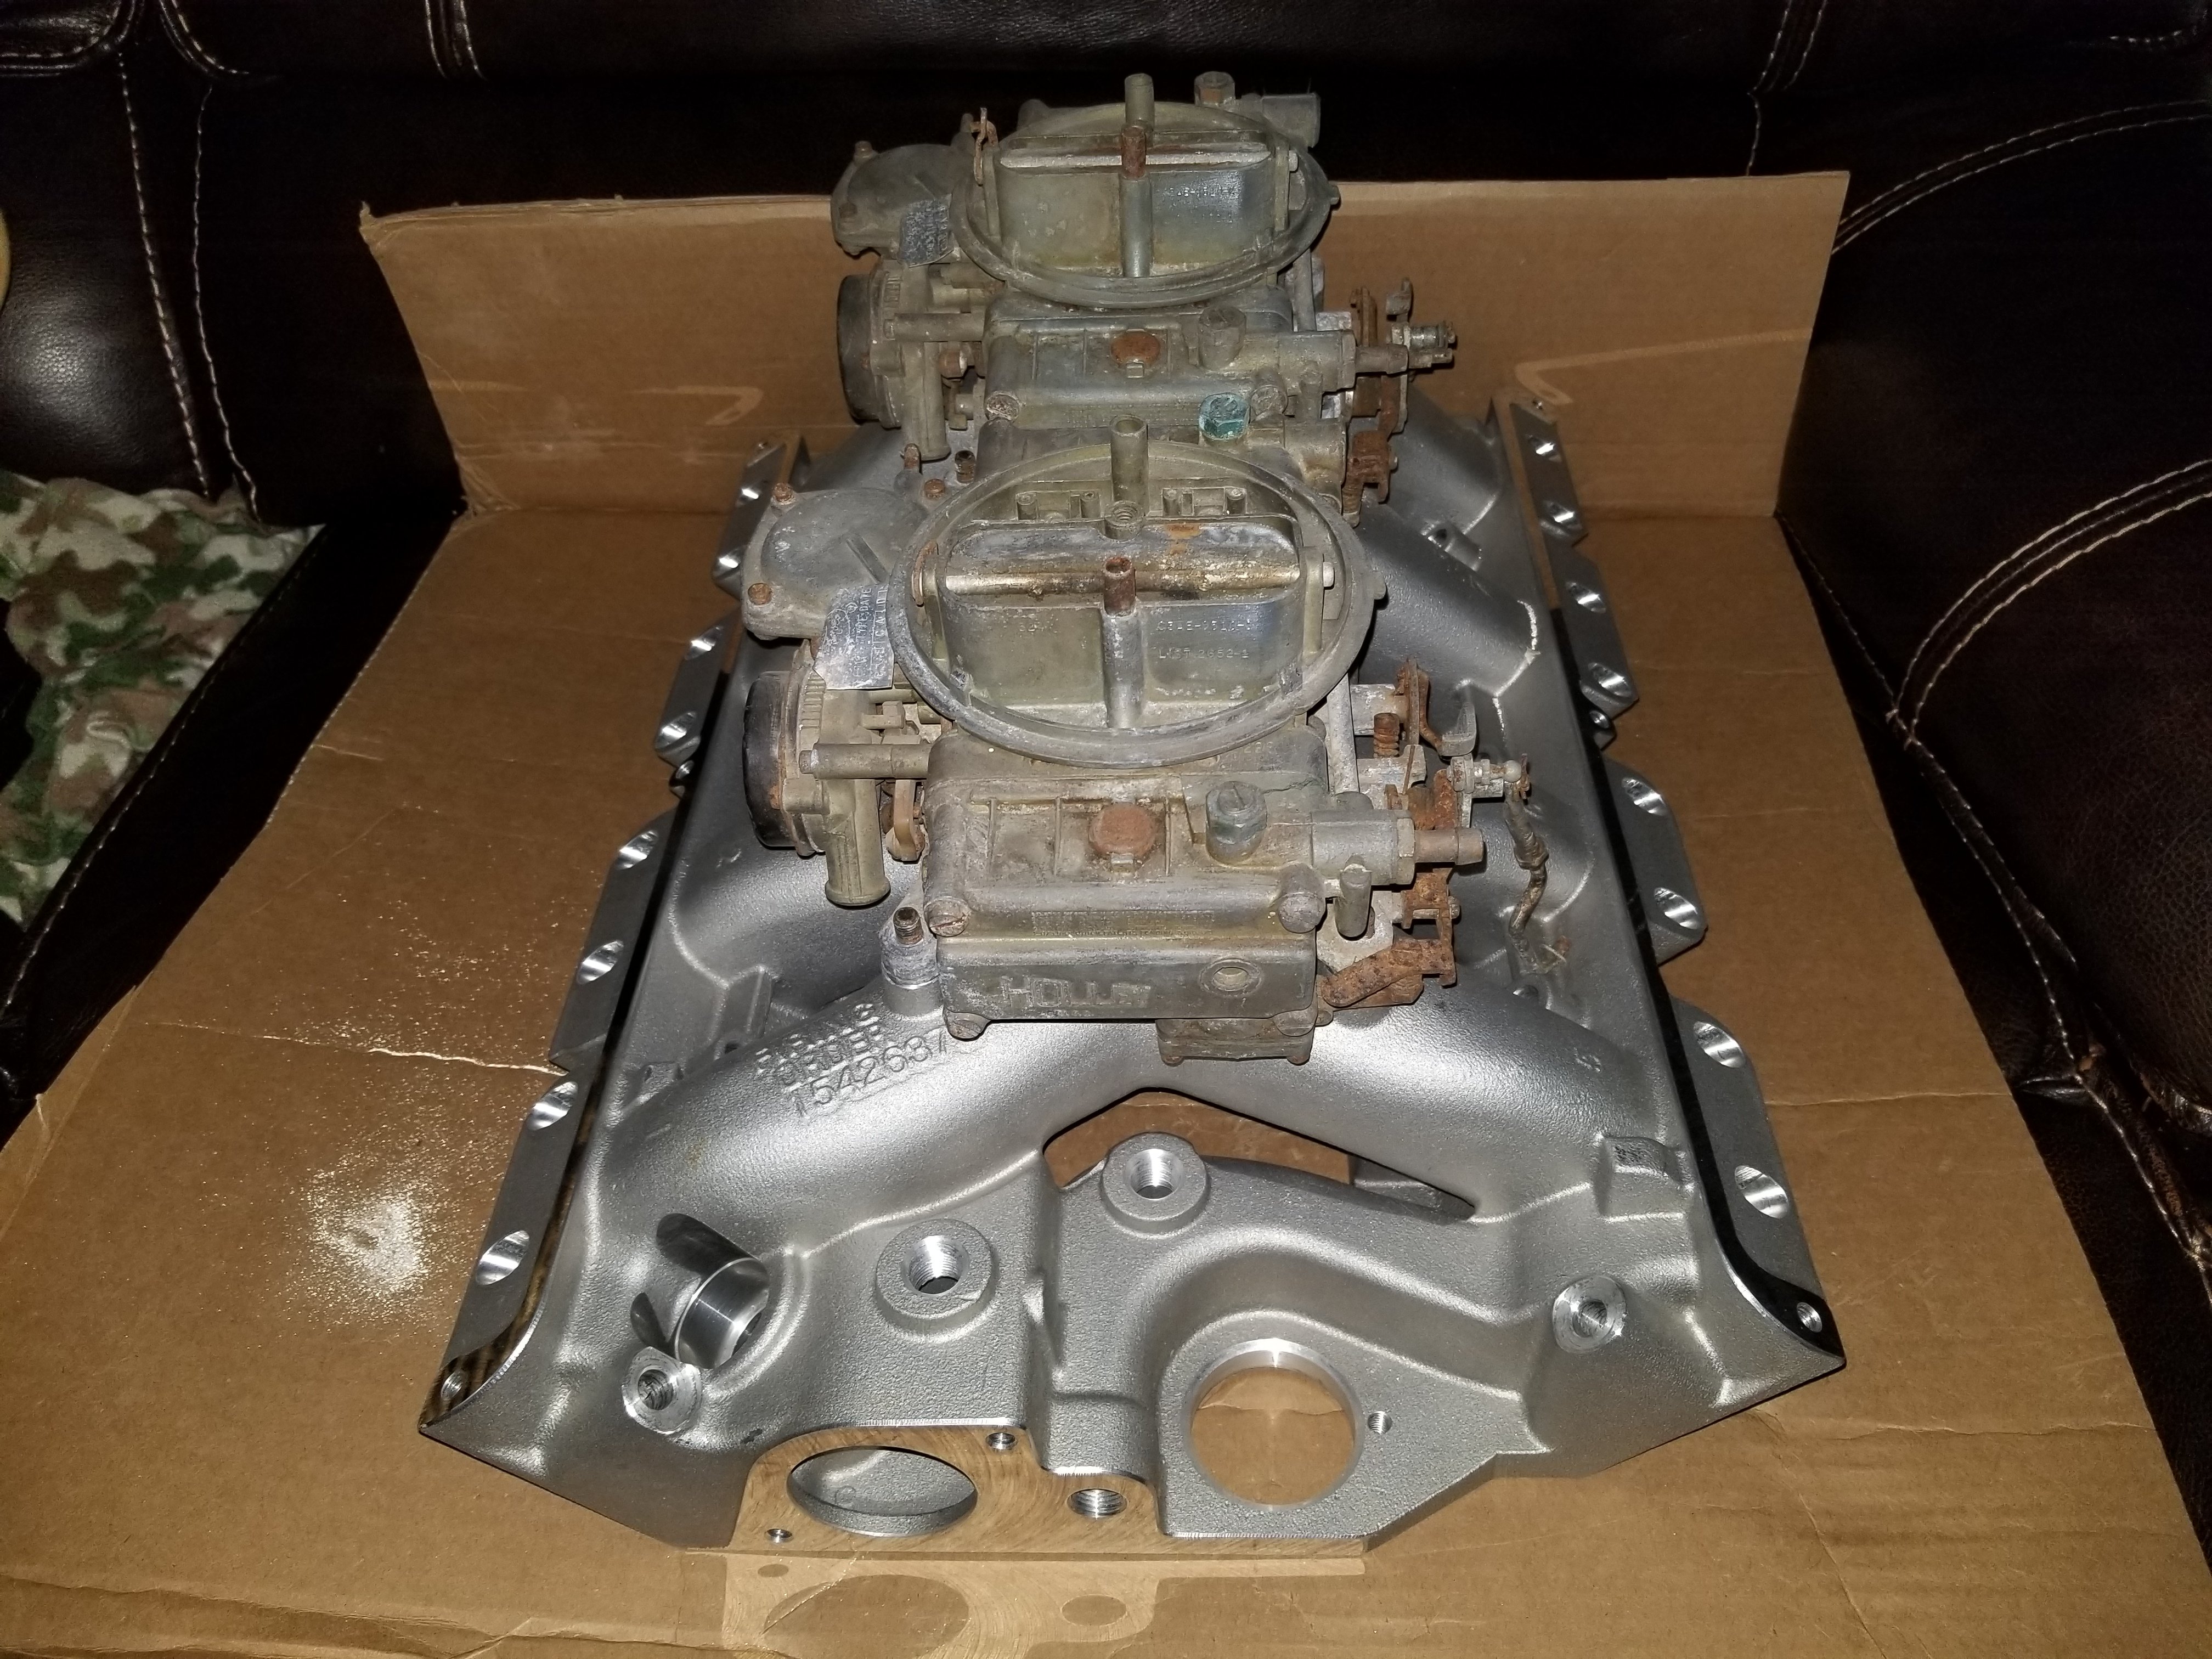
The first picture is with the stock CJ intake, carb spacer, carb, air cleaner base, a one inch spacer and then the intermediary shaker plate and the shaker. The one inch spacer simulates the higher 2x4 intake height.
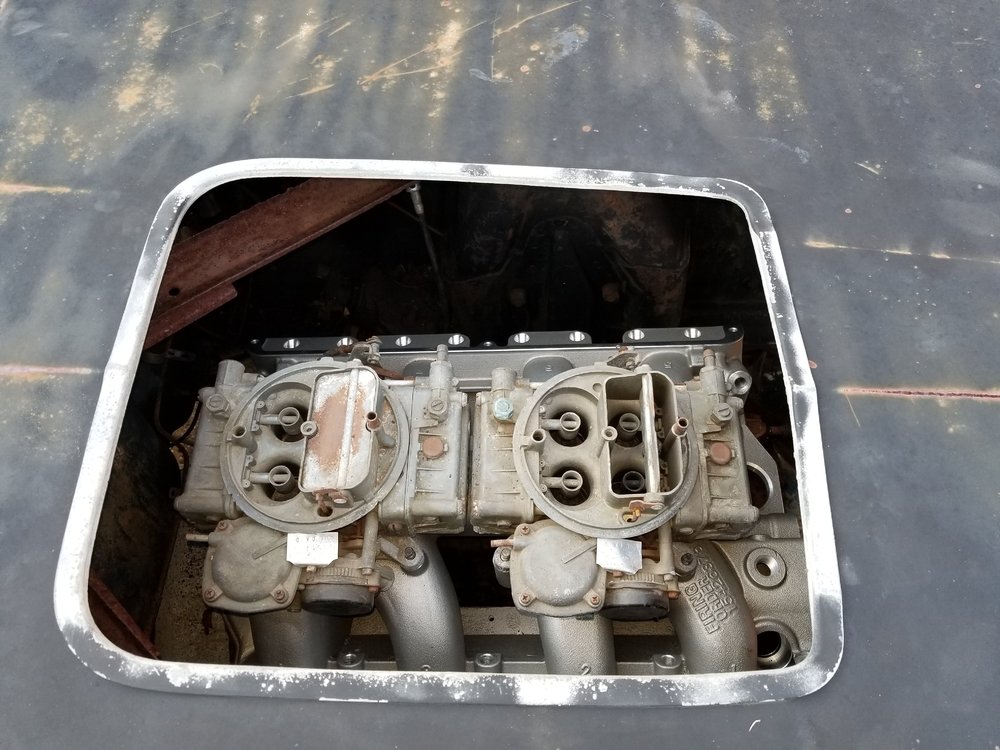
The second picture shows the Tunnel Wedge intake and the C3AE 9510 C carbs. Look how nicely they are centered under the shaker opening. Ford missed a golden opportunity when they didn't do this. They way this centered even shocked me. I wasnt expecting that nice of a fit. The Sniper units are a direct replacement for Holley carbs and should fit the same. They say they'll fit anything above a 6.4 center to center. C to C is 8.5 on the Tunnel Wedge intake so there should actually be more room.
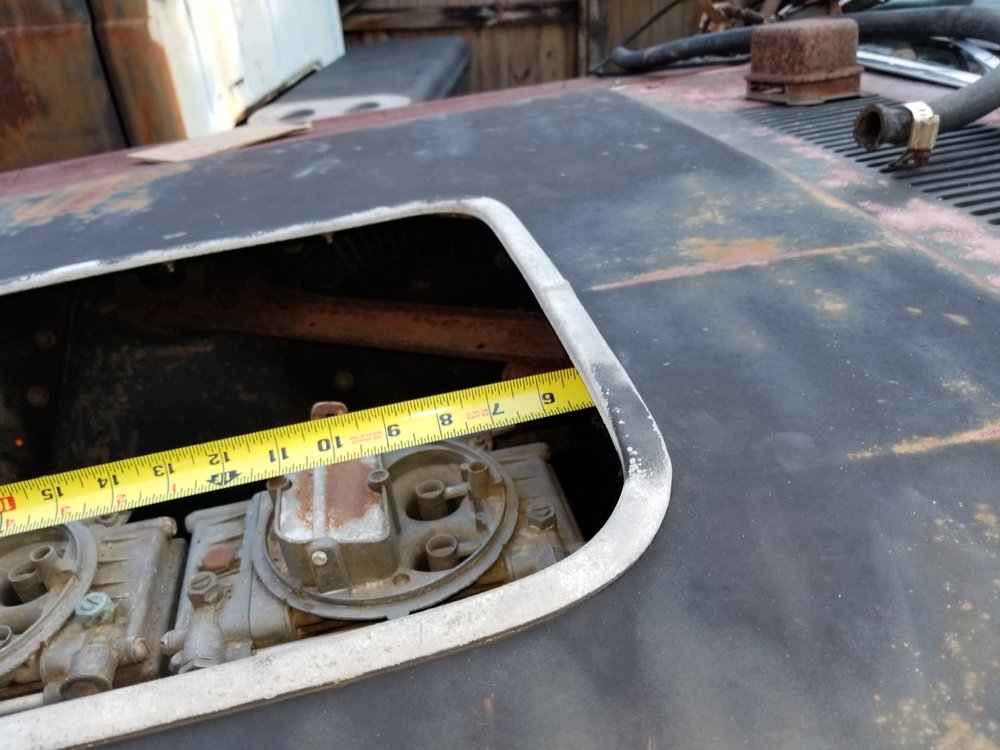
The third photo shows a tape showing ~6 inches from the firewall to the back of the rear carb.
The rest are just some overall shots. Maybe next weekend I'll have the 2X4 Sniper Fuel Injection in and we can see what it looks like. I really need it to be 100% sure my air cleaner mods will work.

-
2 hours ago, stangs-R-me said:What do you plan to use as an AIR FILTER ?? I'm thinking there can only be a few options out there for dual carb set ups and I'd guess most if not all Ford variations are open element types like what you typically see on 60's Ford's with dual 4's. From pic's, it looks like these oval shaped air filters are narrower as well as shorter than the round element used in a shaker.
Possibly a Mopar factory dual 4bbl air filter is wider and possibly taller too. I'm no Mopar expert, but did they ever do dual 4's under their Shaker ?? If so, I'd certainly study that air filter base … however the Mopar Shaker scoop is much larger than Ford's too.
I guess the point I'm trying to make is you definitely want to design your air filter housing around an air filter element that is readily available. Guess you could design around two round elements as you see on some dual 4 set ups, but I'd think these would have far less filtration surface area that one large oval element.
Having your custom elongated shaker air filter housing clear the distributor cap & wires is another hurdle that may make this impossible.
If you can pull this off AND give it a stock look under the hood it will be a huge accomplishment !!
Wish you the best of luck,
Doug
Right now I am planning on the Ford 2x4 oval filter but will look at other filters. Might go with square ones and use two. Lots of options there. As you know in the stock Shaker setup the filter sets around the carb and has a lid on top. That lid does not attach to any of the top structure of the Shaker assembly. The air has to come in the top move around the lid go through the filter and then make a 90⁰ turn to enter the carburetors. I think that can be improved upon at least in the Shaker mode. What I propose is building a short box that will encase the two carbs making it fit two of any of the numerous flat element air cleaners. I think that would be far superior to the original setup a way cheaper than buying the Ford 2x4 cleaners.
When the car is not in Shaker mode the engine breathes through the snorkel which is not really a great looking method and for my big inch motor may even be a choke point. I'll have to give that some thought!
Any ideas. Remember I'm trying to closely look like a stock 69 428 CJ under the hood. One thought I had was to place a couple windows at the rear of the base air cleaner and maybe even draw air from the high pressure cowl area. The Monte Carlo bar and the lengthened rear of the air cleaner base should make it nearly invisible.
About the distributor clearance. The front of the base will not move forward so that should not be a problem. Only the location of the carb opening will move inside the the base.
I should know for sure in a few weeks but for now I'm still convinced it will work. Thanks for the kind words.
What do yall think about drawing air from the cowl?
-
18 hours ago, JET 445 said:Your gonna have some fun getting two carbs to fit under a shaker.
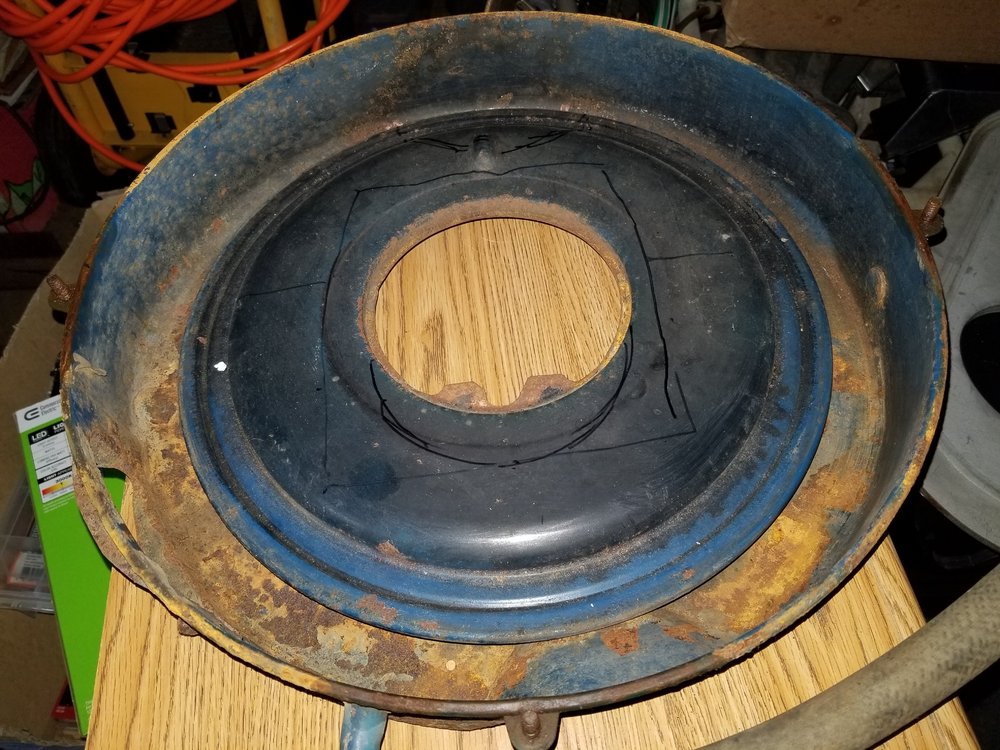
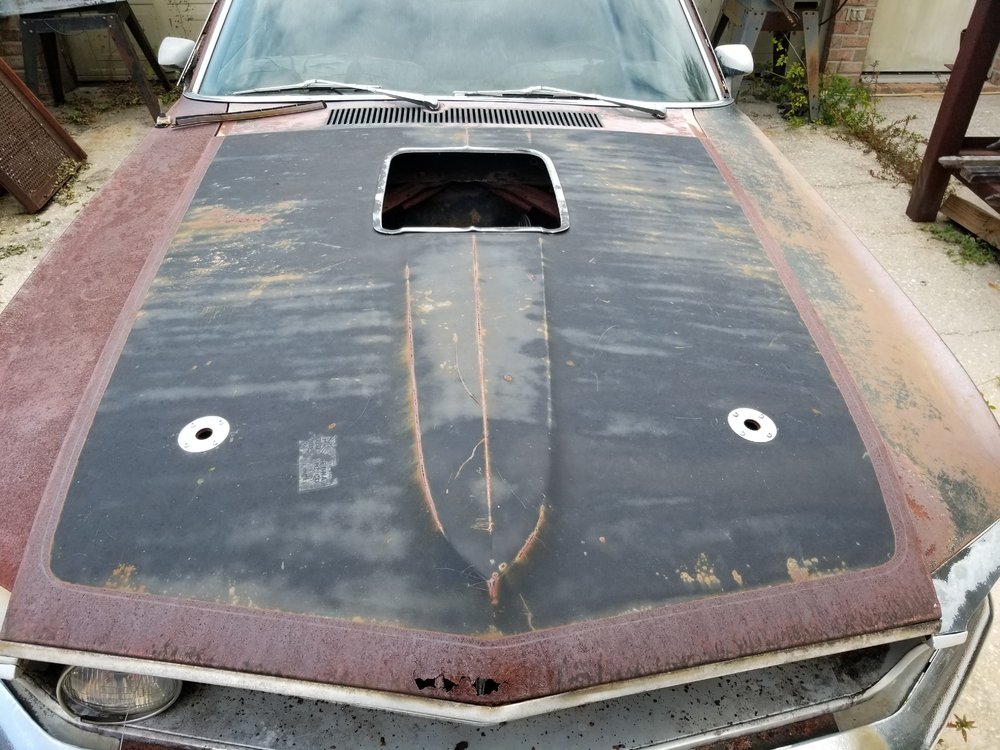
I started tonight looking at the 428 CJ air cleaner base and while complicated it really looks like it will not be too hard. To do this you'll have to be able to make accurate measurements and cut accurately. Of course you'll have to be able to mig or tig, form metal and make forms to shape the curves uniformly. I think the biggest thing is you have to be able to see the finished product in your mind first before you ever pick up any tools!
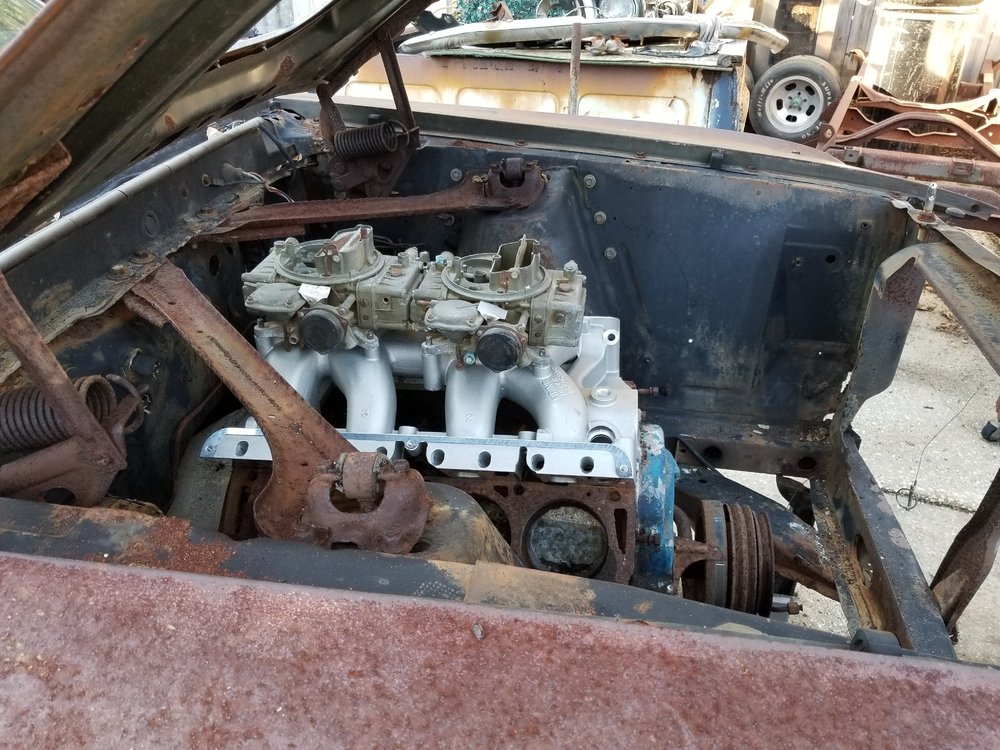
First pic is Tunnel Wedge intake with the C3AE 9510 C carbs off 1963 427 Fords.
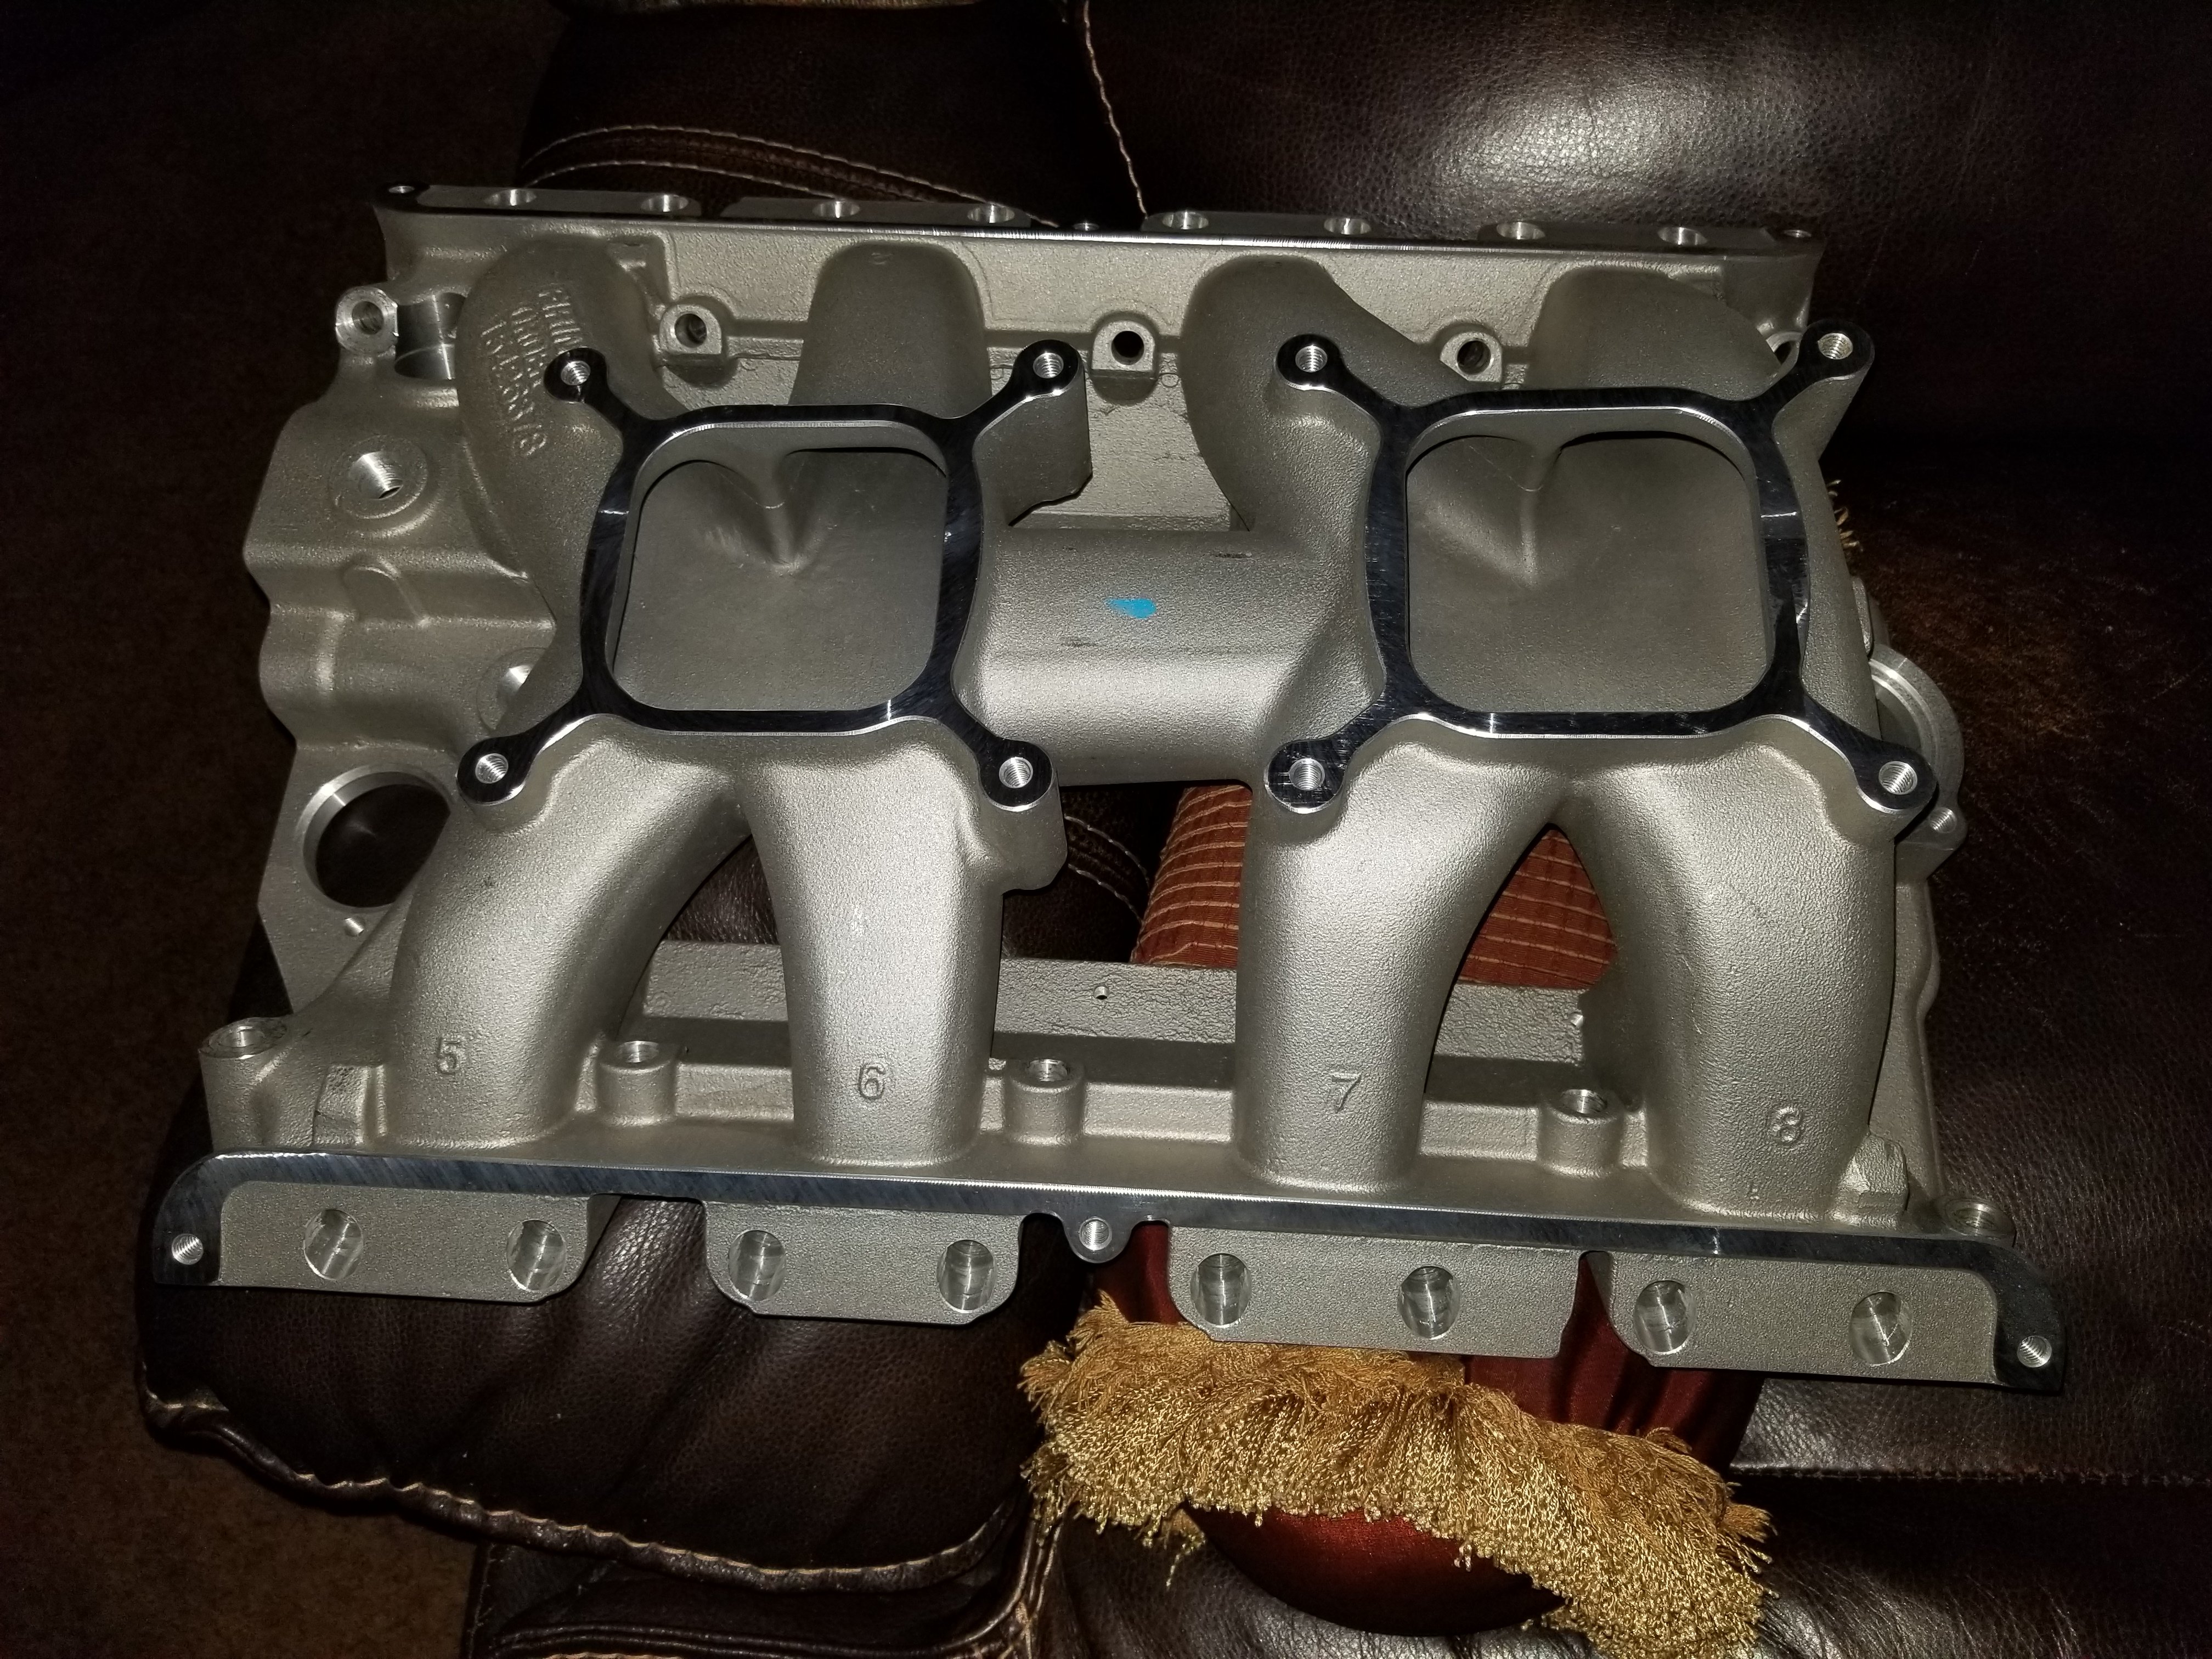
Second is the 428 CJ air cleaner base that will be stretched and modified to accommodate the 2x4 manifold and carbs.

-
5 hours ago, Hux said:Will there actually be enough area under the actual shaker for airflow into a dual carb setup?
Based upon Jay Brown's book The Great Intake Comparo the intake height is negligible. IIRC its 5/8". One thing people forget when comparing intake heights is that the carb base of the intake is meant to be level. The drivetrain sits at an angle making it appear that the intake is much taller but it's actually an illusion. If you look at the front carb pad it almost looks like a low riser compared to the rear carb. So yes I really believe this can be done. I'll be starting on this very soon and I'll be sure to take pictures. Maybe I'll ask Santa for a video camera and a really big bank of memory cards!
More specific to Hux's question no there isn't but my plan is to split the base and leave it exactly where it was originally in the under hood space. I'll move the half moon front half where the base sits on the carb forward. The back half will be moved rear ward. When that's ready I'll fill in the middle. Simple HUH! Well I hope it is.
Here's a pic. Wrong and junk carbs. One's backward. Just did it for a visual. Even all junky, backwards and wrong it sure gets the blood flowing and makes my right foot all tingly!
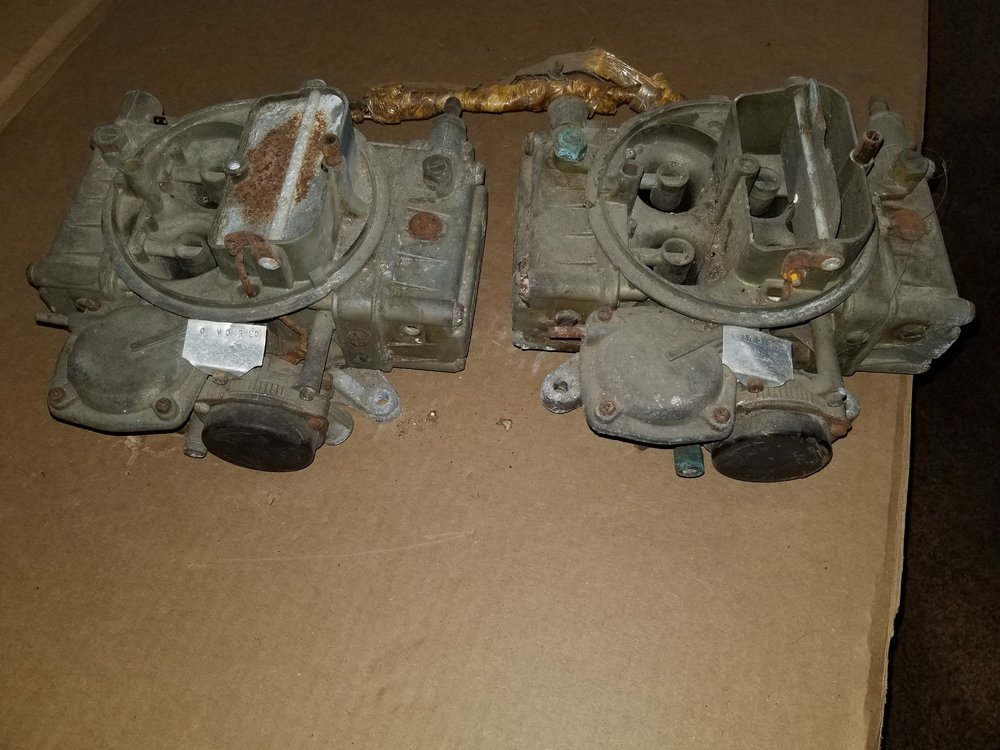
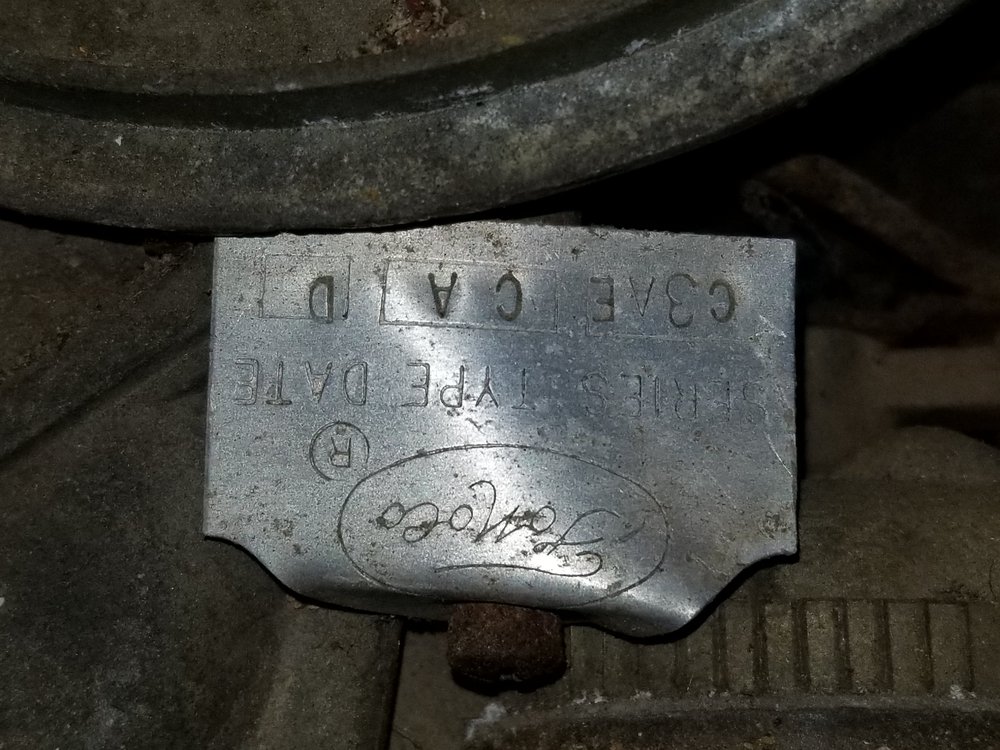
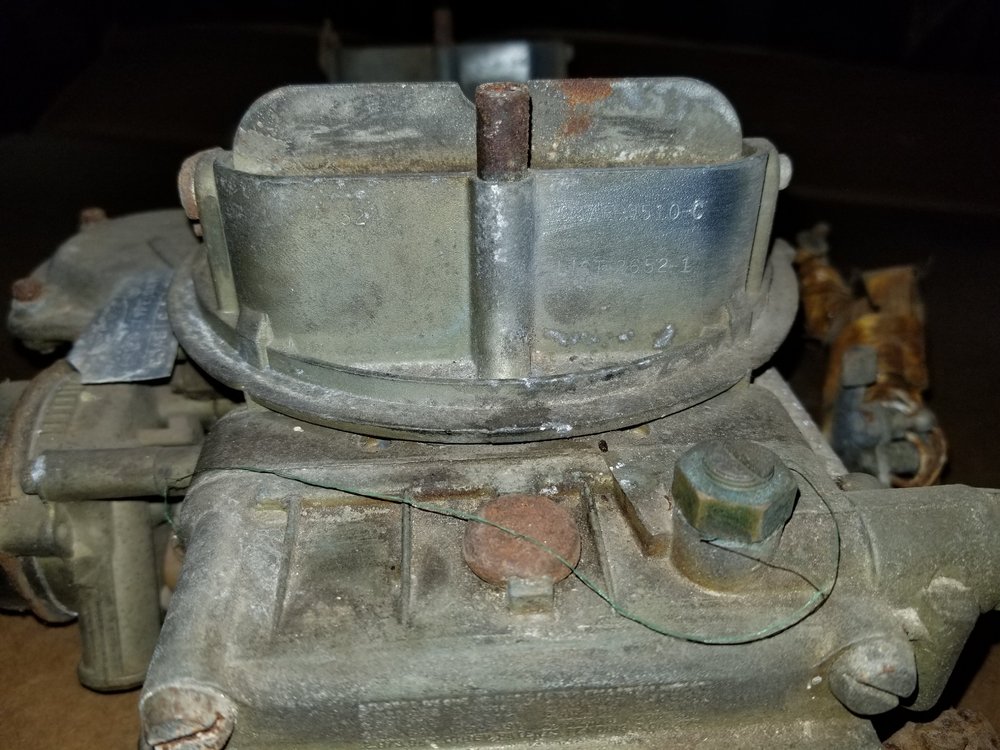
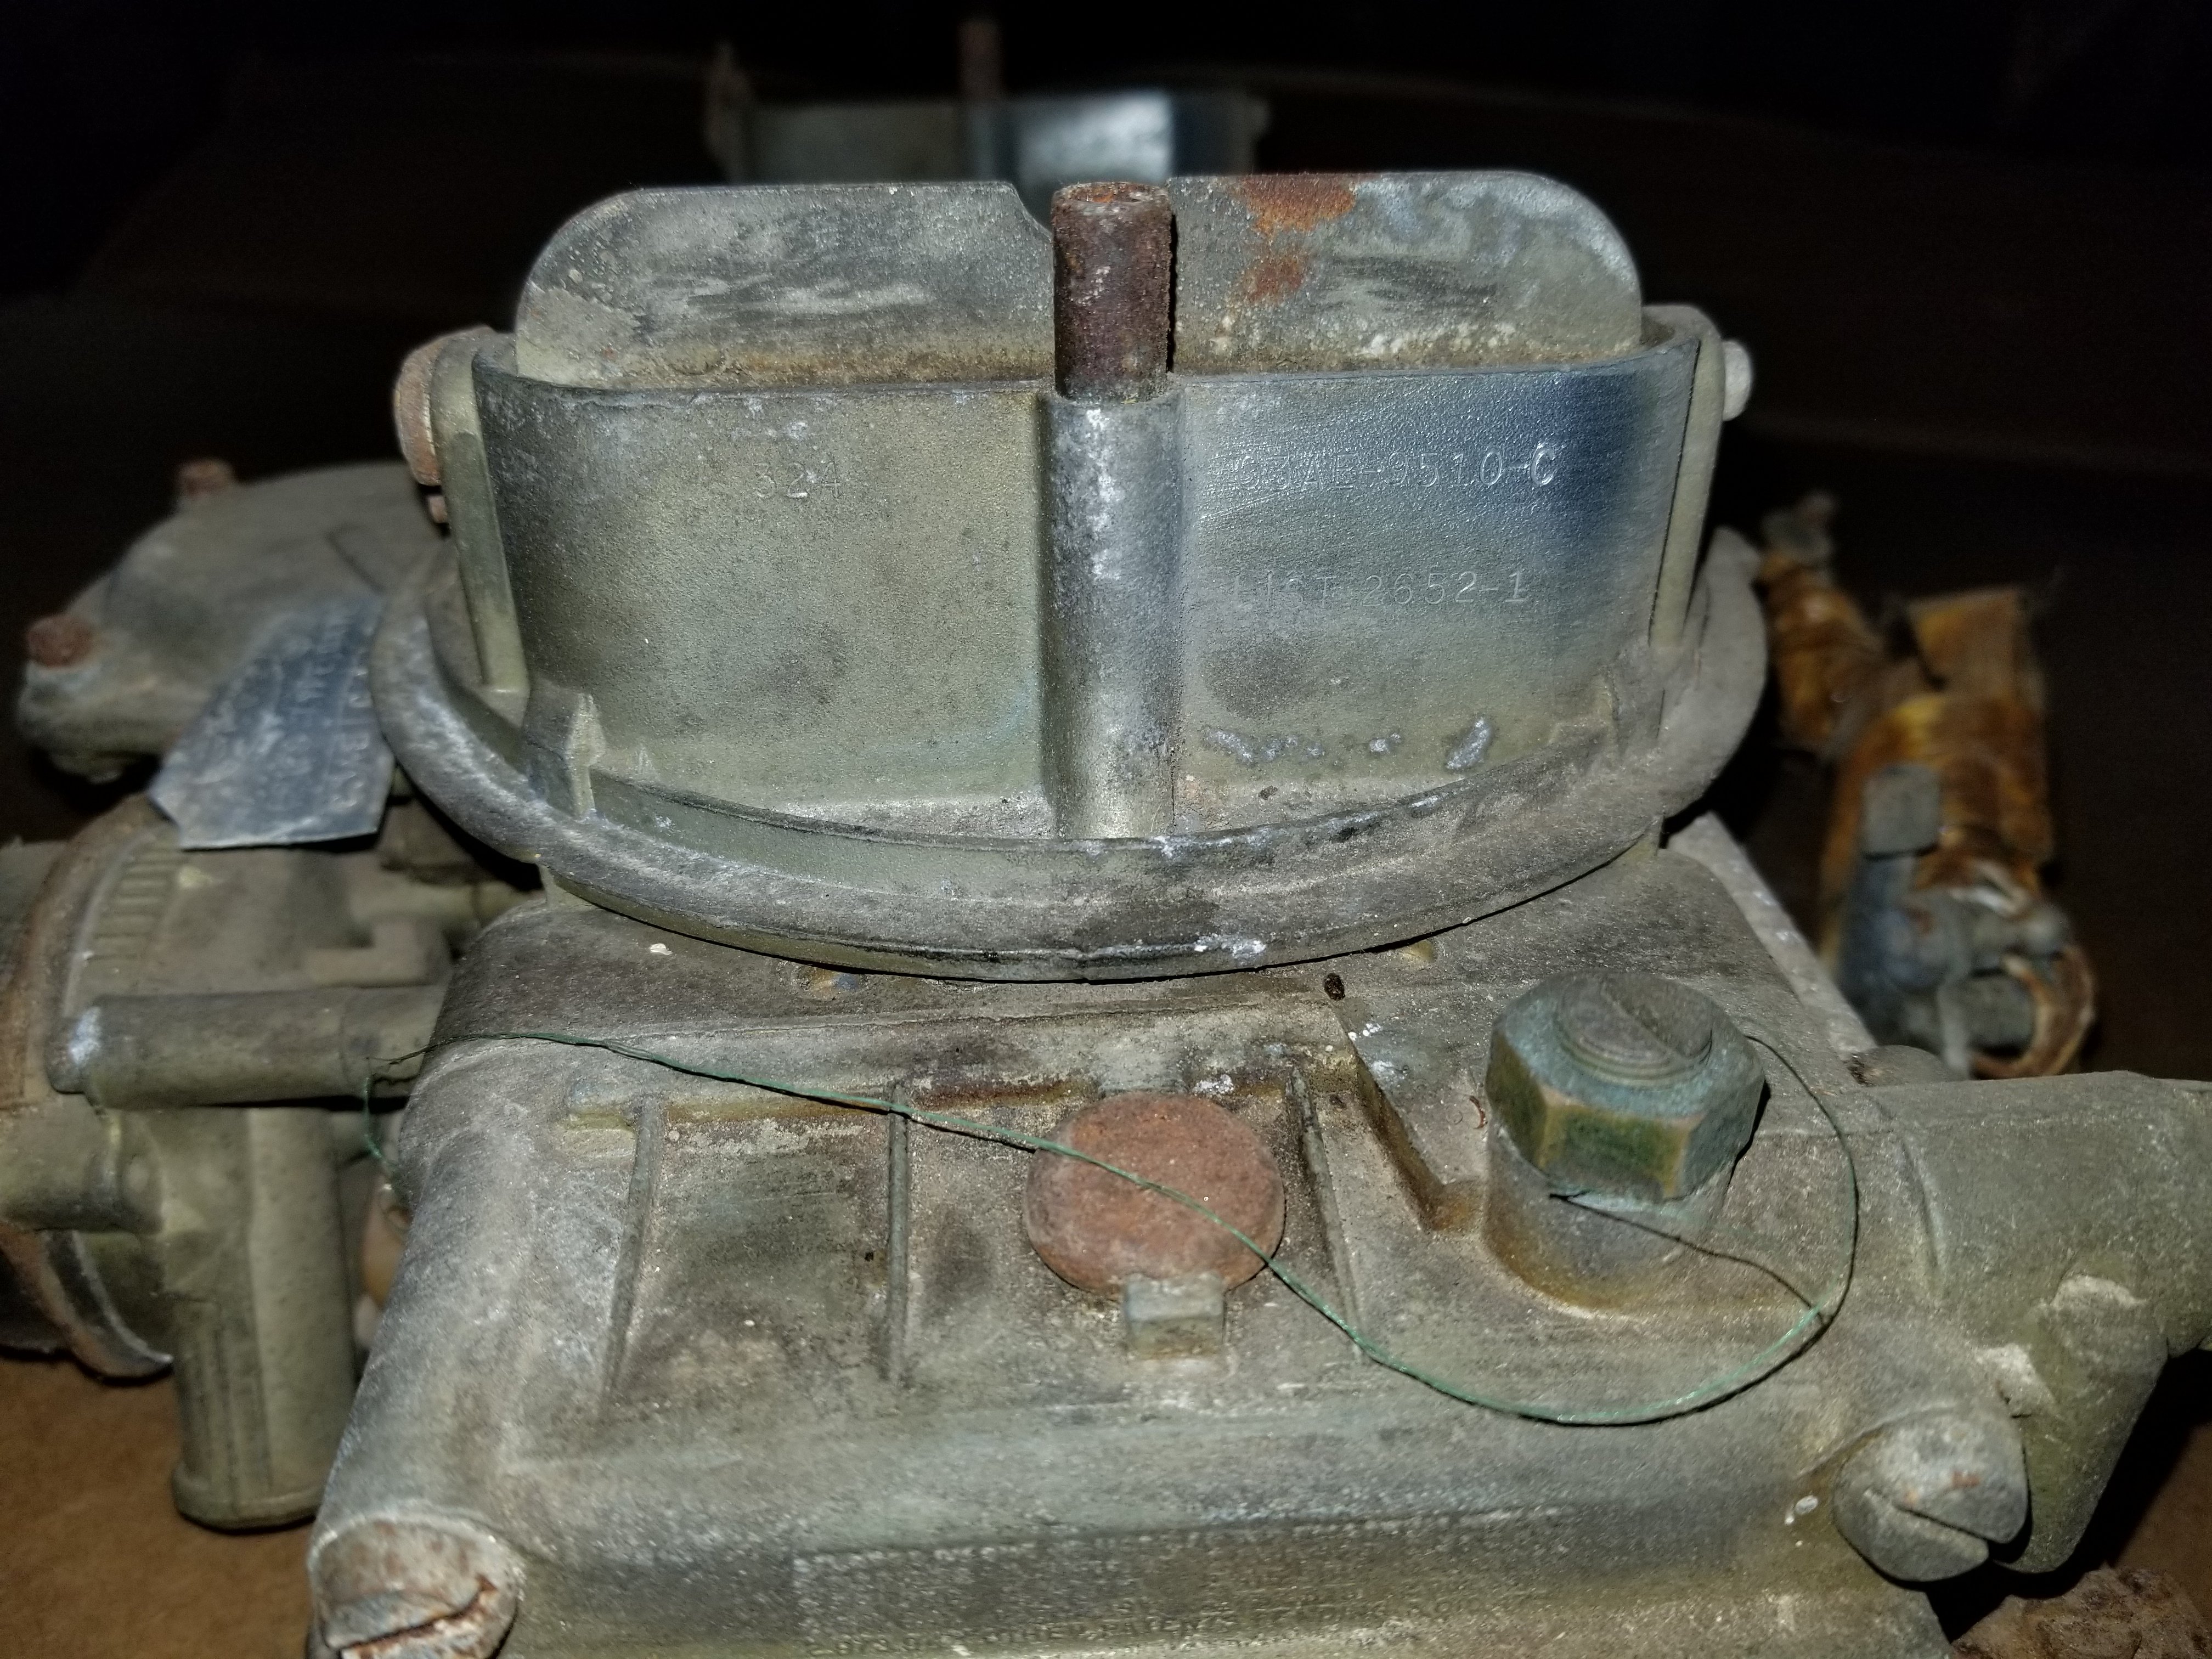
Early today I we finally got into my storage shed and I found the two carbs I purchased in the late 70's as a matched pair off a 427. I'm not sure but I know it's not all correct since they have the same number front and rear bur I do believe they are for a 427.
Air Horn stamped C3AE 9510 C
TAG SAYS
SERVICE TYPE DATE
C3AE CA D
I'm guessing they are service replacements. Either way I'll have Drew go through them if they have any value. I'll lightly clean these off and use them to mock everything up.
-
Here's a tease guys!
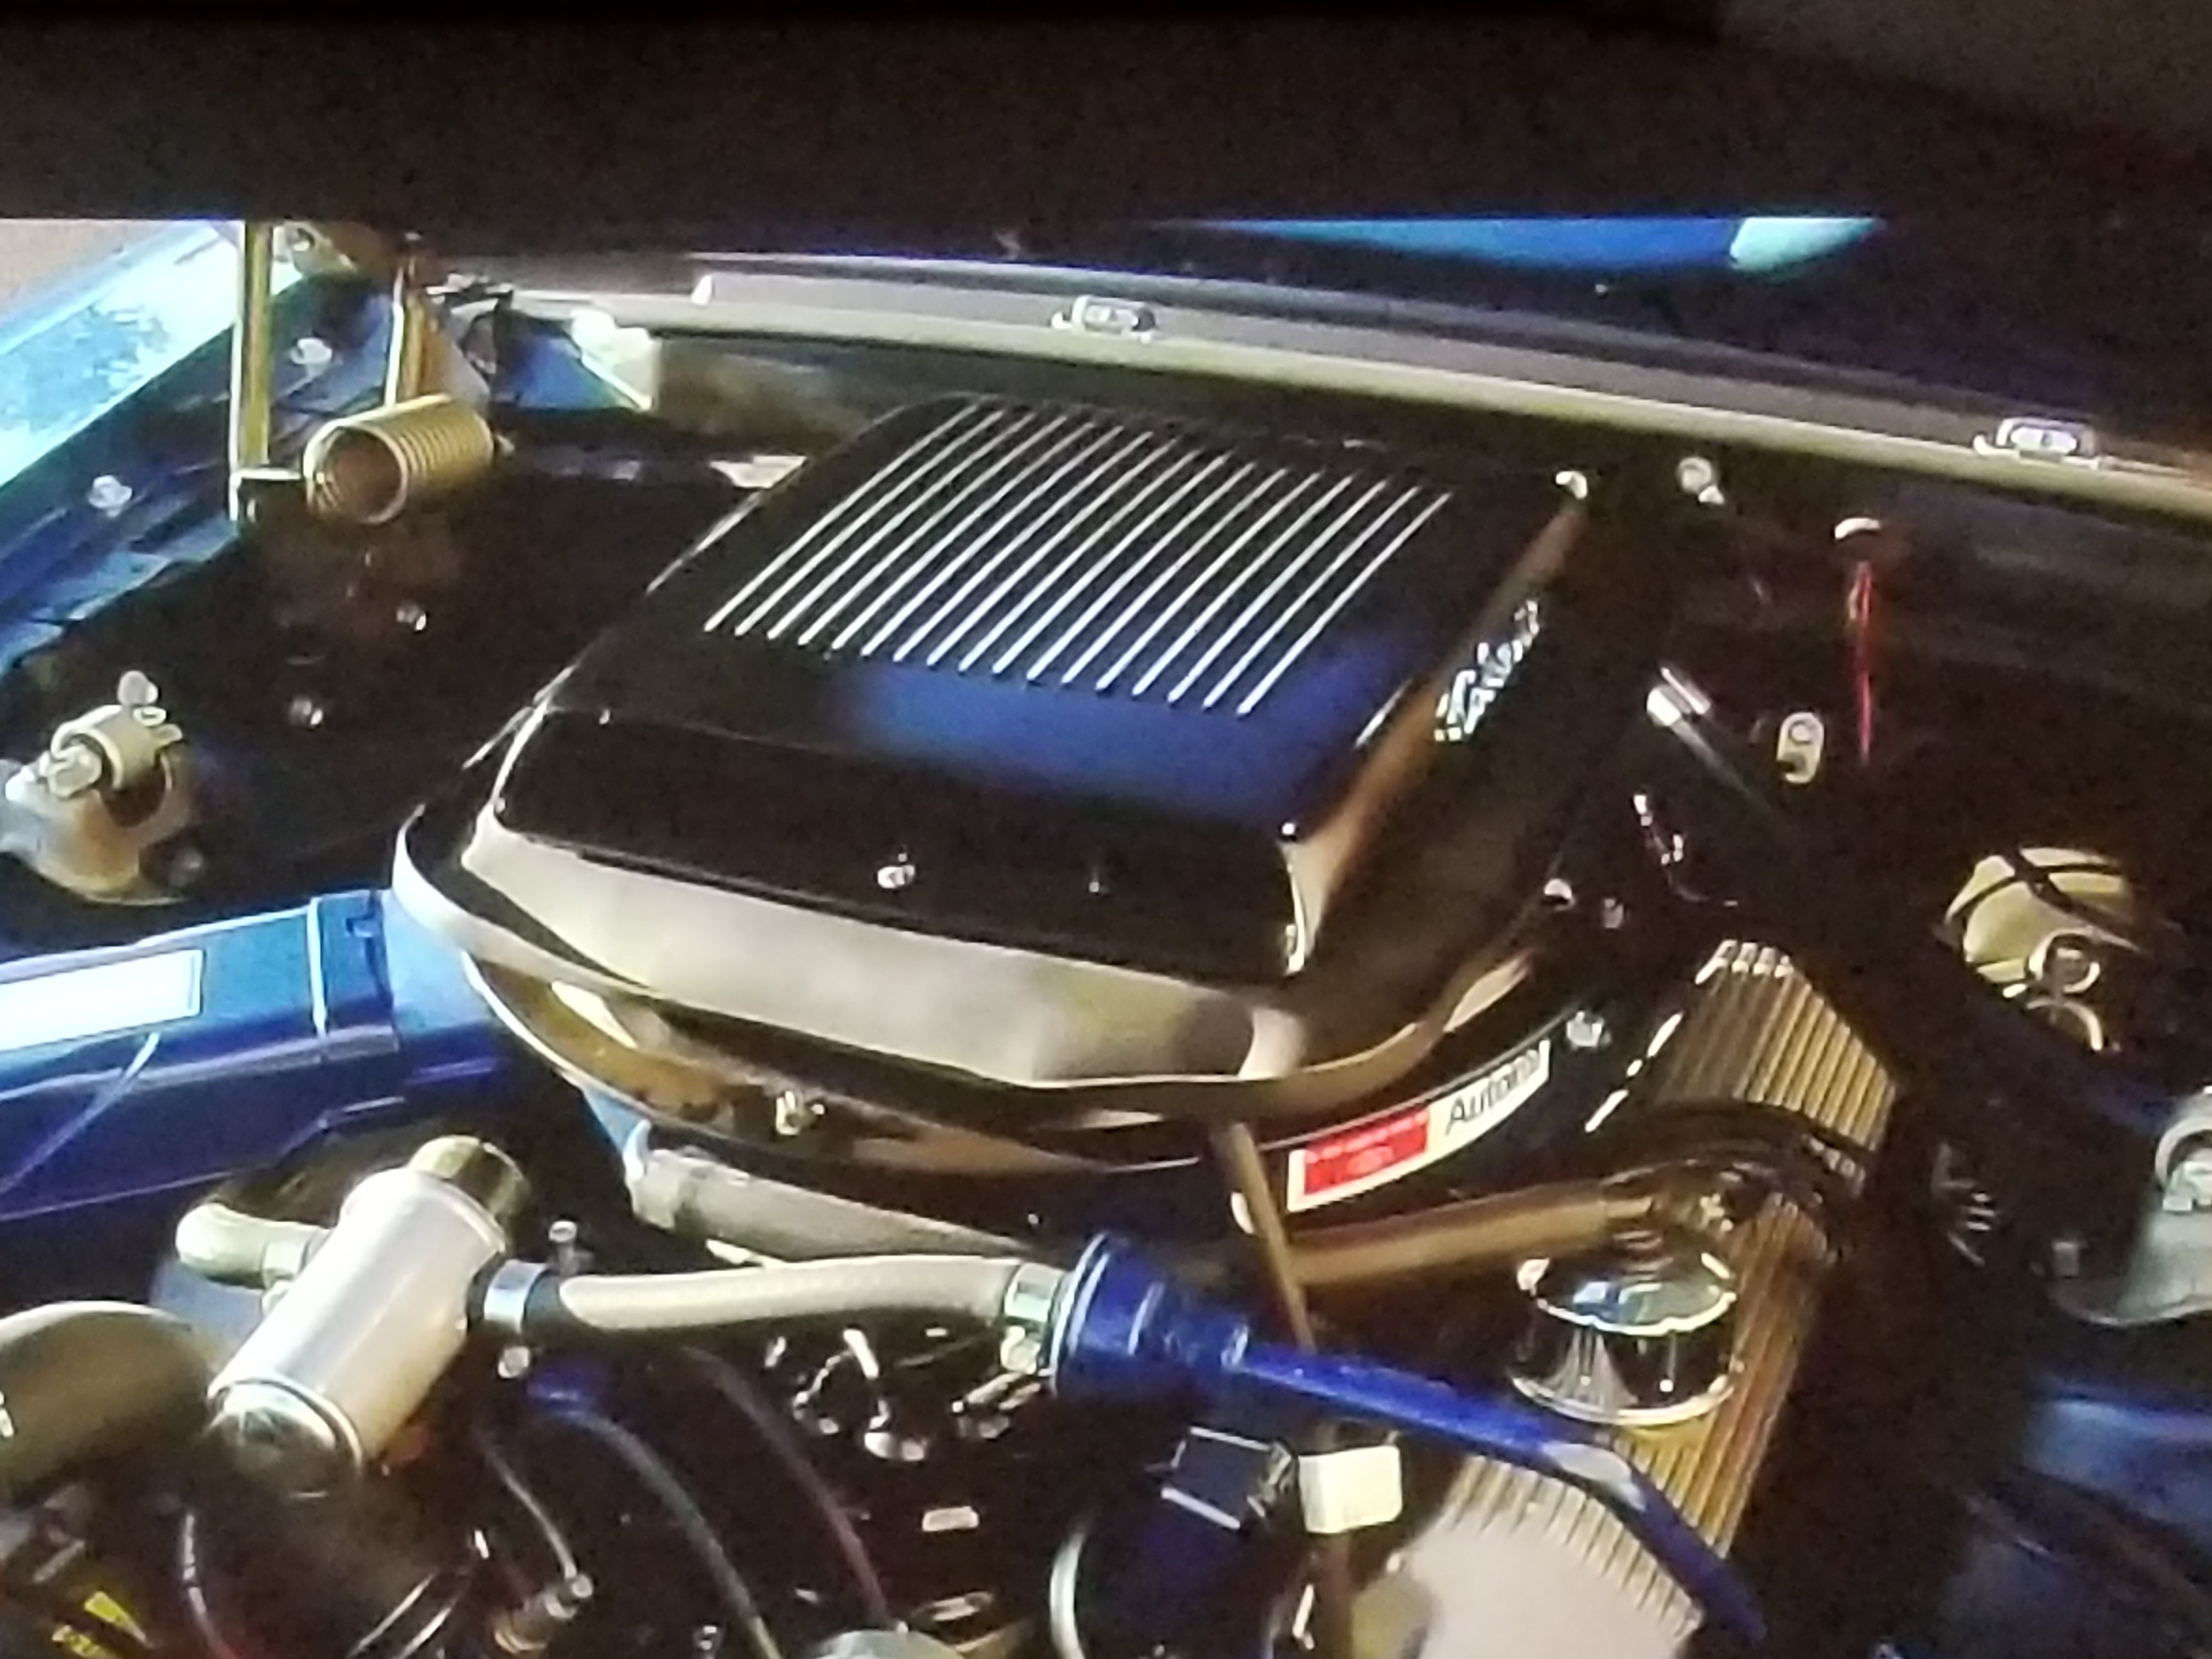
This will be the bottom and the CJ Shaker Ram Air will top it. Second picture is reference only not mine but shows how my engine bay will appear when finished.
Then finally my car"s shaker hood under which all the attitude will reside dressed in sheep's clothing!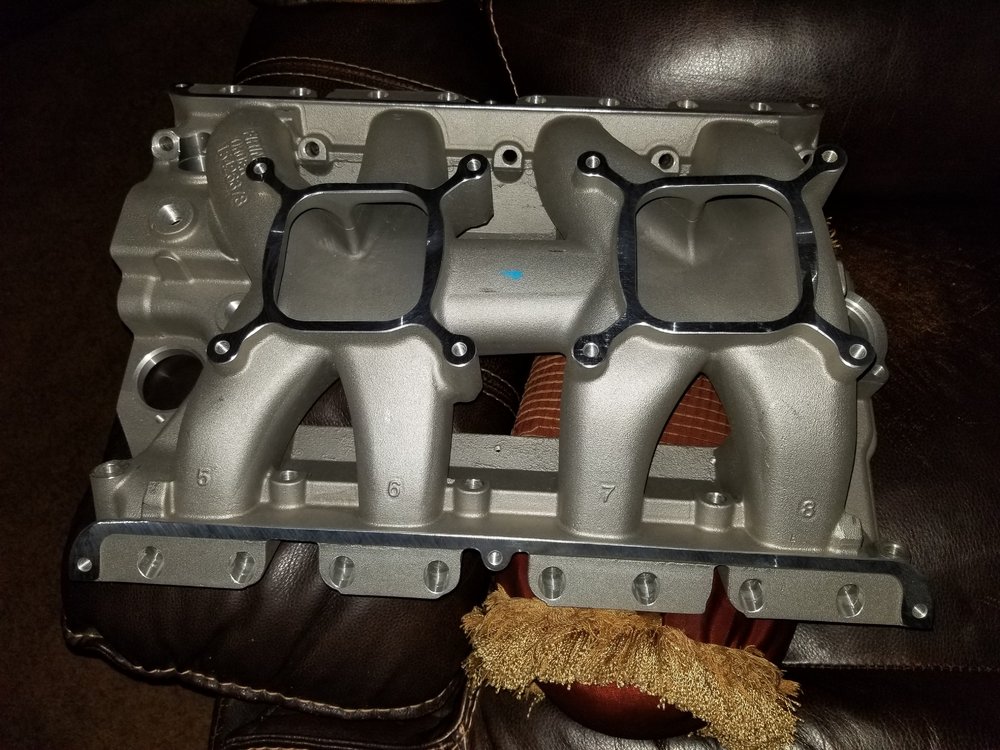
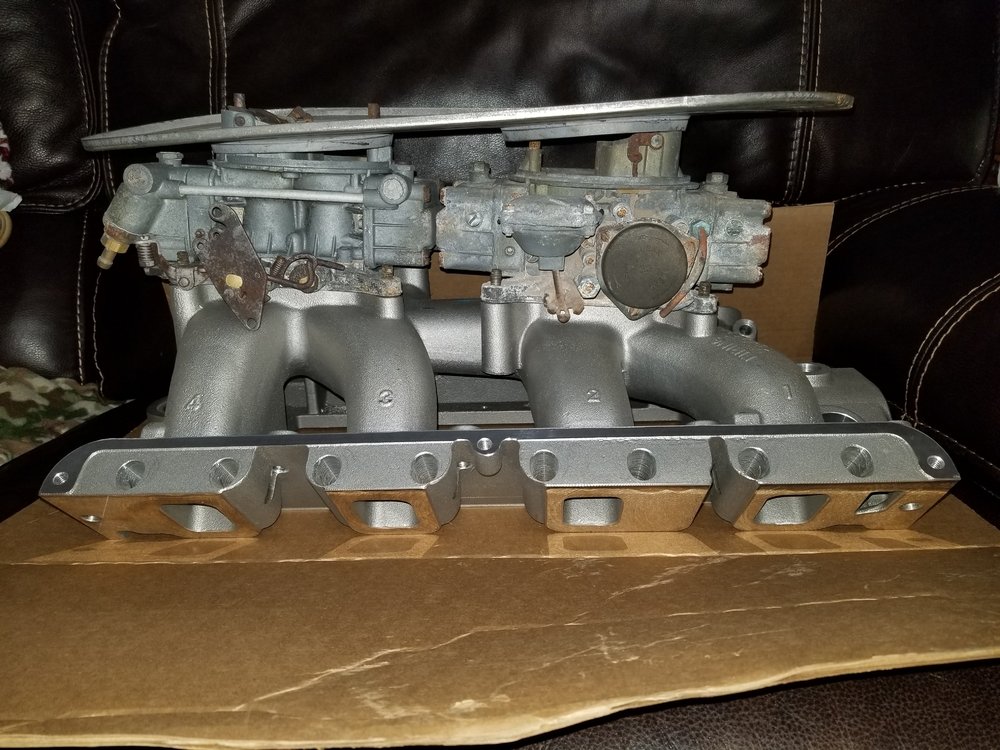
BBM Tunnel Wedge FE intake.

This is what my engine compartment will look like. The 2x4 Intake will be stealthily hidden beneath the Shaker Air Cleaner.

From humble beginnings, this will eventually hide all the magic.
Grabber70Mach reacted to this -
I will know the cost next week. But I got the 6R80 for free. Will not be that lucky I'm sure.
Where they looked smaller would be nominal but important. The two top bolts on the 6R stand out and would hit the Tunnel. On the 10R they dont but the face is thicker so it may be a trade off. Not sure till I see them sude by side. I'm just going by Frank's observations side by side and my impressions seeing the cutaway at the Ford Performance trailer.
I'm not keeping the stock suspension but the motor will be in the stock location and I would think that would determine the transmission placement? Am I missing something?
-
More progress today. The dash pad, radio, instrument cluster, passenger side clock panel and other miscellaneous pieces were removed. Tomorrow we'll get the lower dash, heater core, pedal assemblies and steering wheel maybe. If it can be propped up and still be used to to turn the wheels we may leave it.
So I was at my hot rod shop today and we were discussing the 6R80 and how much or little firewall/tunnel modifications would be needed when Frank, shop owner, asks if I'd considered the ten speed. It was like he'd read my mind. When I was at the swap meet in Moultrie I was drooling at the Ford performance trailer when I saw their transmission display. They had a 10R80 cutaway on display and it looked smaller than the six speed 6R80. I told Frank I had seen one and my observations. He stated he'd seen them side by side and believed the 10R80 is smaller from the block face through the mid point on the transmission and then it just looked maybe six inches longer not bigger than the 6R80. The 6R and 10R both bolt to the Coyote motor and the flex plate on both bolt to the same crank. I would assume the starter is the same too. Taking all that into consideration I called the experts at PBH in South Florida. They confirmed the transmissions are completely interchangeable. There is no reason to think that the 10R80 would not bolt up to my Bendsten adapter plate. Next call was to Bendsten. Thay have not confirmed the interchangeability of the adapter but agreed it's logical. We'll have a 10R80 to play with next Monday. This seems like a win win situation but there is a big UH OH. Right now there is not a stand alone controller but PBH assured me one will be available within the next year. That fits my timeline.
So what's the big deal? It now has a 4.70 1st gear and with the other 6 forward gears the close ratios now gives you a smaller drop in rpm between gears. That keeps your motor right in the sweet spot. A 5800 shift drops only to 4000 rpm. Here are the gear ratios.
First – 4.70
Second – 2.99
Third – 2.15
Fourth – 1.80
Fifth – 1.52
Sixth – 1.28
Seventh – 1.00
Eighth – 0.85
Ninth – 0.69
Tenth – 0.64
Even when you hit the three overdrives your monster will keep on pulling. I'll probably be running a 3.25 final and be able to come out the hole like I had a 5.14.
Additionally the 10R torque converter and transmission in stock form will handle 650 hp.
The 6R and 10R are game changers but the 10R is the things dreams are made of. So I might get lucky. It would be really nice to keep the stock tunnel.I'm kinda liking these wheels. What do yall think? They are supposed to be Hallibrand replicas. I think they look vintage. Don't know where or if they are available. Might be European wheel
-

- Hallibrand replica with lug nut covers and spinners
I'll keep yall posted.
Final note. The Tunnel Wedge intake is enroute. Picture soon.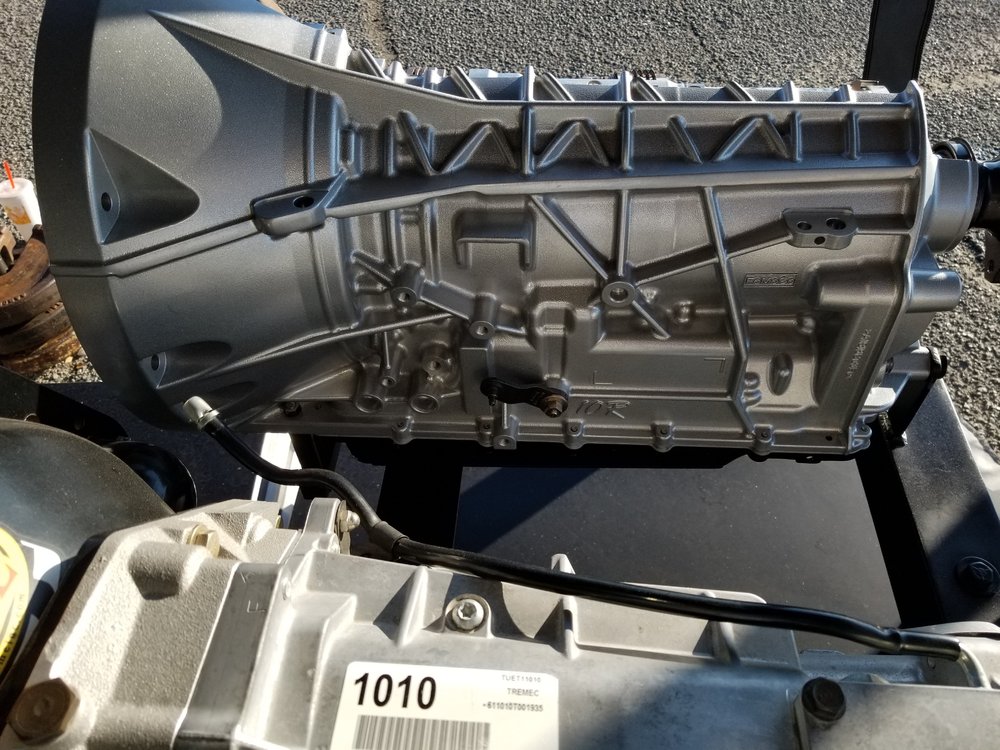
-
-
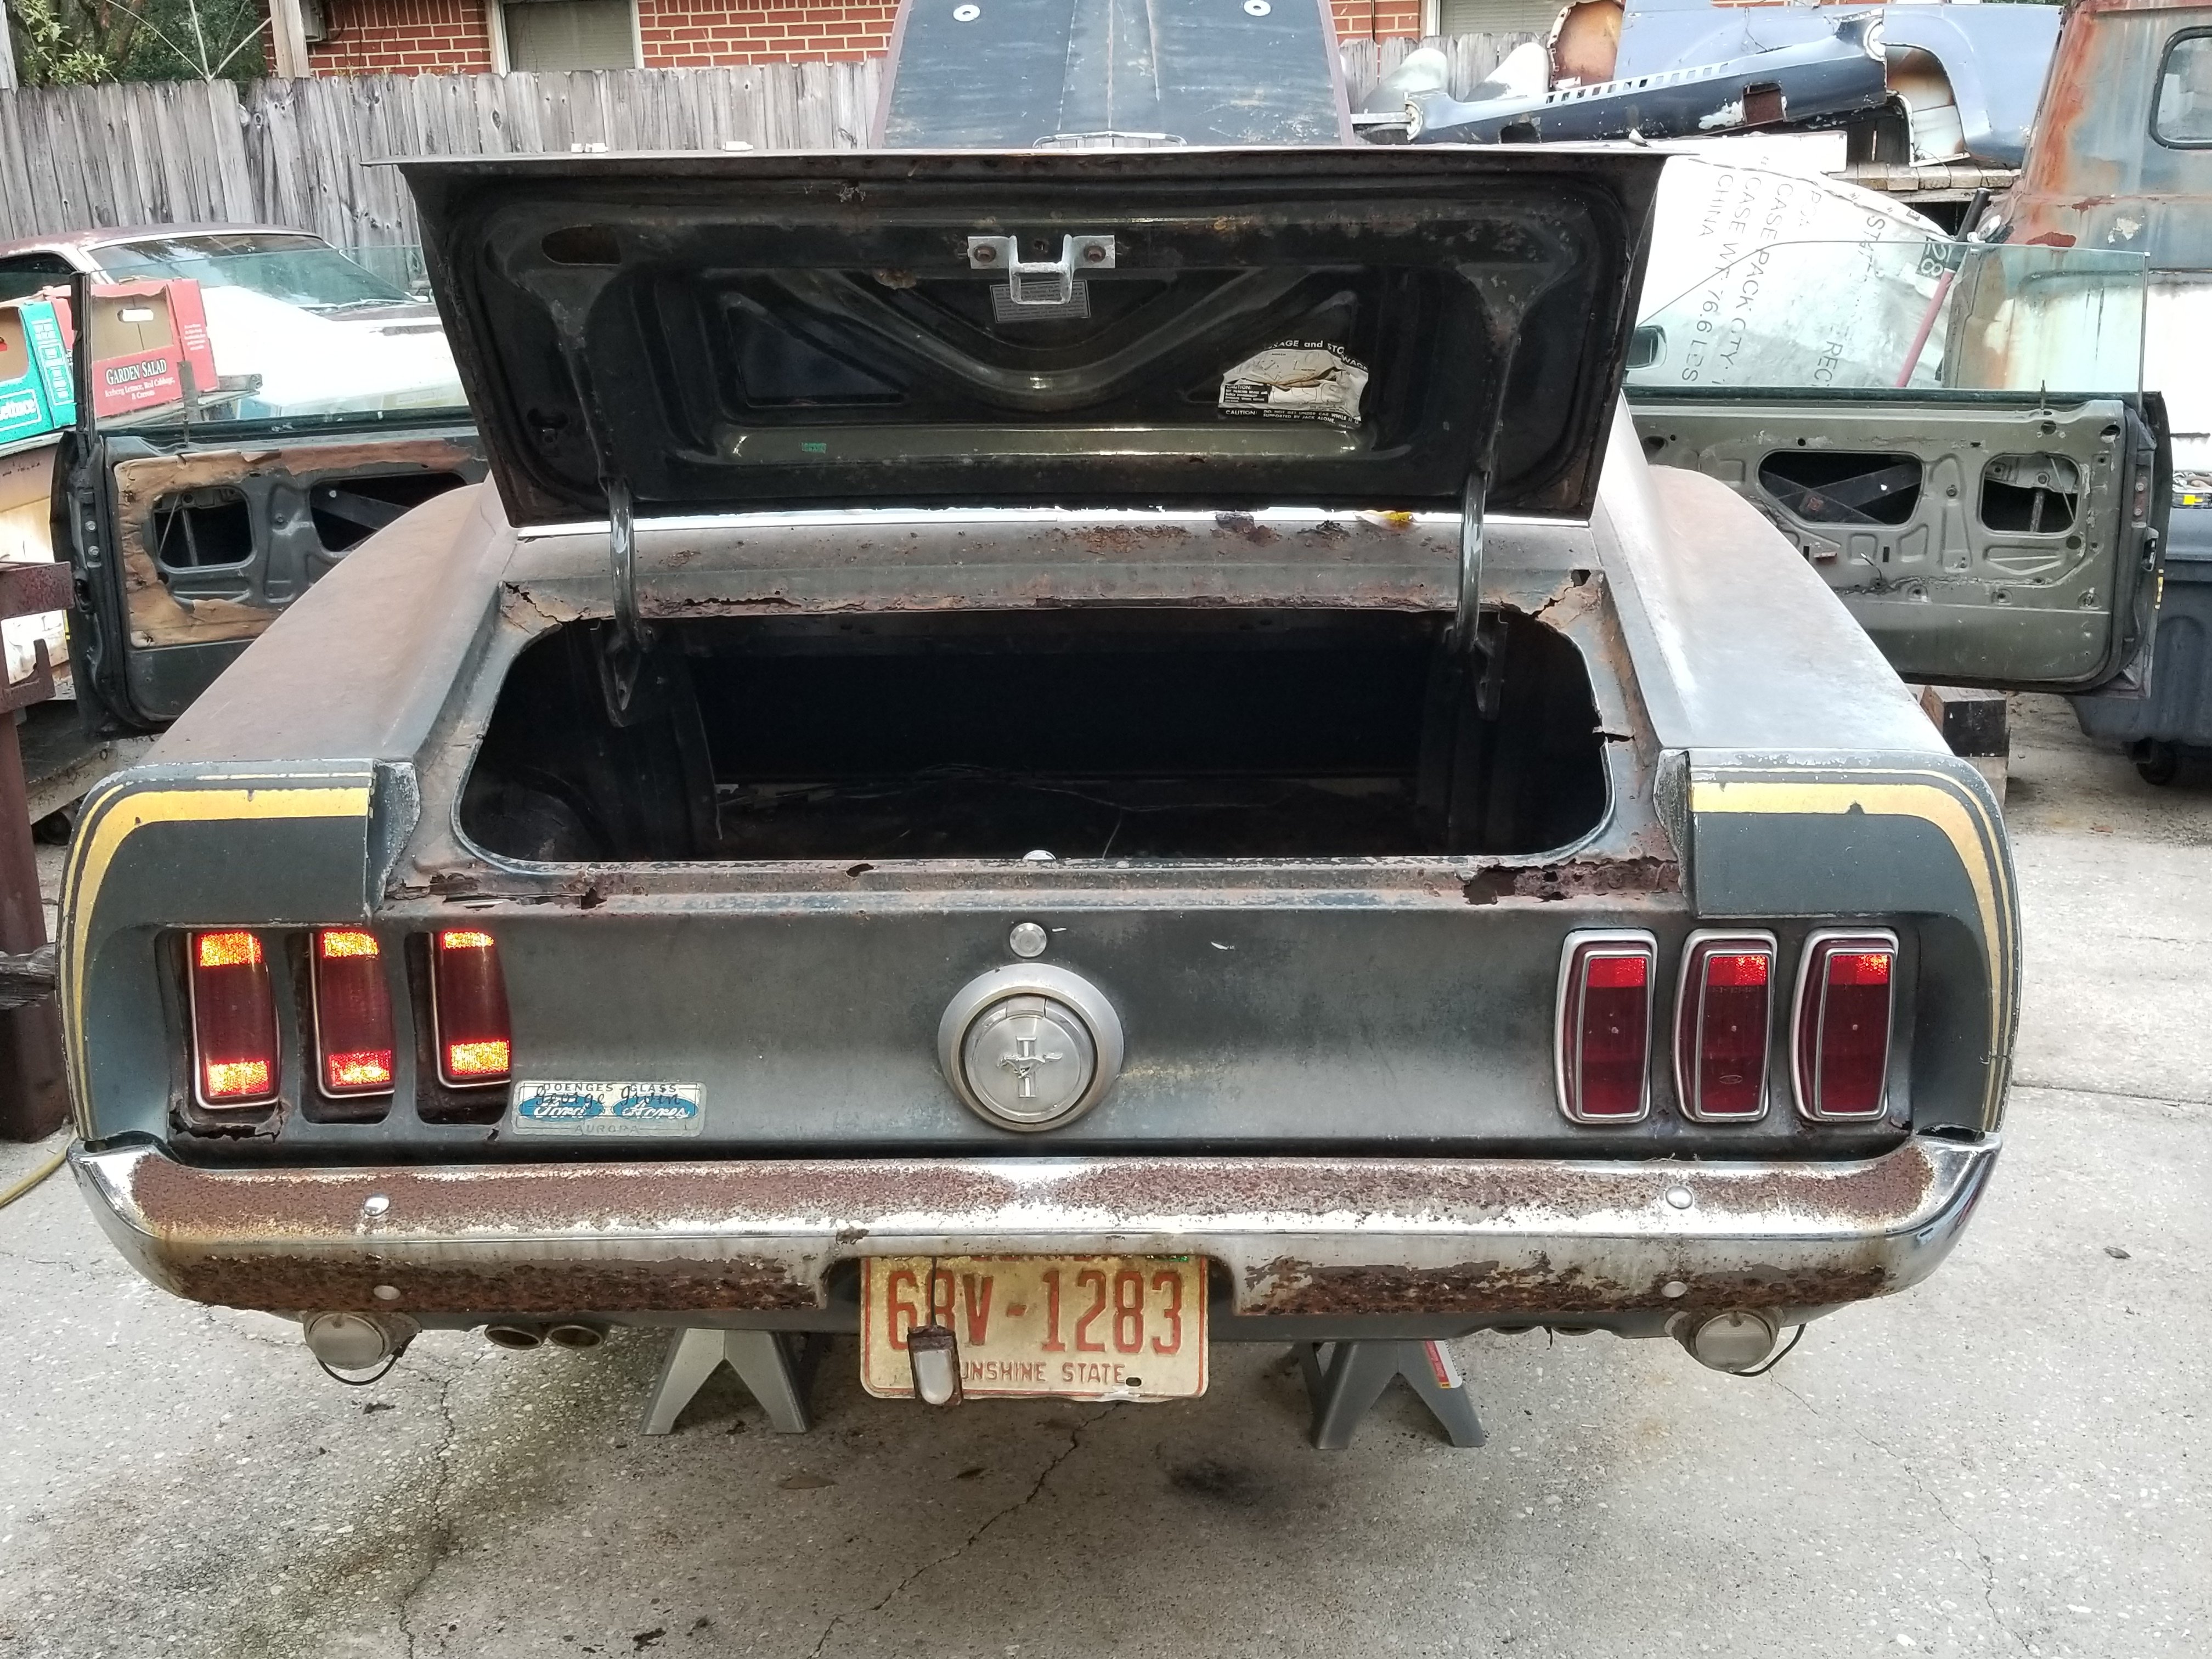
Finally an update! Progress is slow but its happening finally. In the physical world I emptied the trunk and removed the mats. Vacuumed up all the debris and assessed the metal. I need the taillight panel, both rear lower quarter drops, the right and left piece where the trunk deck seals and the piece between the back glass and trunk deck plus the trunk deck itself. I ordered everything except the decklid and it should be here December the 11th. I also ordered the rear spoiler kit and the sport slat kit. On an initial look the inner and outer wheel wells look ok. That makes sense since I'm doing a mini tub. Of course they'd be fine. That way I can cut up perfectly good sheet metal. Yep that's they way to do it. The trunk floor needs replacing all along the back edge and possibly the rear frame rails near the back. I already know there is extensive floor pan rot on both sides of the transmission tunnel and the frame extensions under the floor also. At this point there is a real good chance I'll be buying a Dynacorn complete floor from firewall to taillight panel. I believe it will be the quickest and most efficient repair.
I also bought the fold down seat conversion and the ACC complete interior cut pile carpet kit. I know it might seem odd buying these items now but they'll be stored inside my house in a spare room designated for the Mustang rebuild.
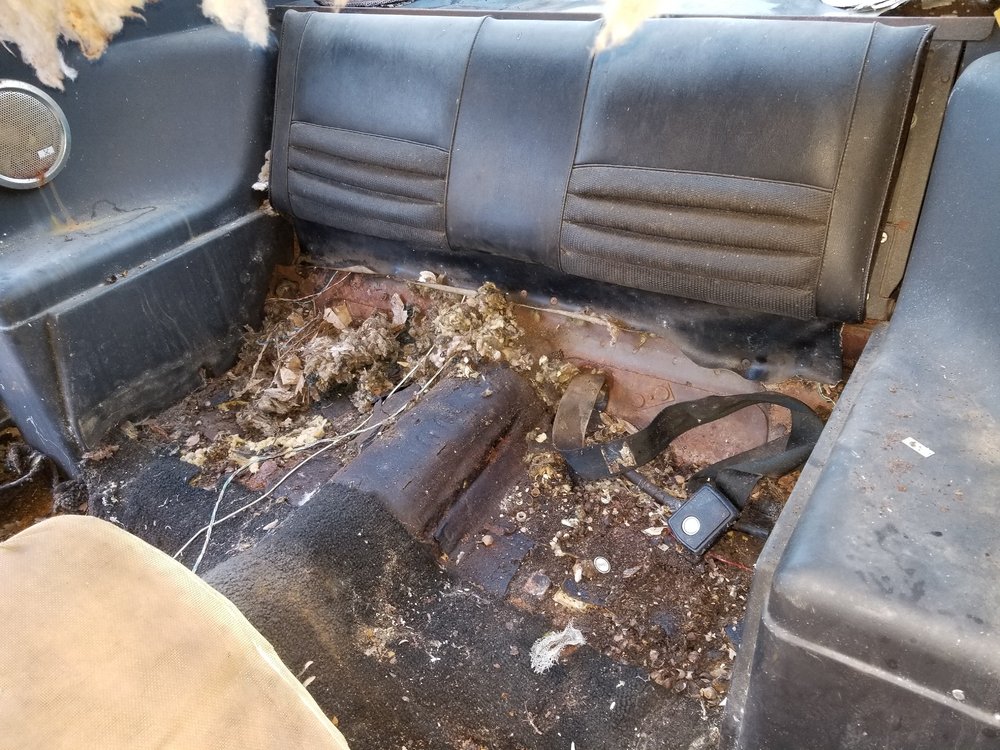
We've also been working on the interior removing the front seats, lower rear seat, door panels, kick panels, sill plates and the front carpet. We could not get the drivers door open and it took hours of work before it finally come open. Both doors have rotten bottoms. Probably buy new doors as I don't think just the bottoms are available? Over the next few days we'll finish the interior removal and rear bumper, fuel tank and quarter panel extensions. Then the fun begins removal all the carpet underlayment and exposing what's left of the floor pans. Only then can I decide or confirm that I'll need that full floor pan.
A couple more funner stuff. My 6R80 is in and the adapter to bolt it to the FE big block. Those two items will allow me to see what if any modifications I'll need to do to the firewall and transmission tunnel. I'll also be able to fabricate the transmission mount and even measure for the driveshaft.
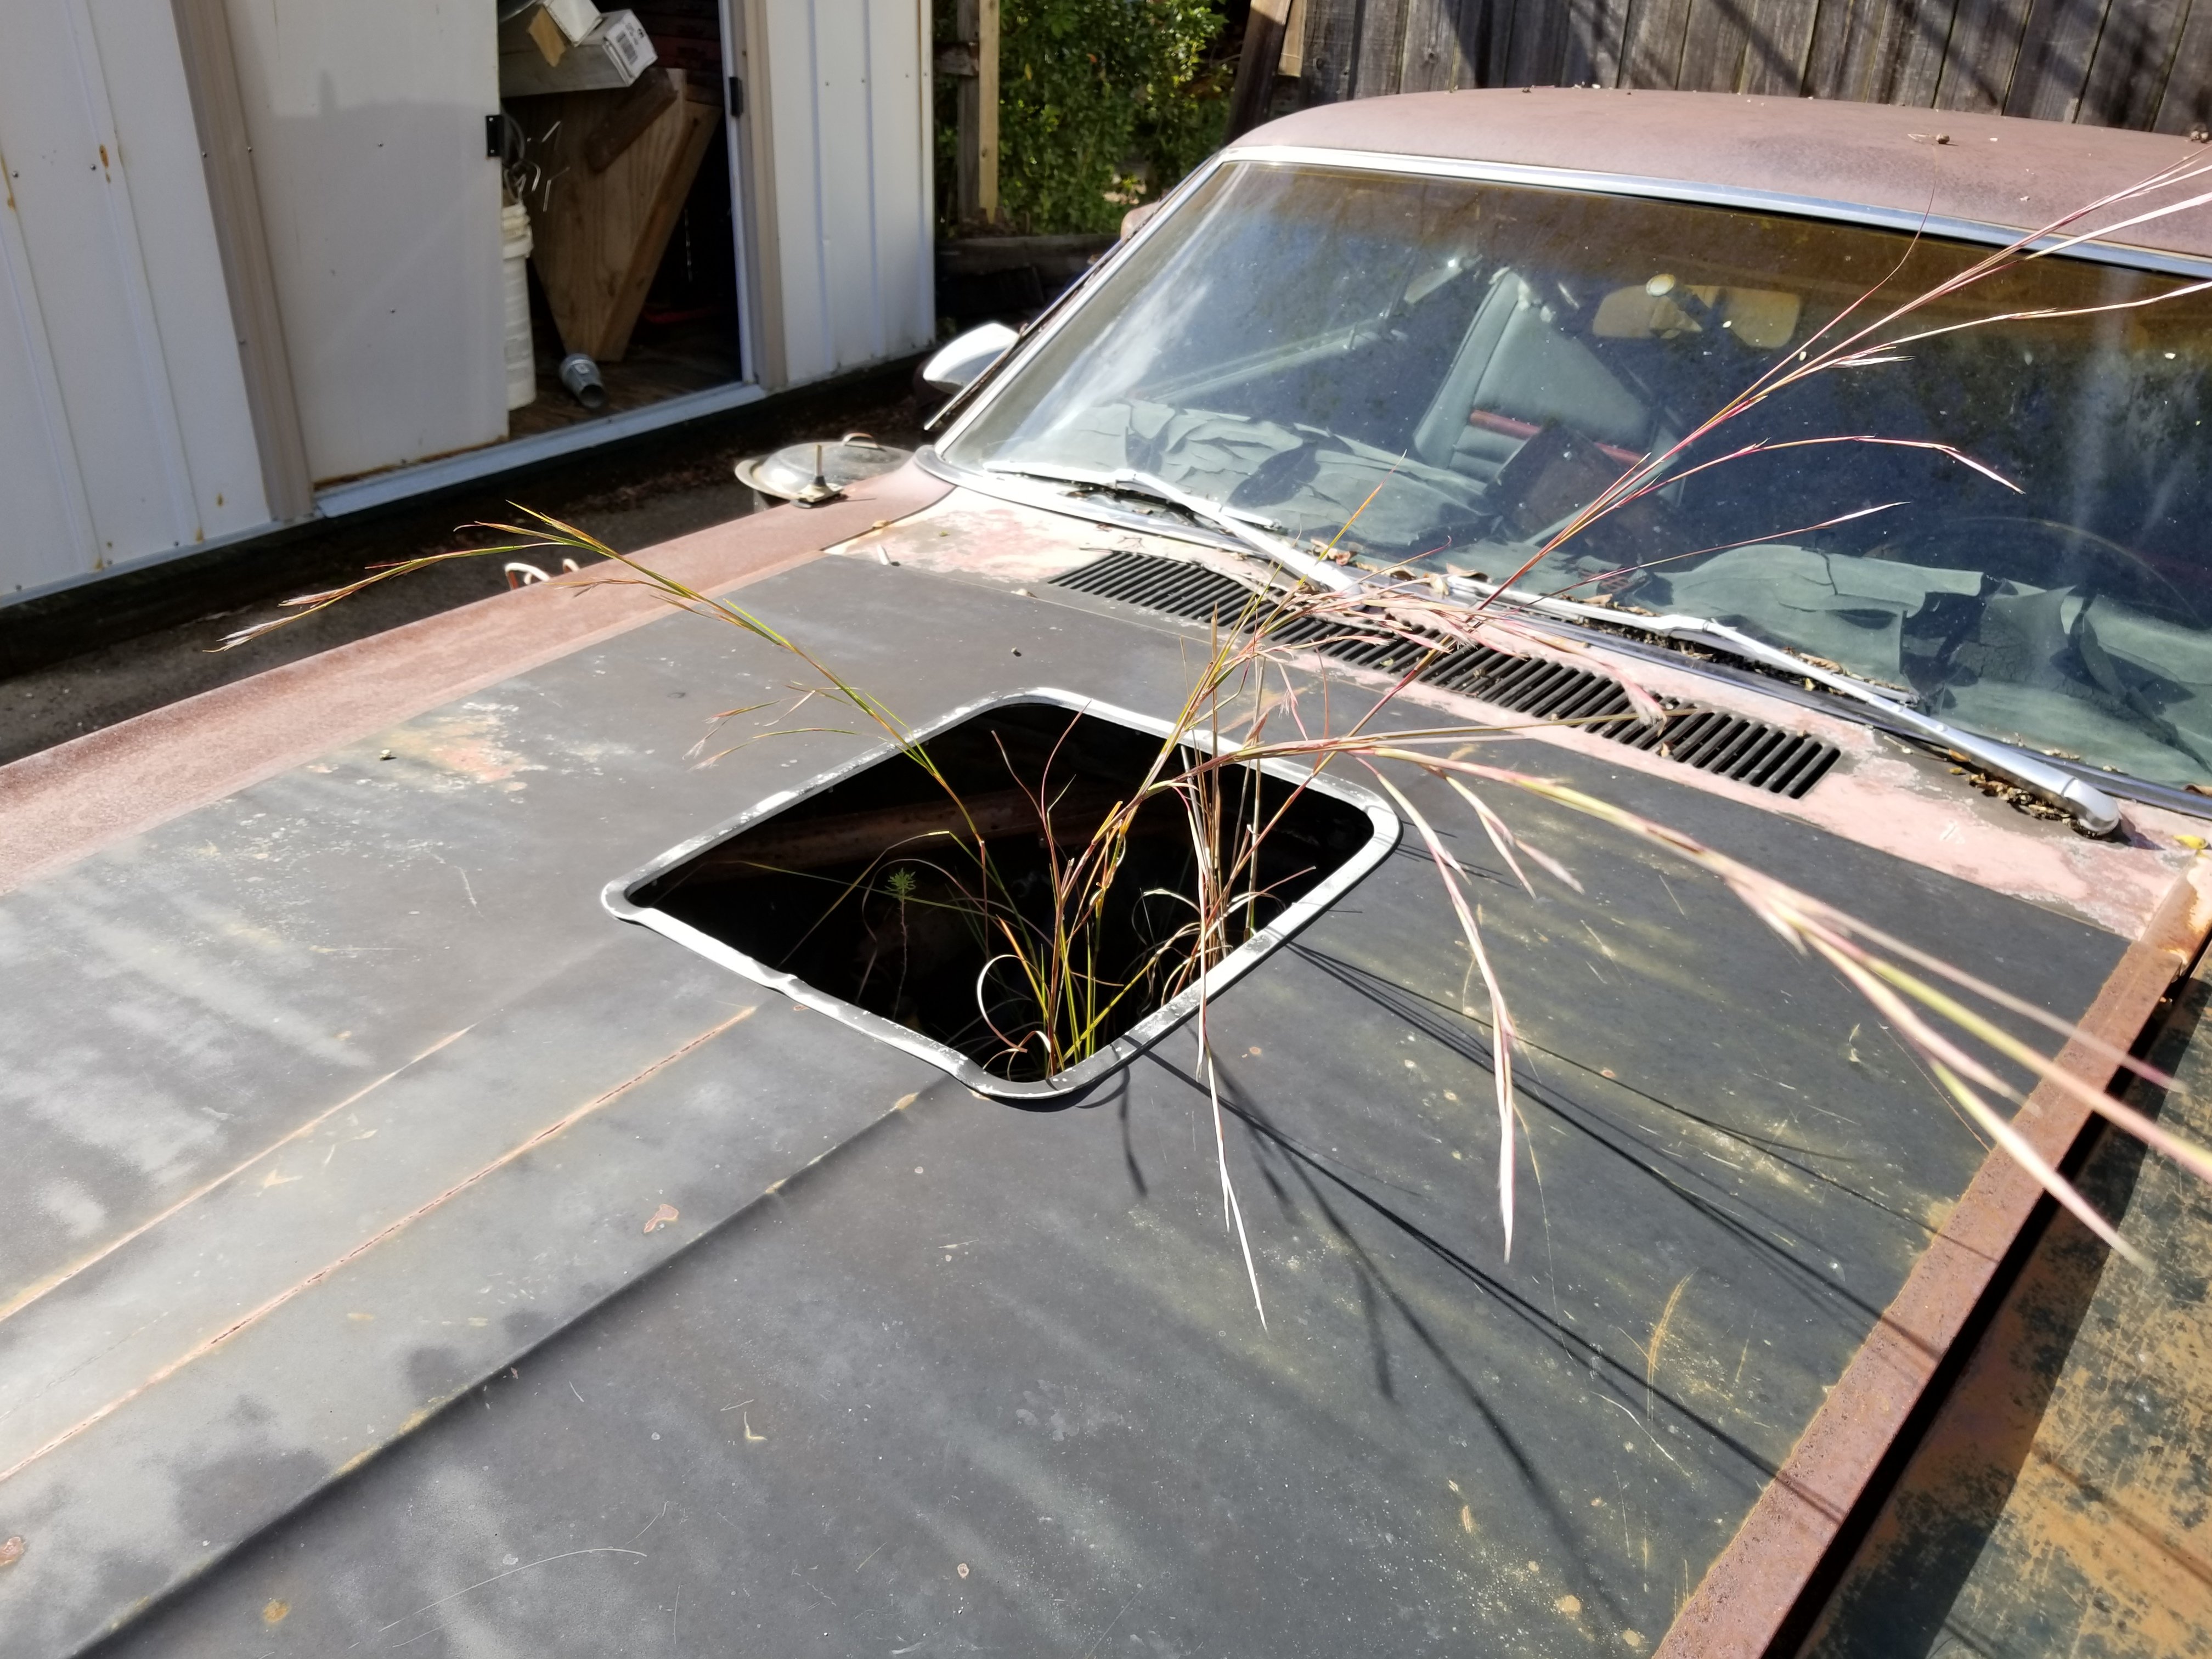
I went to the big swap meet at Moultrie Georgia and had a blast. It's really cool when you find something you didnt even know was made. It's even better when you need it. What was this item a sheet metal 2x4 air cleaner base. Just like the aluminum one but sheet metal. This give me a big step forward on building my air cleaner base for 2x4's that will work with the intermediary CJ Ram Air Shaker hood system.
I think that's about it for now! Thanks for reading.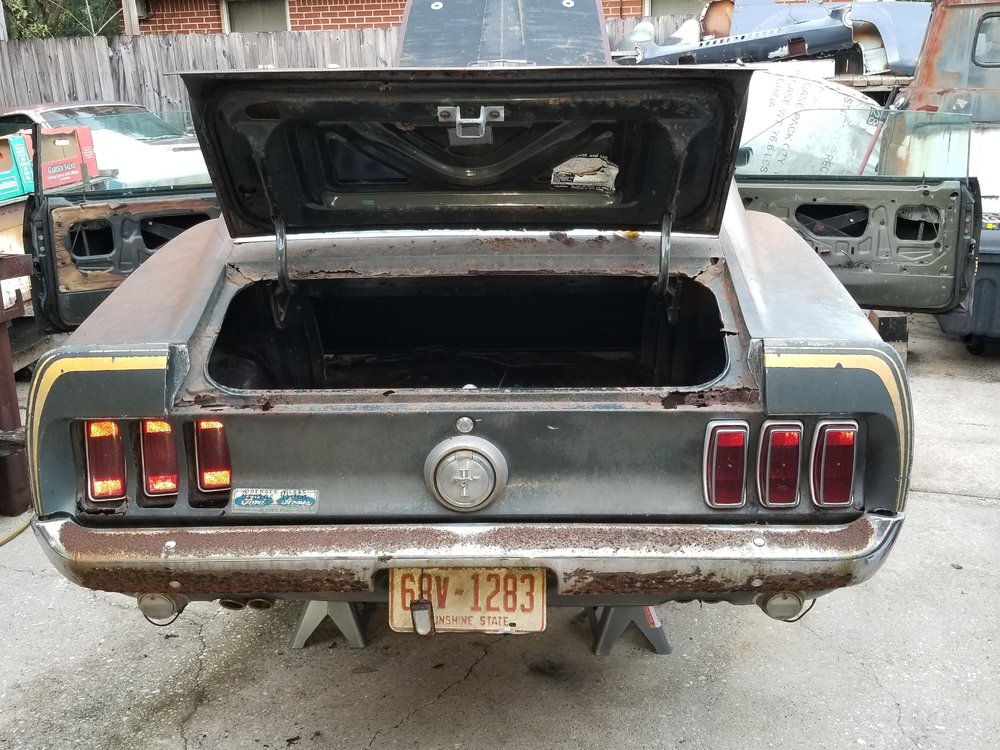

-
5 hours ago, Vicfreg said:I have Foose Knuckle, 18 x 9.5" on the back, with 1" offset and 5.25" backspace. I am running BF Goodrich Sport Comp 2 tires, 235/35-18. They are 11" wide. I have rolled fenderwells and running a leaf spring suspension. Cut the inner wheel well spring bumpers off for more room. You have to play with the tire combinations to get what you want. In my case, I wanted to keep near the stock height, and a height that is close to the front tires. The rear tires are 25.6" high.

So you did not modify the inner wheel well and only removed the spring bumpers? I hope I can get a bit more height and width but I plan to modify the inner wheel well some. Thanks for sharing your information. Your car is looking nice.
-
-
8 hours ago, Grabber70Mach said:....have you looked at the coilover kit from Street or Track? ....On the subject of brakes have you considered a hydraboost setup? .... 315/35/17's can fit on the rear of a leaf spring 69/70 car. But you have to be selective on the brand of 315's.
I did look at Street or Track and several others before deciding that the Total Control Products front coil over conversion best fit my needs.
I also considered the hydro boost and have not eliminated it. I'm hoping that my stock booster and master cylinder will work. Wilwood tech people said it would IF I could supply vacuum.
What brand(s) of 315's will work? Do you know if 315/35/18 will fit?
3 hours ago, Hux said:Welcome and good luck. Looks like lots of new sheet metal to come - but great to see you haven’t given up on it.....
I look forward to seeing the 6r80 go in. Thats going to be a nice choice.
Sheetmetal! The only thing I'm scared of! And you're right I do need a bunch of it. The car is like part of the family so I cant give up on it!
The 6R80 should be a game changer on FE's in Mustang's. Really hoping it will tame the beast and allow interstate driving to get to shows and cruise ins.
2 hours ago, mustangstofear said:If you're going with a Coyote, we make everything you need for the swap. No modifications to the firewall or tunnel with our IFS. Check out our website mustangstofear.com.
Thanks but I'm sticking with the FE 428CJ architecture although it will be a 427 sideoiler bored and stroked. Trying to make the restomodded part fairly innocuous!
-
I'll start off with the back story.
My name is Charles and I live in Pensacola Florida. In 1978 I traded a 1971 Volkswagen Beetle for this 1969 Mach 1 Mustang. The plan at that time was to race it in NHRA stock class. The local economy was bad and fortunately I made little effort towards racing the car other than installing a set of Hooker racing headers, purchasing a 5.14 gear with 31 spline spool and installing .540 lift Reed racing cam. I never even was able to reinstall the top end of the motor (big mistake).
The bad economy led to a move to Houston, three children and life! The Mustang was stored in Pensacola but not securely and outside. At some point while we lived in Houston someone who knew where the car was talked or they them selves stole the Hooker headers and factory chrome GT rims. That was bad enough but they uncovered the car and hood with the shaker scoop opening and unwrapped the motor that I had sealed very well in order to access the header bolts. All 16 of them. Yes I put all of them in. With the hood open and the motor unsealed there was nothing to protect the inside of the motor. We recieve around 75" of rain each year. It was several years before I discovered what happened. By that time there were plants growing in the lifter valley and the block had been full of water for years. Very disheartened I wrapped it back up but the damage was done. I fenced the back yard and life went on.
In July 1983 we returned home as broke as we left but having survived 4 more years and now with a family of two and one on the way but the economy was better and we were home. I also brought home a 70 Mach 1 351C 4 bbl Shaker Hood Mustang but that's another story. Over the mext 34 years working 50 to 60 hours a week family and life left no time to work on my car till 2017 when I retired!
After two years of retirement and finisjing a few other small projects it was decided that it was now or never to complete the 69 and so it began. First with lots of thought about what we wanted, a restoration or a restomod. The car itself was a time capsule having almost all the original parts still there. That was a great thing! I'd even stored most all the parts taken off the car when working on the motor in 1978. What was bad is that over the years I was fooling myself thinking that the car would not rust just sitting around. It did rust and badly. Worse the drip rails, which I stupidly ignored, accumulated leaves and debris resulting in rusting through. I really didn't think the roof would rust through there but it did on both sides. When that happened the door bottoms and floor pans were next. I was really surprised that while the top of the hood looked good the bottom near the front was rusted badly as was the lower lip of the trunk deck. At this point a complete examination has not been completed but I know the body work will be a lot of the money and work. Where I had it stored was kinda in an area I didn't go that often and it was blocked in by other vehicles but at least it was on a concrete slab.
After lots of thought and considering the car's as delivered options it was decided to tastefully restomod it but to do it with bolt on removable parts so that it could be returned to original state. The car was 1 of 100 built in 69. That sounds special but it's the odd grouping of options that makes it 1 of 100. We decided we did not like the Black Jade paint and we wanted the rear Sports Slats and both spoilers. Also a non AC car in Florida, not a realistic choice so adding AC was a must have. I've always wanted a rear fold down seat and have all the parts so why not. Here's a strange option on a 428CJ ! What good is a 428CJ with an open rear end and F70 14 tires, really! A traction loc and 295 18 will aid in the traction department. Definitely have to upgrade the AM only radio and the guages or lack of guages. So it was decided a tasteful restomod will happen.
I've now moved the car to where I can start stripping it down and documenting each piece. It really was quite a job to move everything in the way out of the way and then get the car rolling. But now it's moved and we can walk around it and officially commence working on it.
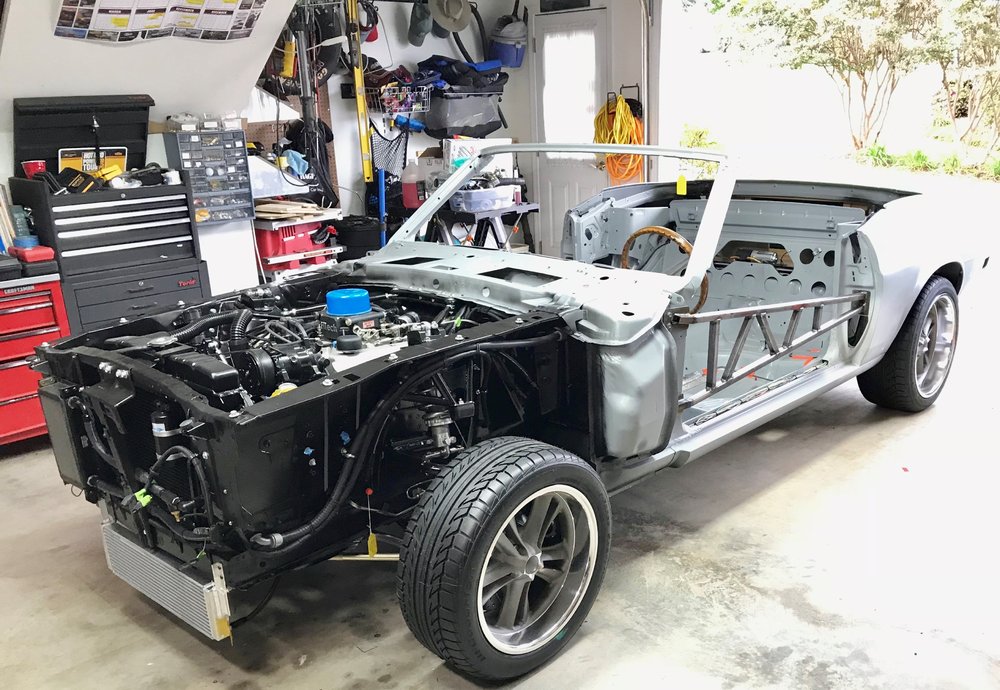
I've spent many many hours trying to find the right shop to do the body and paint work. After looking at a dozen or so places I think found one that can do the work at the level I want. That will start with a total strip down to metal. Currently I'm waiting on a slot in the shop to open up. The shop specializes in old school restorations and old and new chassis and engine mods. They have put a lot of Coyotes in early Fords and have the only chassis dyno in the area. While waiting for a slot to open I'll continue to strip and catalog parts.
Restomodding the 69 means I'm also going through my storage looking for parts. Yesterday I found the Thermactor air canister along with the short hose and special clamp. The Ford number on the hose was still mostly readable. I'll probably not put it on but I want to preserve an safely store it. I've also located several SCJ oil cooler assemblies complete from adapter to cooler except of course the cooler brackets. They may be there and I just havent found them. I do intend to add that option to my restomodded Mustang. While living in Houston I may not have been able to work on my car but I certainly went to swap meets and bought up parts.
Constantly on my mind has been what to do with the drive train. Having had a taste of power while young I definitely wanted that taste back. While the 428CJ is certainly no slouch I can do better. Much better! Starting with a new "Made in the USA" reinforced Dove POND NOT DOVE Aluminum block bored to 4.25 occupied by a Scat 4.25 stroker assembly topped with massaged Aluminum heads attached to a port matched Blue Thunder 2 x 4 medium riser intake will be a good foundation. All that Aluminum will be coated in Ford Corporate Blue. I have two original 427 Holley carbs that will set atop the 2 x 4 intake and a modified air cleaner base will set on the carbs. The air cleaner modified for 2 x 4"s will allow me to keep the ram air shaker hood scoop looking and operating just like stock. The cam is still to be determined but I want the car to remain streetable with the ability to idle and drive to and in cruise ins. With the proper top end the cam becomes an accessory to it and doesn't have to work as hard to make the torque and horsepower numbers desired. That also leads to good street manners and the ability to drive longer distances without worrying if it will make it.
I'll retain the C6 although it will be highly modified to handle the additional torque and horsepower additional I'll add a Gear Vendors overdrive to it. To stroke my memories I might go with a manual cable body.
Moving to the rear it seems that everybody is going to the four link setups and I confessed when I saw there were bolt in units with minimal welding I was smitten with lust. BUT then I remembered in the 70's there were many cars running 10's and low 11's with leaf springs. What were they doing. I started an intensive internet search that led me to Charles Maier. You might remember Maier Racing doing road racing years ago. He says you can gave a great handling Mustang with three things. The right springs engineered properly with proper supportive parts, a Panhard bar and the right shocks. With those three you can turn, accelerate and decelerate safely and very quickly. No sway bar. No wheel hop and awesome launches. One of his satisfied customers has a 750 hp Mustang. This is a bolt in operation except for the Panhard top bracket but it could be easily removed if someone wanted to restore the car.
As mentioned I'll upgrade to a traction lock and most likely a 3.91 gear that could have been optioned in 69. An Aluminum driveshaft will connect it all.
All this go needs woah and a bunch of it! I'm still deciding but Baer or Wilwood will get the nod. 6 piston up front and 4 piston in the back. Of concern is the lack of vacuum for the power brake booster. I'm determine to try and use the factory or factory appearing master cylinder. One way to get this to work may be to gut the booster and put an hydraulic assist unit inside it thus keeping a clean factory look under the hood. Another idea is a electric vacuum pump. It's still very much a work in progress
I'm not a fan of rubber band tires so the rims will be 16" or at the most 18" and probably Magnum 500's. I dont want to mini tub the car but there is one small area in the front of the wheel well that may need some modification. I'm not opposed to rolling the lips as was done on the Boss cars and really Ford should have done on the CJ's. Other than that I'll play with wheel spacing to maximize the rear tire width. 295 17 are possible and its said with proper wheel spacing 315 18 will fits. We'll have to see. I also have to consider the overall appearance of the finished car. I still am striving for a factory look.
That pretty much leaves only a few things. One is the front suspension. I settled on Total Control Products coil over conversion which is a bolt on kit. I researched a lot of kits a feel this is the best one for me. They also have a bolt on true power steering that replaces the under engine crossmember strengthening the front chassis. The crossmember actually sets higher not hanging down like others. A one inch drop spindle that uses a late model snout for larger bearings will also be used.
I'll need a awesome cooling system for this engine and the anticipated usage of low speed driving during cruises or parades or maybe some autocross events. In any event I'll choose one that resembles the factory appearance but is made of aluminum and has the capacity to keep things cool in the harshest of conditions. A high volume Aluminum water pump will be installed but not an electric one. I'll probably have to use an electric fan but maybe I can use it as a puller inside the fan shroud where it will be hidden instead of a pusher. While I'm in the engine compartment I recently became aware of dummy hollow batteries that appear stock shaving weight off the front end and allowing one to but the battery in the trunk like the Boss cars. I'll do that
So if your still reading this and I commend you if you are you're probably wondering what color is he painting this. Well here you go! Acapulco Blue with the Mach 1 Gold stripes. I'm thinking to put just a touch of Gold metallic into to Blue paint. IMHO that will be truly original but faithful to the Ford design and keeping in the spirit of the proud Mustang heritage!
I will try and preserve all of the original parts. I want the car to appear stock to the casual observer and only if start looking closer will you start to see the changes.
I really want to hear everyone's comments good or bad. Also the build is still very much in the development stage and parts and ideas may change.
Thanks for reading.
Charles AKA Darkman in Pensacola FLNovember 6th,2019
Here's a brief update.
The aluminum block is out and a BBM cast iron block will be used. This is on the advice of many top tier FE engine builders. I've become aware of the ability to install 6R80 6 speed automatic behind the stroked FE. I've ordered the adapter from Bendsten and it should be here soon. I've acquired a 6R80 that came from a 2013 Mustang with a Coyote motor. This was not my first choice as I figured a F150 probably wouldnt have been beat on as bad as a Mustang transmission would be!
BUT the price was right. It was FREE! Yep that's a really good price and it comes with the transmission mount, crossmember, shiftercable, shifter and any other associated hardware. Additionally if I need or choose to rob some of the donors firewall or tunnel I can.
How'd this come about. My friend needed the Coyote motor and bought the wrecked Mustang for just that and I get the spoils!
I've also made arrangements to get a 6R80 case to check for tunnel clearance and crossmember, mount and shifter fabrication. And so it begins.
I'll update soon!
-
Here's a brief update. I've acquired a 6R80 that came from a 2013 Mustang with a Coyote motor. This was not my first choice as I figured a F150 probably wouldnt have been beat on as bad as a Mustang transmission would be!
BUT the price was right. It was FREE! Yep that's a really good price and it comes with the transmission mount, crossmember, shiftercable, shifter and any other associated hardware. Additionally if I need or choose to rob some of the donors firewall or tunnel I can.
How'd this come about. My friend needed the Coyote motor and bought the wrecked Mustang for just that and I get the spoils!
I've also made arrangements to get a 6R80 case to check for tunnel clearance and crossmember, mount and shifter fabrication.
And so it begins.
I'll update soon!
OR NOT I just realized I should be posting this in the project update forum!

-
None fit the FE block but the Bendsten adapter bolts to the block and allows you to bolt the 6R80 to the adapter. It requires a 2011 or later 6R80 from a V8 F150 or Mustang. Some other Fords and Mercurys will work but the F150 is the easiest and cheapest to find. The Bendsten kit has a crank adapter, flex plate, starter and all bolts. Here is the link. It says AOD but when you order you tell them you are using the 6R80 and you get the AOD adapter machined for the 6R80. You also specify internal or external balanced motor.
I spoke with PBH about the transmission and they said as long as it was 2011 and later and from behind a V8 it would work. The 6 cylinder has a different bolt pattern. F150 and Mustang were the same except for the mounting bosses for the shifter cable on the Mustang case.
Modifications to the tunnel and firewall should be minimal. But I guess that all from an individuals perspective. I know I'll have to cut and weld but I'm good with that. I already have to replace some floor pans so it's no big deal. If it wasnt for those long top bolts on the case it sure would be easier. One suggestion was to counter bore and use a caps crew to pick up a little more clearance there. I'm sure it will be a challenge but the end result should be worth it.
-
Bought the Bendsten 6R80 to FE adapter and the Steele Rubber rear window gasket! Almost bought a 6R80 but it wasn't the right one!
-
I had it bought well almost. I found a 2014 6R80 in a F150 for $500 but it had the 6 cylinder engine. My parts purveyor said he'd try to locate a Mustang since I mentioned I'd like to have the shifter, cable and crossmember. Later I got to thinking do I really want the transmission out of a Mustang that most likely had been rode hard? OR maybe I should source a low mileage F150 driven only on Sundays by a little old lady going to church. It's going behind a FE with around 500 - 600 hp and torque in my 69 Mustang. I can always source the cable, shifter and crossmember later. Of course there's the $$$ thing. The Mustang 6R80 will cost $1000 plus just to get those two shifter mounting bosses on the side of the transmission. Other than that they are the same! Seems like the F150 makes a lot of sense!
Yes I've ordered my Bendsten adapter and it's on the way! I'll use the PBH 1000HP rebuild kit for the 6R80 and it should be like new.
-
Although mentioned early on in this post the Total Control Products coil over conversion kit looks like a very well thought out bolt in kit. I plan to use it with a one inch drop spindle on my 1969 Mach 1. That should make it handle much better.
-
I am planning on using EFI on my 69 Mach 1 restomod. I want to use the system where you dont have to run a return from the front and it's all handled at the tank. Holley makes the tank and EFI system like that.
Is the Tanks Inc. tank better or cheaper than the Holley EFI tank?
-
The 6R80 has 6 speeds and handles much more torque and horsepower than the AODE/4R70W. The rpm drop between shifts is much less. Adapter kits to bolt up to small blocks and FE's. I'm exploring putting one behind my 69 428 CJ Mach 1. I'd like to see them side by side to see how close the tunnel will be. It's supposed to be wider but not taller. In 2011 Ford removed the ECM from inside the 6R80 and now there are stand alone controllers available. Torque converters and internal parts are available. Can easily handle 1000 horsepower.
Hoping this will work for my car


ANOTHER 69 R Code 428CJ Mach 1 restomod!
in Project Progress Forum
Posted · Report reply
With the holidays progress has been slower but we are almost through stripping to have the car soda blasted. Still have to finish the air cleaner conversion but I have a clear path to that now and after the holidays should be able to wrap it up. Once that is finished out comes the transmission and we'll bolt on the adapter and the 10R80 to see what we'll need to modify.