-
Content Count
362 -
Joined
-
Last visited
-
Days Won
30
Posts posted by Rich Ackermann
-
-
On 9/18/2023 at 7:34 PM, Vicfreg said:Hey Rich. Good to hear from you, hope all is well with you.
Thanks for the insights. Great explanation about this wiring change that happened in 1970, I did not know that.
I realized this ground issue was there after I looked at the wiring on my '68 Mustang. So I decided to do a quick check with test lead to ground that I ran to the screw hole in the '70 parking lamp bracket. That solved the problem, so I just added the permanent ground wire.
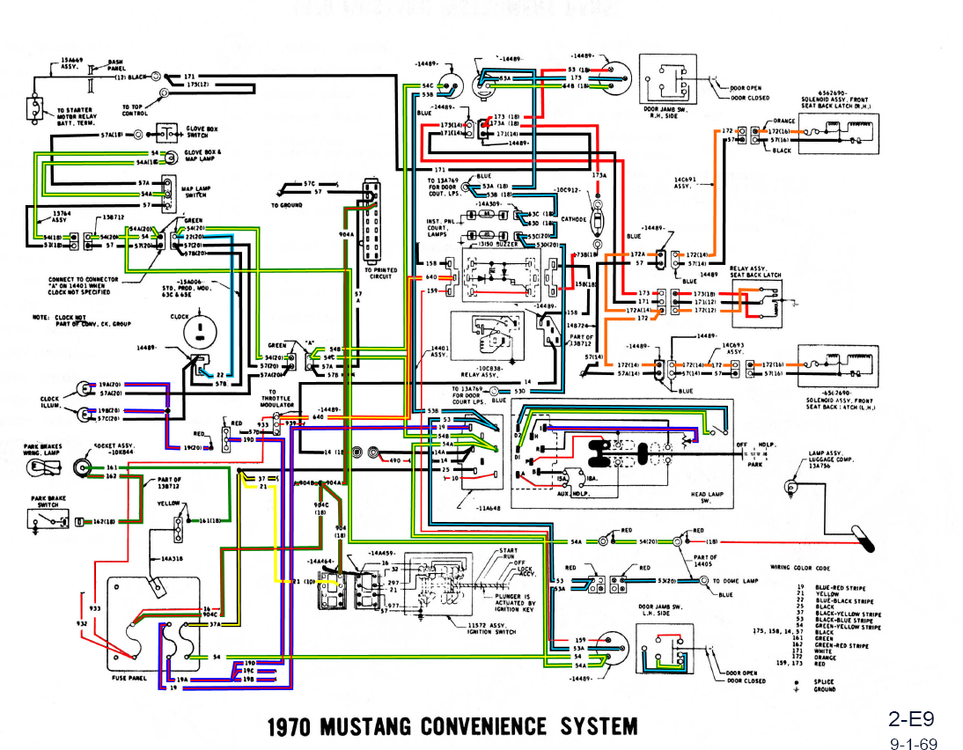
I have a set of those diagrams, someone posted them on the technical forum years ago. Very useful.
Luckily, this was the only lighting area where I didn't have a dedicated ground. I don't have side marker lights anymore, and my tail lights are LEDs that have a dedicated ground going to my trunk ground bus.
Your car is spectacular.
I plan to take the '70 to Carlisle next year and a couple of Mustang National shows.
Thanks
Vic
Hi Vic, Your build is really looking fantastic! I really like those horizontal LED headlights. Can you go thru MV inspection in N.C. without side markers on a car made after 1967? In Delaware, I don't you can, unless they overlook it. Anyway, the wife and I will be moving in six months to N.C., about 20 mins southwest of Raleigh. Waiting for the house to be built. I looking forward to living there, but not looking for to making the move. The amount of stuff we have accumulated over the years is just overwhelming. We can it all with us, so what to do?
I did not make Carlisle this year for the first time in more than six years. Next year we will have just relocated, so I am not sure if I will be ready to go, but I'll let you know next May.Regards,
Rich
-
21 hours ago, Vicfreg said:Quick note about using powder-coat/painted parts that are relied on for chassis grounding to complete lighting and other electrical circuits.
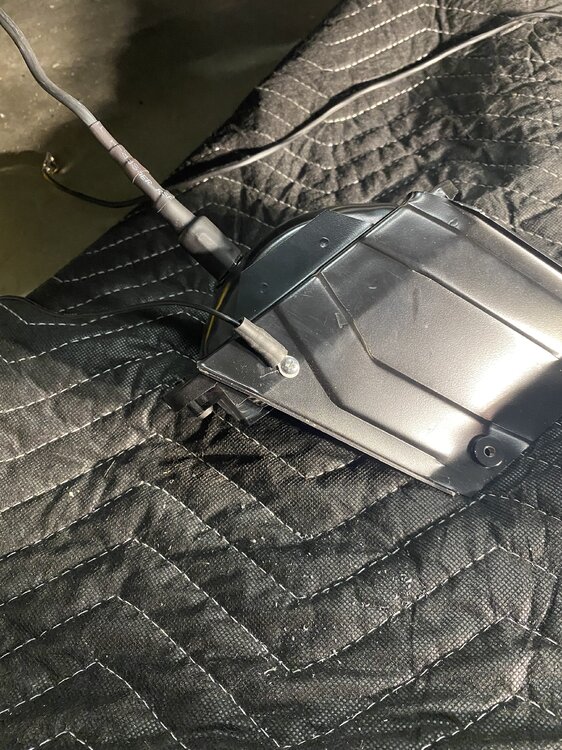
I had to add a separate ground wire to my parking/turn signal lights that mount to the front bumper.
The bumper is powder-coated, and the parking light housings are painted in black epoxy. My screws are also coated black.
When I tested the lights, one side was very dim. The other side flickered.
Ground wire fixed the issue so both sides have a consistent level of illumination.
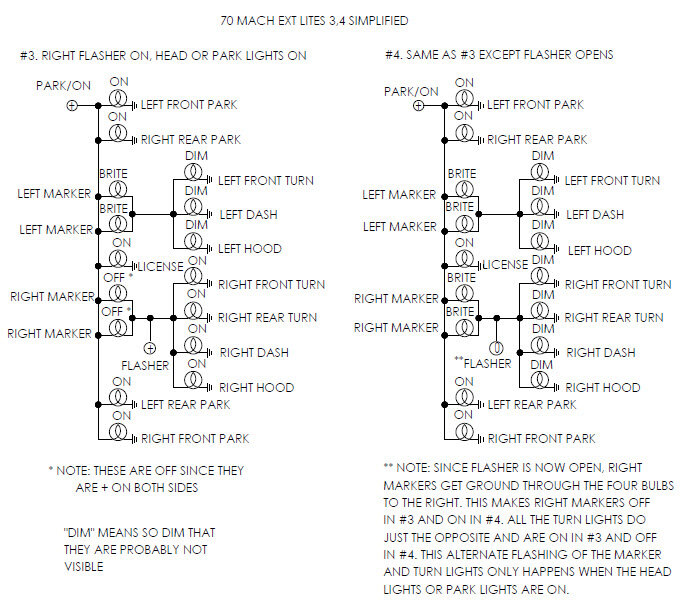
Hi Vic, I have been following your build project for a long time, but its been a while since I visited the site, or posted anything. Your Electrical issue is a common problem with the 1970 model year (only), powder coating or not. The reason is that the parking lights and directional signals, which all share the same circuit and same bulbs (with the except of the turn signals in the standard Mach 1 hood), Ford, probably to reduce cost, went from a three wire to a two wire configuration on this circuit. The Ford electrical engineers, got creative and alternated the current across the two wire system. Essentially, on a 1970 model, the ground for each bulb is in series and not in parallel like it was before and after the 1970 model year, which a use a three wire parallel ground system, with the third wire being ground wire. What the two system does is sends 12v positive thru one wire and seeks ground thru the other and then reverses the positive and negative signal. In order to find ground, the system must pass thru each bulb (in series) on it's circuit until it does. Typically ground is found in the turn signal hood ground or under the dash. This passing thru each bulb becomes a problem when a bulb filament or the bulb fixture is failing. Finding the offending bulb can be frustrating. It's like find that one little burned out bulb on that string of 50 bulbs not lighting on the Christmas tree. Ford after seeing the error in their ways, switch back to a three wire in 1971.
By you adding a ground wire at the bulb fixture to the chassis or fixture housing, you essentially gave the system another place to find ground. You put part of the ground system back to parallel, where the system can fin ground, in some cases, without having to pass thru a bulb to get there.
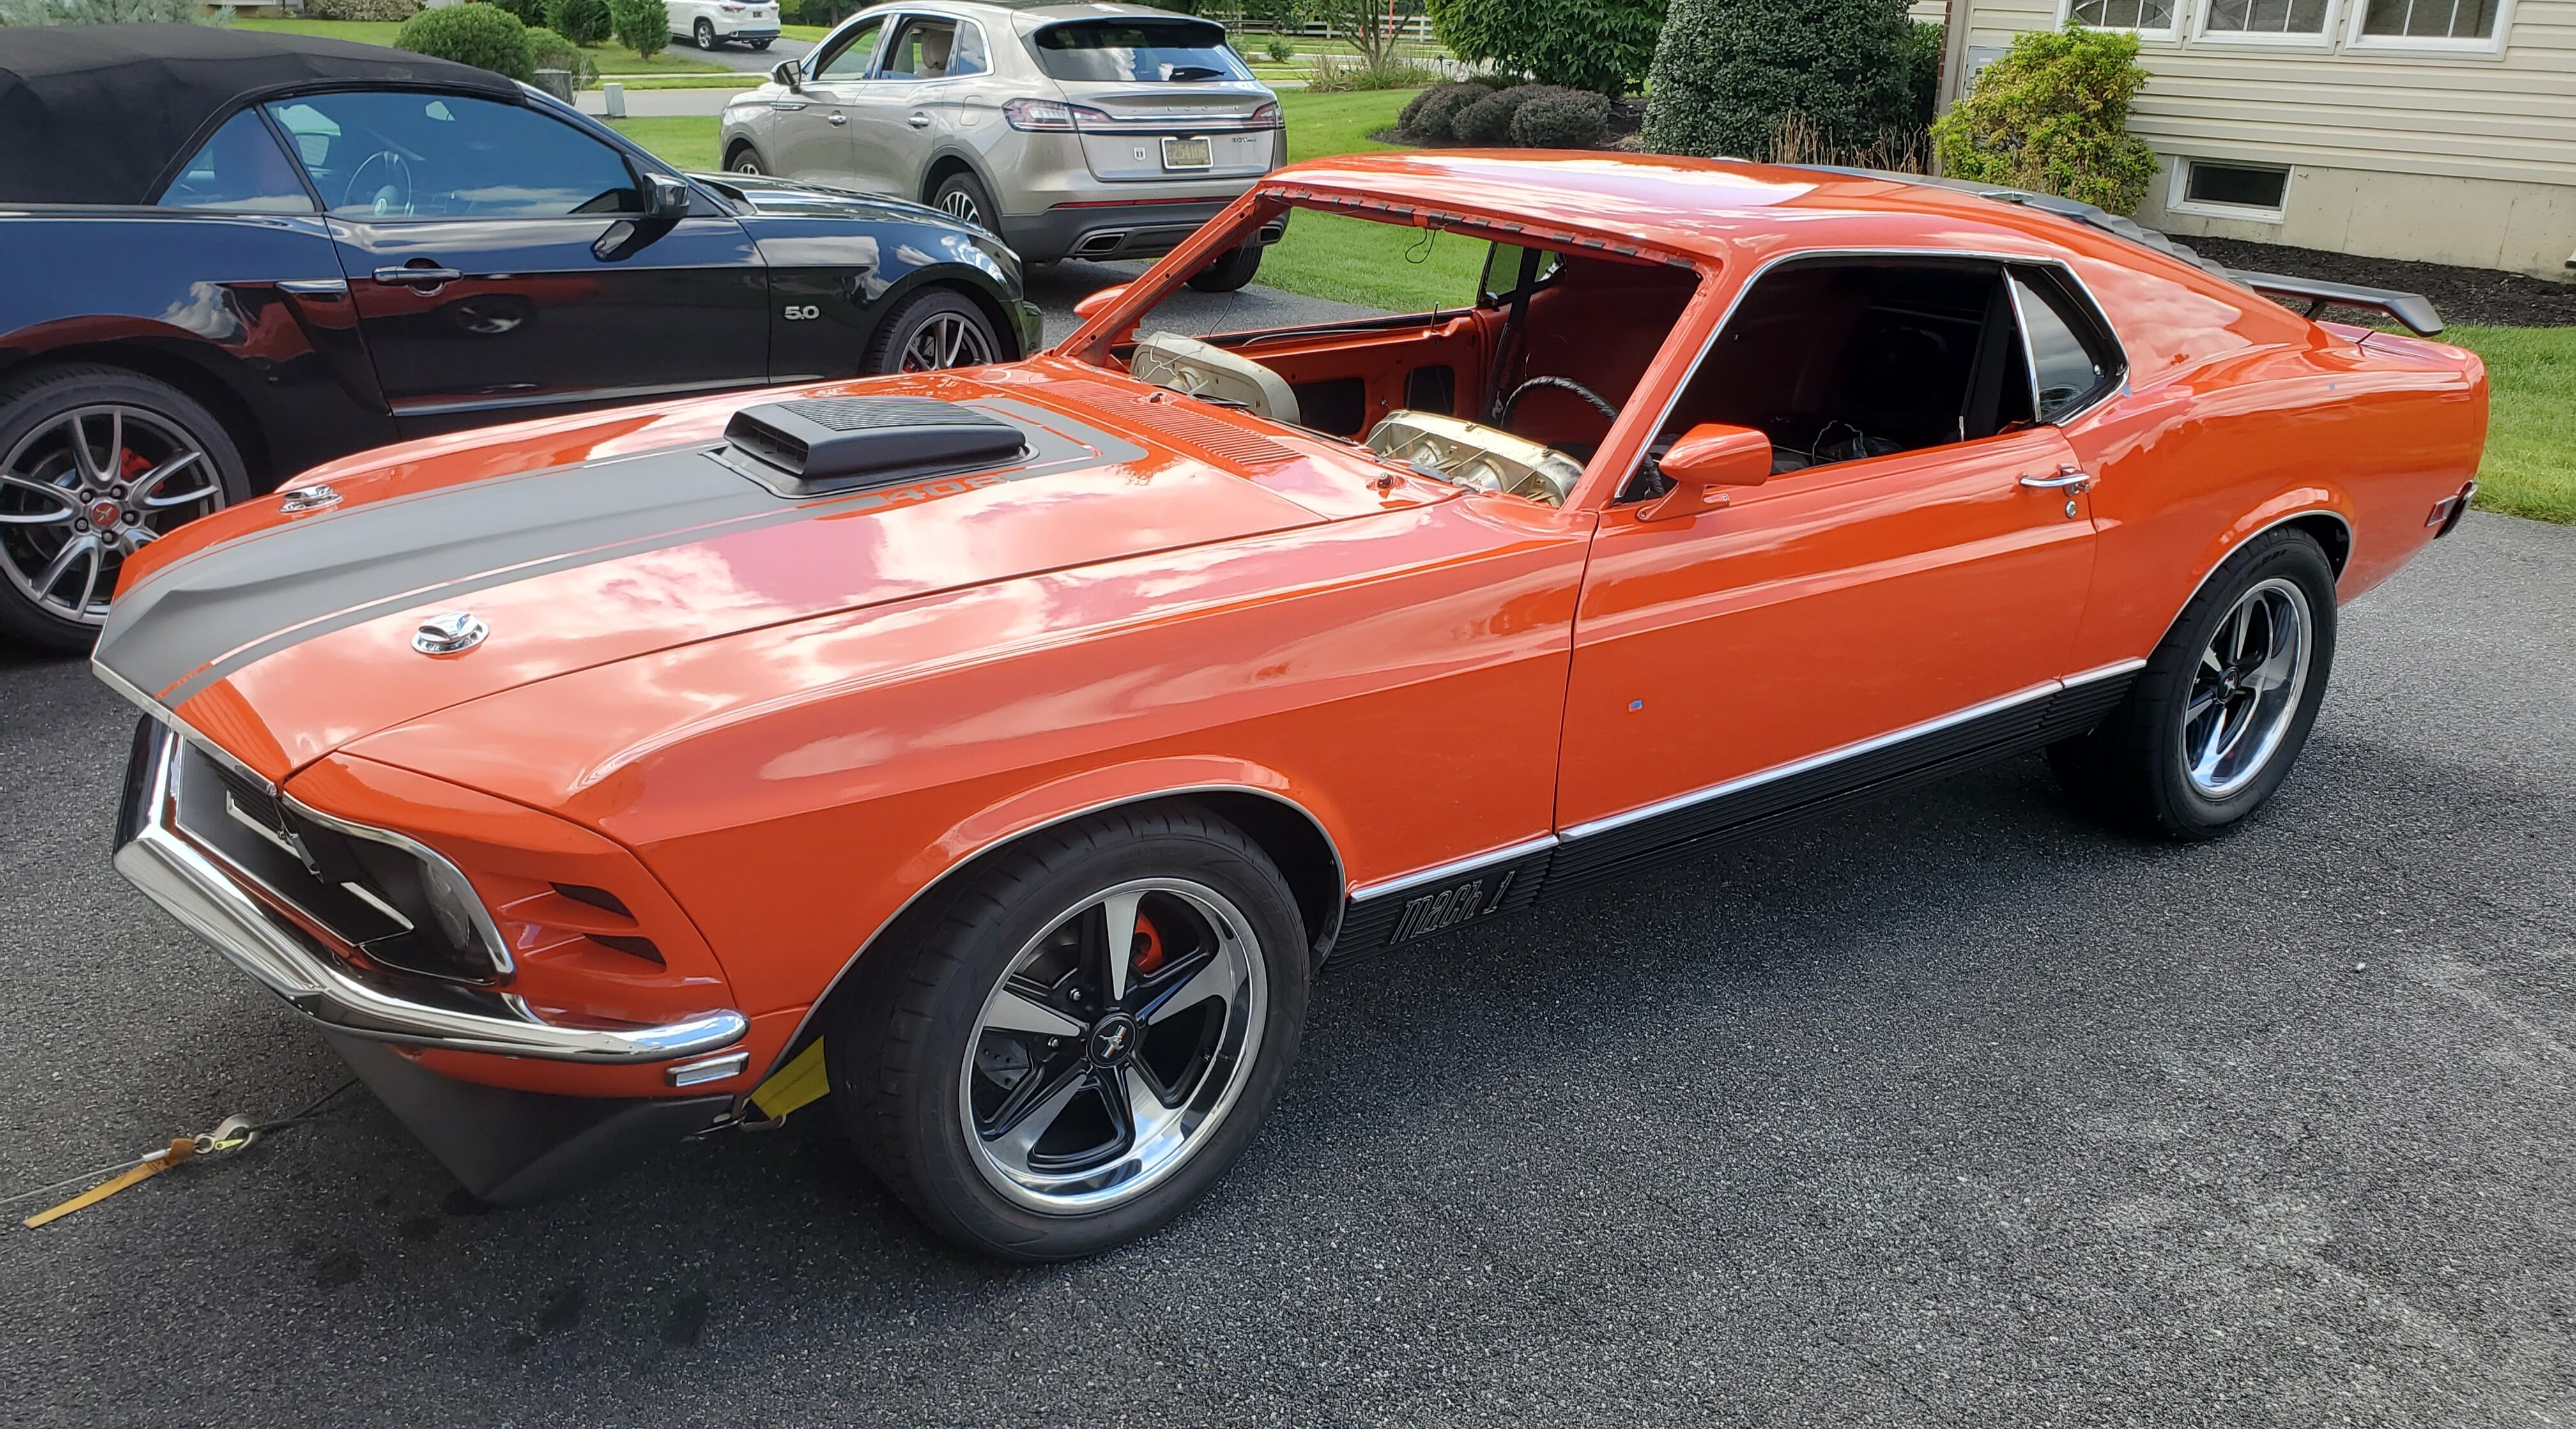
When I restored my 1970, I added a thirds wire for ground to each light fixture or I replace the fixture with the equivalent fixture from the 1969 model year which was designed with the third wire for ground. So my 70 Mach 1 has a 1969 valence and front and side three wire parking/turn signal light fixtures.
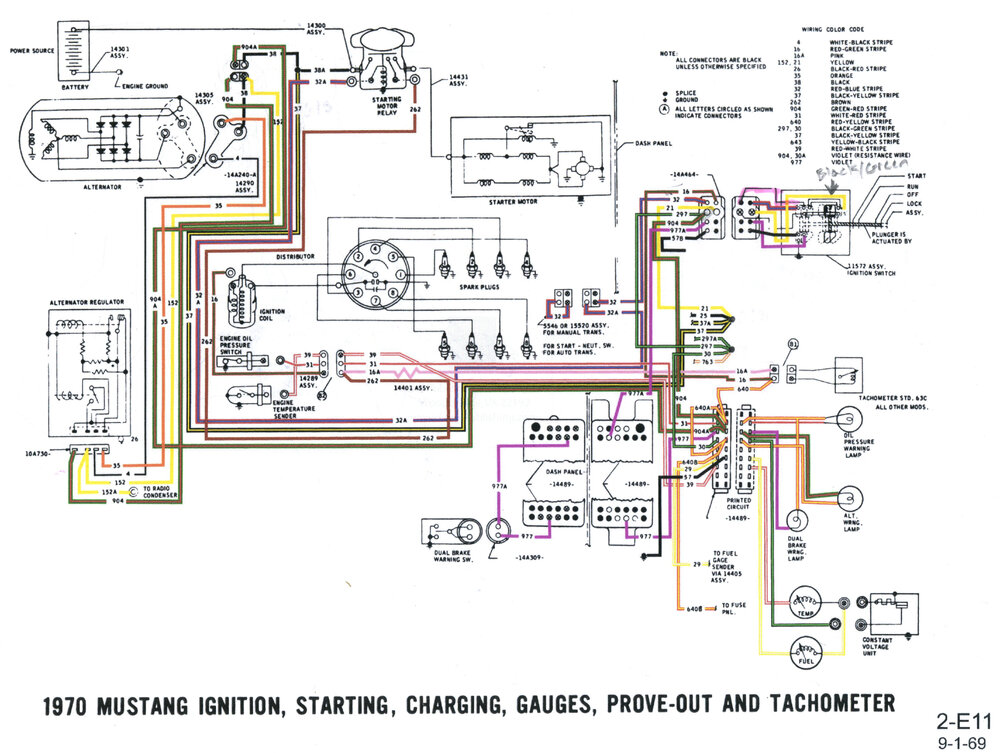
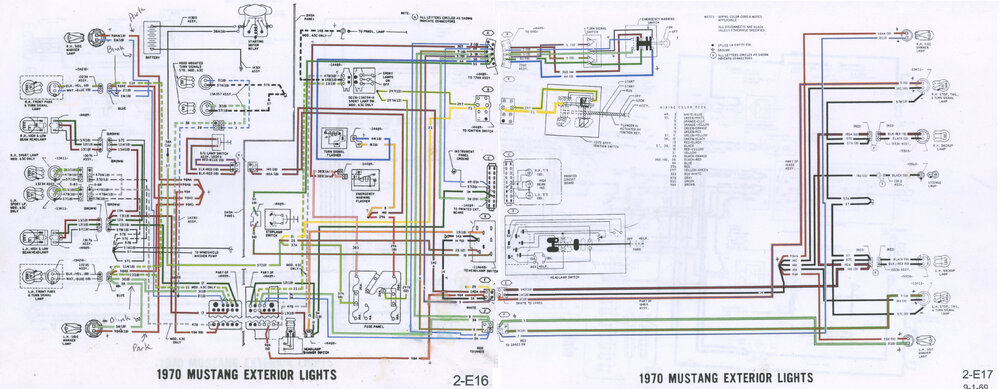
The third attachment, I don't know created it, but it was very helpful to me when I was chasing electrical gremilins.
-
I'll take all, but the complete mirror. Please message me. Thanks
-
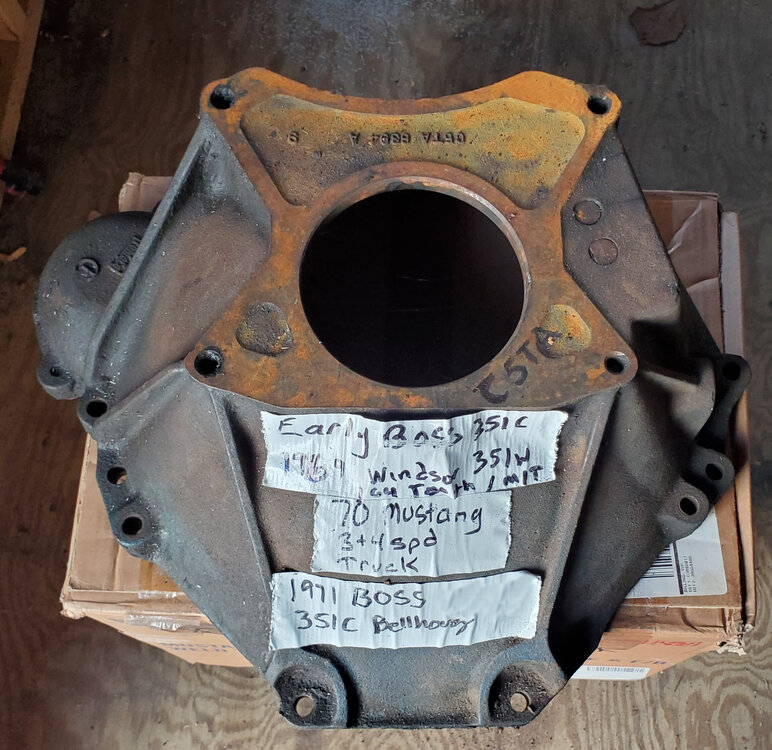
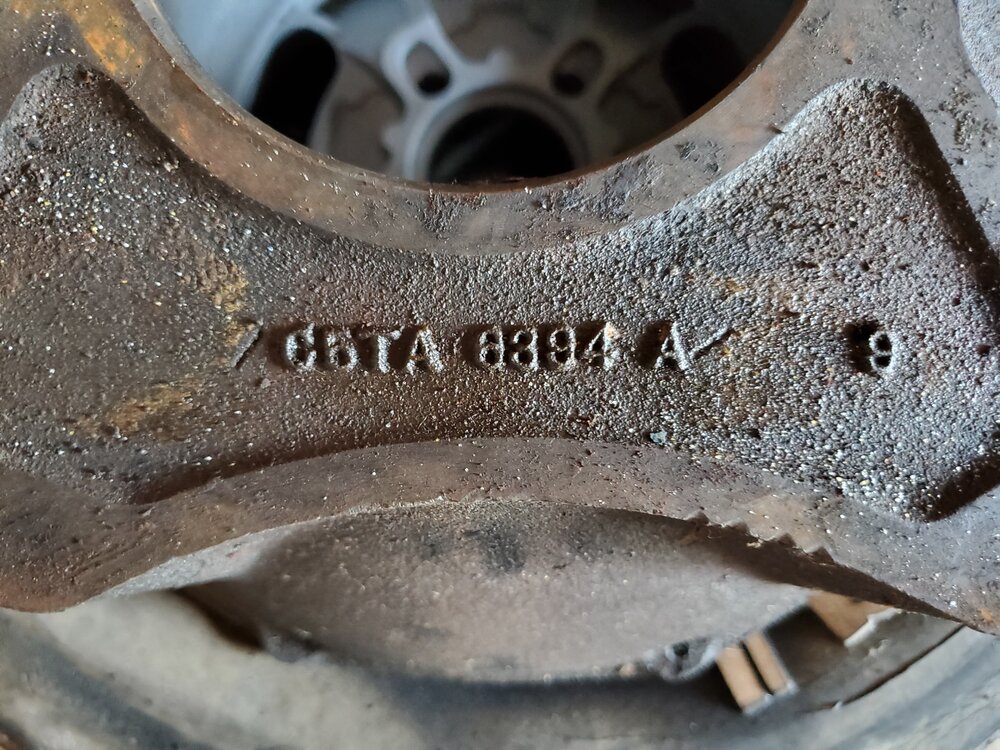
Ford Small Block Toploader Bell Housing C5TA- 8394-A - $125
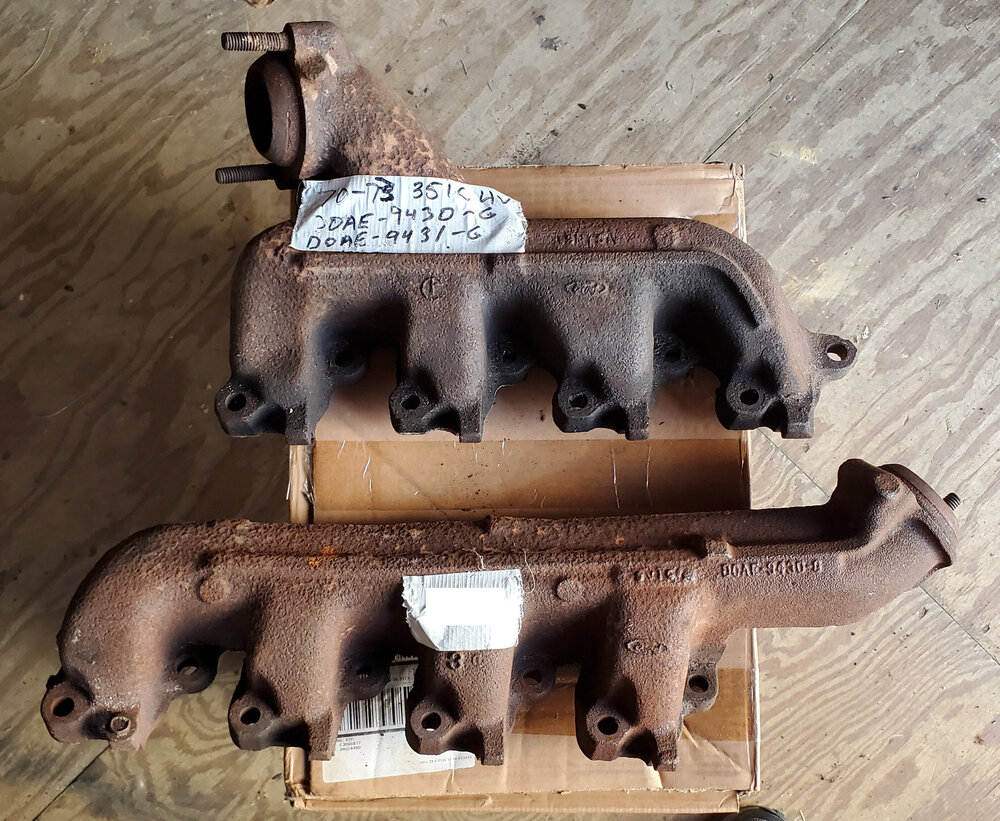
These Exhaust Manifolds came off my January 1970 built '70 Mustang Mach 1 M-Code. They are a matched set based on casting # (D0AE-9430-G and D0AE-9431-G) and Date Code. They have no cracks or issues. they just need sandblasting and a coat of cast iron paint. If I am not mistaken, they are correct for 1970 and early 71 M-codes and '71 Boss 351,.... $450 + Shipping.
Also I will be driving from Delaware to the Raleigh N.C. in late June. To avoid shipping costs, I would be happy to meet you somewhere near the I-95 Interstate and hand you the parts.
-
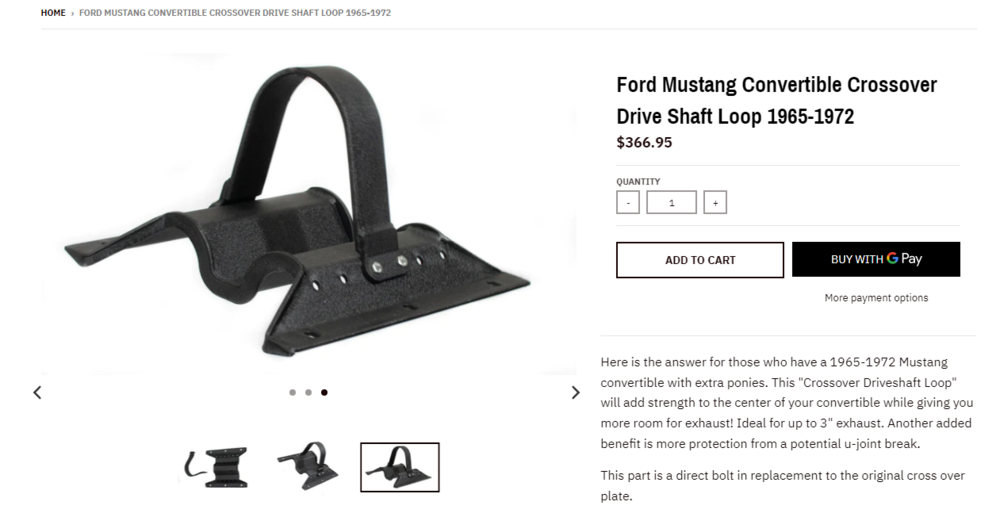
Maybe you already seen this aftermarket part from Tinman. I just learned of it, so It thought I'd pass it along.
https://www.tinmanfabrication.com/products/mustang-convertible-crossover-drive-shaft-loop-1965-1972
Grabber70Mach reacted to this -
Very nice!
-
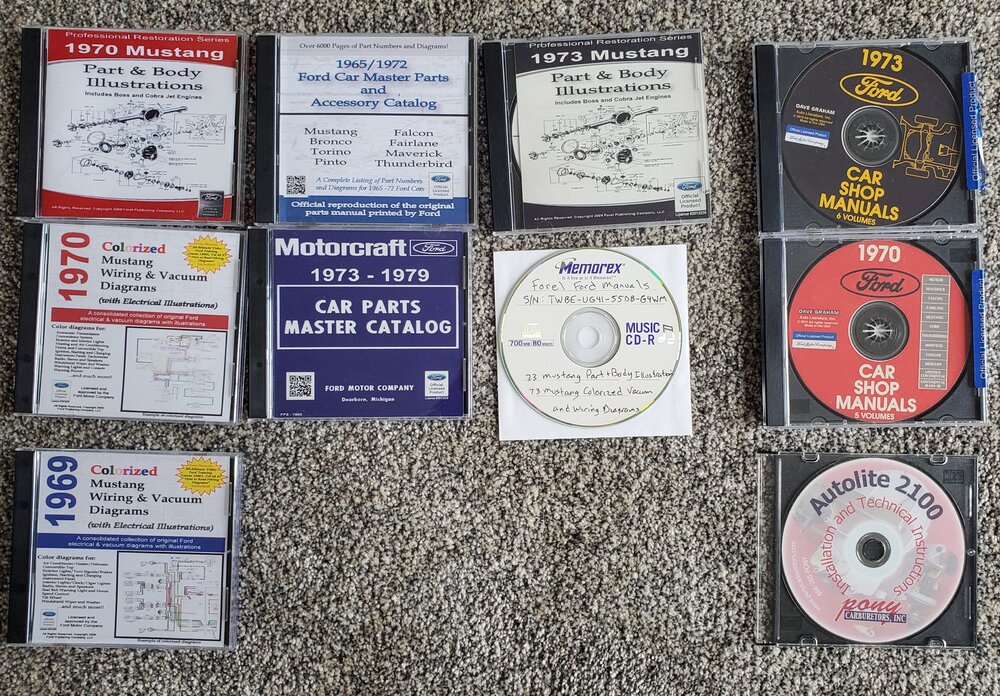
On 4/28/2023 at 8:37 PM, ThePoose said:Thanks, Rich. Good info. It looks now like they've moved away from the CDs and are all flash drives or ebooks, which I figure are PDFs. My computer doesn't even have a CD/DVD drive.
Yep.. I"m still old school. My son keeps telling me nobody uses CDs anymore. I slowly have converted many of them to digital on a computer.
-
Glad to hear that your his and hers hip replacement went well and you are back to normal..... and fixing those shorts :-).
-
Hi Brian,
Did you try NPD. If all you need is the two plugs, then this kit may be overkill.
PLUG AND GROMMET KIT, (44), repro, contents:377901 seat access hole and top of cowl under fender (10), 376966 front fender apron, trans crossmember (10), 377977 frame rail at sway bar (2), 378923 rear shock access hole (2), 378770 inner frame rails at transmission (2), 377949 trunk floor pan plug above frame rail, side of cowl at door hinge, LH apron behind shock tower (5), 377678 heater hose firewall for A/C cars (2), 377936 inner frame rails at radiator and center of firewall (5), 377356 rear spring front bolt access hole (2), 383181 top of cowl under fender (2), 011202 quarter panel drain (2)
NPD Part Number : 011136-5K
Manufacturer Reference #'s: 376970,Mach1 Driver reacted to this -
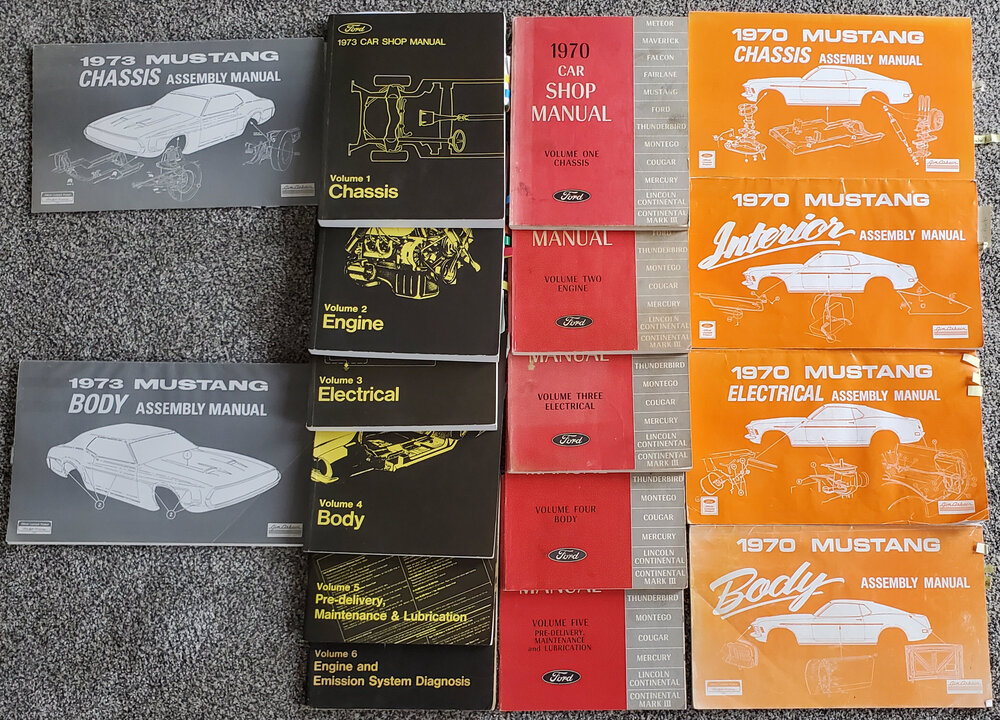
Yes all the time. I have seven of their CDs... Somehow I lost my original 1973 Colorized Wiring & Vacuum Diagrams, but I have a backup. The Forel manuals are good for Electrical and Vacuum details, and another CD with Parts and body illustrations, but to my knowledge, Forel does not have Engine Assembly. You have to get the shop manuals for that and other things. I have the Shop Manuals from David Graham Auto Literature. Forel also has on CD The Ford Master Parts Catalogs (MPAC), which are packed with parts and numbers by year, model, etc, but are very cumbersome to browse thru, best to use the PDF search function. Finally, there Assembly illustration manuals published by Jim Asborn. There are also helpful, but the pictures are sometimes very faint and hard to read. I prefer a digital copy so I can zoom in on sections.
One more comment on Forel, years ago Forel required you to install software called PDF OwnerGuard License Manager to install the CD on you r computer. This software was always malfunctioning and preventing access to the manual. I would have to call them to get it fixed, but fortunately they did away with it a few years back.
I say you can never have enough Information....:-)
Mach1 Driver and kblagron reacted to this -
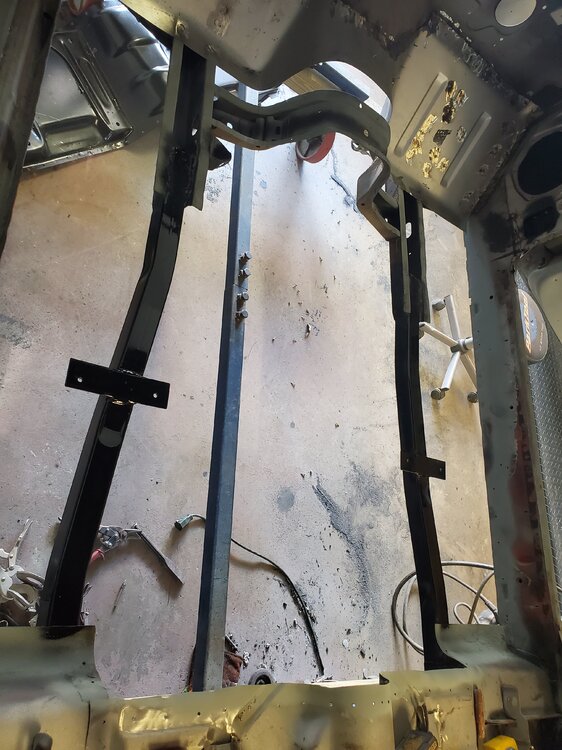
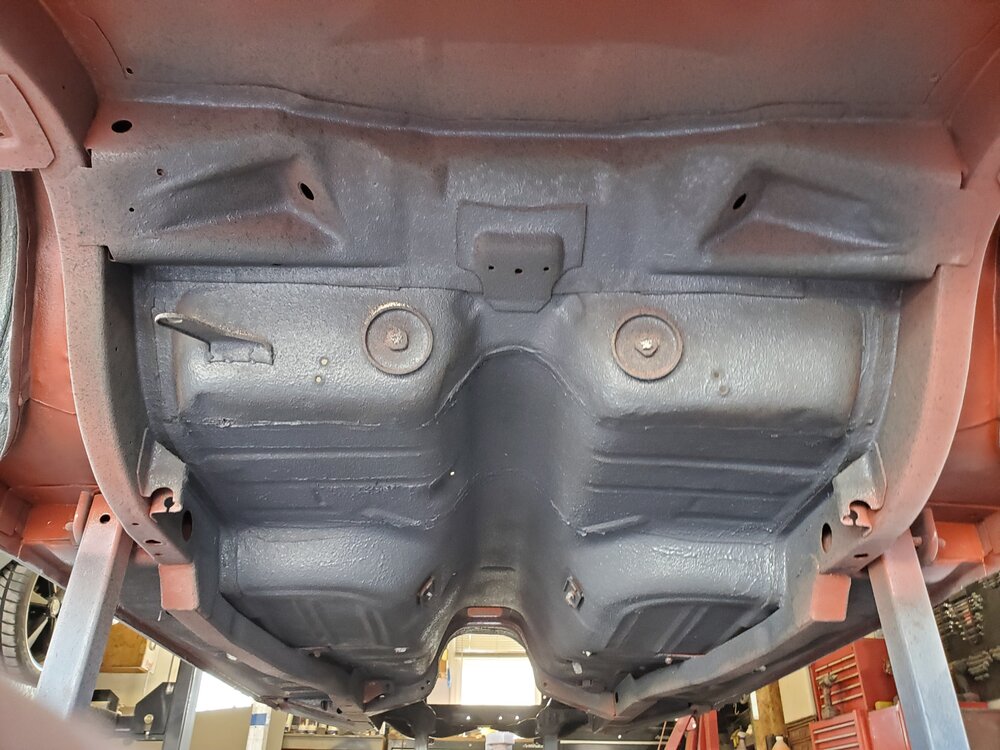
On 4/26/2023 at 9:55 AM, Brian Conway said:Great picture of the floor pans and rails. Questions; The year and body style? Back seat area what is the large brace on the left for? The circular backing plates are? The frame rail holes for the forward leaf spring bolts. Rubber and push in plugs? Thanks, Brian
1970 Mach1 M-code.
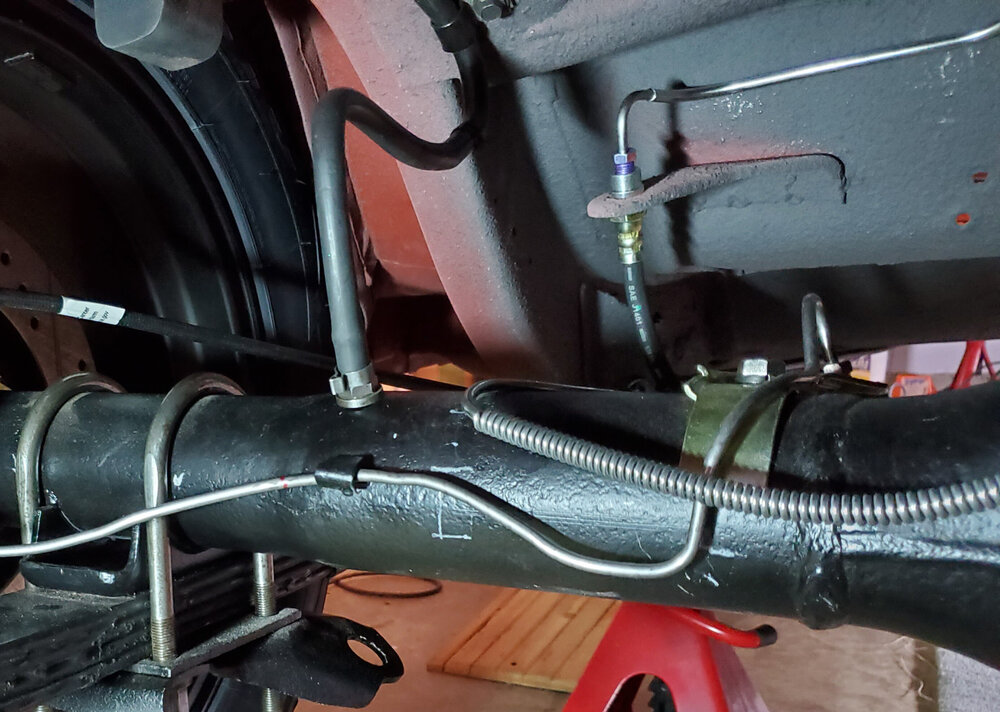
The bracket is where the rear brake hardline connects to the flex hose to the rear axle. See picture below.
The circular plates are threaded reinforcement plates for the rear seat belts (bucket side)
I am not sure what ou are asking here... The frame rail holes for the forward leaf spring bolts. Rubber and push in plugs?
-
-
On 4/19/2023 at 1:16 PM, RPM said:" I've just been enjoying driving the car. "
I'm calling bull$hit. No way a car with that clean of an undercarriage is being driven. Ya, I've got a bit of envy going on :)
Well...Bob. Okay, I admit, I only drive it on dry sunny days... Mostly to car shows on the weekends, but I enjoy every minute that I am behind the wheel... and that's no bull :-)
RPM and Grabber70Mach reacted to this -
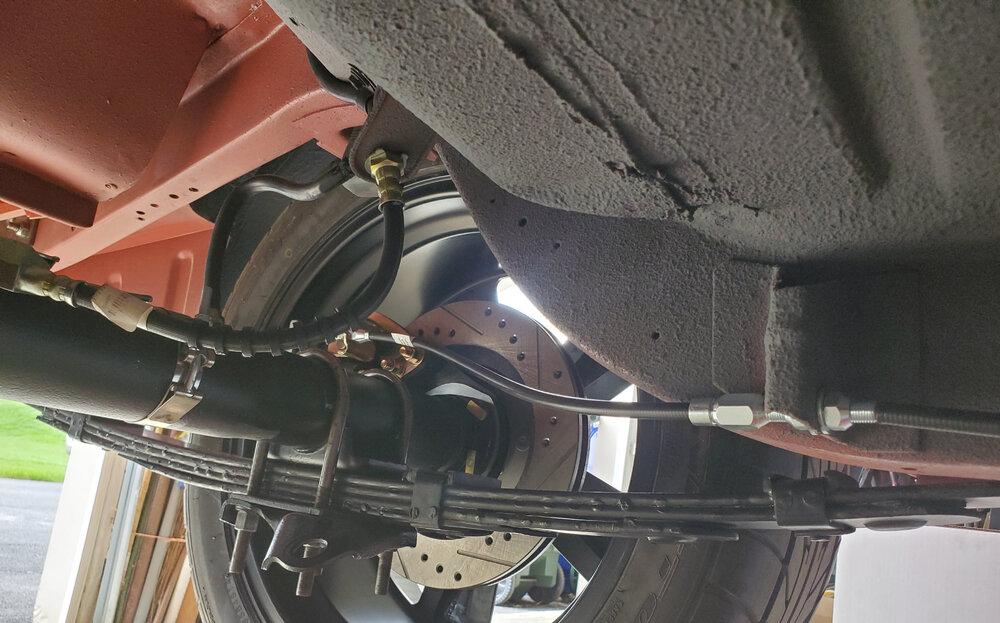
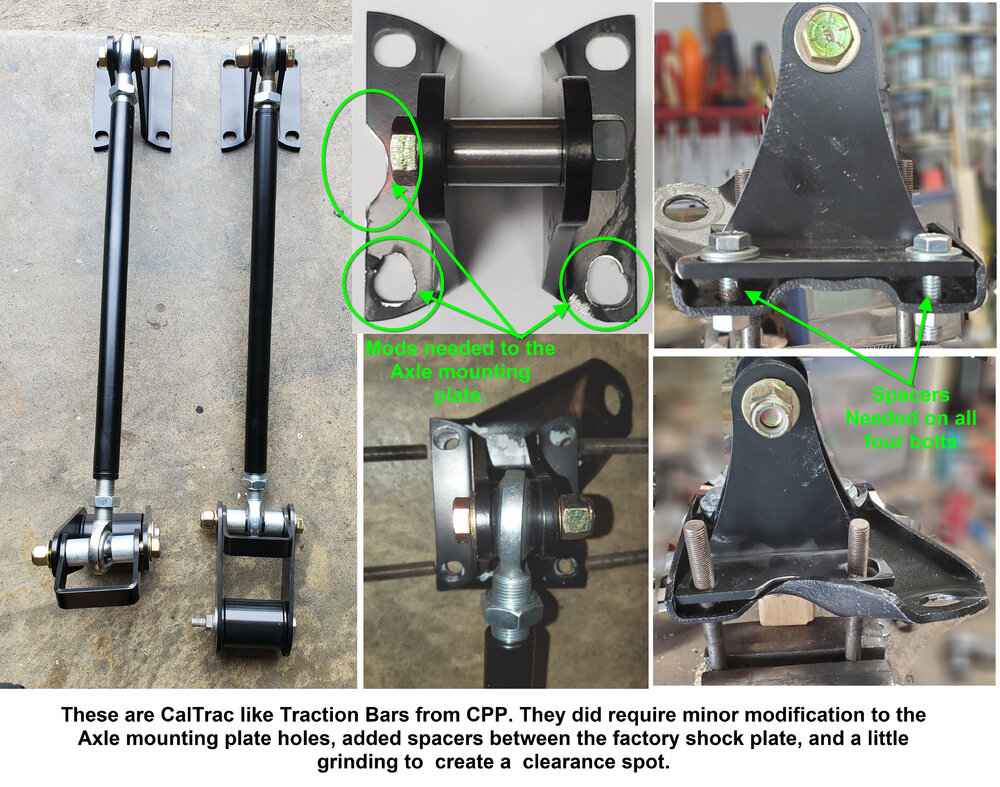
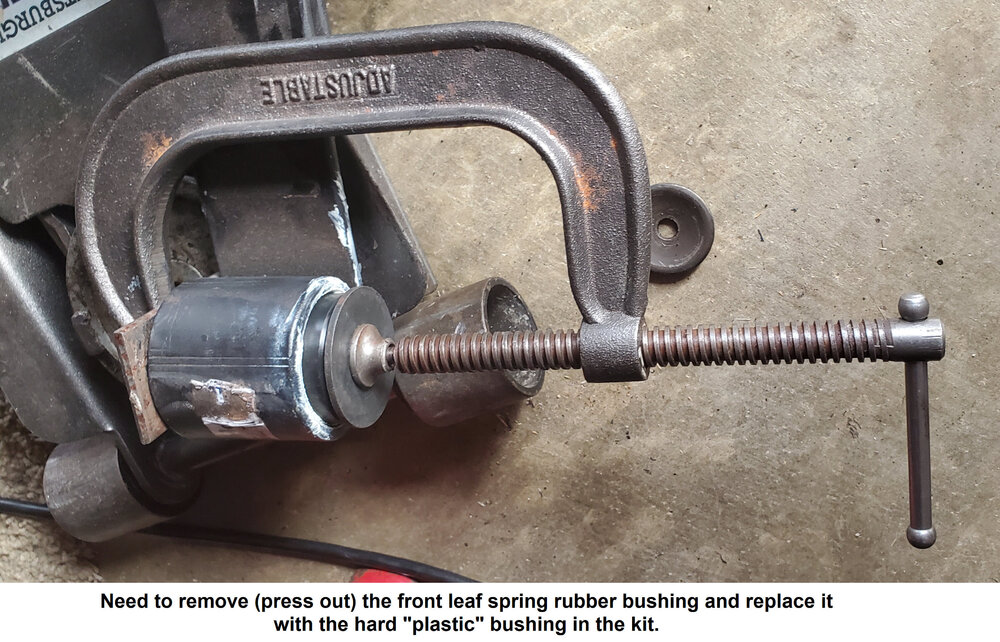
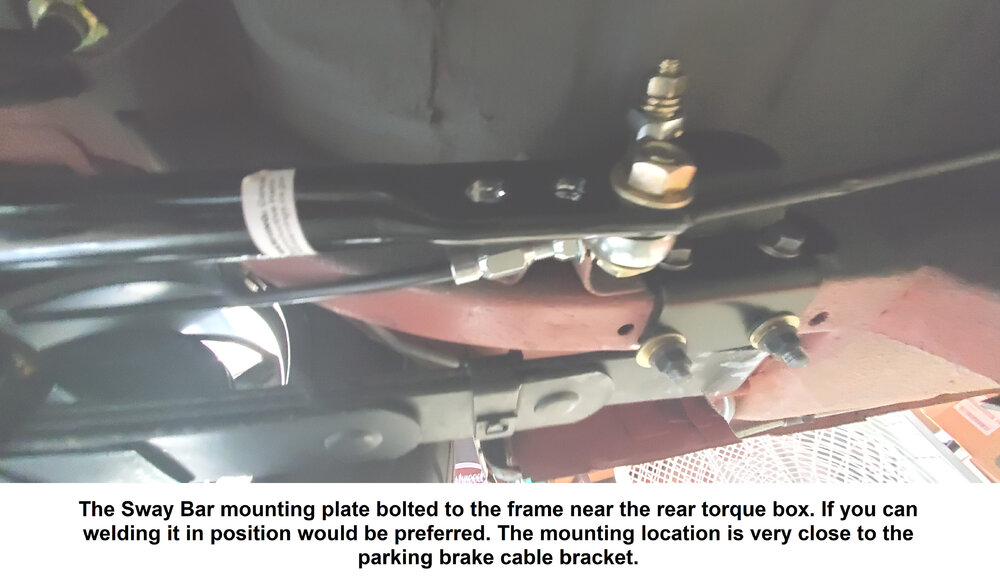
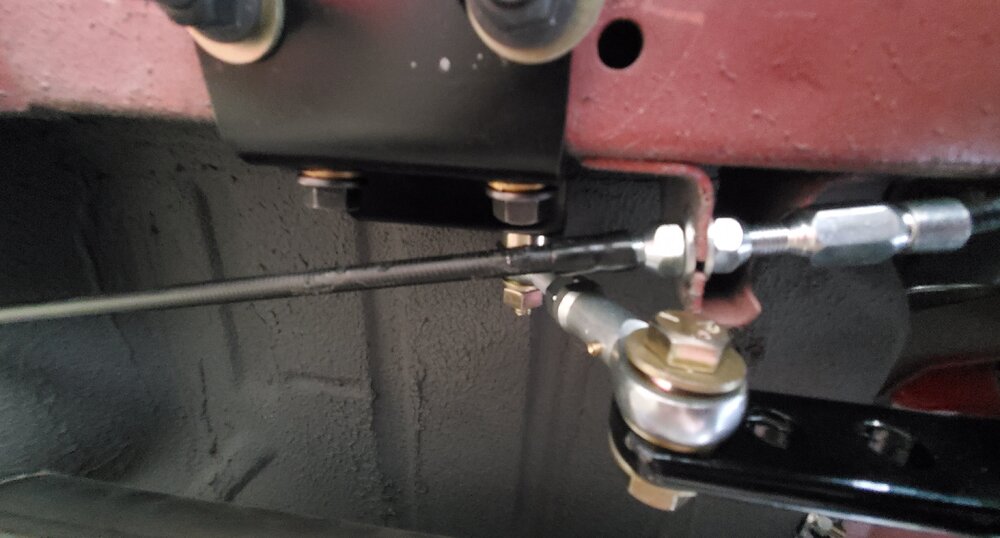
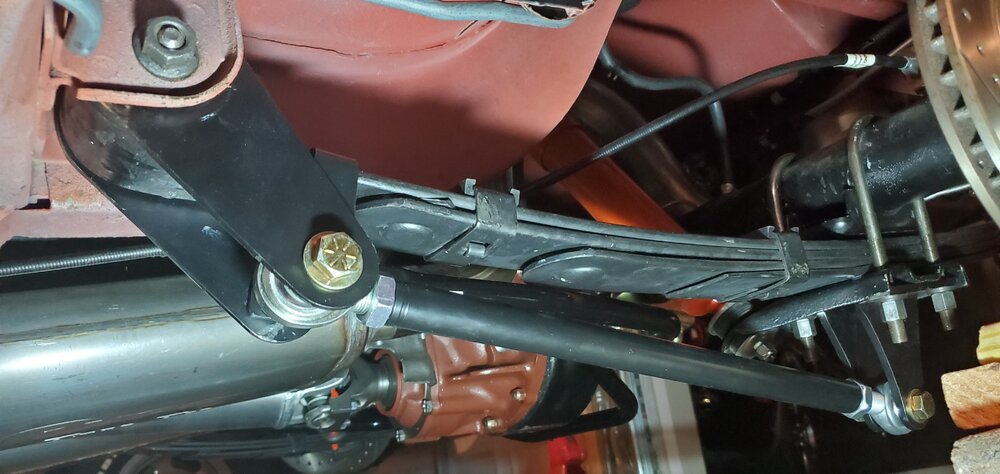
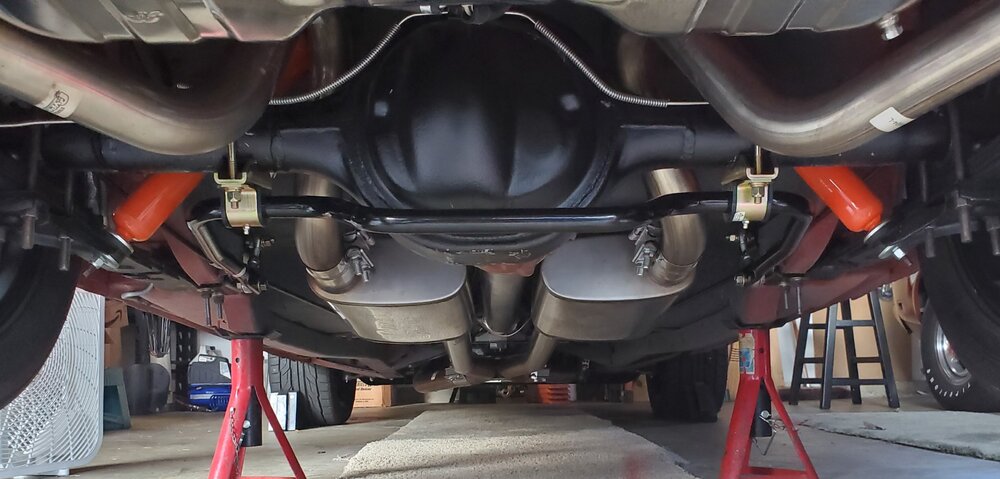
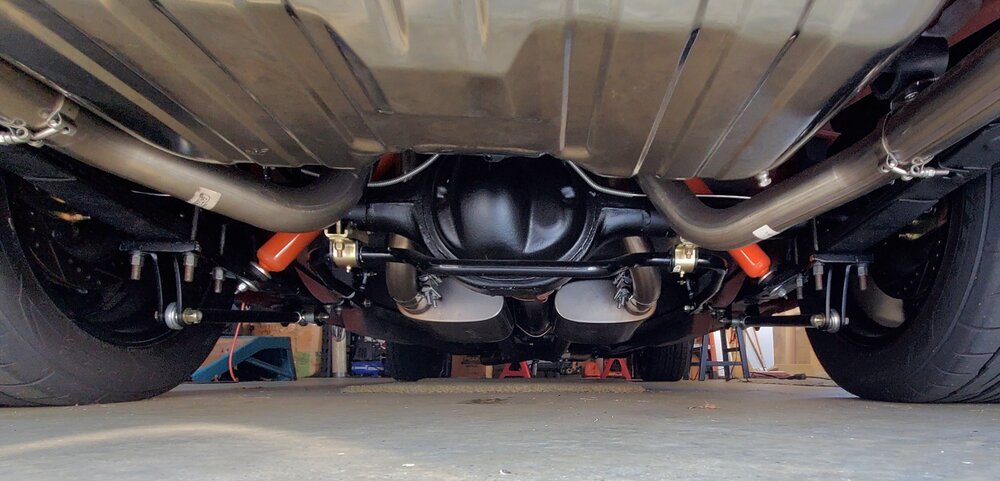
It's been awhile since I posted anything, I've just been enjoying driving the car. While in winter storage, I decided to install a 1" rear sway bar and "CalTrac like" traction bars from CPP. Becasue I converted to rear disc, the factory style sway bars that mounts to the plate that is bolted to the axle/shock plate will not fit around the calipers. So I went with a CPP sway bar that clamps to the axle housing and bolts to the frame near the rear torque boxes. It also does not interfere with the new traction bars. See the captions with each picture below.
-
4 hours ago, kblagron said:I am installing an AAW wiring harness and getting close to finishing. I can't figure out exactly how the key-in buzzer would be wired after reading quite a few posts on here. I know that the buzzer uses the 3 prong door switch to switch power to it. I am just not sure if the power comes from the door switch or from the column wire, and how it would be wired with an AAW harness.
Following the factory wiring schematic, the buzzer receives power from the driver side door jamb switches' red wire (3rd Wire) #158 when the door is opened, and ground from the ignition key (#159) when the key is inserted. Both events are needed to trigger the buzzer. The red wire also activates the convenience group seatback release actuators if you have that option for both seats. Wire #640 provides fused 12v when the the car is running.
Mach1 Driver and kblagron reacted to this -
5 hours ago, smh00n said:Good intel. I will look at doing the NSS. Along with the fact it's a stick, that might confuse the kids who might attempt to boost it when I'm parked on the street.
If you have fuel injection, you could use a second relay to cut voltage to the fuel pump while in Neutral and you are not priming the pump.
-
-
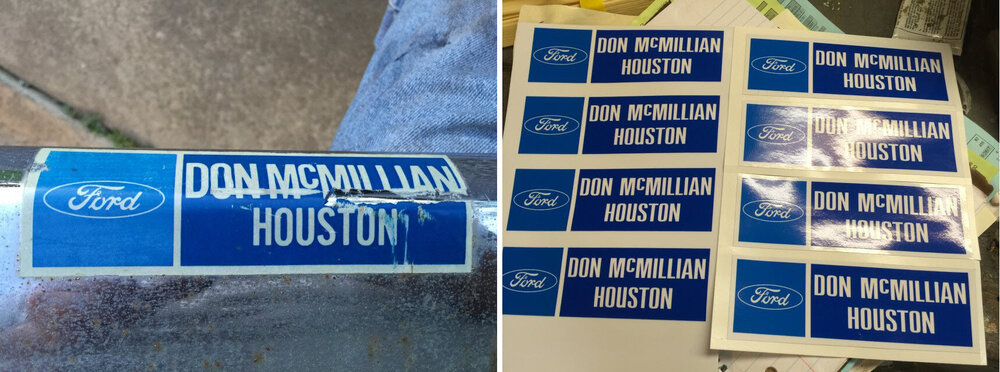
On 3/21/2023 at 6:04 PM, 69Mach1 M code said:Yes, I was referring to the sticker or emblem that was located either on the rear tail light panel or bumper that advertised the dealer.
I had the same idea about a license plate frame and sure enough, there was one on eBay. $150 is a little steep though. Looks like I'll be spending some time on CAD to model a replica.
Years ago a guy on another forum asked if I could reproduced a dealer bumper sticker for him. So he gave me the picture on the left of the one on his bumper and I recreated the image filling in the damgaed areas and we had them printed.
-
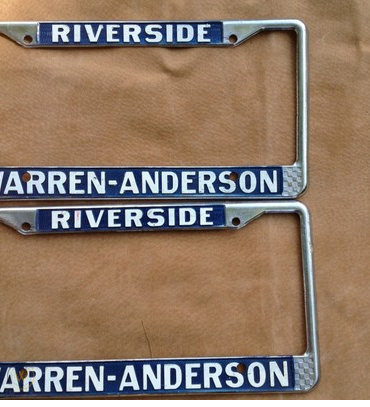
On 3/20/2023 at 9:03 PM, 69Mach1 M code said:Looking for some details related to a rather unique item. I'm planning on having a dealer sticker made for a Mustang sold by Warren - Anderson Ford in Riverside, CA in the late 60's. The dealership is still there but has been renamed Fritts Ford. It's a serious long shot but, hoping someone on the forum in the CA area knows of a survivor car, has some old photos, etc. that would provide some details on the dealer sticker. I've already contacted the dealership for old records but no luck yet.
A quick internet search and up pops a few leads about people associated with Warren - Anderson Ford past. These folks may be will ing to help you..
Before 1933 the dealership called "Johnson Motor Company" when it was bought by Warren Anderson and renamed Warren-Anderson Ford. Now the "Ford Warren-Anderson" company DBA Fritts Ford" is privately held/owned by Marie J. Fritts. Corporate Address: 8000 Auto Dr Riverside, CA, 92504-4118. Write her a letter asking for copies of the companies history. Worst that can happen is she ignores you letter or respectfully declines. What have you got to loose?
Maybe Jim Johnson, an auto dealer most of his life and whose father, Harold Johnson was affiliated with the old Warren-Anderson Ford dealership in Riverside, Try contacting him, he may be able to help.
These sold on eBay some time ago. Keep us posted and good Luck!
-
6 hours ago, smh00n said:Phew. Super mind-bending day at work and just read this. I appreciate it, have not thought about keeping the NSS active but probably not a bad idea. The video is simples, nice easy bit of work.
I'll digest it later when my brain is not telling to go to the fridge and take 3 beers in quick succession (like a Doctor says take some pills and call me later, beer fixes my issues)
I am with ya... I needed 3 beers after writing that darn post. Let me know if I can clarify anything.
The video created by American AutoWire is a bit more generic and they use their wiring kit as a reference point. I still have the original Ford wiring harnesses in the car, so I created the diagram using the Ford wiring diagram as a reference point. It helps me keep things in context, because I will surely forget what I did a month later and have to spend time retracing my steps to refresh my memory.
-
On 3/5/2023 at 9:52 PM, smh00n said:Ladies and Gentlemen
I am into the wiring for my TKO conversion from an auto, and just needed some hand-holding before I chop wires up. The car has been hacked up especially in the back so I don't want to spend nights pulling wires and hair out.
From this thread I see I am looking for a black and red wire into a 4 wire connector (labelled "H") at the firewall to plug the back up switch from the trans into. Yes? I guess there is power into this switch from the 296 wire out of the fuse box? So I need to make sure 12V is on one side?
And then, in back I have the same single red/black wire to power the reverse lights. Yes?
Next, I have seen you basically jump the original neutral start wiring to bypass the original automatic gearlever switch. Can someone give me wire colours to jump? I have a single wire and also a block of about 4 that came off the auto.
Last, can you buy the OEM moulded plugs? I have LED lights for the hood turn signals, but they have been hacked before from the harness plug, so I was going to make a new harness; but I don't have any of the original plugs used. I can use dodgy connectors but prefer not to.
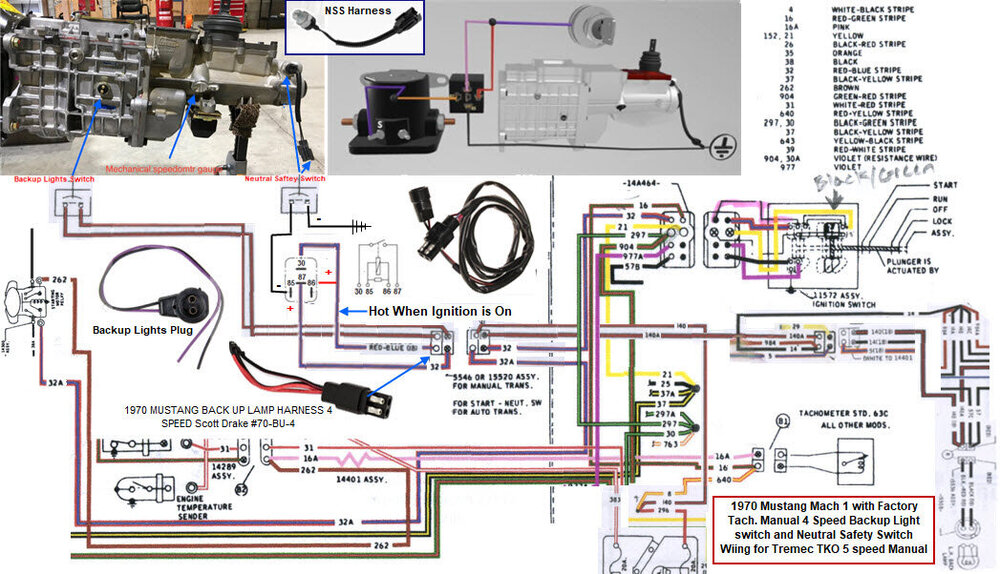
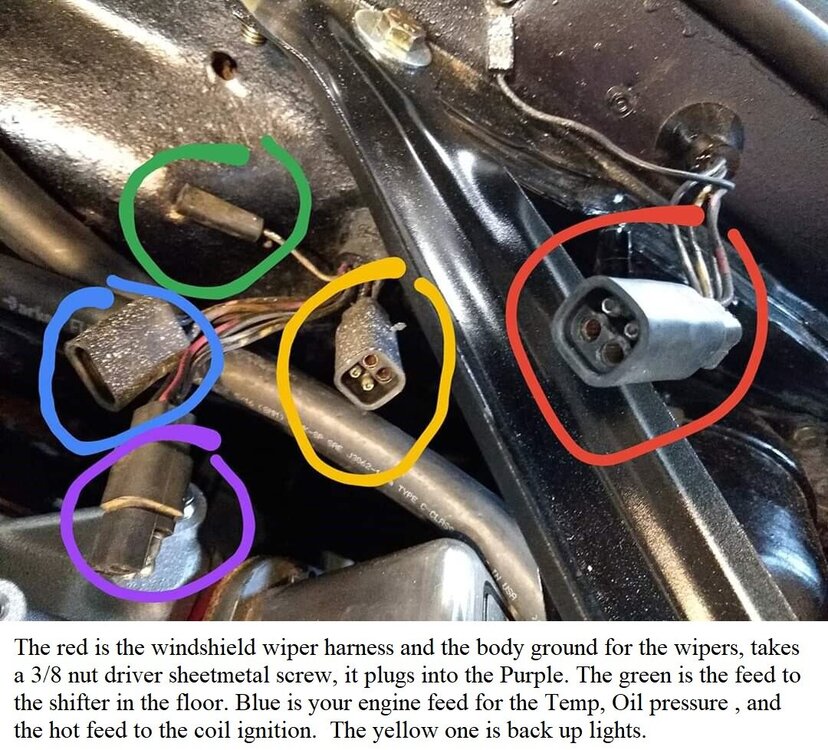
Here is the way I wired the NNS and Backup Lights Switch on my factory 1070 Mach 1. Manual 3 and 4 Speed cars had basically the same NSS/Backup Light harness out thru the firewall to the four pin plug. Automatics had the NNS safety switch harness to the trans, whereas manual shift cars had a loop back wire in the plug on the trans side. If you wan the NSS to function with your Tremec TKO, then you will need The Tremec NSS harness, and the Tremec to Ford Backup Light harness, (Scott Drake has a nice one). Also some 14 AWG wire ( blank ground wire) and a 4 or 5 terminal 12v 30 amp Relay and some blade connectors or matching relay plug (a mounting bracket optional). The relay is needed because the NSS will trip the relay on or off when it completes or disconnects the the ground circuit, which in turn will connect or disconnect voltage to the starter solenoid. I read that you should not pass 12v thru the Tremec NSS, if you do it will eventually stop working.
Fish one or two ground wires thru the Tremec to Ford Backup Light harness (only need to fish one wire thru the harness if you ground the second wire in the harness to the undercarriage near the Tremac). I brought both ground wires to the the firewall. One near the four pin plug and the other I grounded to the firewall with the wiper ground wire. One NSS ground wire goes to relay terminal 30 and the other as mentioned before to the chassis ground. If the Backup Light harness four pin plug has the red/blue striped loopback wire cut the loop wire in half so yo have equal wire lengths. Identify which of the two Red/Blue striped wires that you just cut is coming from the ignition key/switch side and mark it as such and connect it to the 30 terminal on the relay. Make a 3 inch pigtail wire when crimping the relay terminal spade to the end of this Red/Blue striped wire and connect the pigtail to the relay's 86 terminal. Finally, connect the other Red/Blue striped wire you cut to terminal 87. Here is a diagram of what I just described...
And a Video explanation...
-
I am jumping in to the middle of this thread, so just ignore it if this is not helpful....
You can permanently or temporarily bypass the NSS by connecting the two Red- Blue Stripe wires together in the four pin plug coming from the firewall. It the same as the loop-back Ford used on manual cars. I bought the manual safety switch wire harness for my Tremec. It had the correct factory 4 pin plug on the one end and the tremec plug on the other.
-
I'm guessing you already know this, since you have replaced the rotors. The 70 to 73 Factory Calipers are a floating design. They are held loosely in place on two pins with a rubber boot over each pin to keep the caliper from rattling. Spraying brake cleaner, Gumout, or other solvents dissolve these rubber boots which makes the caliper looser to the point where it may rattle when not applying the brakes, and possibly come in contact with the rotor on the front side when applying the brakes. Try replacing the rubber boots if they are old, worn-out or damaged. You can get them at NAPA for a few bucks.
-
On 7/16/2022 at 4:33 PM, Kris said:What spark plugs are you guys running with your sniper setups? I currently have Autolite 45 copper plugs. They are resister plugs like they are supposed to be and I have MSD super conductor wires. I finally got it to run and idle by running it in closed loop but it still runs rich. The tech guy I spoke to at holly thinks I need to run a different plug.
Kris, sorry for the delayed response.
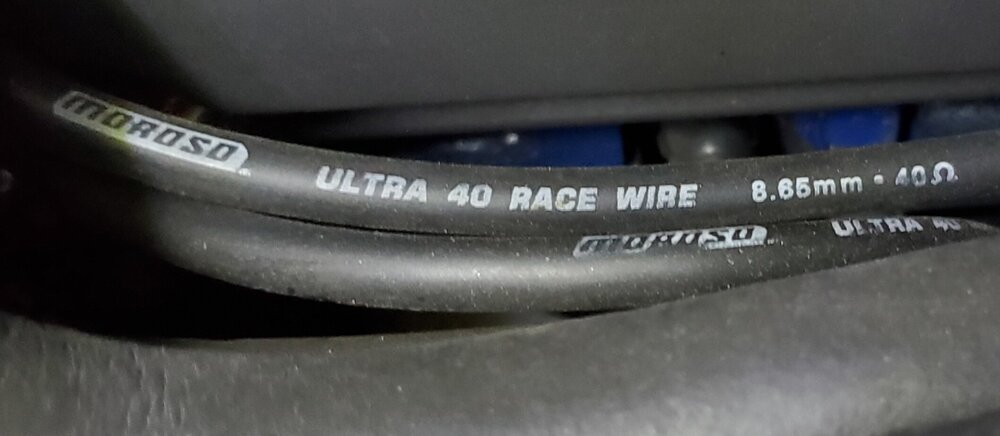
I have Motorcraft ACF 42CA Plugs and Moroso Ultra 40 Race Wire sleeved 8.65mm 40 ohms.
Rich






1970 Convertible Restoration
in Project Progress Forum
Posted · Report reply
Hi Vic, Thanks for moving tips. We given away a bunch of furniture to friends and family who wanted it. We signed up with a Estate Sale company and they are going to sell or dispose of what we are not bringing, but even with that I have a basement full of stuff, the two cars, and all my tools, and extra car parts to store for about 3-4 months. Any suggestions on short term car storage?
We are moving to a retirement community that just open up for lot sales off of Rt64, next to the Jordan Lakes state park (I think it is call) in a old historic town called Pittsboro. We will be near three of our grandchildren in the Apex area. We will be able to see them more often without having to make a 6 hour drive from DE, which makes my wife very happy.
Regards,
RIch