


69Stanger408
-
Content Count
233 -
Joined
-
Last visited
-
Days Won
10
Posts posted by 69Stanger408
-
-
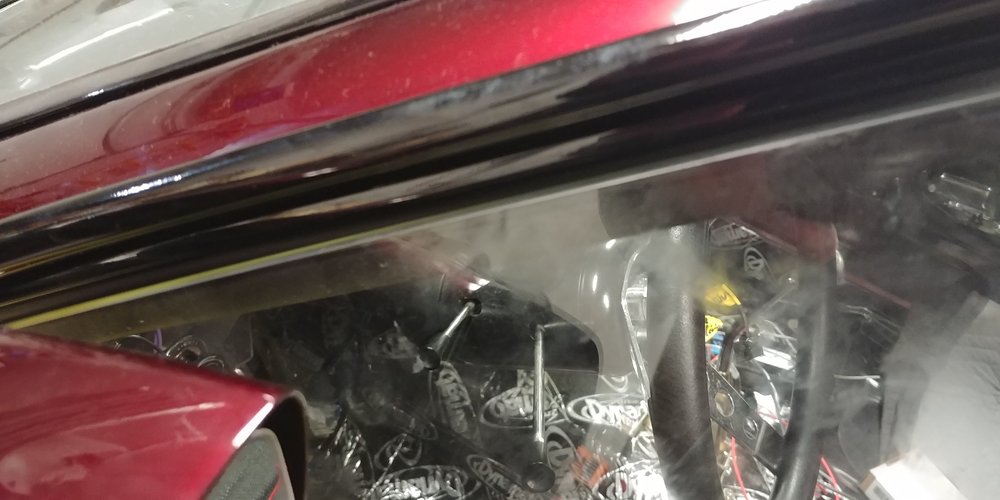
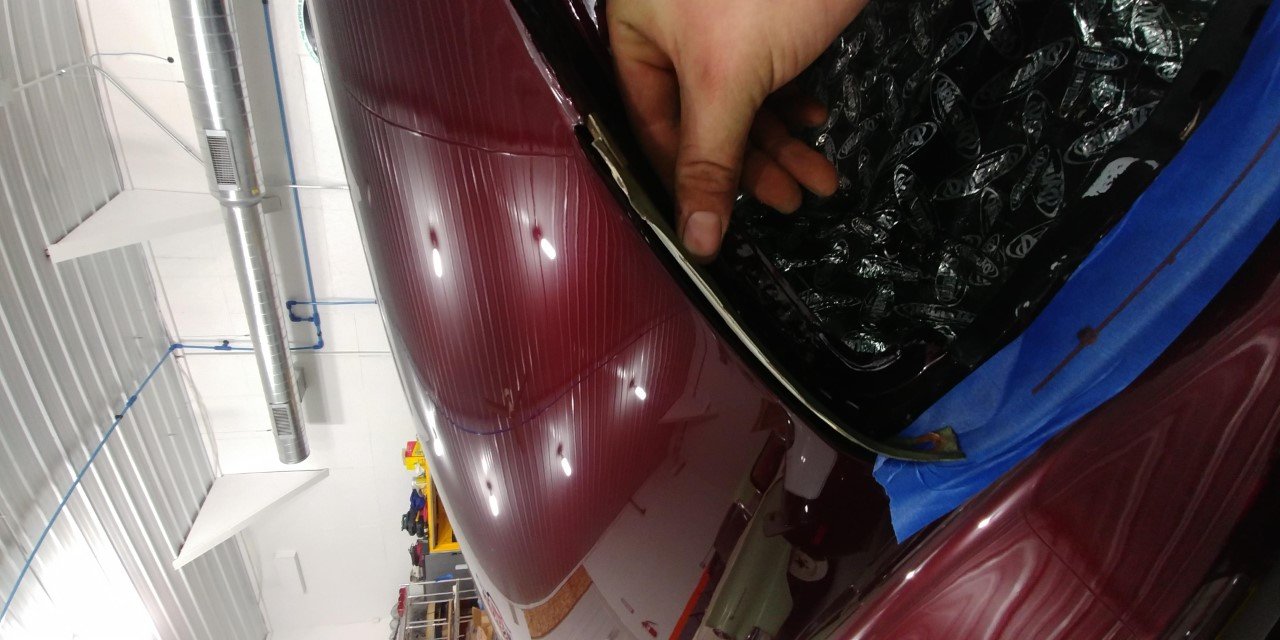
Been playing around with the door glass for awhile and it's time to ping the group. Any tricks for adjusting the angle where the top and front leading edge sits further into the weather strip? I've got new glass and new power unit (Ne-Relic). Replaced the glides (small plastic pieces) within the two vertical guides. I've moved the lower vertical bars in and out which really did not affect it much. The front to back is nice as well as the top. Just sits out to far. Passenger side is satisfactory, if I can get drivers side to match passenger I'd be happy.
-
Both of mine are fberglass, still had to work them. One is from MTF, the other out of California, can let you know if interested
-
12 hours ago, jmlay said:Block of wood and a hammer.
LOL - That was too easy, one hit per window!!
-
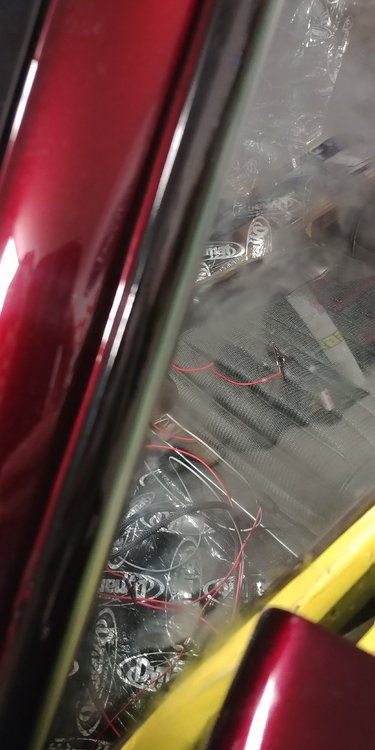
Whats the trick to remove the vertical chrome channel that holds the weather strip on the door glass? I replaced my glass with bolt it for the power windows and need to swap out the channel. Also, what is the recommendation for gluing/epoxying it to the new glass?
-
On 1/16/2020 at 12:57 PM, Machspeed said:Gorgeous! Curious, did you get the cost of that paint job worked out? As I recall they doubled the amount of hours they quoted you on it.
After several discussions, the shop realized the error they made in lack of communication and disclosure regarding the huge discrepancy (estimate 220 hours versus actual 660 hour), we came to an acceptable agreement.
-
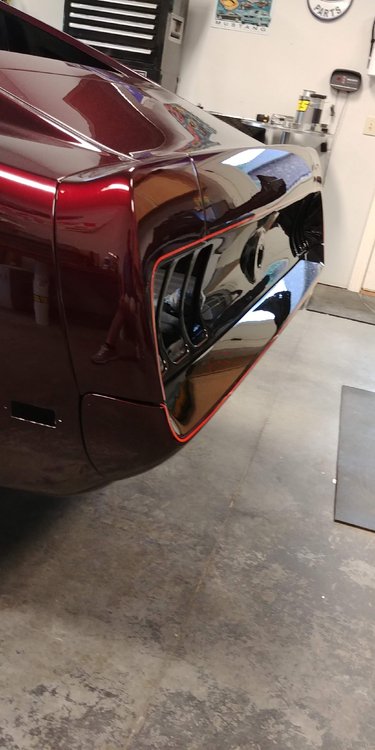
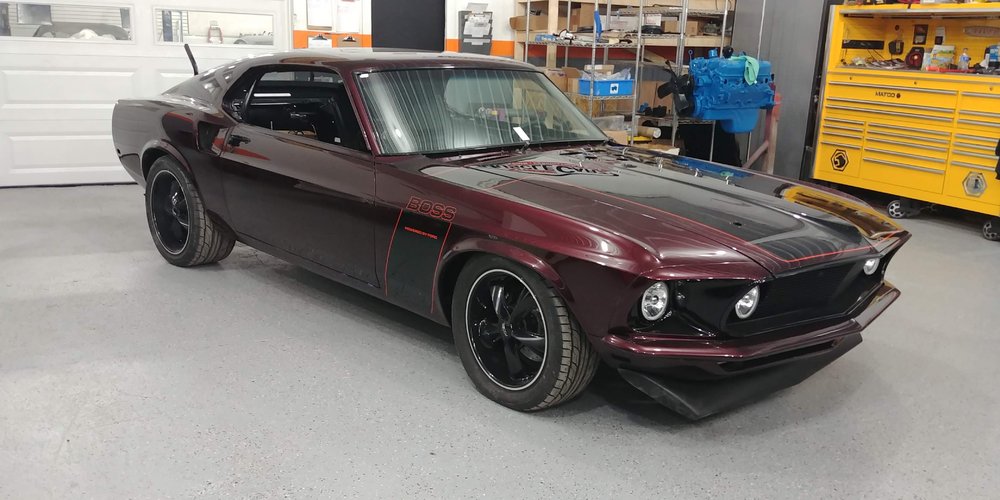
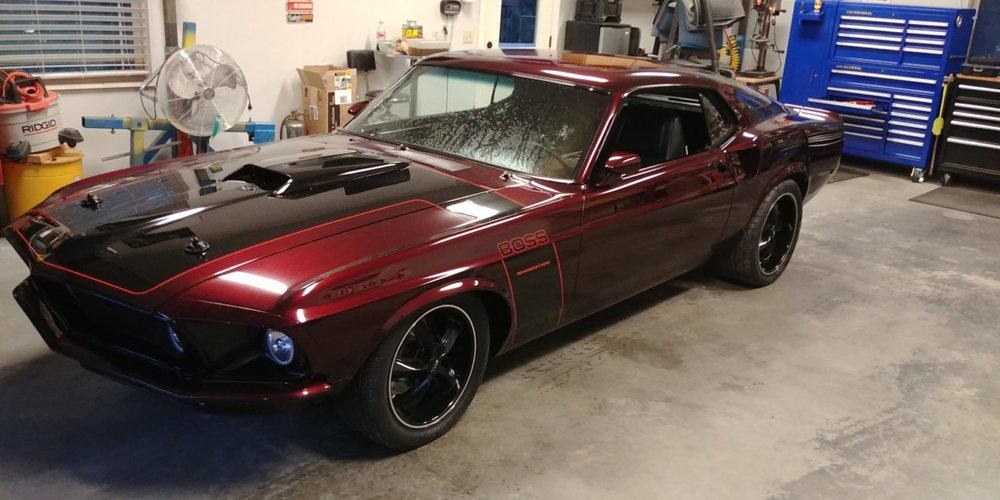
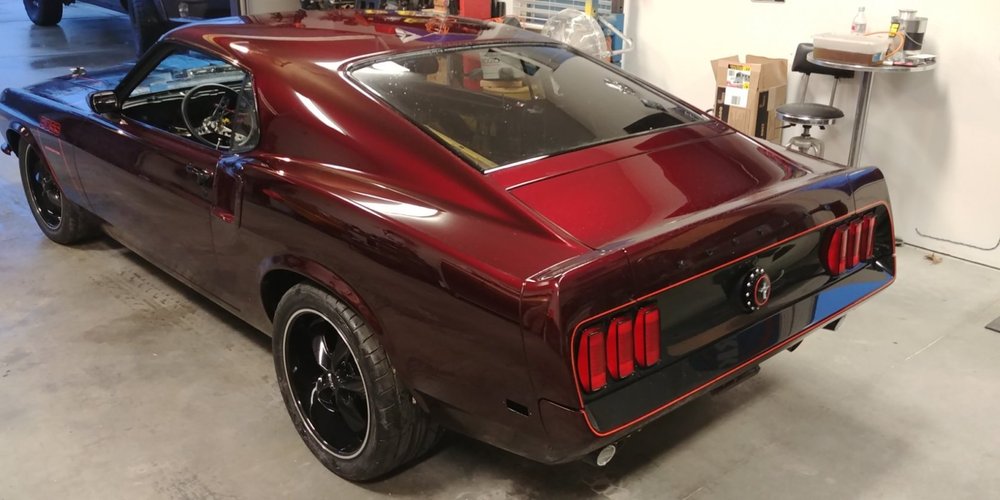
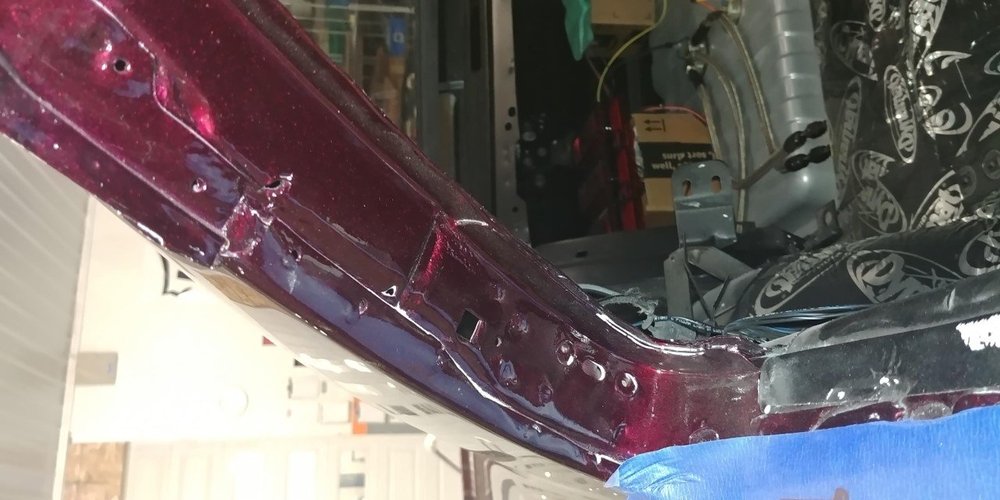
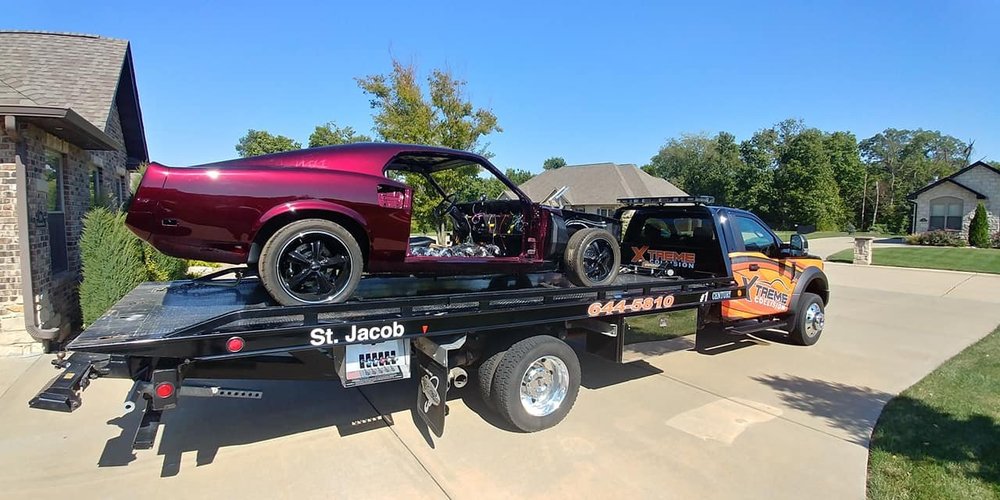
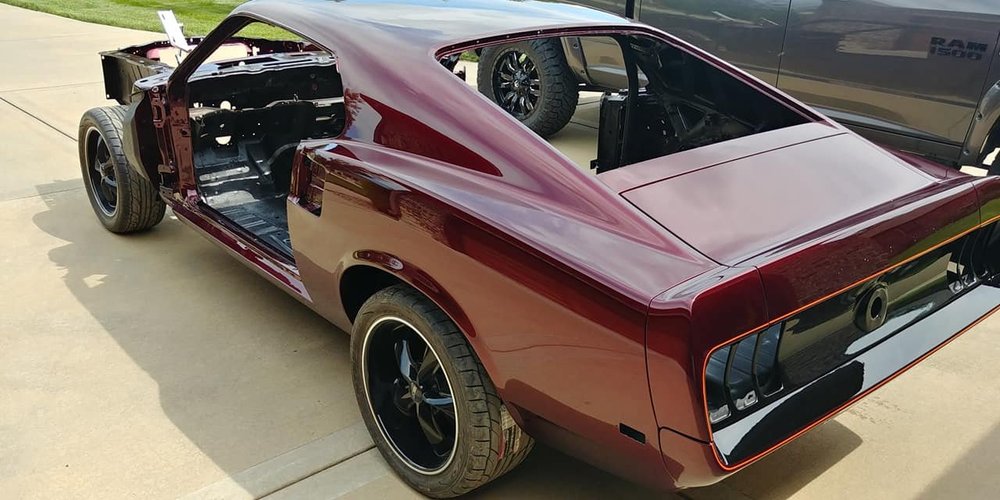
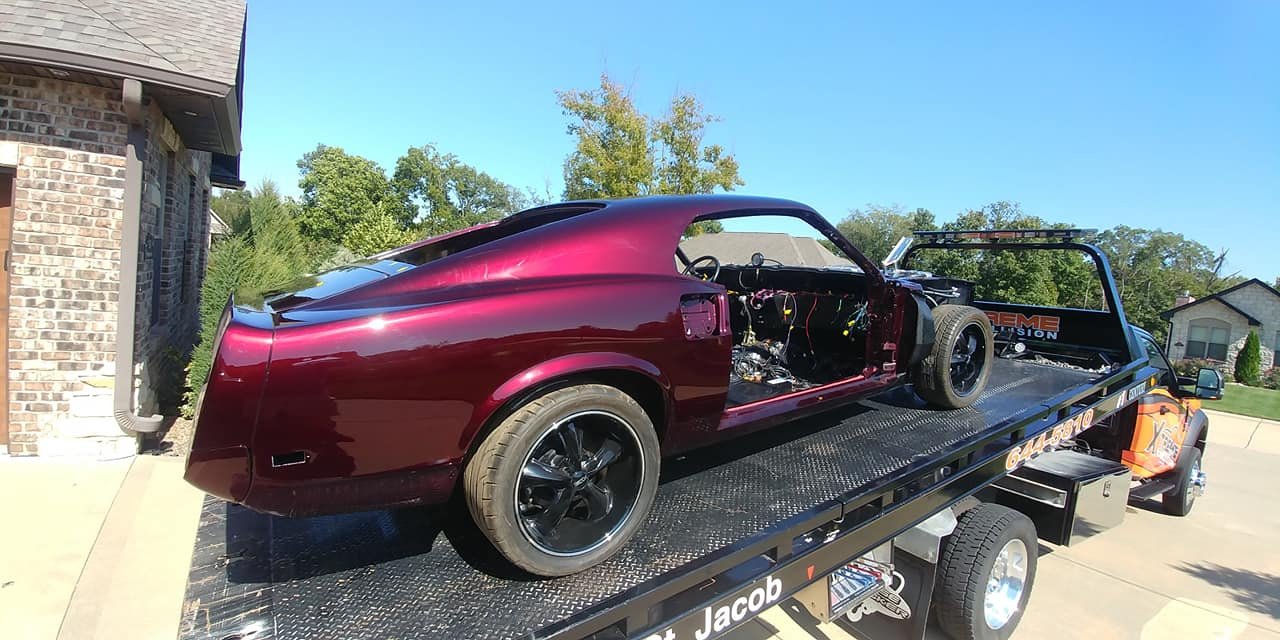
Got my car delivered from paint. House of Kolors Candy Brandywine over base black. Stripes and lettering all painted along with blacked out bright work throughout. Now onto the interior.
-
Looking for guidance. I received a written estimate from a restoration shop to paint my car. The price was in the middle range of other shops I went to. I paid the amount throughout the process and when delivery of the car came the shop says I owe double the amount. Says its labor based and that is what it is. The estimated hours went from 250 hours to a final of 535 hours. I did add a few extras that were not in the original estimate but those hours would equate to approx 50 hours (snug fit fiberglass bumpers, move seat risers back, weld in new hoop). At no time did they tell me I was exceeding the estimate and when this came about they said I should of asked them where I was at prior to now. Quick rundown, I did 90% of the bodywork prior (panel replacements, blending, etc.) yet they said to warranty the work they'd have to media blast the car which they did and was included in the estimate. Nothing more was required other than re-doing the blasted skim work (which was included). What say you?
-
I ran mine through the passenger floor next to the tunnel and will mount it in the center console.
-
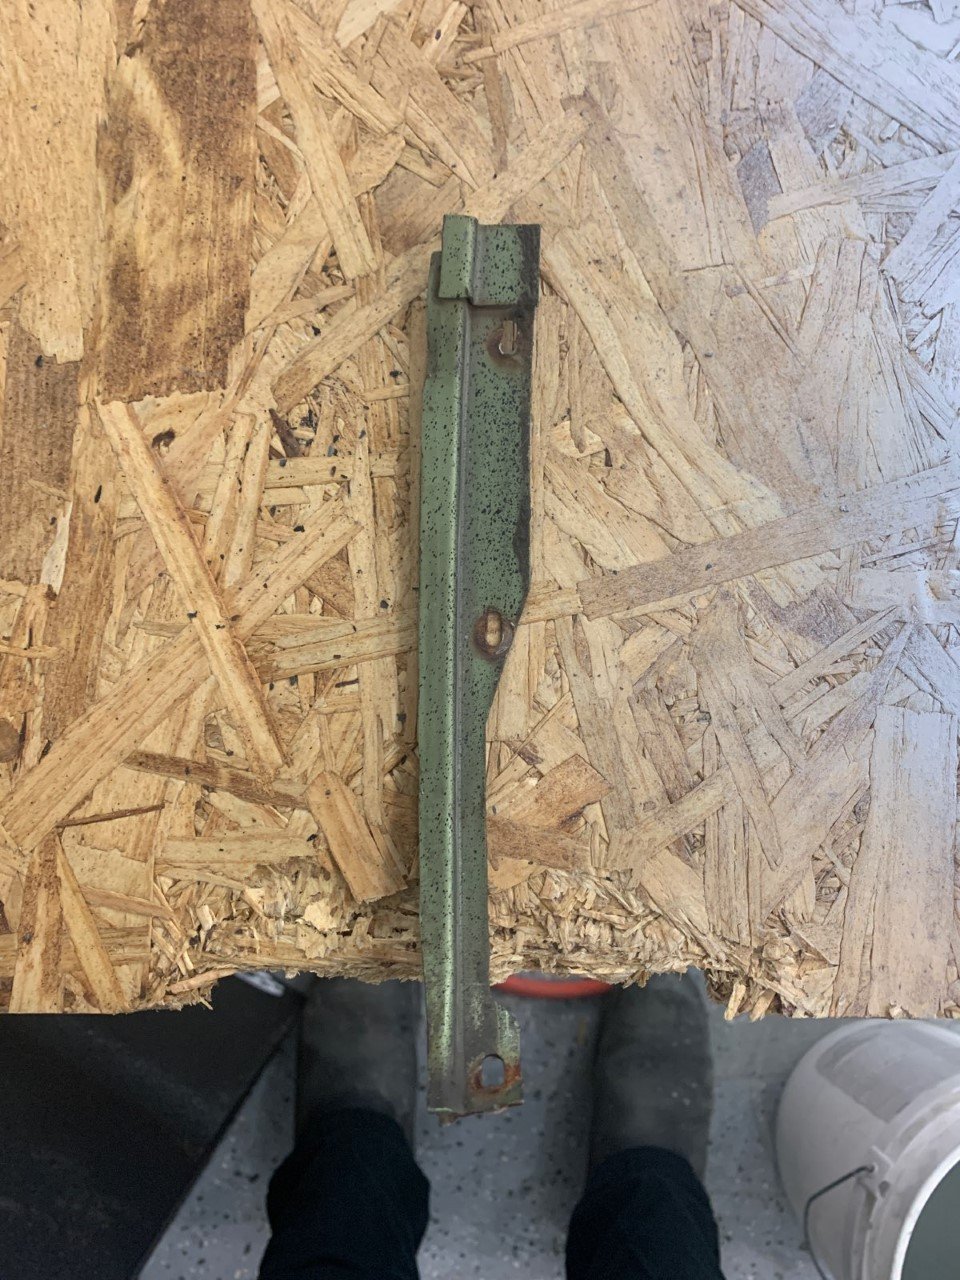
What is this part called and where do I find one? Need it for the drivers side, looks like a roof rail extension, but can't find it anywhere. Evidently one must remove it from an original quarter as repo quarters do not come with it.


-
Heading off for exhaust, glass, alignment, and AC charge. Then back home for final assembly (looking forward to my Mustang to Fear seats!!)

 Grabber70Mach reacted to this
 -
I'm in the process of purchasing halos but have not found anything that has great reviews. Which brand/part number for your installed halo headlights? Did you have any issues with the trim ring fitting?
-
Yes, increase
-
1 hour ago, Vicfreg said:Oh, good stuff. I like the RPM increase on compressor start. I have to look into that with my FiTech.
The compressor, when activated decreases RPM by ~200.
-
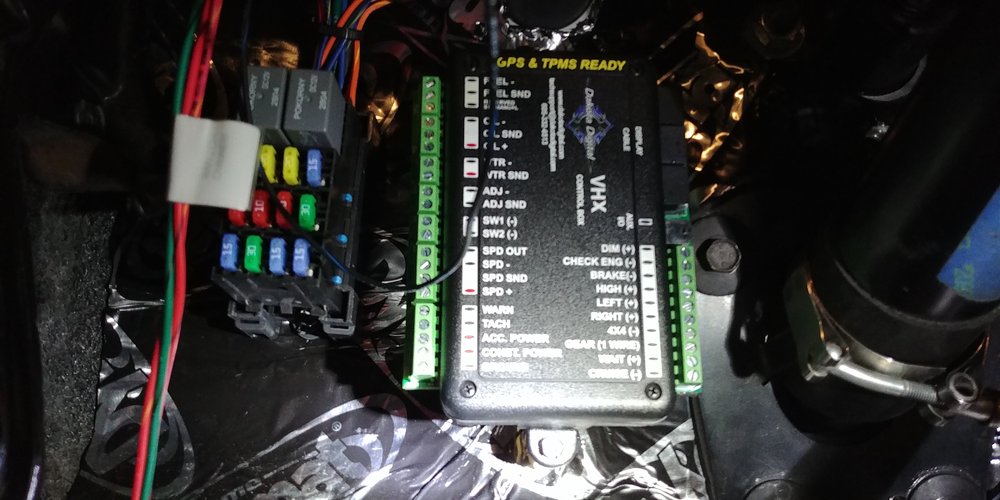
Update - guess I needed to connect both ribbon cables to the small gauge modules not just one!!! All works.
-
Checked with Vintage Air (VA) and they recommend the following for the Gen IV system:
For the idle / RPM increase when AC is activated, tap the existing blue wire on Pin 85 of the VA relay with the orange wire (ground input #1 -) from Holley Sniper. This will signal the ECU that the AC clutch is activated and increase RPM to assist with compressor load.
For compressor shutdown at wide open throttle (WOT), you require a new 5 pin relay, wire as follows - Pin 86 Holley gray wire (output #6 -), pin 30 battery, pin 85 keyed 12v, and pin 87 is a tap from Vintage Air orange wire off the ECU that goes to an existing VA WOT switch.
Little different than Holleys explanation and reduces the installation of two replays to one.
-
Ring pliers work as well
-
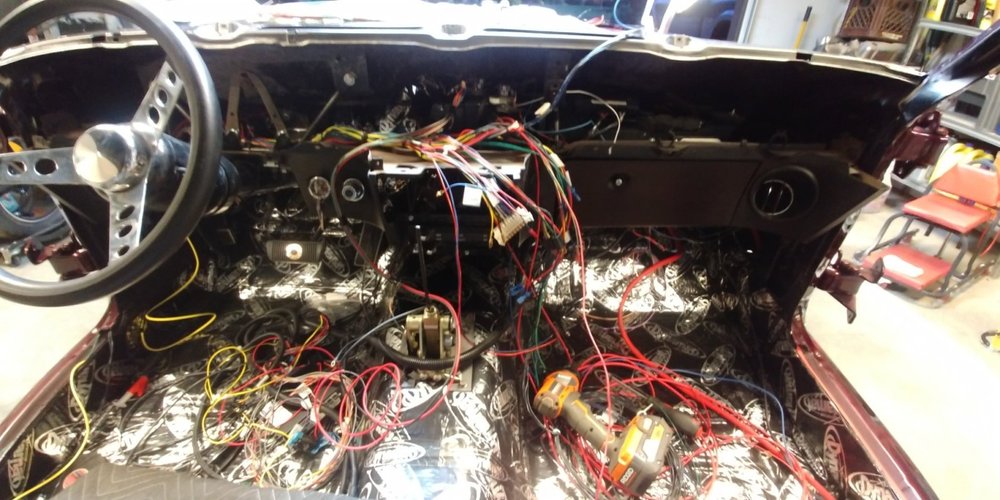
Making some final electrical connections and stuck at the WOT relay switch. This newly installed relay will shut down the compressor at wide open throttle via a ground trigger from the Holley ECU. I believe the activation wire would be the light blue that goes to the trinary switch and then onto the compressor, however I am unsure. The Holley techs call it the "AC Activation Wire" Additional pin out for this relay is pin 86 battery power, pin 87A from pin 86 of existing vintage air relay #86 (which is breaker power), and pin 30 which is the AC Activation wire... Assistance appreciated.
-
-
Pressing through, went through the instructions for activation however I don't get the BIM option to display when using the SW1 button. I get into set up mode, select TACH, select engine, and next set of pushes are supposed to show BUS...but no option for BUS?
-
Nick, I've yet to fire up the Holley, but when I did power up the Dakota (w/o Holley), I did not have lights for fuel or water temp, assume that is because the BIM will power that up? Also, did you tap the power and ground off the VHX module for the BIM?
-
Retrotech looks awesome, but only for 65/66....https://www.phoenix-tuning.com/rtx-65f-mus-x/?sku=MTX-65F-MUS-X&gclid=EAIaIQobChMI8MDUr6Oz5AIViP_jBx0eagBHEAQYAiABEgKx_vD_BwE
-
On 8/27/2019 at 11:18 AM, nickjames138 said:Oh gotcha, I see what you're saying. I was just going to mount mine directly behind the dash (where that crossbar is). Is there a reason I shouldn't? I mean my wiring is such a mess and I'm not about to get into cleaning it up at this point.
The module fits nicely between the fuse box and steering column. I used a couple round spacers to allow it to sit level.
-
I went with MTF as they sit lower than anything on the market. I'm 6'7" so I need all the head room I can get. Hydro-graphic your wood-grain interior pieces, mines in the process of being done. What color is your car, looks like Kandy Brandy Wine?
-
Thanks, that's what I needed, kinda flimsy but I guess I had it right. Thanks Again!!


Door Glass Alignment
in 1969-70 Technical Forum
Posted · Report reply
I have not installed the felts at this point as I do not want to damage them should they need removal for glass removal, however the window is spaced evenly in the gap. The glass is bolt in. Regardless where the bottom of the vertical guide bars are (in or out) does not effect the fully closed spacing against the weather strip.