


mikee
-
Content Count
98 -
Joined
-
Last visited
-
Days Won
9
Posts posted by mikee
-
-
-
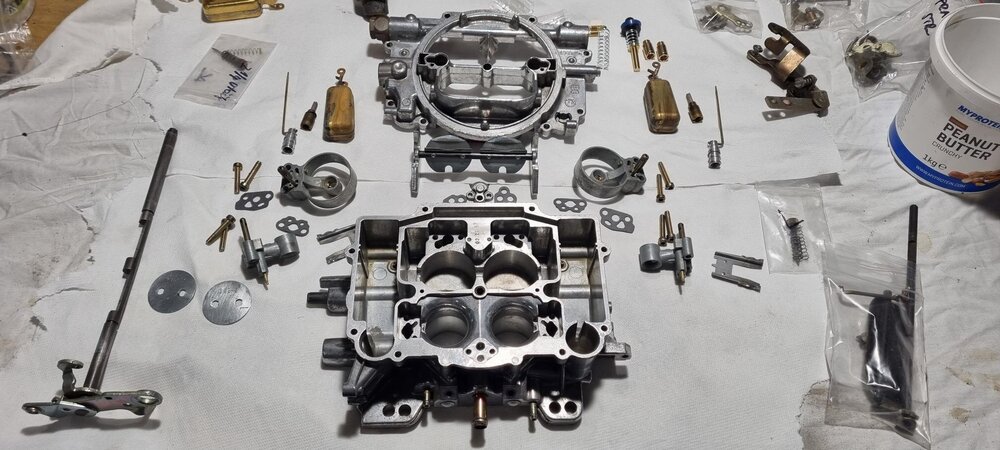
5 hours ago, SWPruett said:Looks great! Steady progress and……….it’s in!
One word of caution however: carb rebuilds should really be done with creamy peanut butter. The crunchy causes misfires…..
-
It's this one : https://www.rockauto.com/fr/moreinfo.php?pk=3096576&cc=1132322&jsn=897&jsn=897
I have the radiator already in can try the fan and will measure the clearance
-
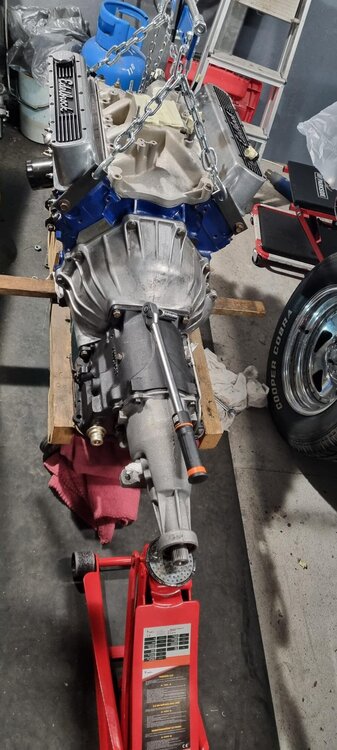
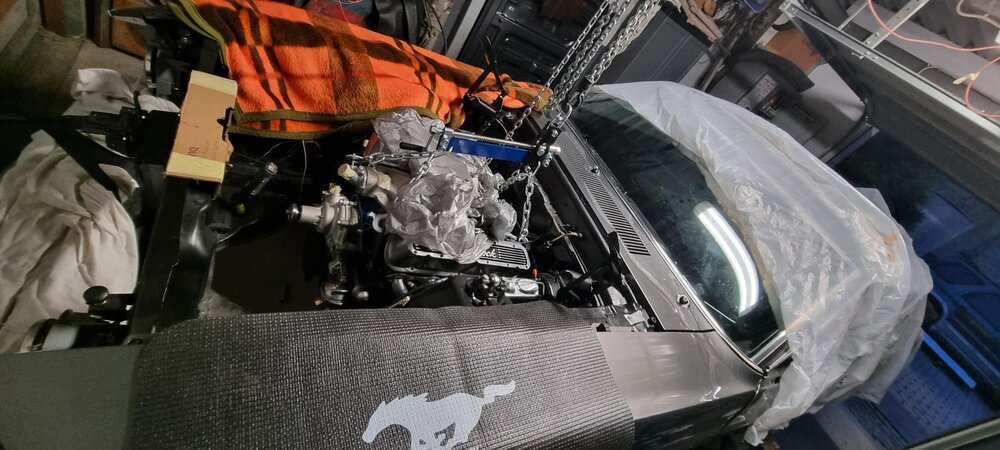
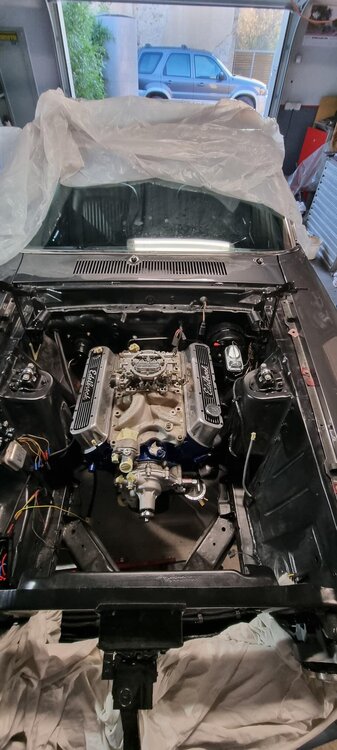
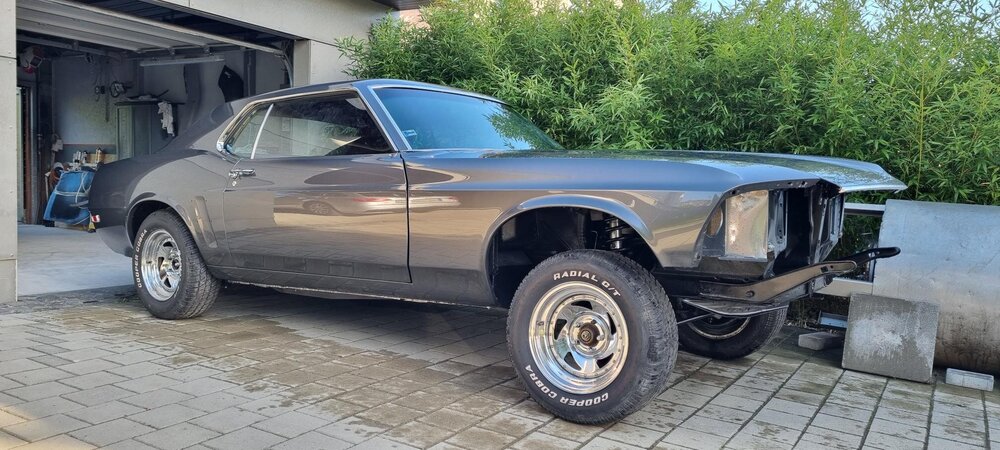
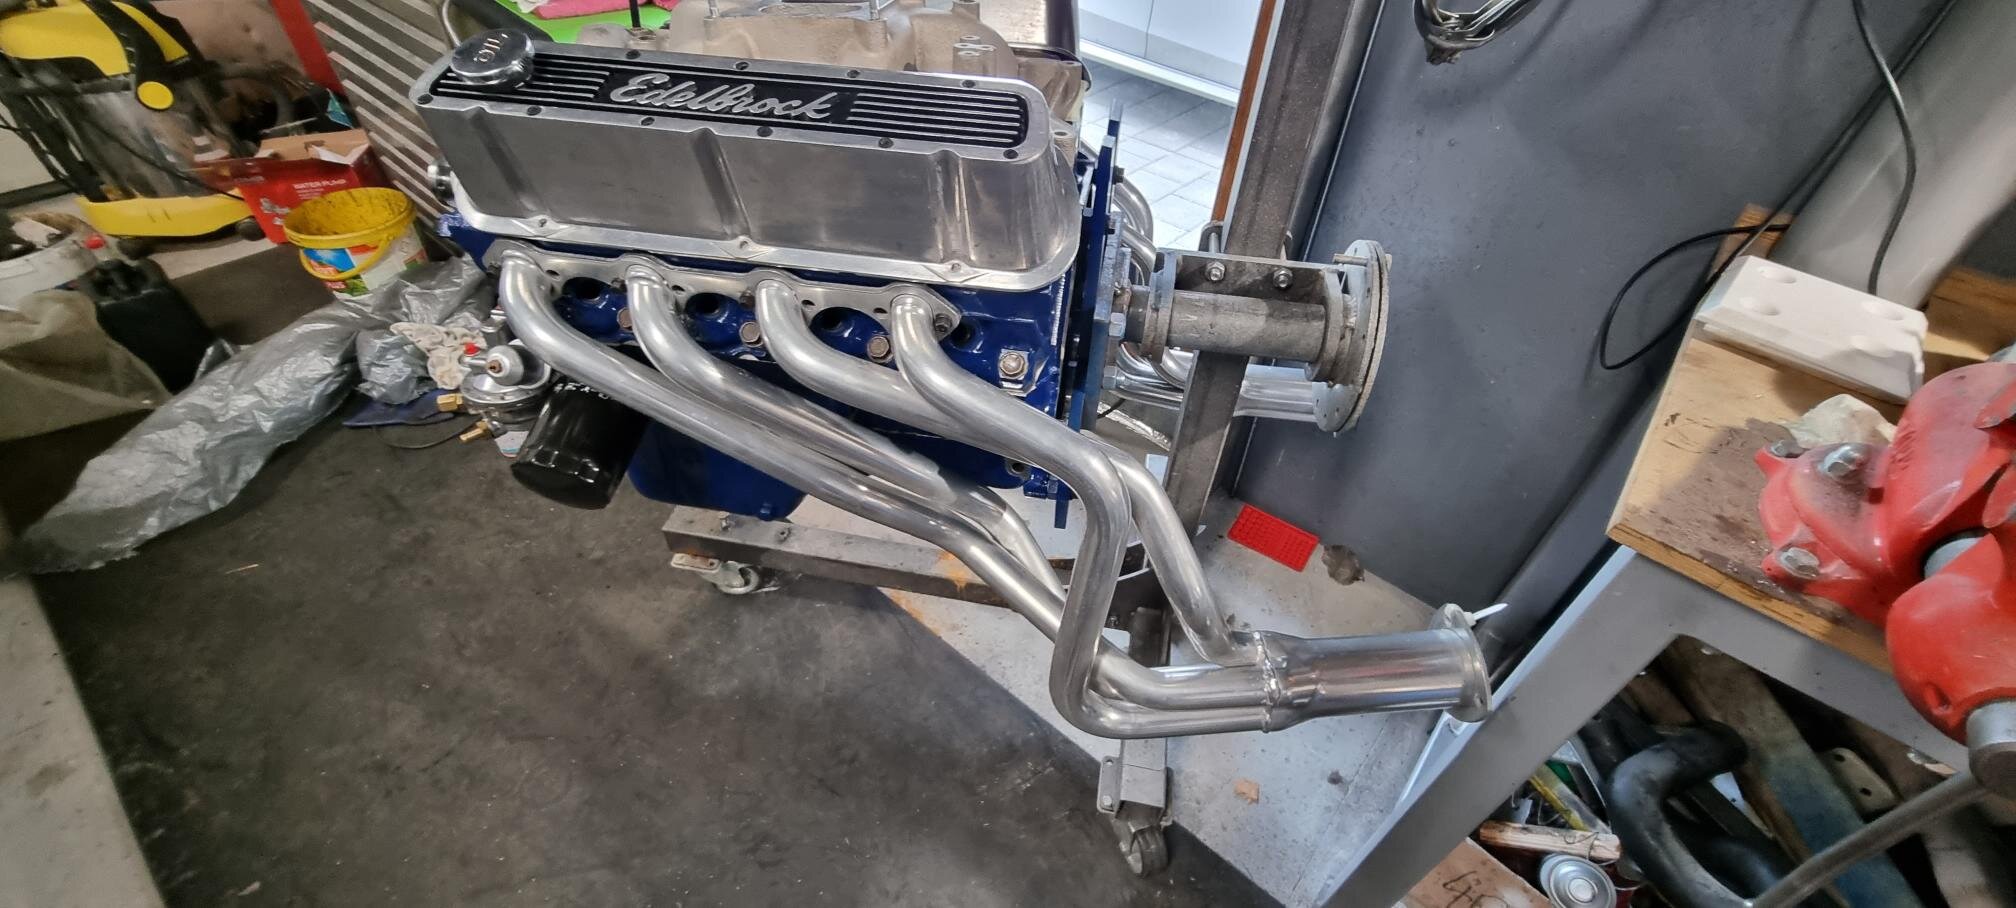
Sooo, Carb is overhauled, installed and my biggest nightmare - installing of engine with tranny is done!!! Due to lack of time for quality time in garage I decided to order whole exhaust and not to build it by myself. That's the last thing to my initial engine start :)

 Grabber70Mach and RPM reacted to this
 -
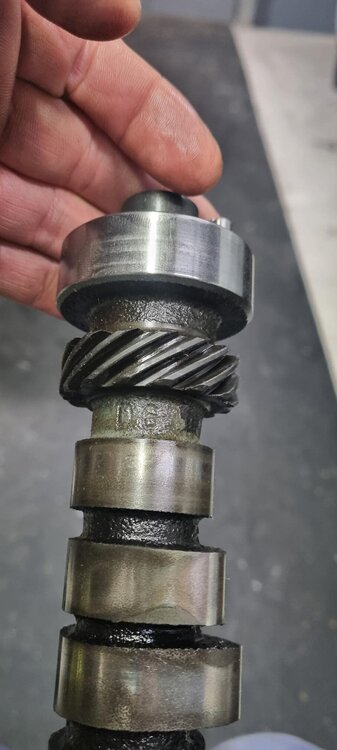
I was excited when the cam came and didn't checked even if the signing corresponds with description sheet. Better than pulling it out was for me to check the timing :) - learning by doing.
-
-
Thanks jmlay I'll check the video right away, i didn't find this one.
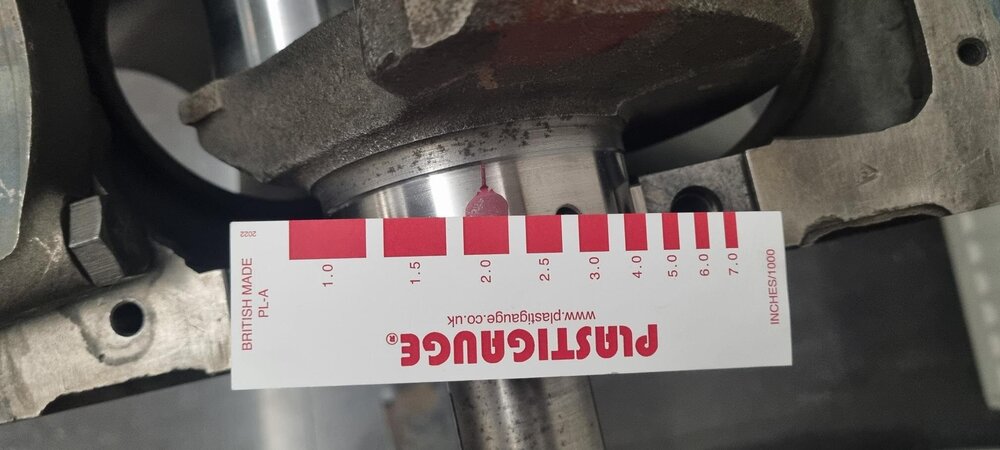
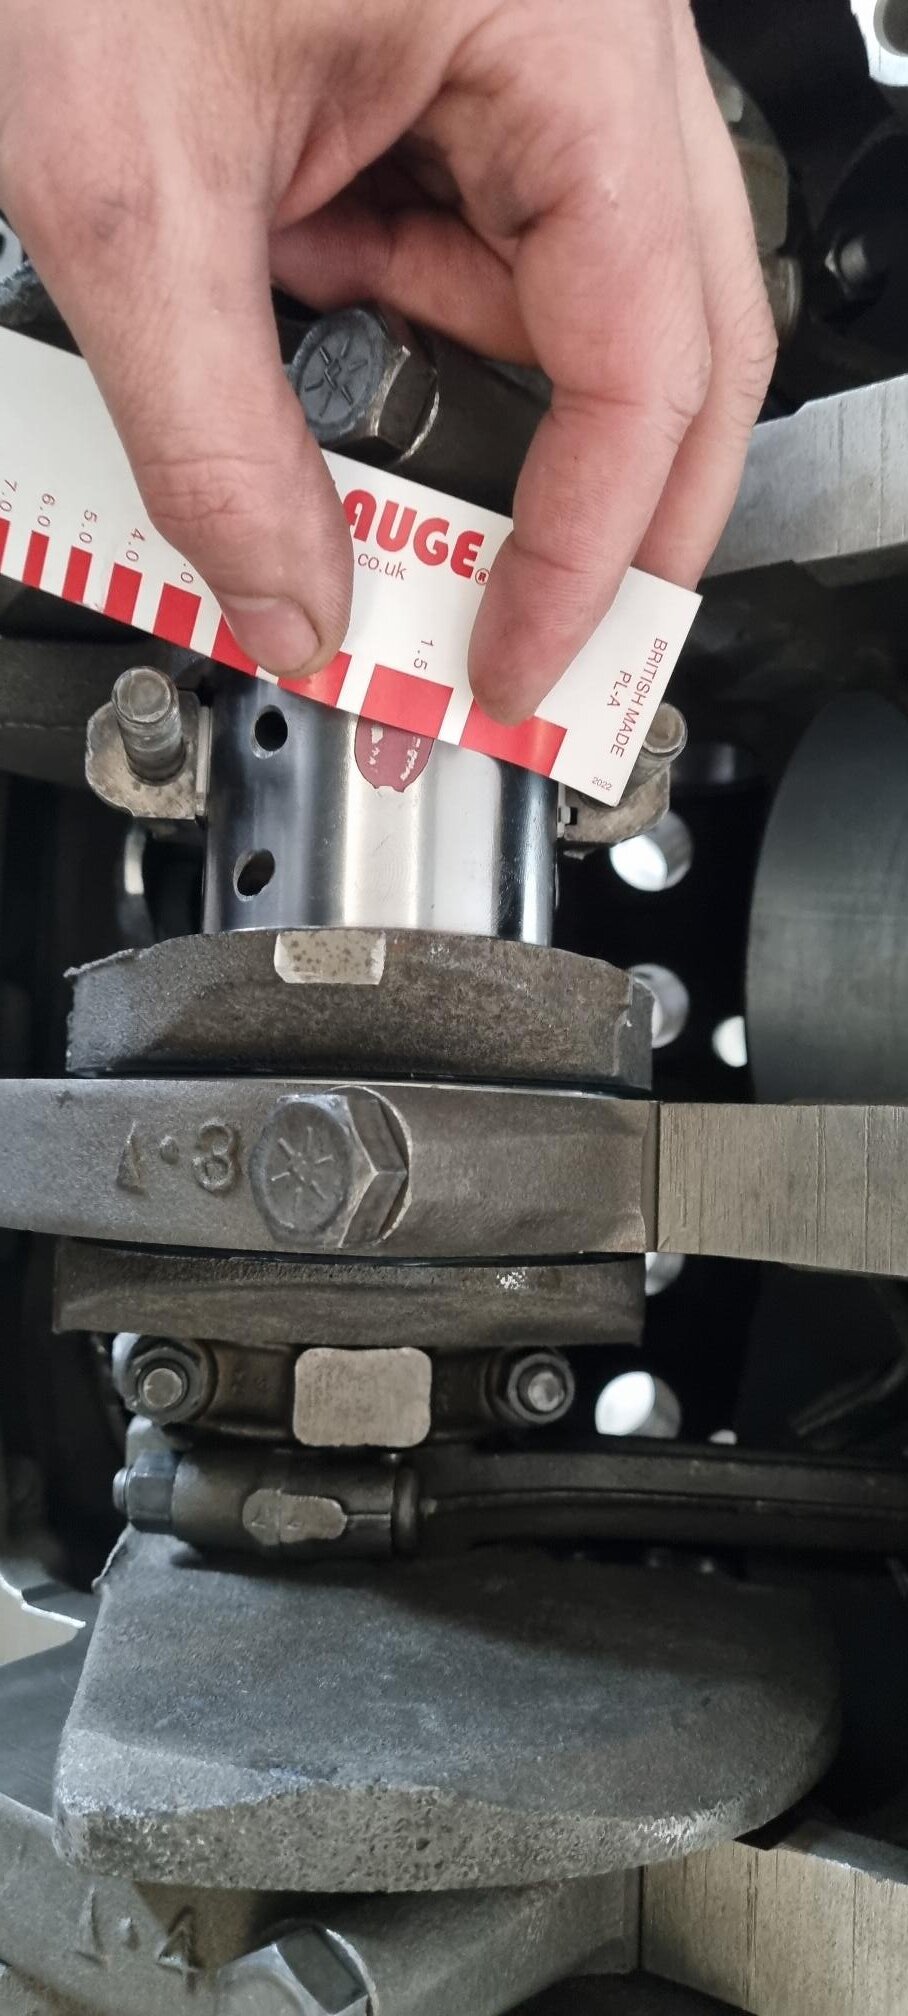
Plastigauge was just "for fun", just for double check - I bought that i was curious how it will perform. I have full range of micrometers and bore gauge as well, but my measurements are all in millimeters and plastigauge was my only inch reading.
-
Hi Folks,
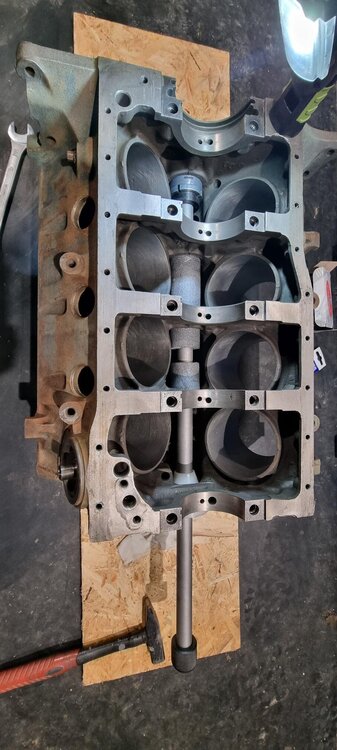
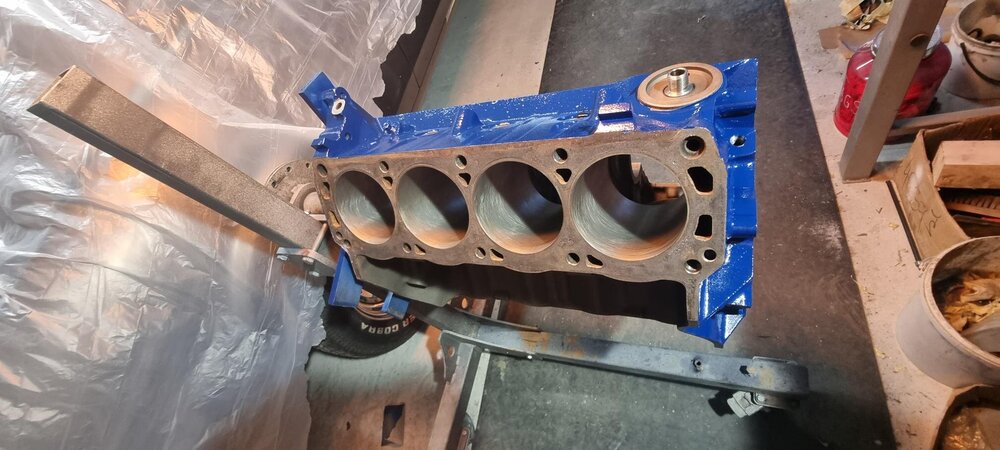
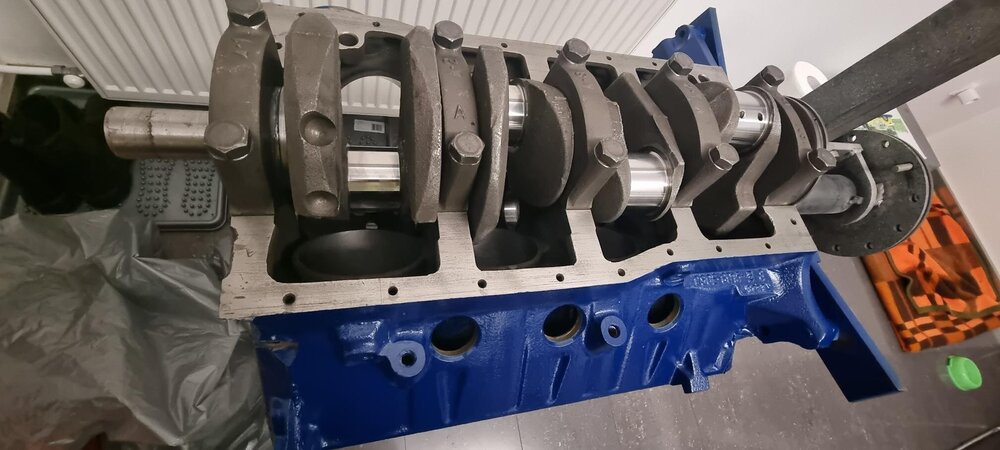
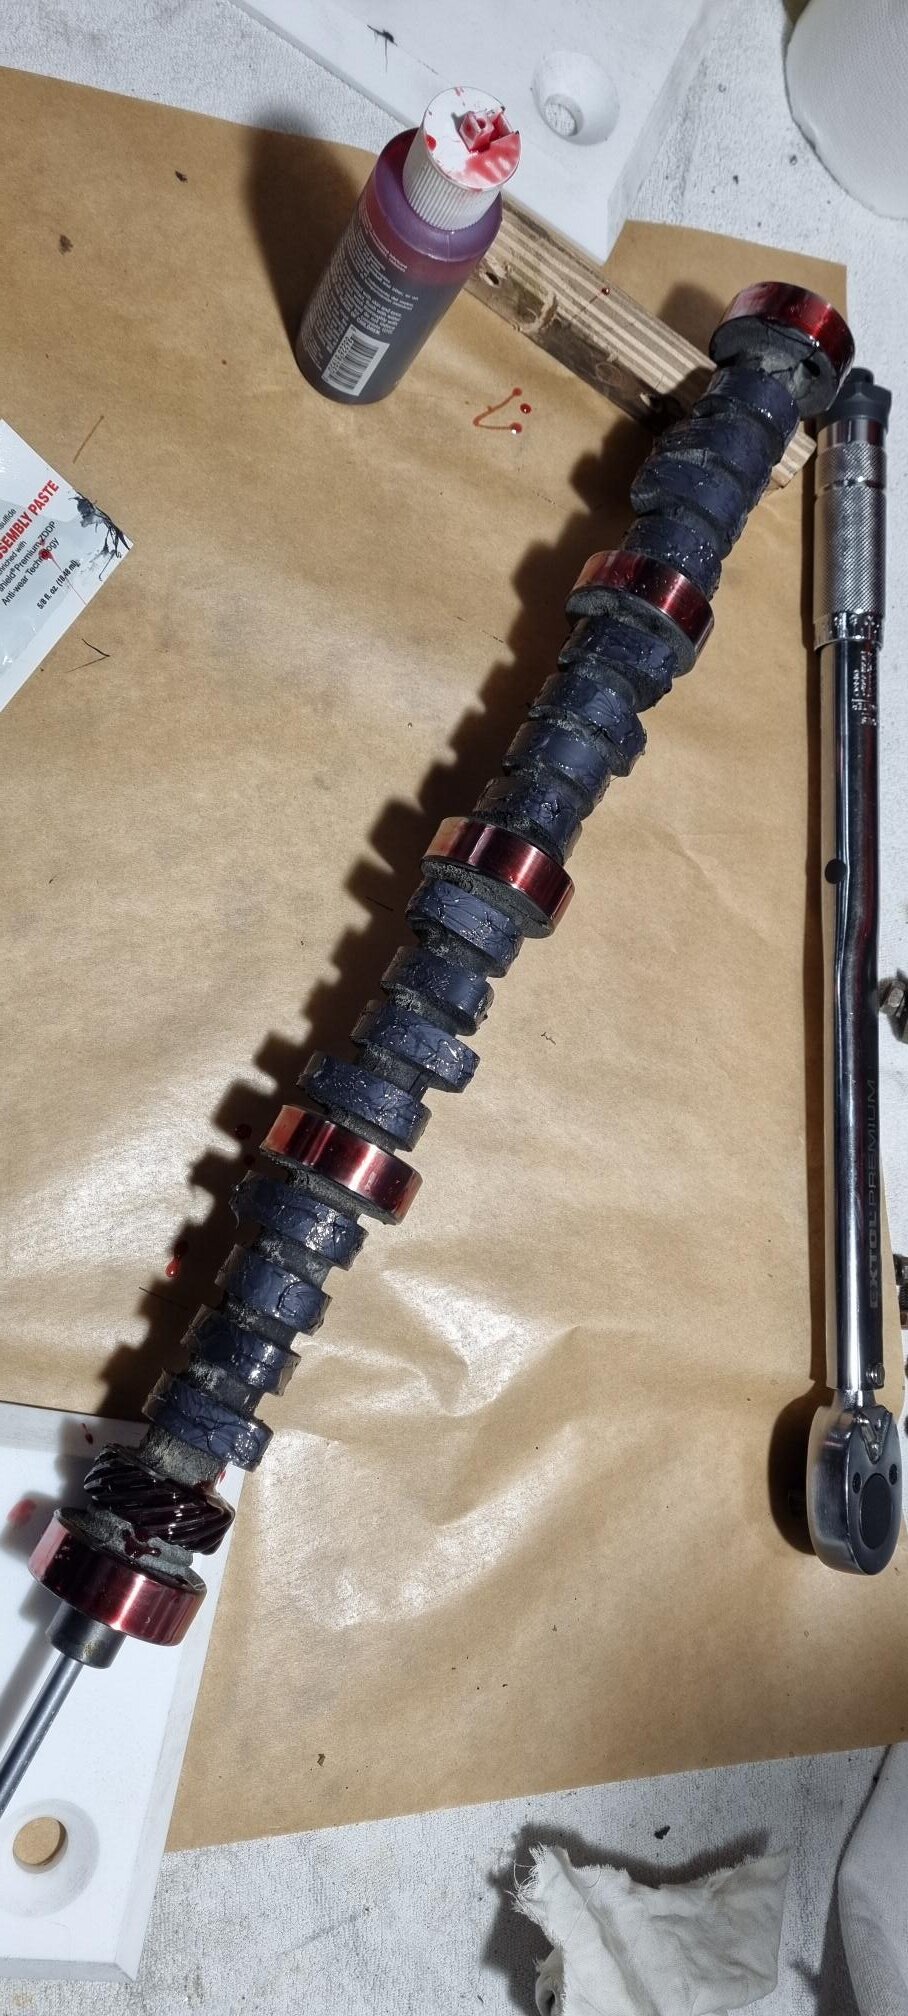
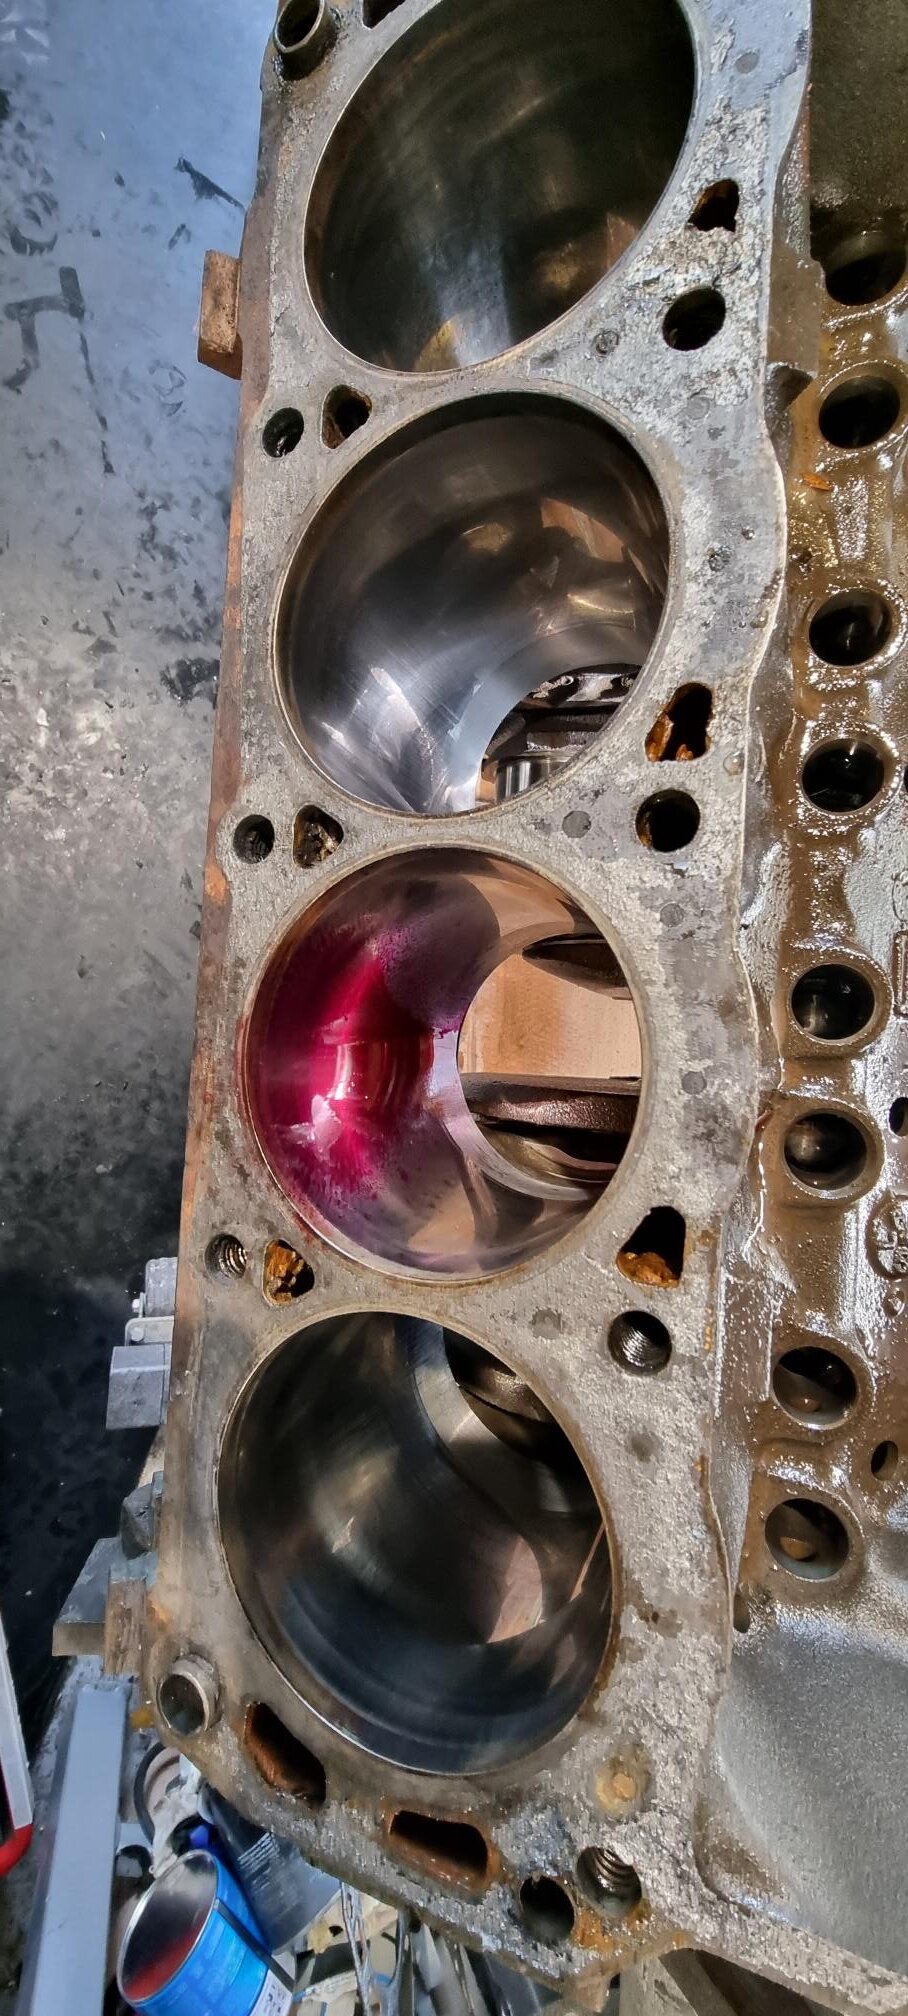
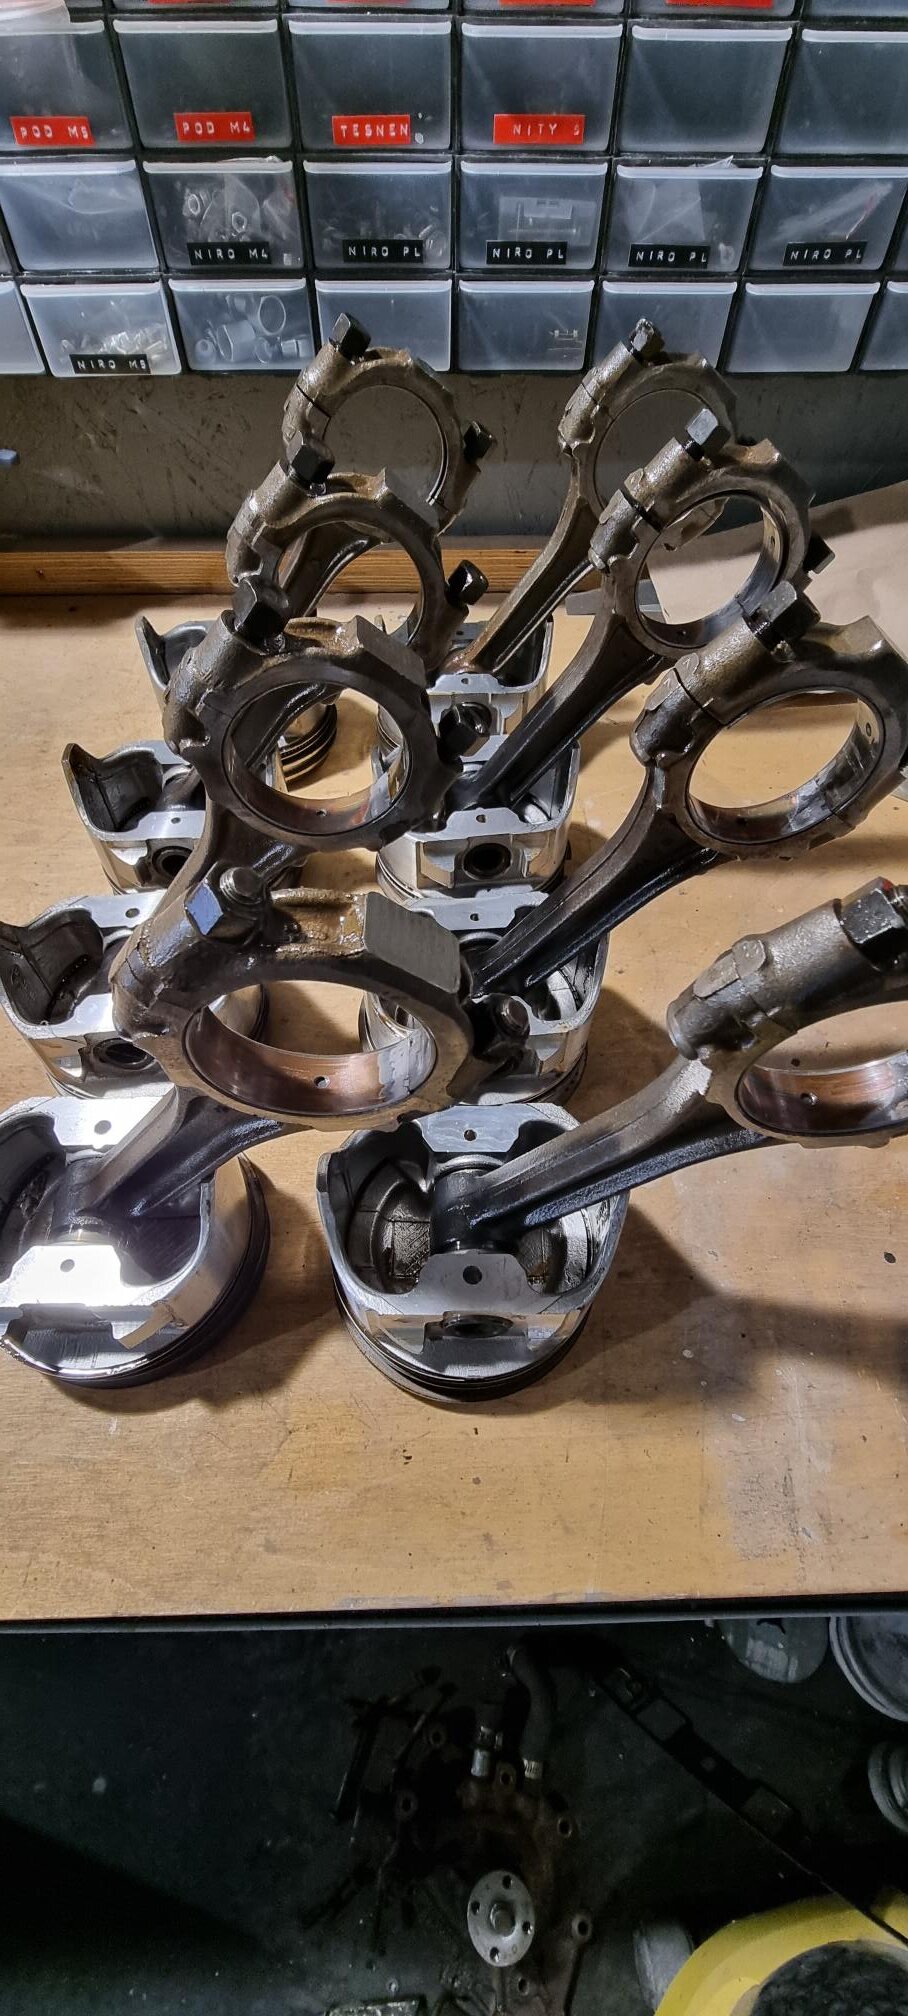
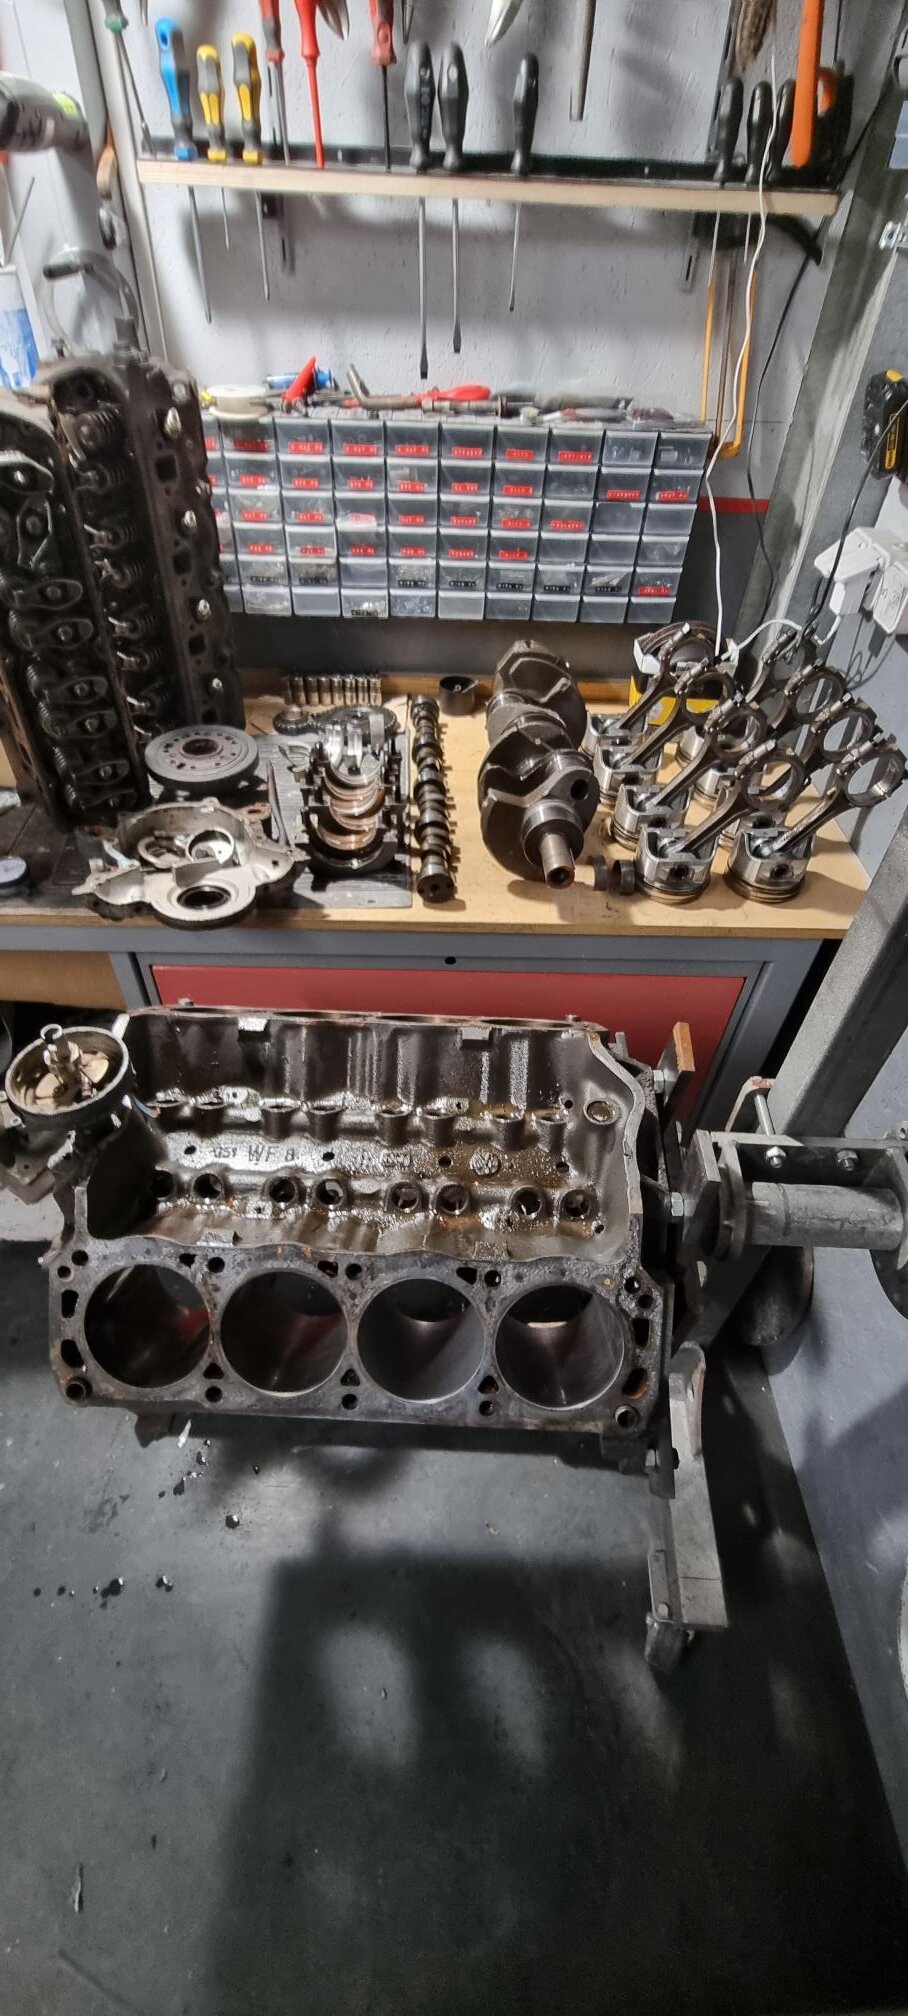
cam bearings are installed, block painted, main bearings in and I started piston installation.
Since I didn’t machine the block, recommendation of machine shop was to bring the clearances on mains and rod bearings to the edge of range. I have ca. 0,0015 on rod and 0,002 on mains of inch clearance.
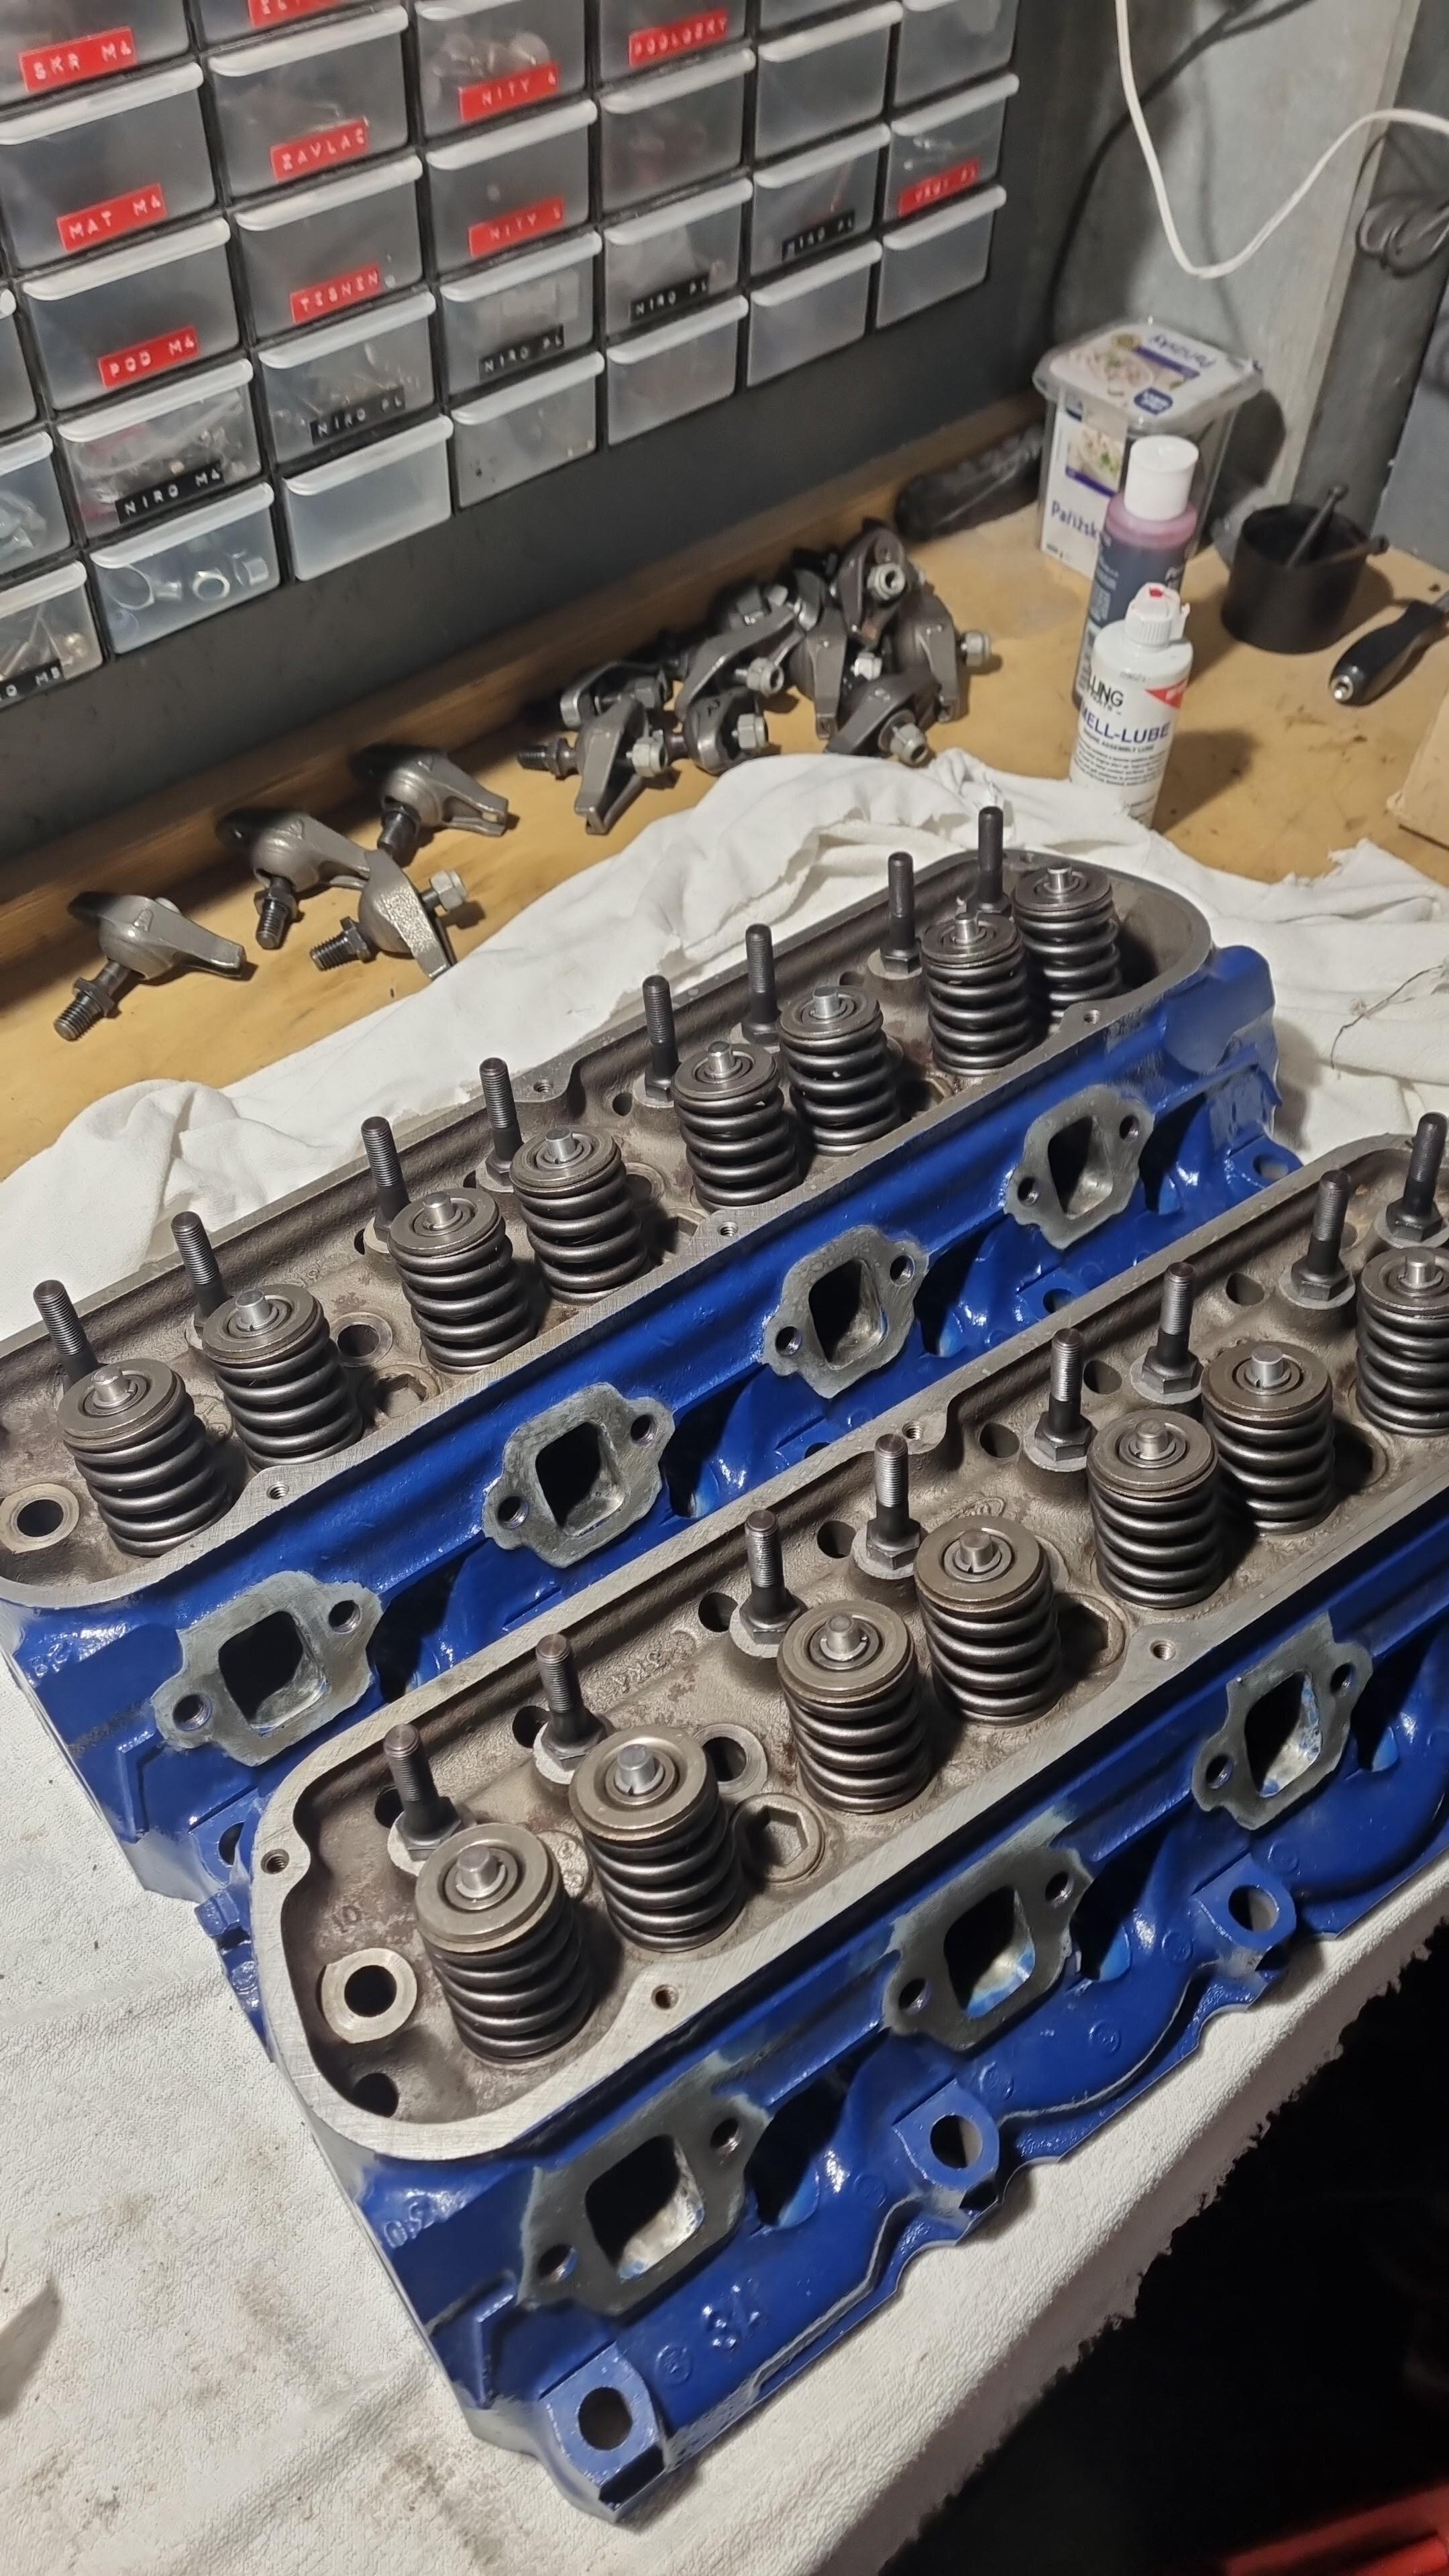
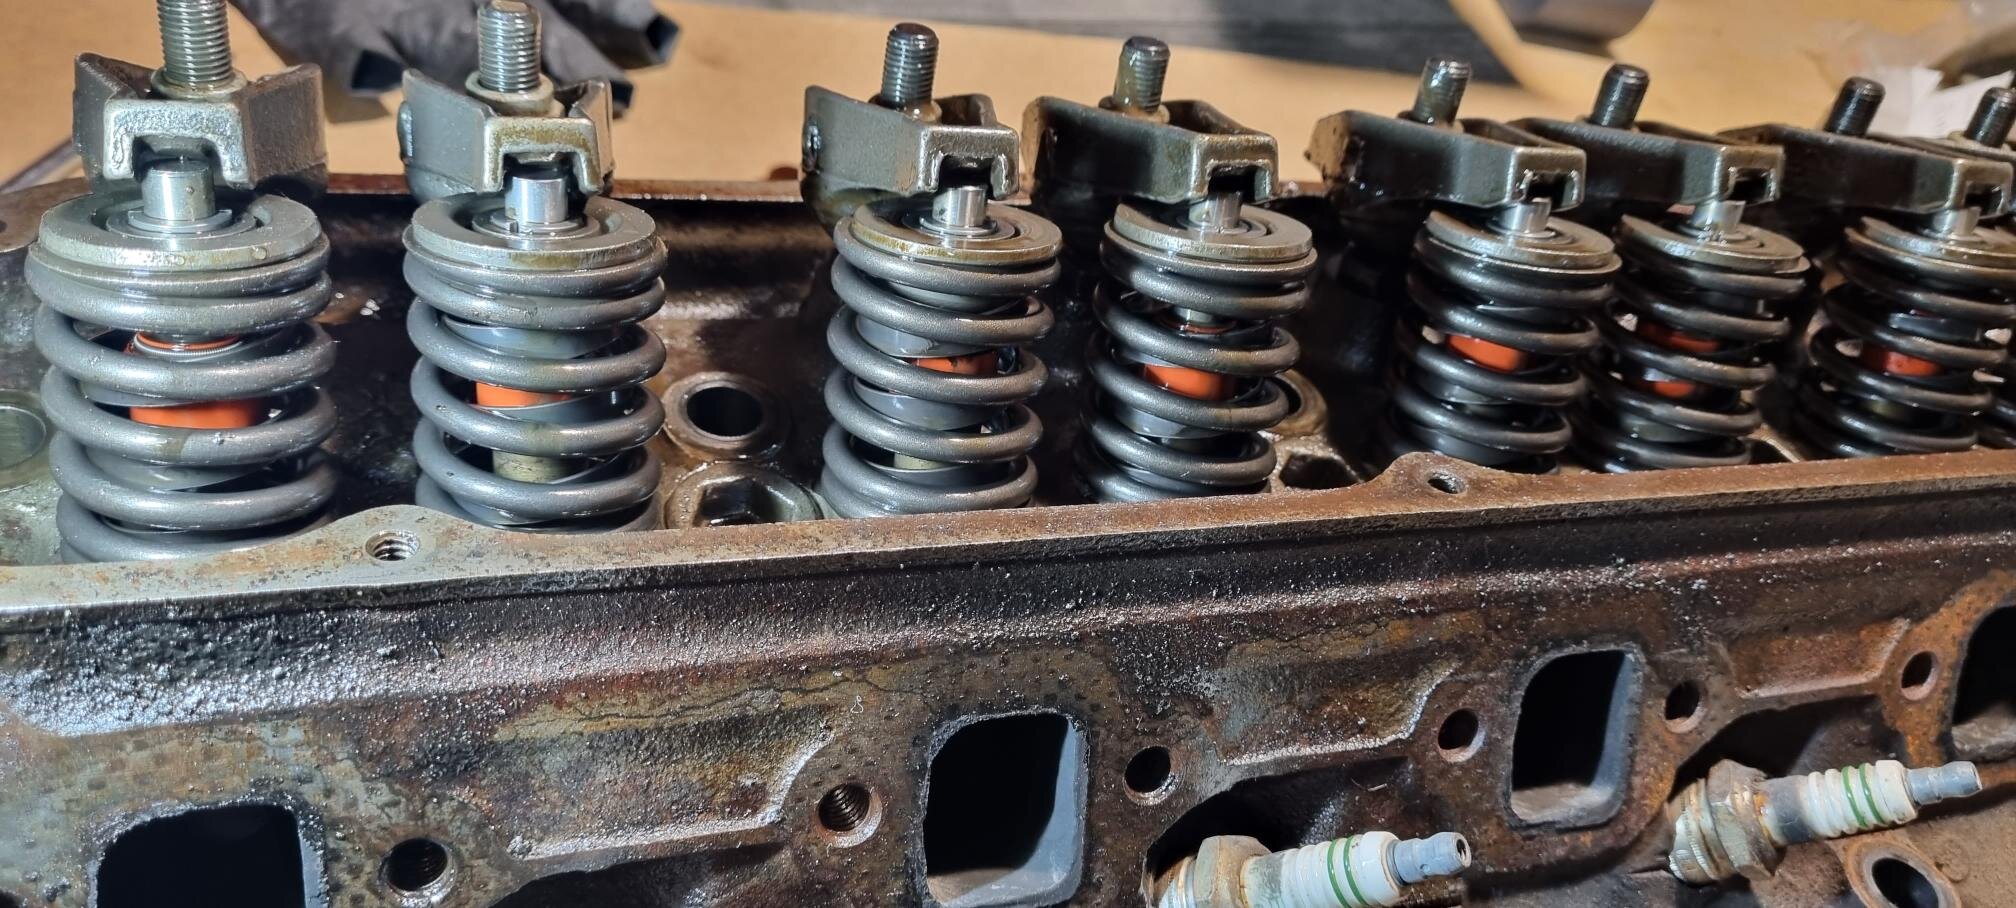
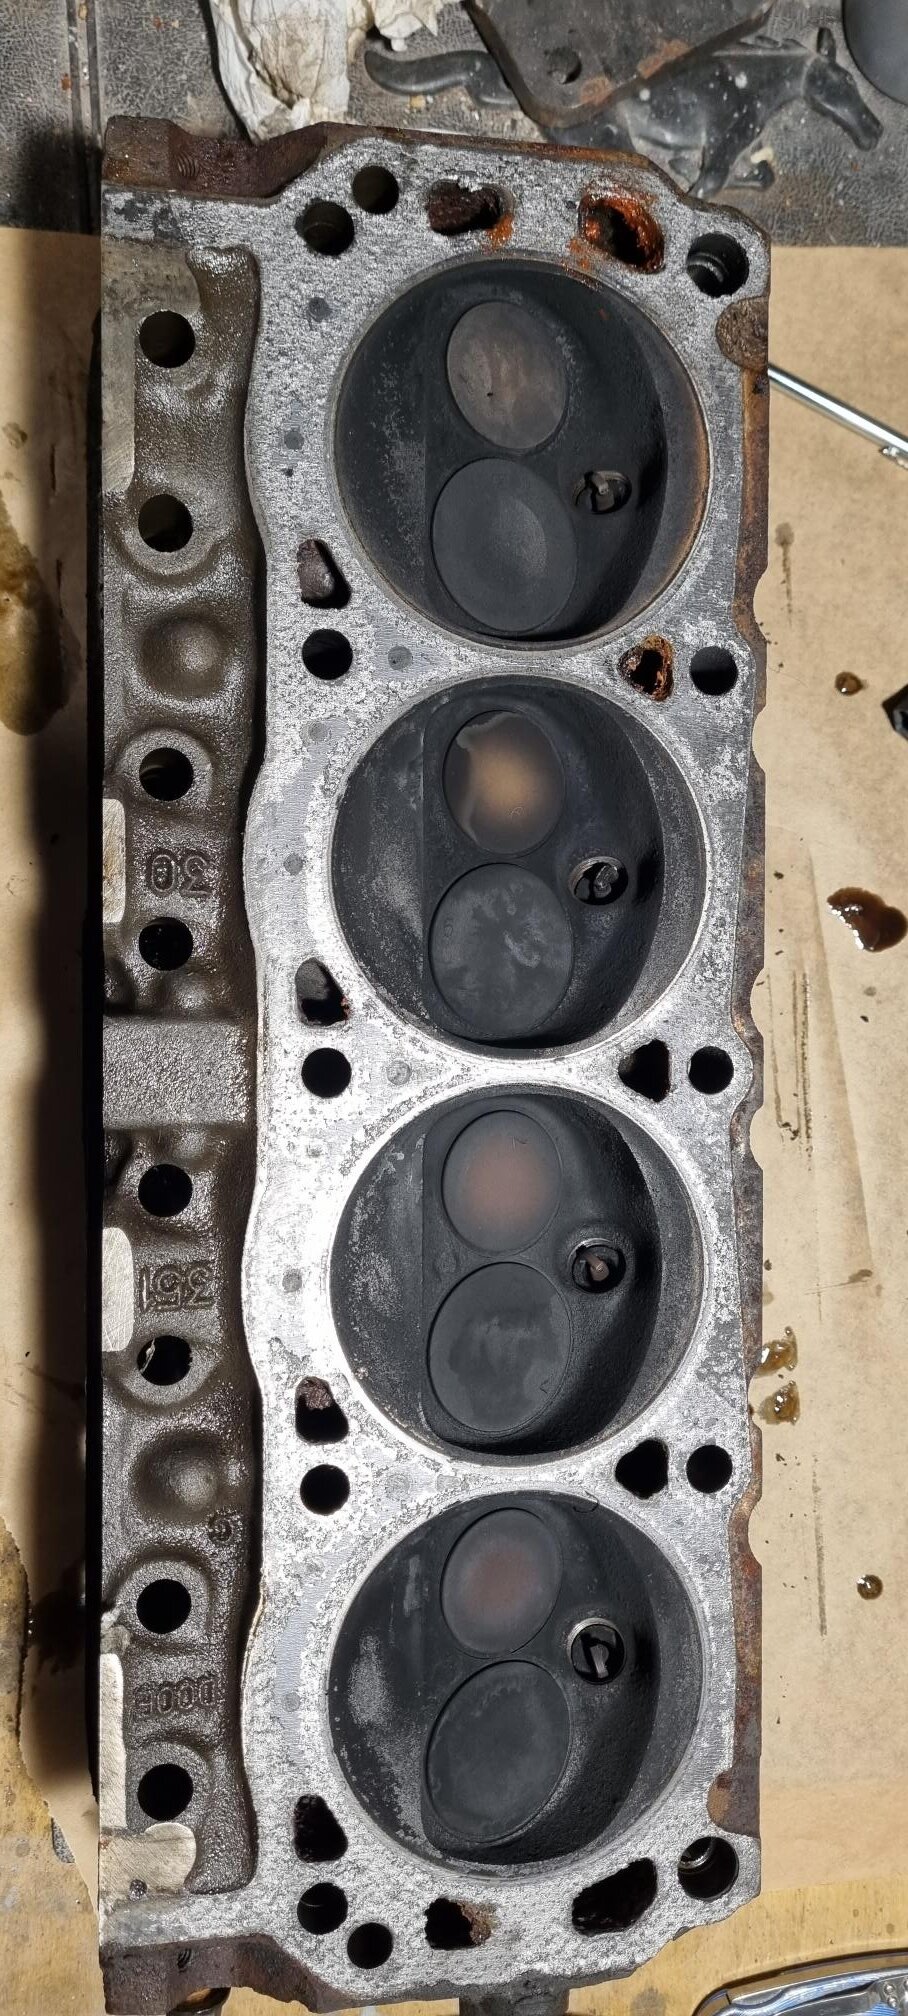
Meanwhile I matched head ports to size of gasket / manifolds.
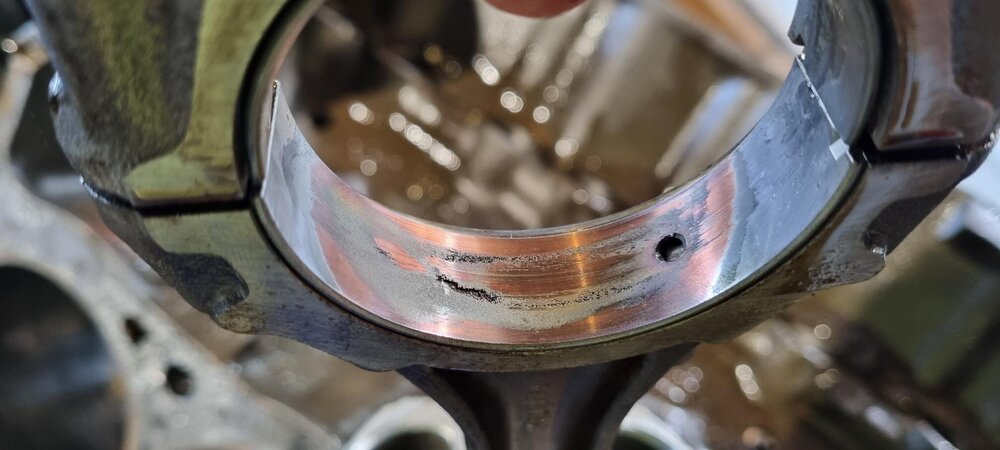
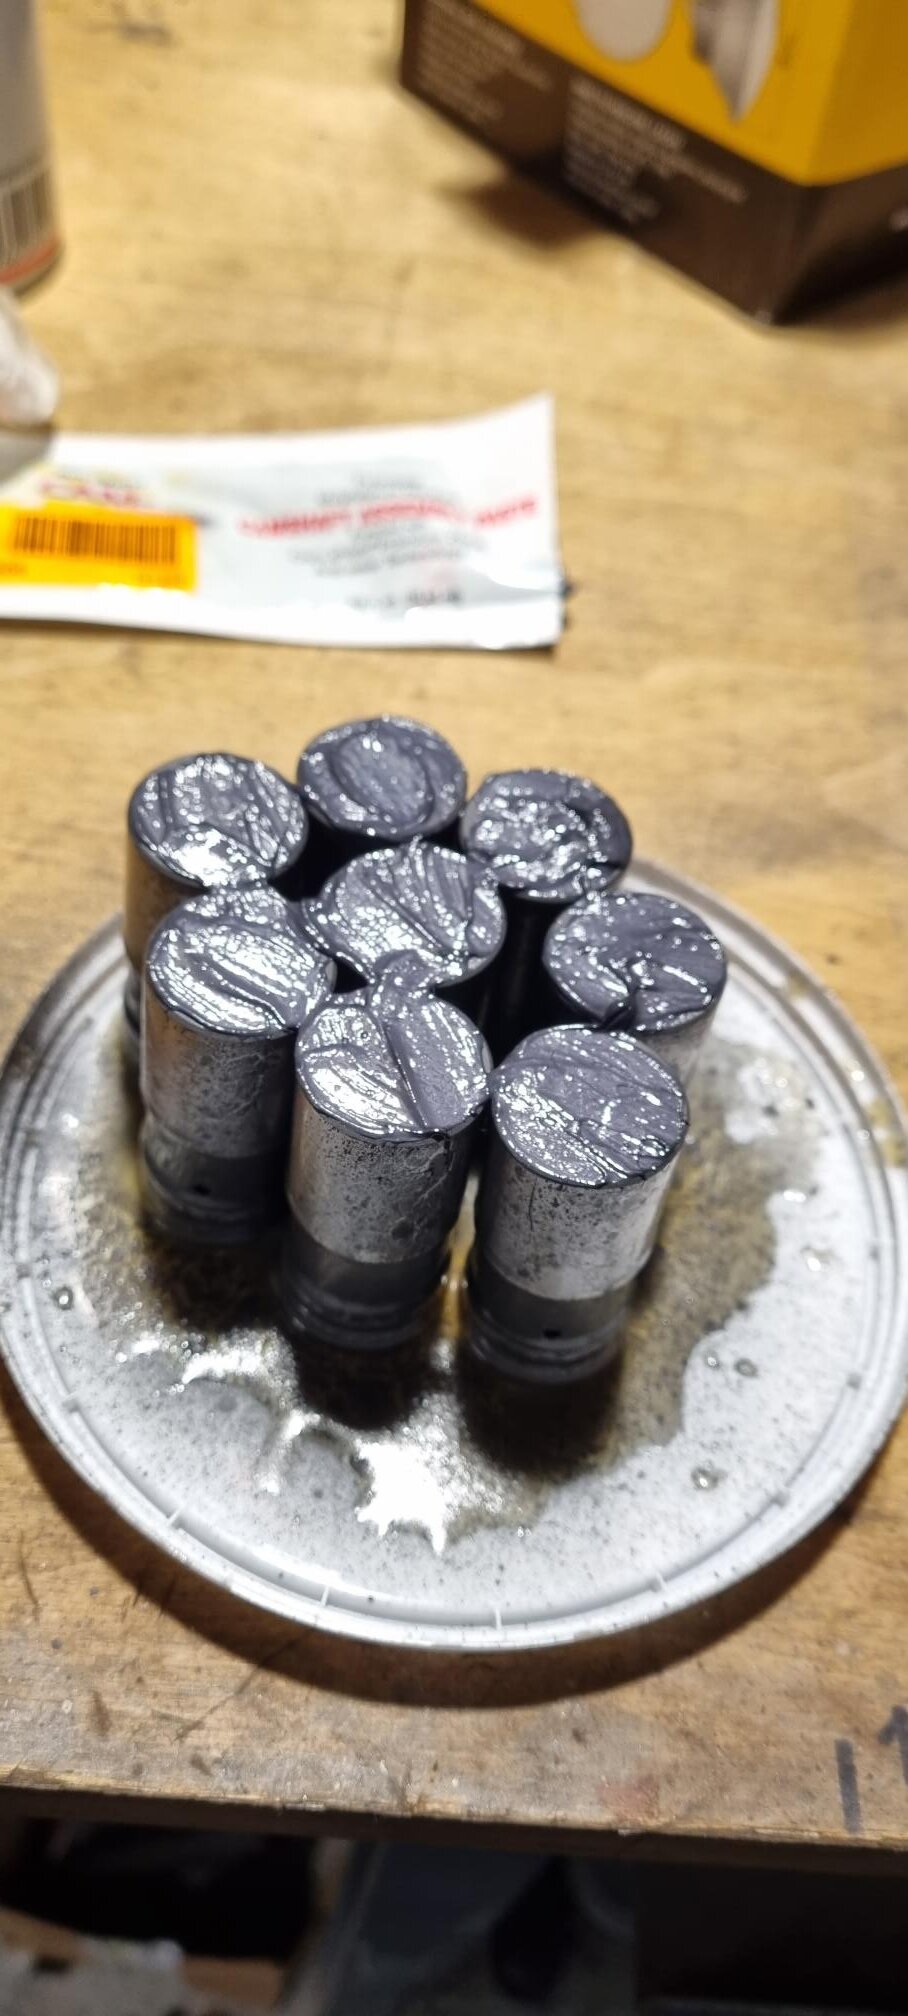
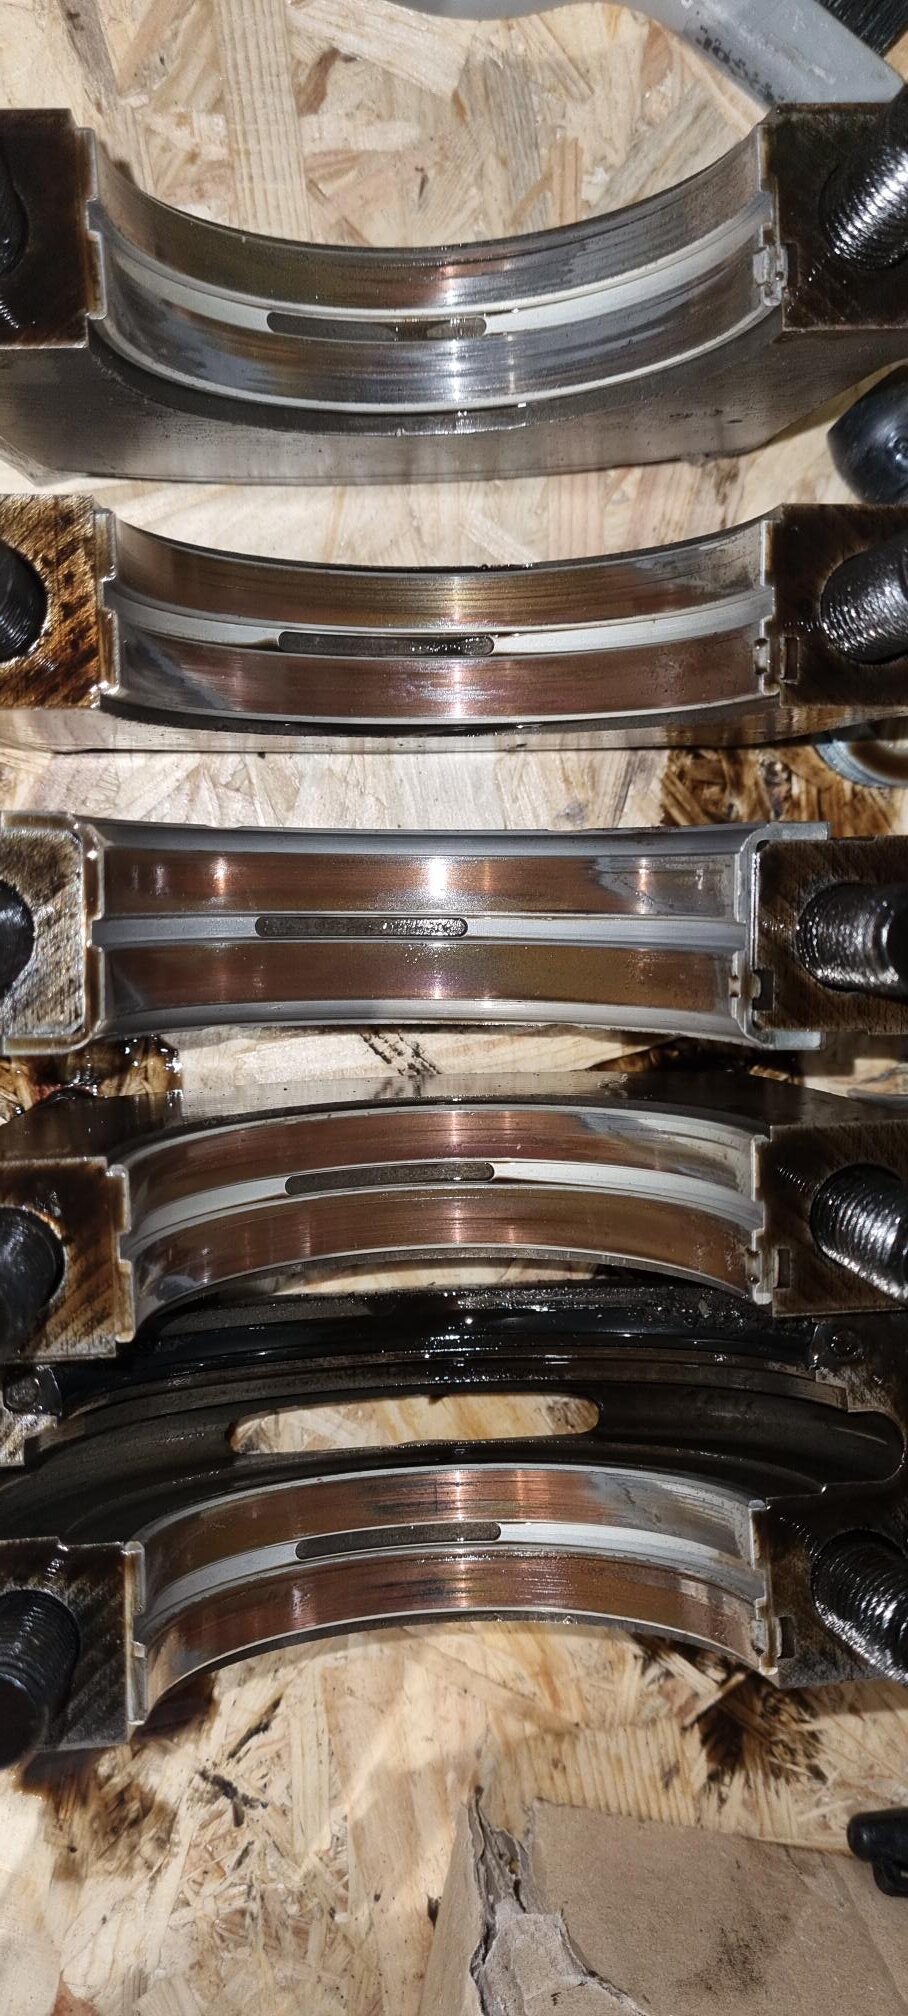
After I opened first 4 boxes of rod bearings, I realized that they have different marking: A-2 and B-1. I spent hour looking for this in Malhe / Clevite catalogues but only mention I found of “B-1” was type of backing Material, but none “A-2”. Both halves are identical in dimensions. After I opened 5-th box the was only “B-1” sign on both halves. Does anyone know meaning of this – is it only batch sign?
Thanks


-
Damn, that sounds good :)
Thanks guys, I'll do it that way - anyway till I came home from work any of that cam was still on stock...
-
Hi Guys,
just a quick question...
Finally I found some cam on stock at rockauto:
https://www.rockauto.com/en/parts/melling,24211,camshaft,5260
Its Melling 24211
Advertised Exhaust Duration 306 Advertised Intake Duration 300 Basic Operating RPM Range 3000 Cam Type Hydraulic Flat Tappet Computer Controlled Compatible No Exhaust Duration at .050 inch Lift 234 Exhaust Valve Lift 0.520" Exhaust Valve Lift with Factory Rocker Arm Ratio 1.600" Intake Duration at .050 Inch Lift 224 Intake Valve Lift 0.497" Intake Valve Lift with Factory Rocker Arm Ratio 1.600" Lifter Type Hydraulic Lobe Separation 112 Can I use it for stock engine (I just matched intake and exhaust openings on stock heads to gasket size)?
Thanks a lot for some reply
-
-
Hi Guys,
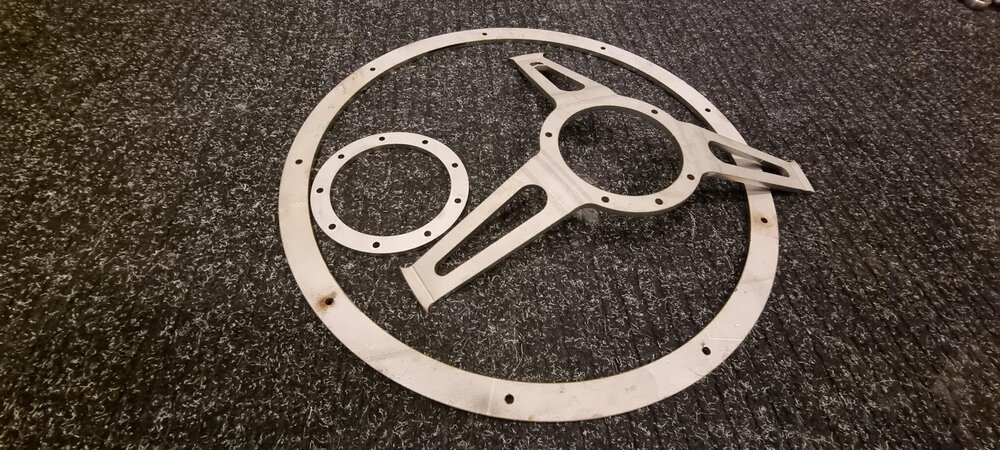
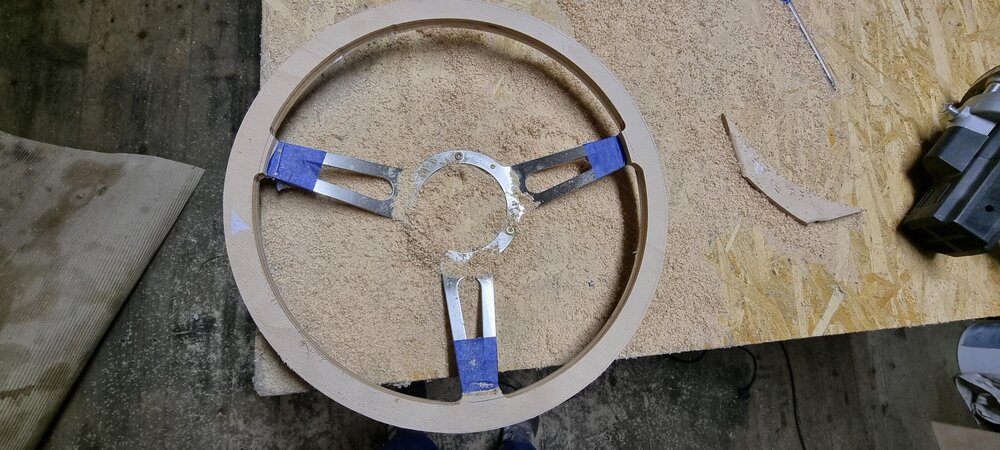
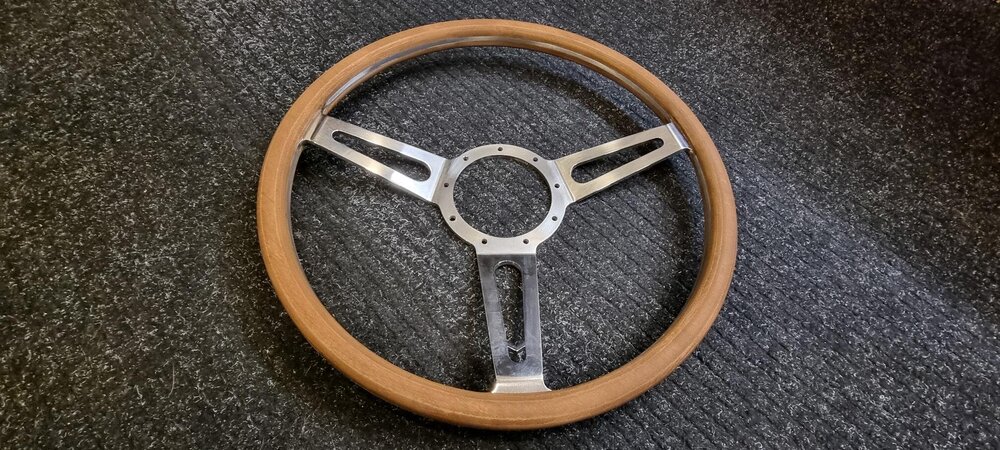
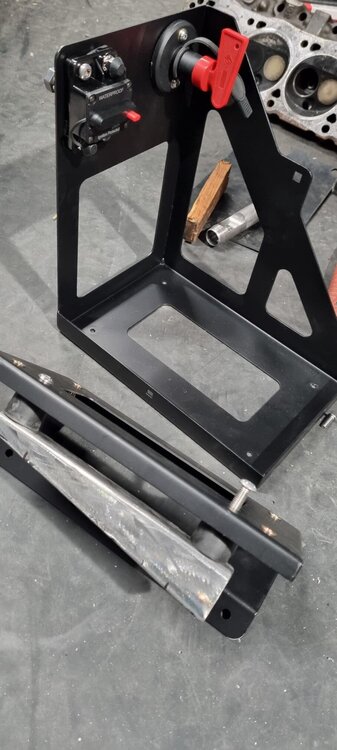
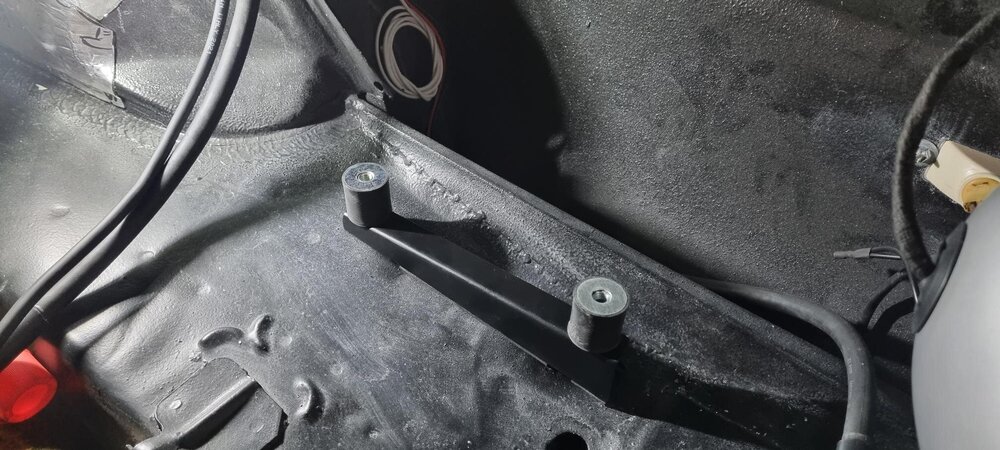
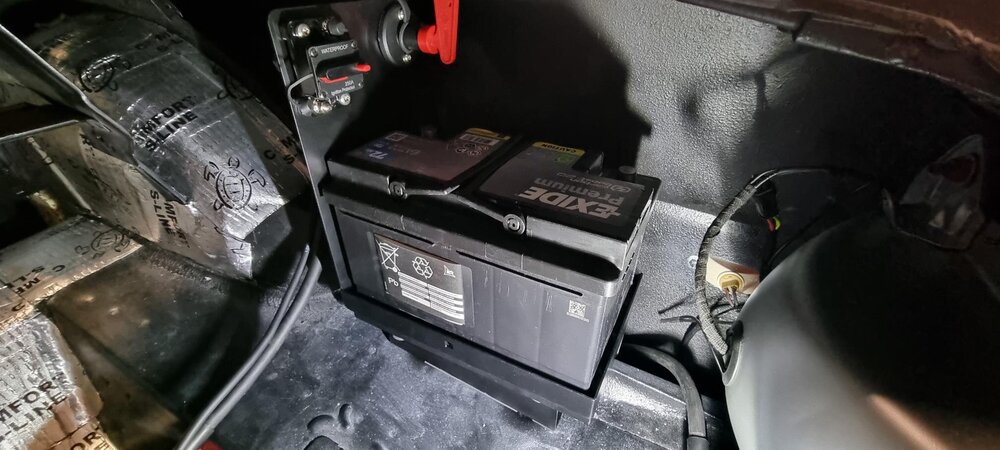
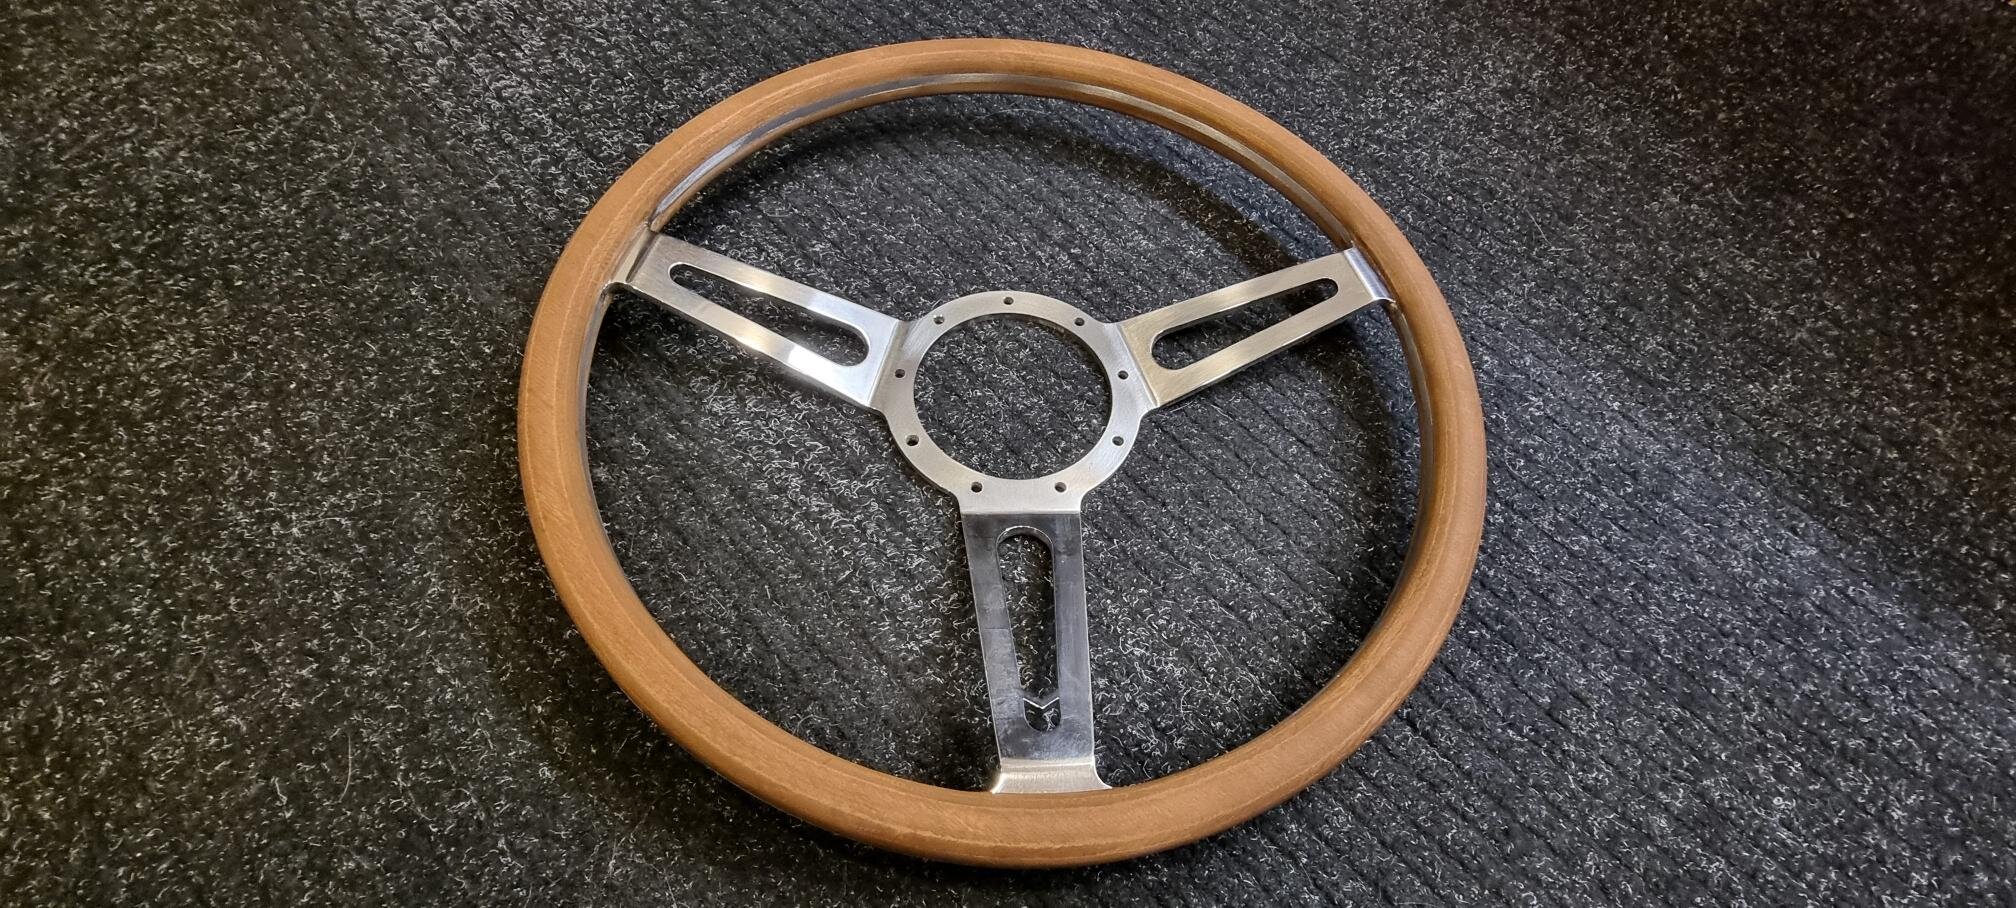
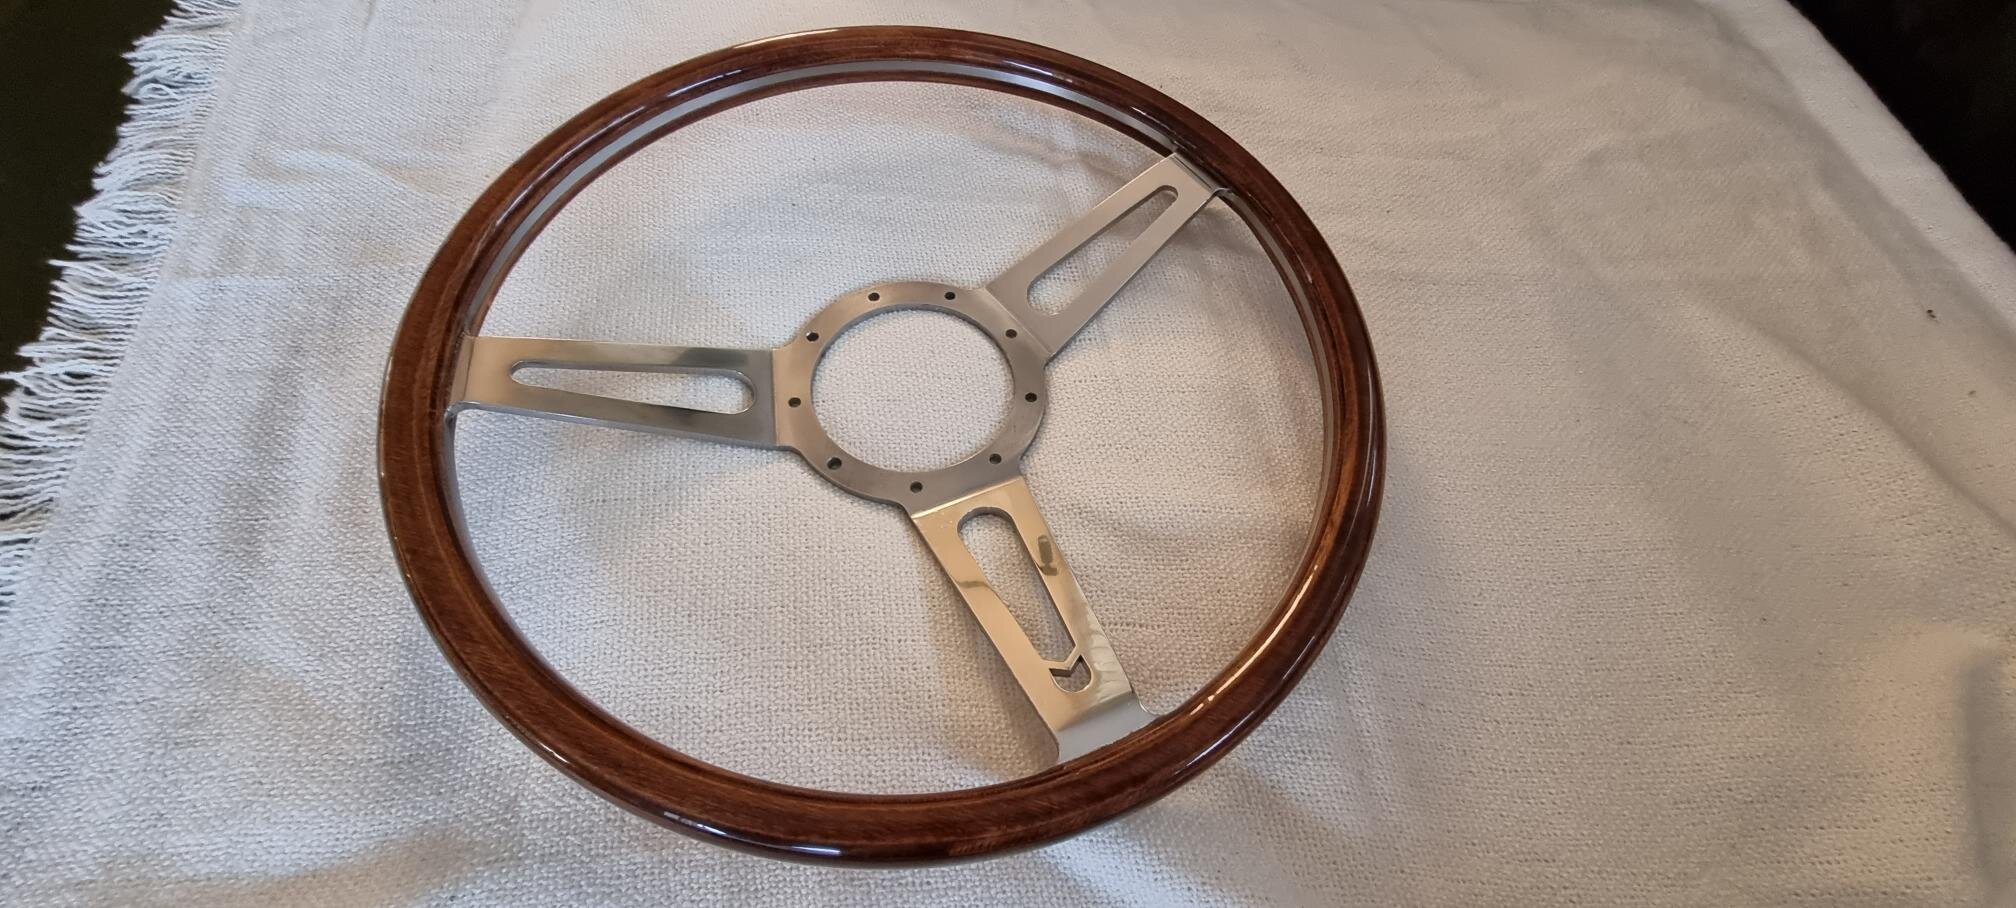
so, my euphory after my first engine parts shipment came only after a week since order (Rockauto) is gone. I received connecting rod bearings, cam bearings, oil pump, timing chain but the rest of delivery (with main bearings of course) got stuck at our famous customs to. Since December 12th I have no respond from them what I should do to get the parts. My “Christmas” build is gone, so I spent Holidays with some unnecessary work. After I build my custom steering wheel, I finished battery relocation pan with circuit breaker and kill switch.

-
Hi Guys ... after a while (that felt like forever)
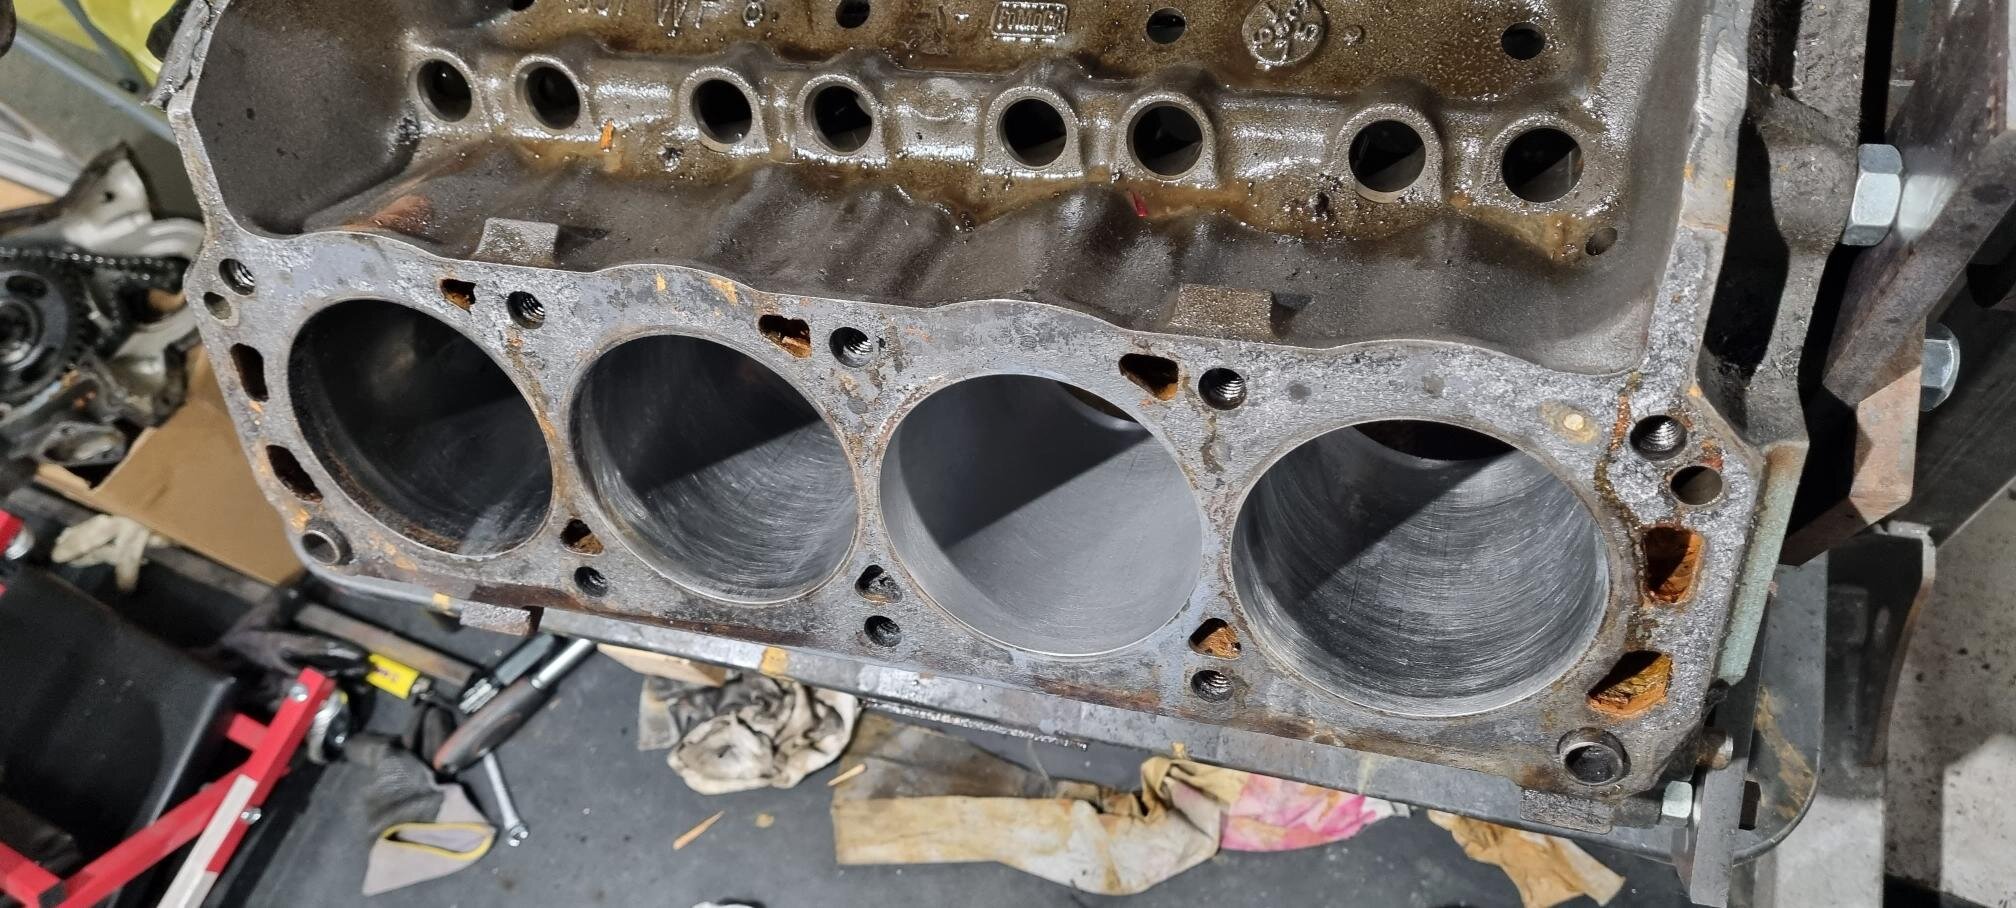
So my lesson learned - never judge engine after removing one cylinder head :)
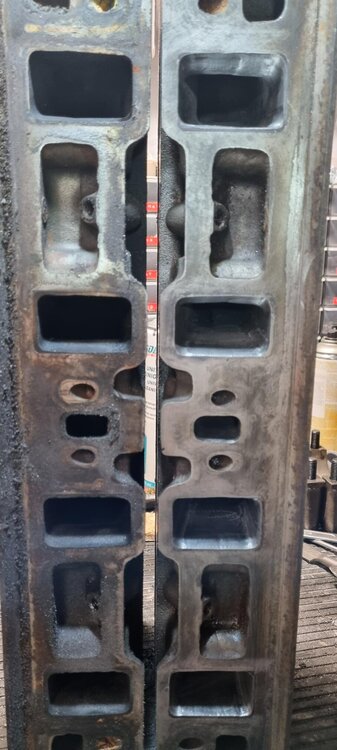
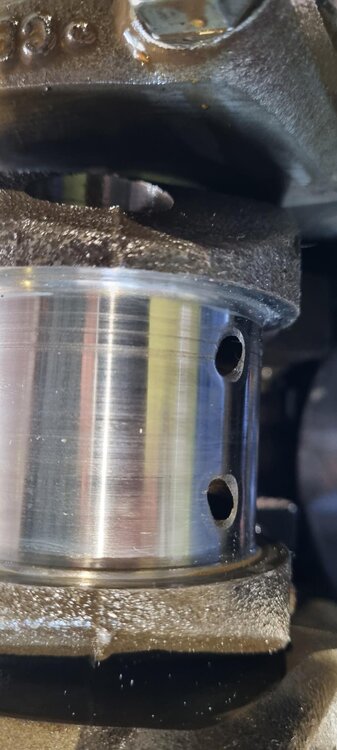
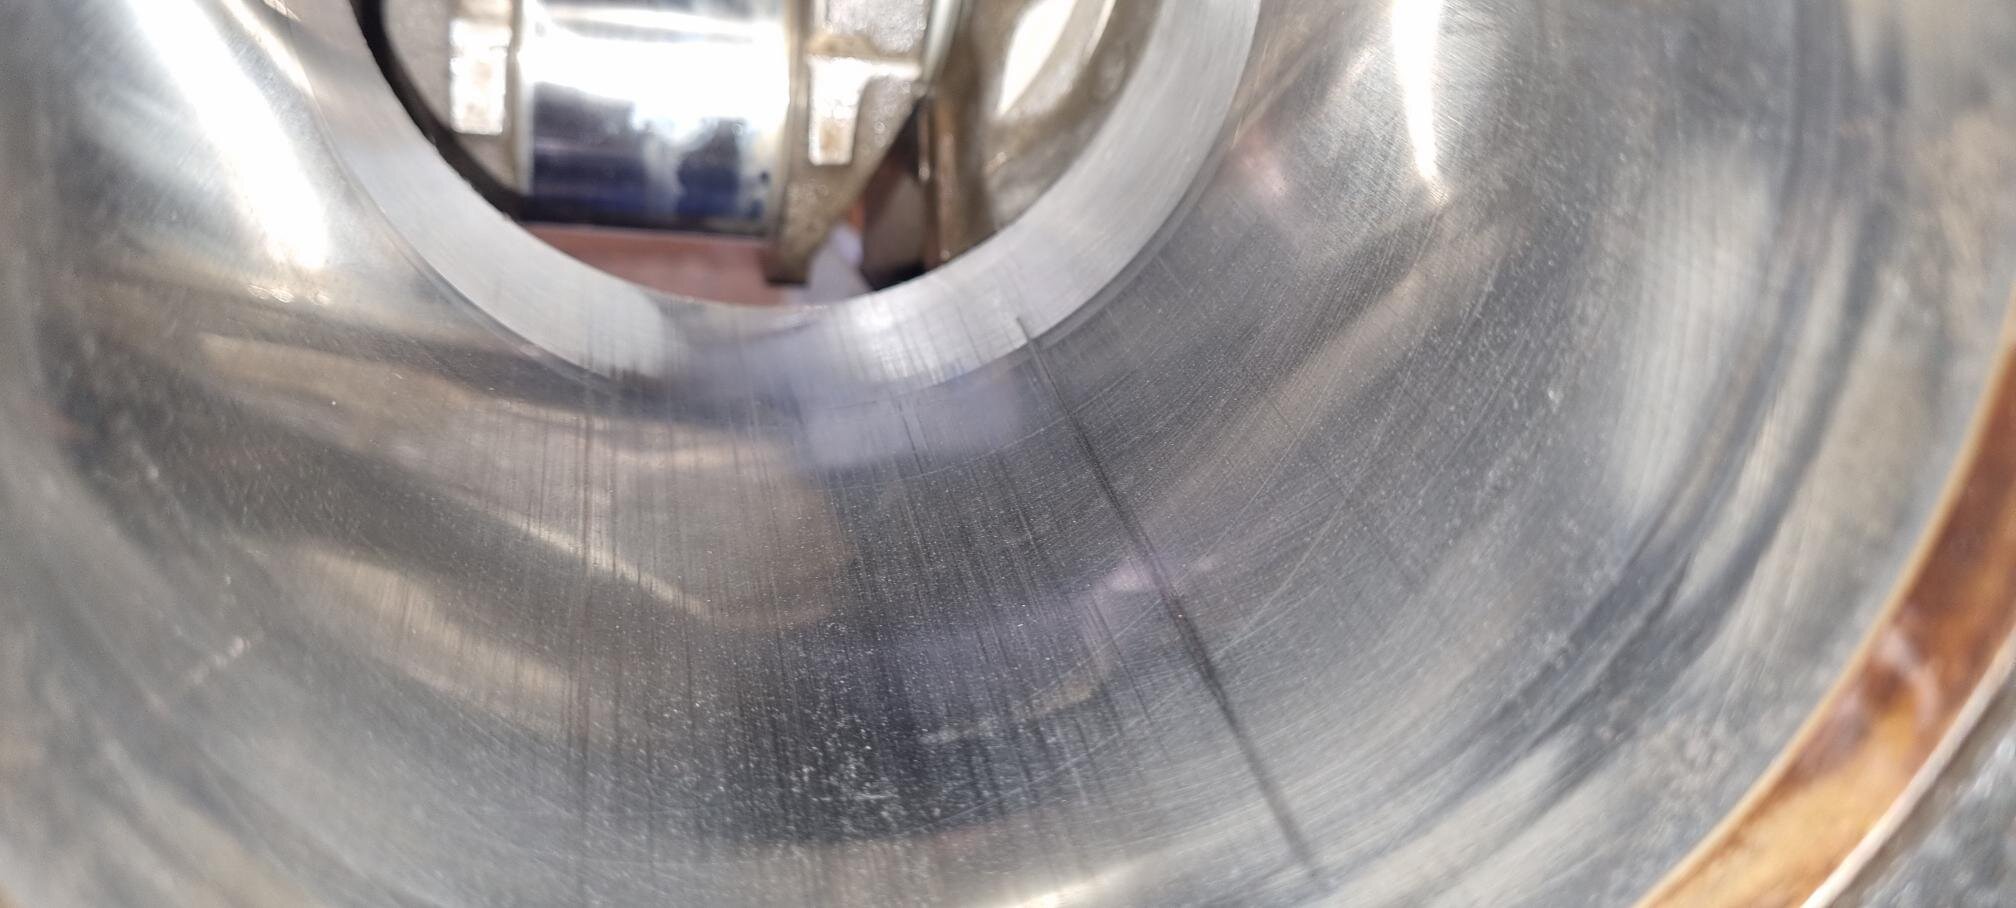
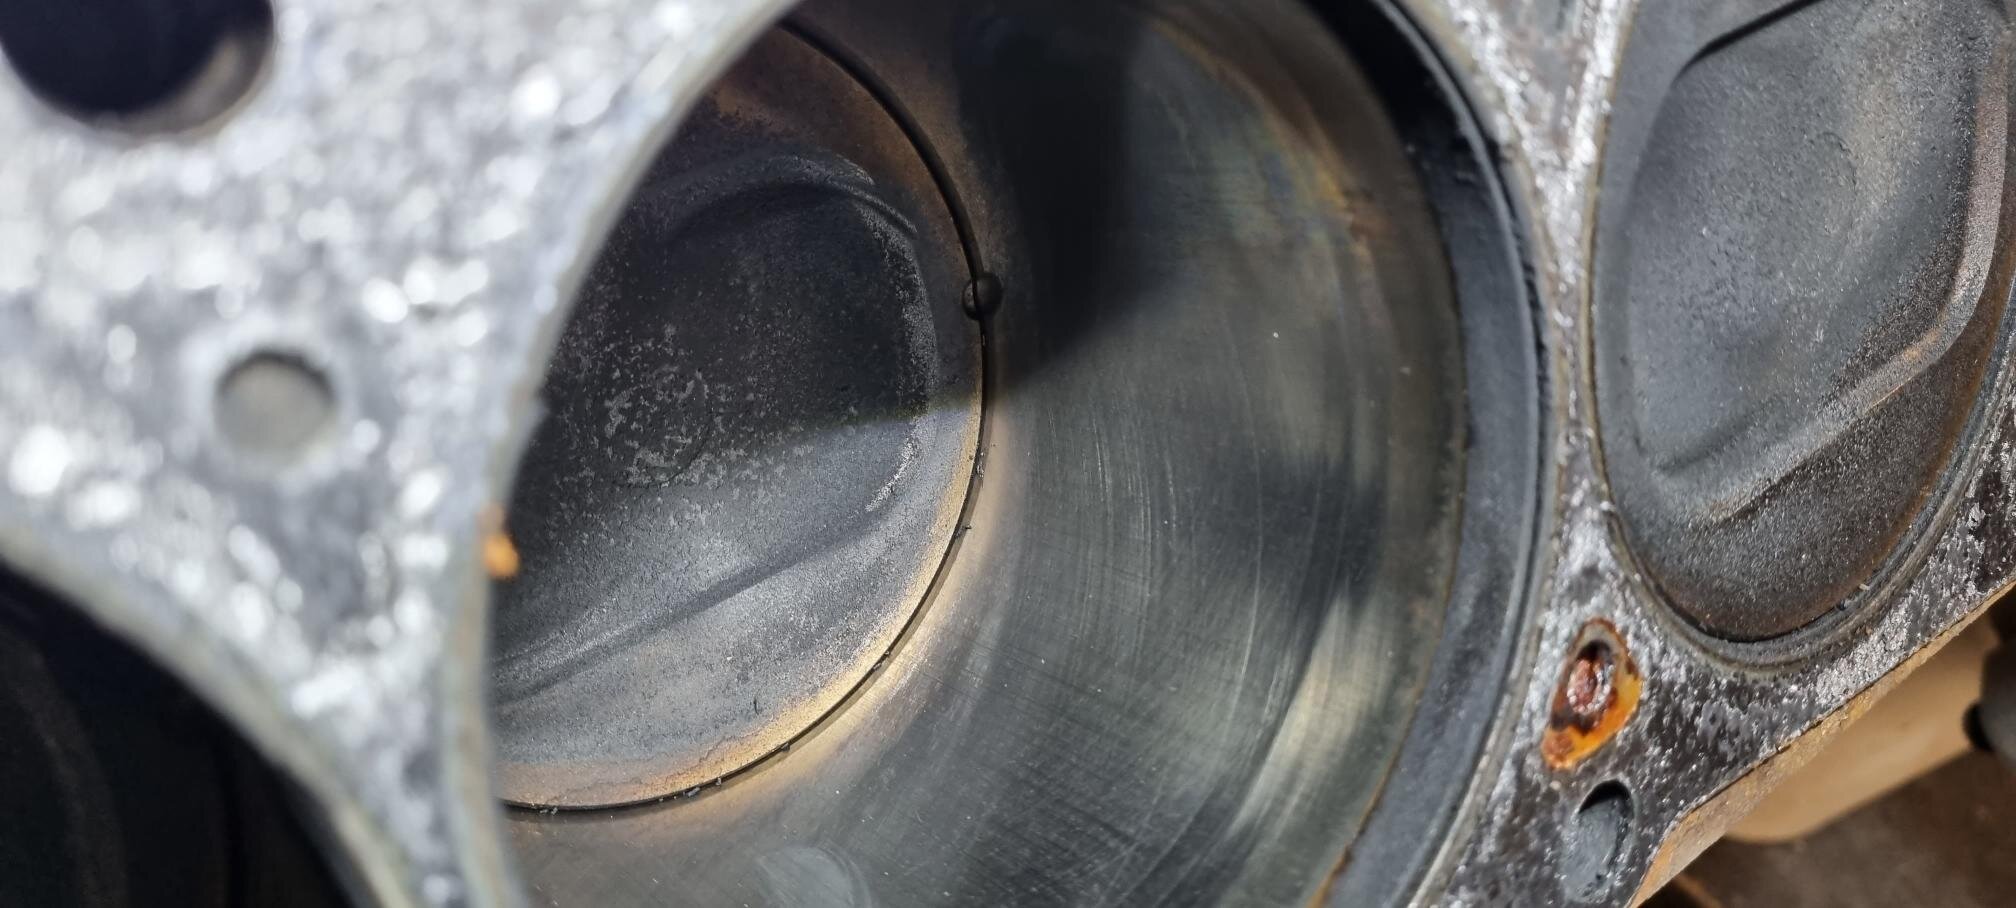
After I took down the second one o found some scratches in cylinder 6 and suspicious spot in cylinder 7 that could be a crack. So my optimism was gone and I knew I have to disassembly whole endine. I made penetration test of cylinder 7 - and it came out that it was no crack. The biggest disappointment was then I realized that the engine is already 0.040 over. The bearings of connection rods were also destroyed as well as on crankshaft.
I spent hours on net to browse 351w topics and videos, what are my possibilities. To bore it over to 4.060" is to risky, to sleeve it to expensive and to find some good block for reasonable price in europe is impossible. So I decided to just refresh the engine (hone the cylinders, re ring it and change all bearings, timing, cam, lifters and oil pump), put it together so I can finish the car. With finished hone I was able to get roundness and taper to factory specs, but my bore is up to 0,002 inch over the top limit. Anyway, no option at this time, at least the crank is 0,010 under so I can let it grind to 0,020 and balance. Im looking now for parts to order. Except piston rings and camshaft it should be no problem.
Rings - I'm not sure if I buy 0,040 over rings the gap will be not too big (my worn rings make 0,026" gap). I'm thinking to buy 0,060s and grind them to size, but I don't know if the shape of rings is already different because of bigger diameter.
Camshaft - I can't find some stock cam or some alternative in any shop (everywhere is only edelbrock performer + )


 Grabber70Mach reacted to this
 -
Hi everybody,
I started the most exciting part of my restoration – engine. My goal is nothing extraordinary, just to have reliable engine around 300-350 hp. I'd like to buy some top end kit in the future, but I can’t find anything reasonable anywhere around right now.
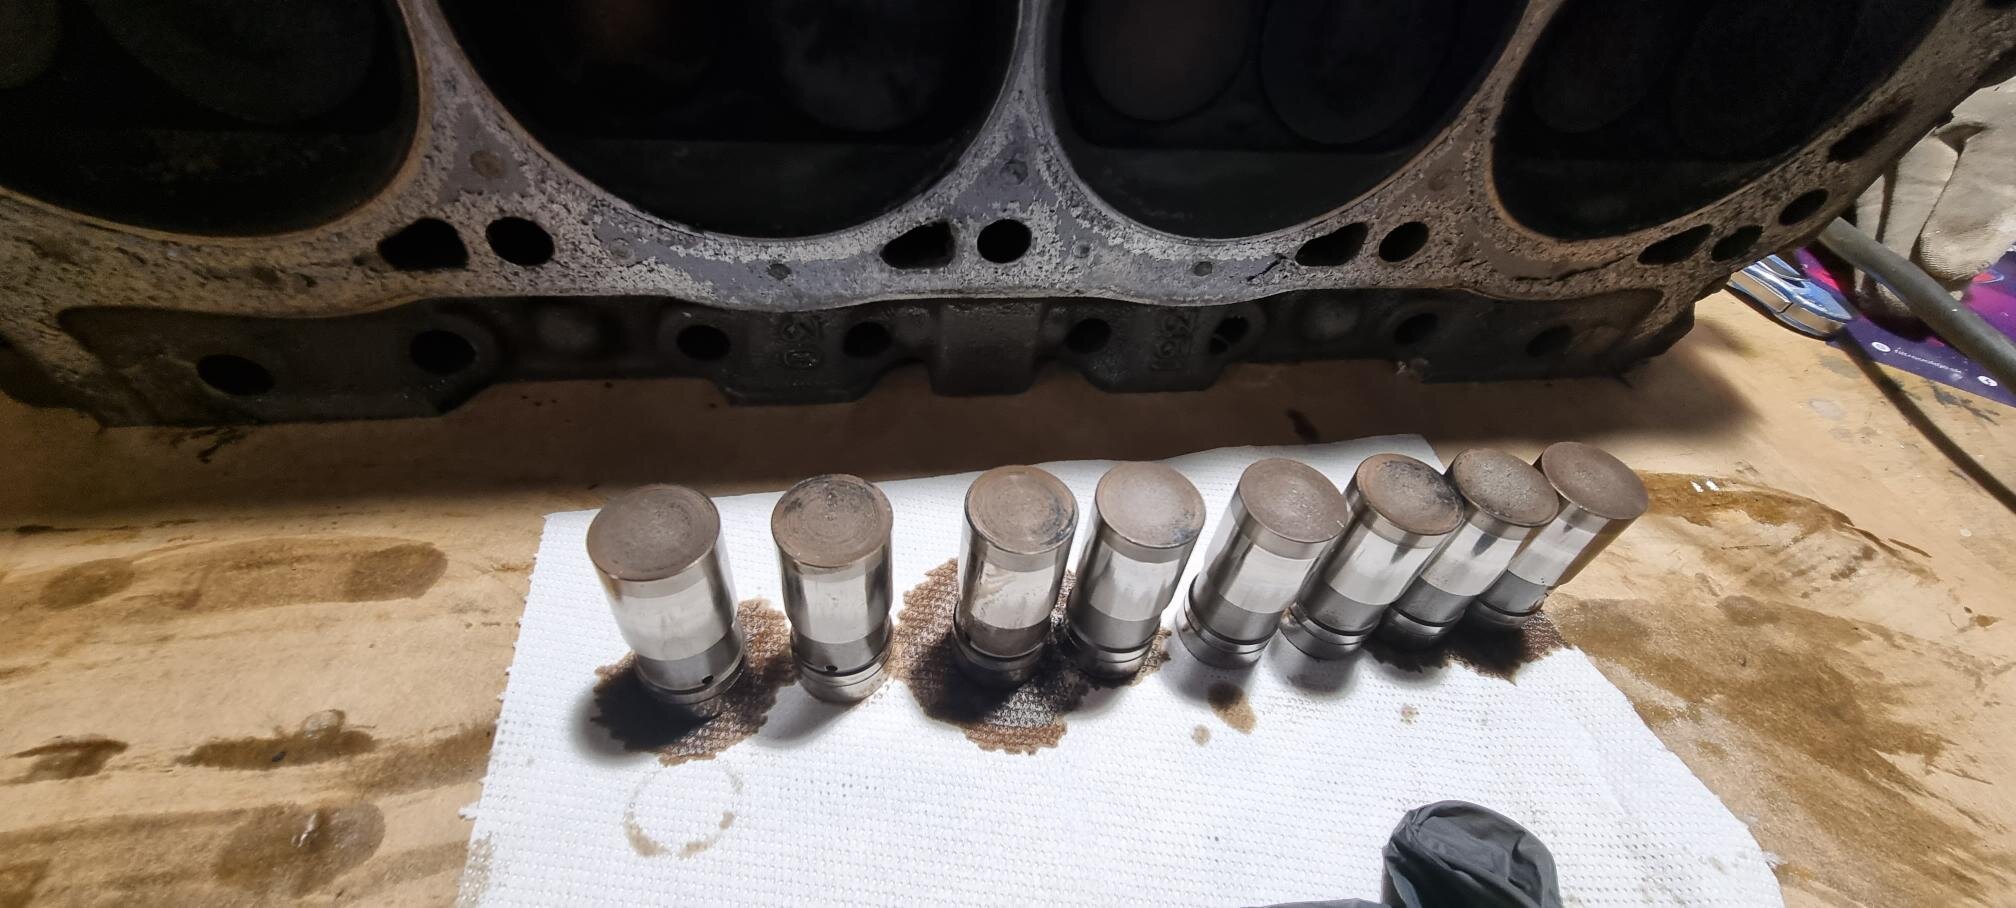
Last time the engine worked was 6 years ago. As I remember, smoke was no issue, and it did run … For condition check I made cold compression test, no additional cylinder lubrication, the max. pressure was achieved after 3-4 cranks. My readings were from approx. 168 to 180 psi – what I think is pretty good. Even condition of cylinder is not so bad – the crosshatch pattern is still noticeable, and I didn’t feel any step on top of the cylinder in end position area of first piston ring. On lifters is almost none wear visible.
What’s your opinion please: Can I leave the rotation assembly as it is (crank, cam, pistons), or should I replace some parts anyway? I don’t know the condition of timing chain yet.
At this point I’m thinking to just reseal whole engine (inc. frost plugs) and just slightly port heads (remove and open overhangs on openings edges) and leave it as it is. Anyway, I think my next upgrade will be just EFI for better cold start and smoother engine run, until I start something more serious with replacing for T5 transmission.
Thanks for you suggestions...


-
On 9/28/2022 at 7:10 PM, RogerC said:Like what you did with the license light panel. Had an idea for something similar but haven't decided how I want to do it.
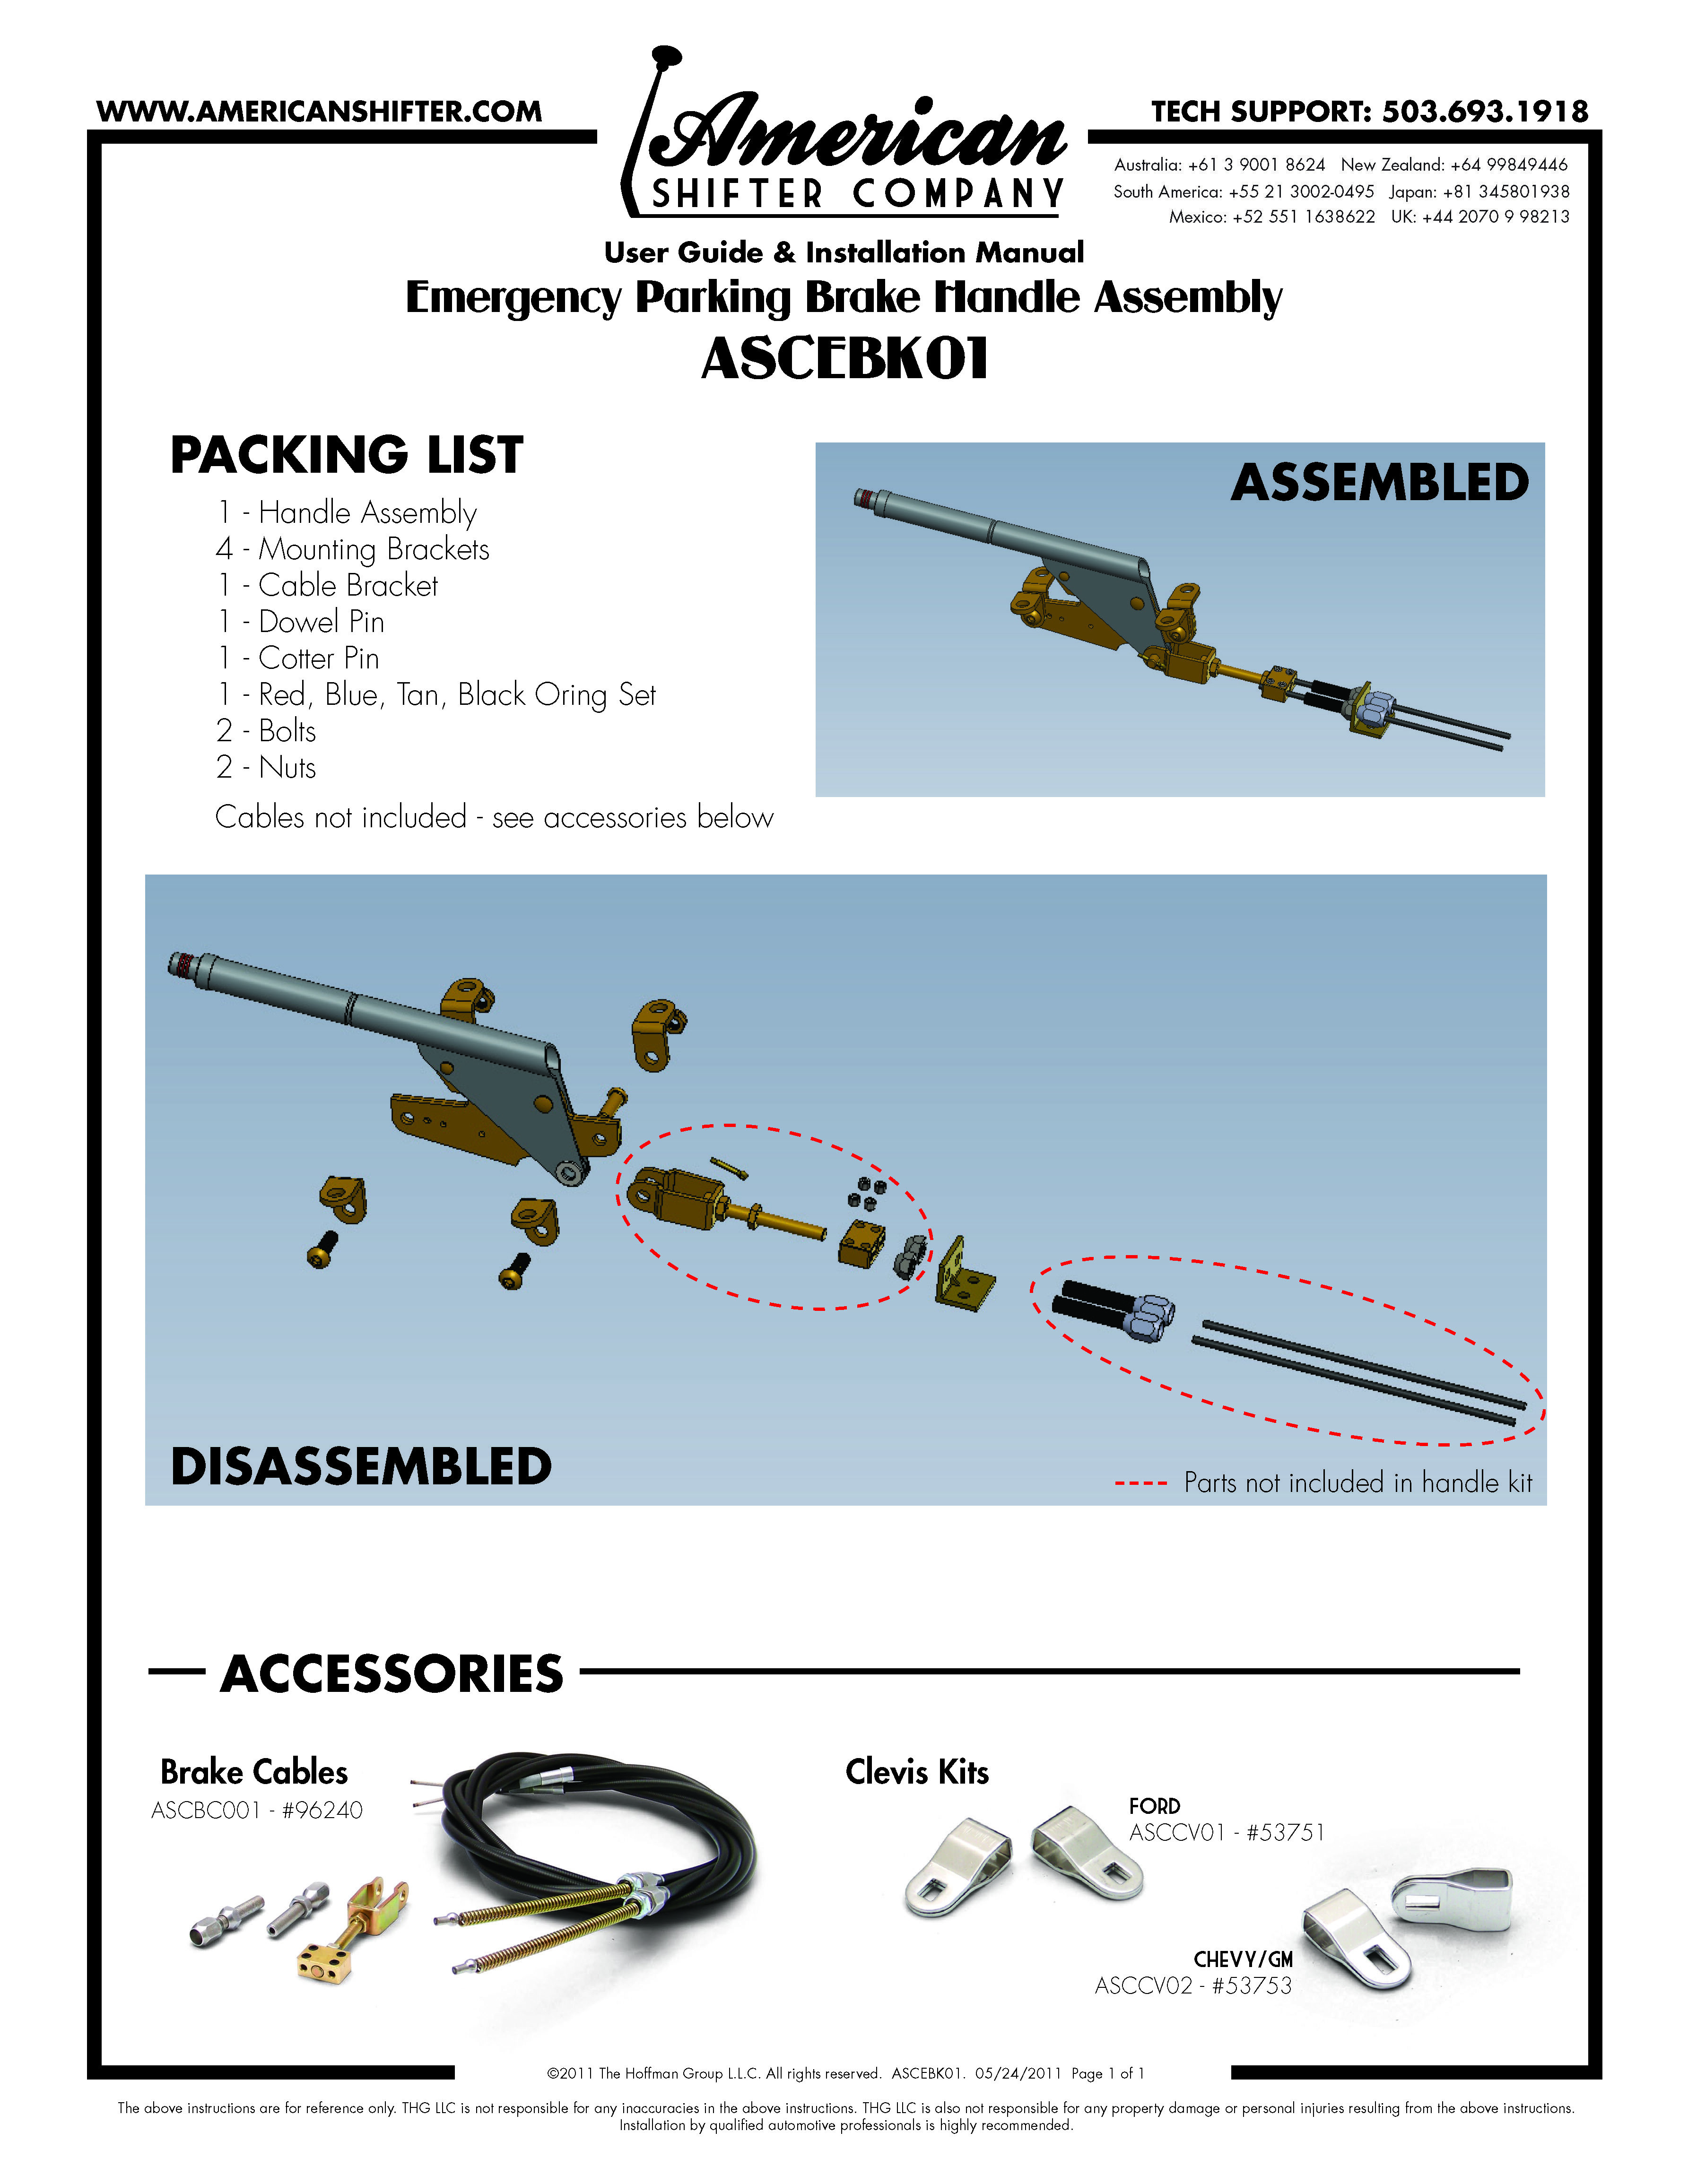
I'm using this from American Shifter Co. I think I got it on ebay about 5 years ago. Don't recall the cost but think it was around $60. Also bought the accessories kit but don't recall the price.

Thanks Roger, id checked them, but prices are already on Lokar level :( but at least nice details inspiration
-
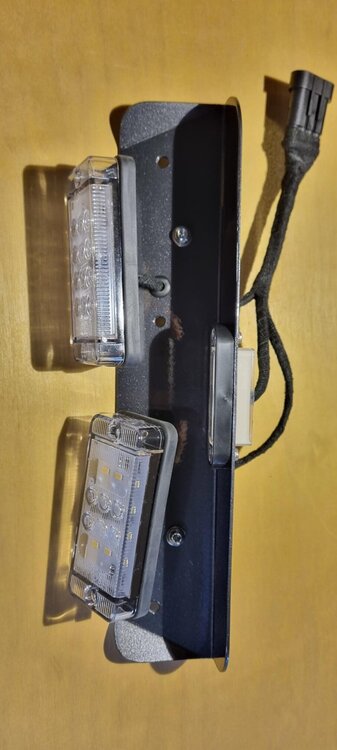
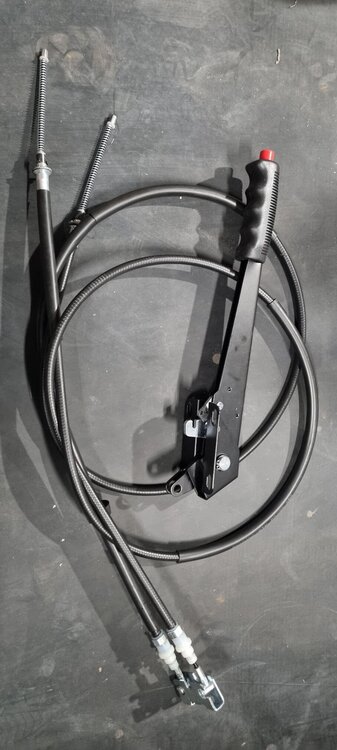
Just finished my light panel for rear fog, reverse and license plate light. Will be mounted in rear bumper notch and is all LED. After I saw YT video from AtotopiaLA with Mercury Comet crashing because of brake failure, I decided to converse emergency brake to floor mounted that I'm more used to. Nice Lokar kit is way to expensive, so I'm going cheaper way:
-
14 hours ago, EastYorkStang said:Where did you get the LED modules ? Want LED tail lights for my 65 El Camino.
Hi, its cheap module from china - aliexpress / ebay:
I tested it for a while and it did survive, but how long will it in light is still a question :)
-
On 9/25/2022 at 1:27 AM, Vicfreg said:Nice work!!
Thanks Victor,
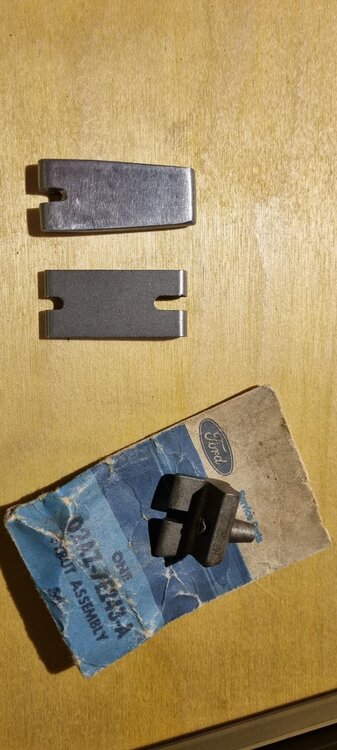
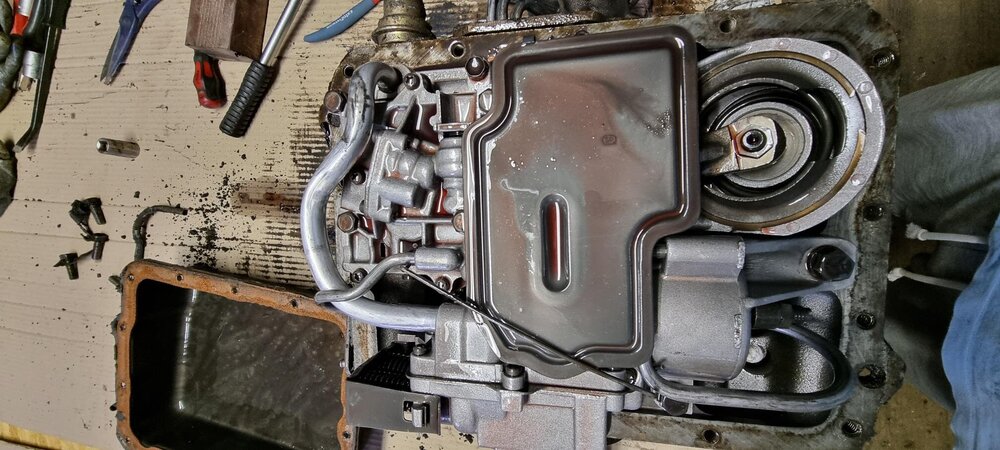
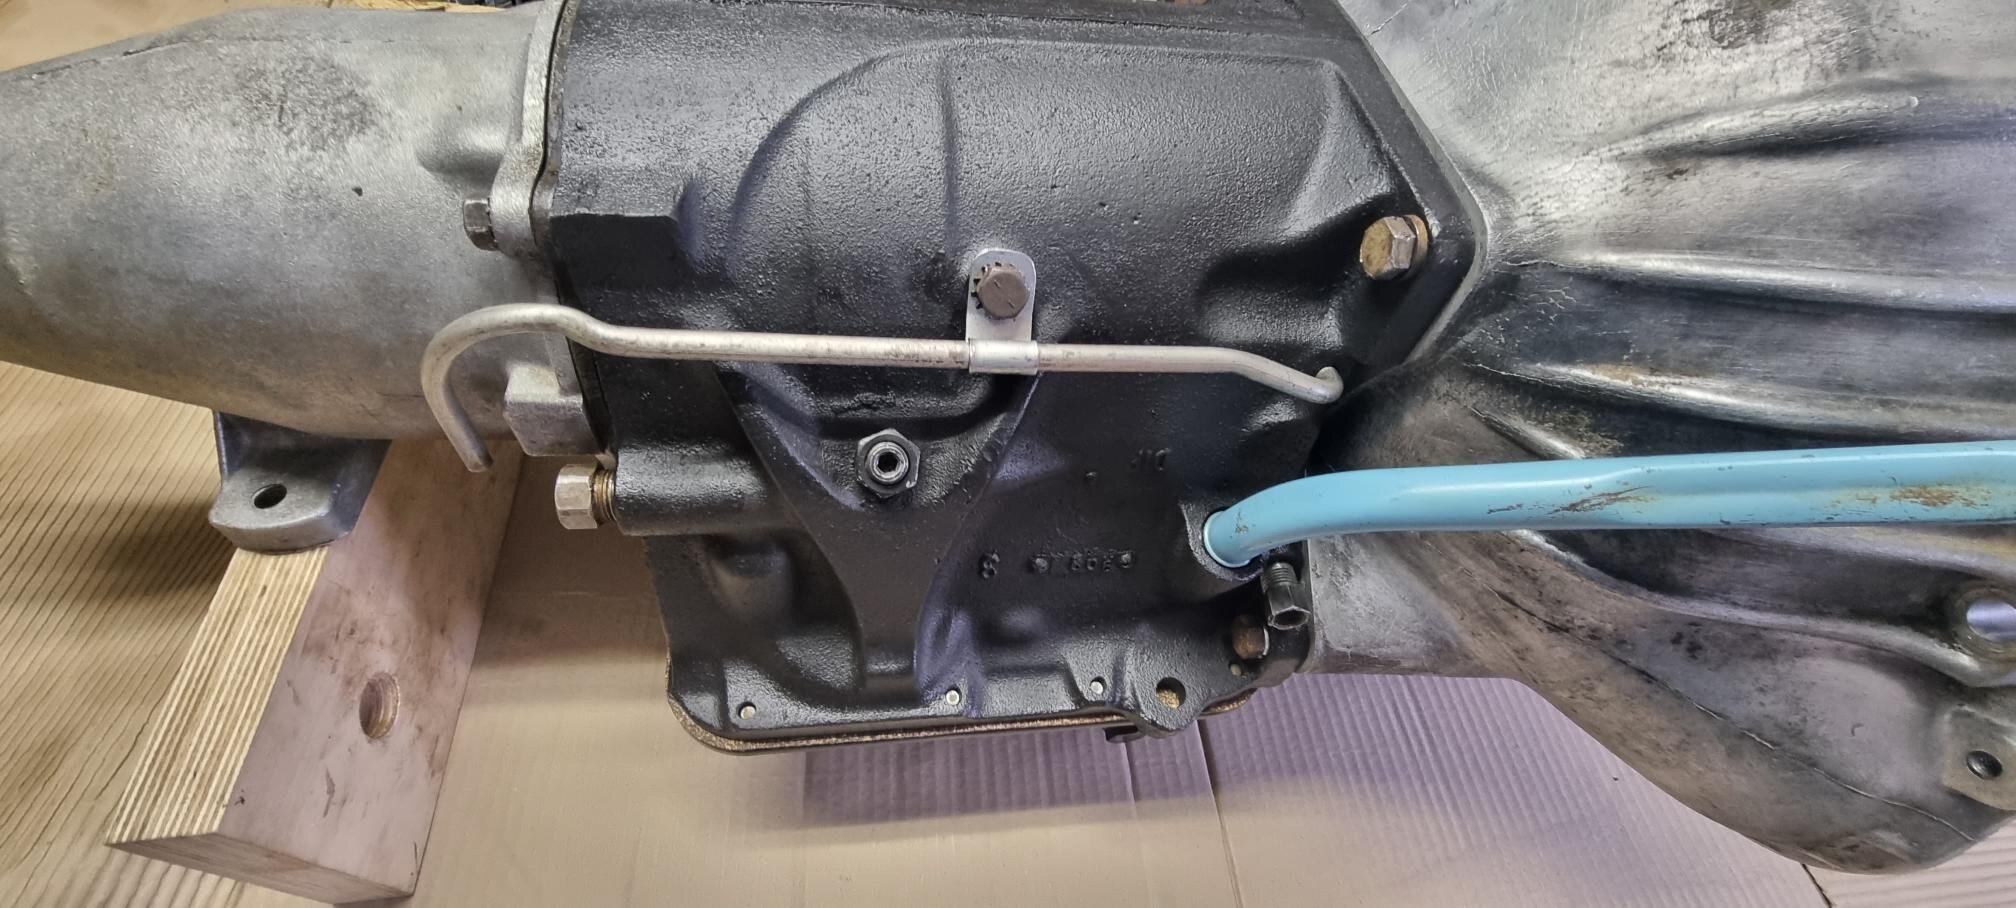
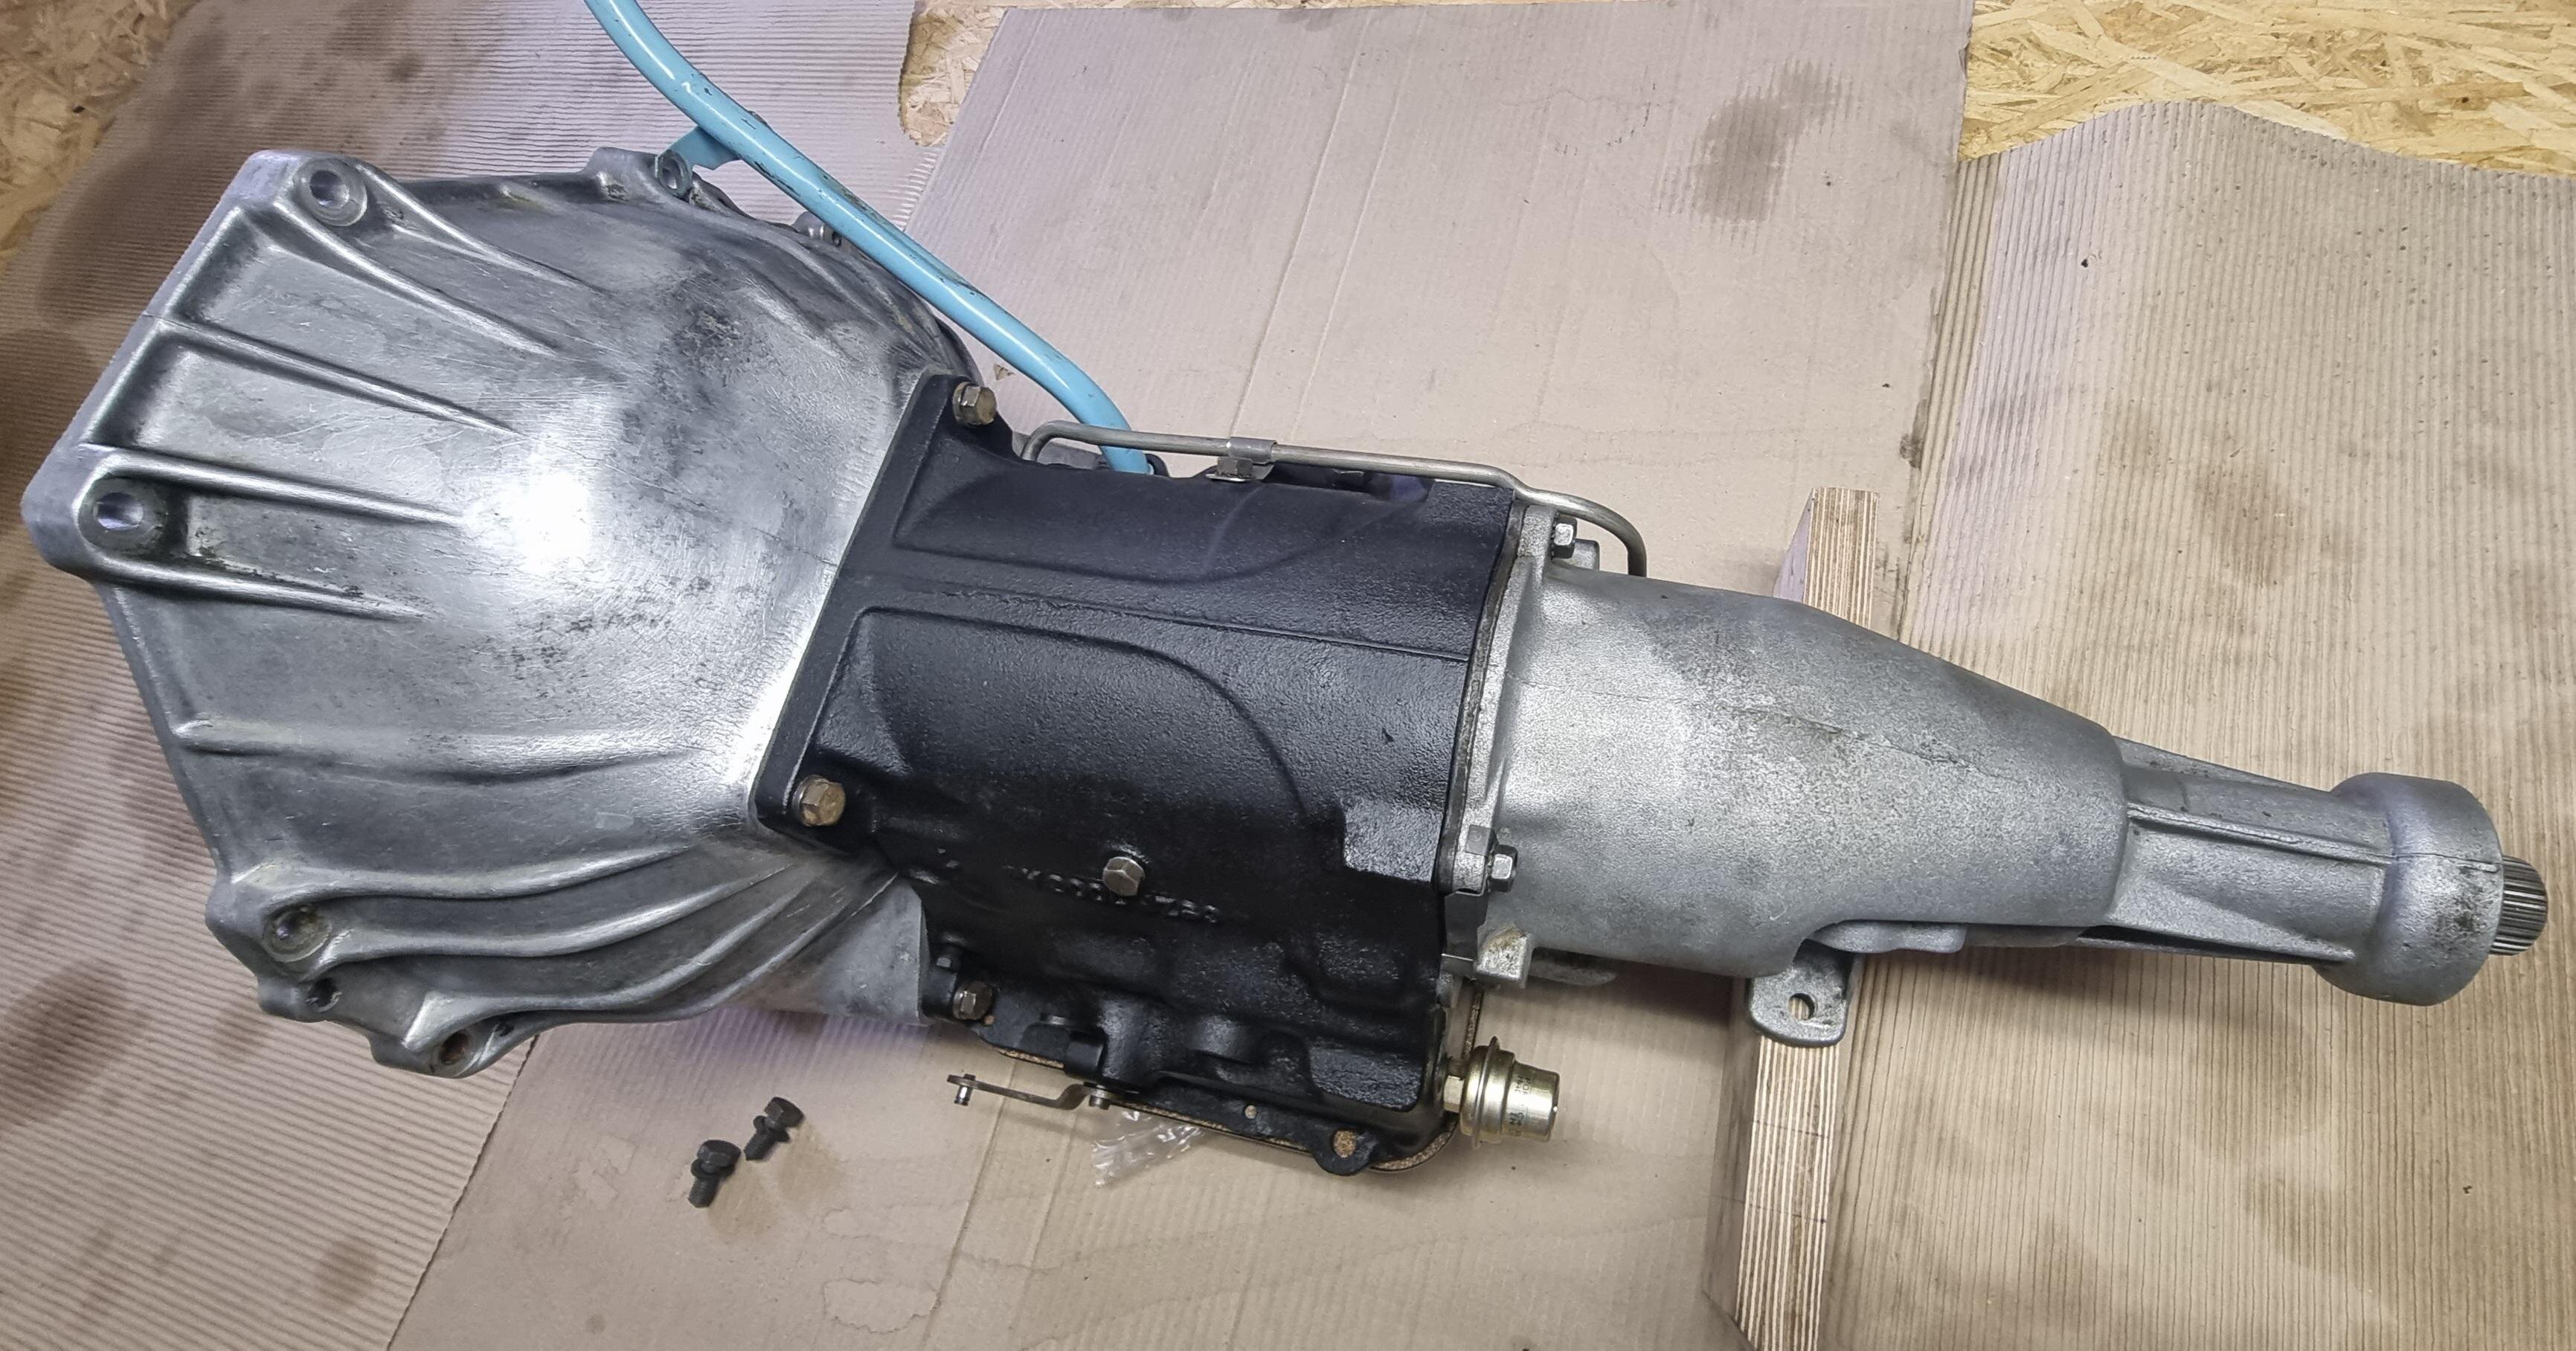
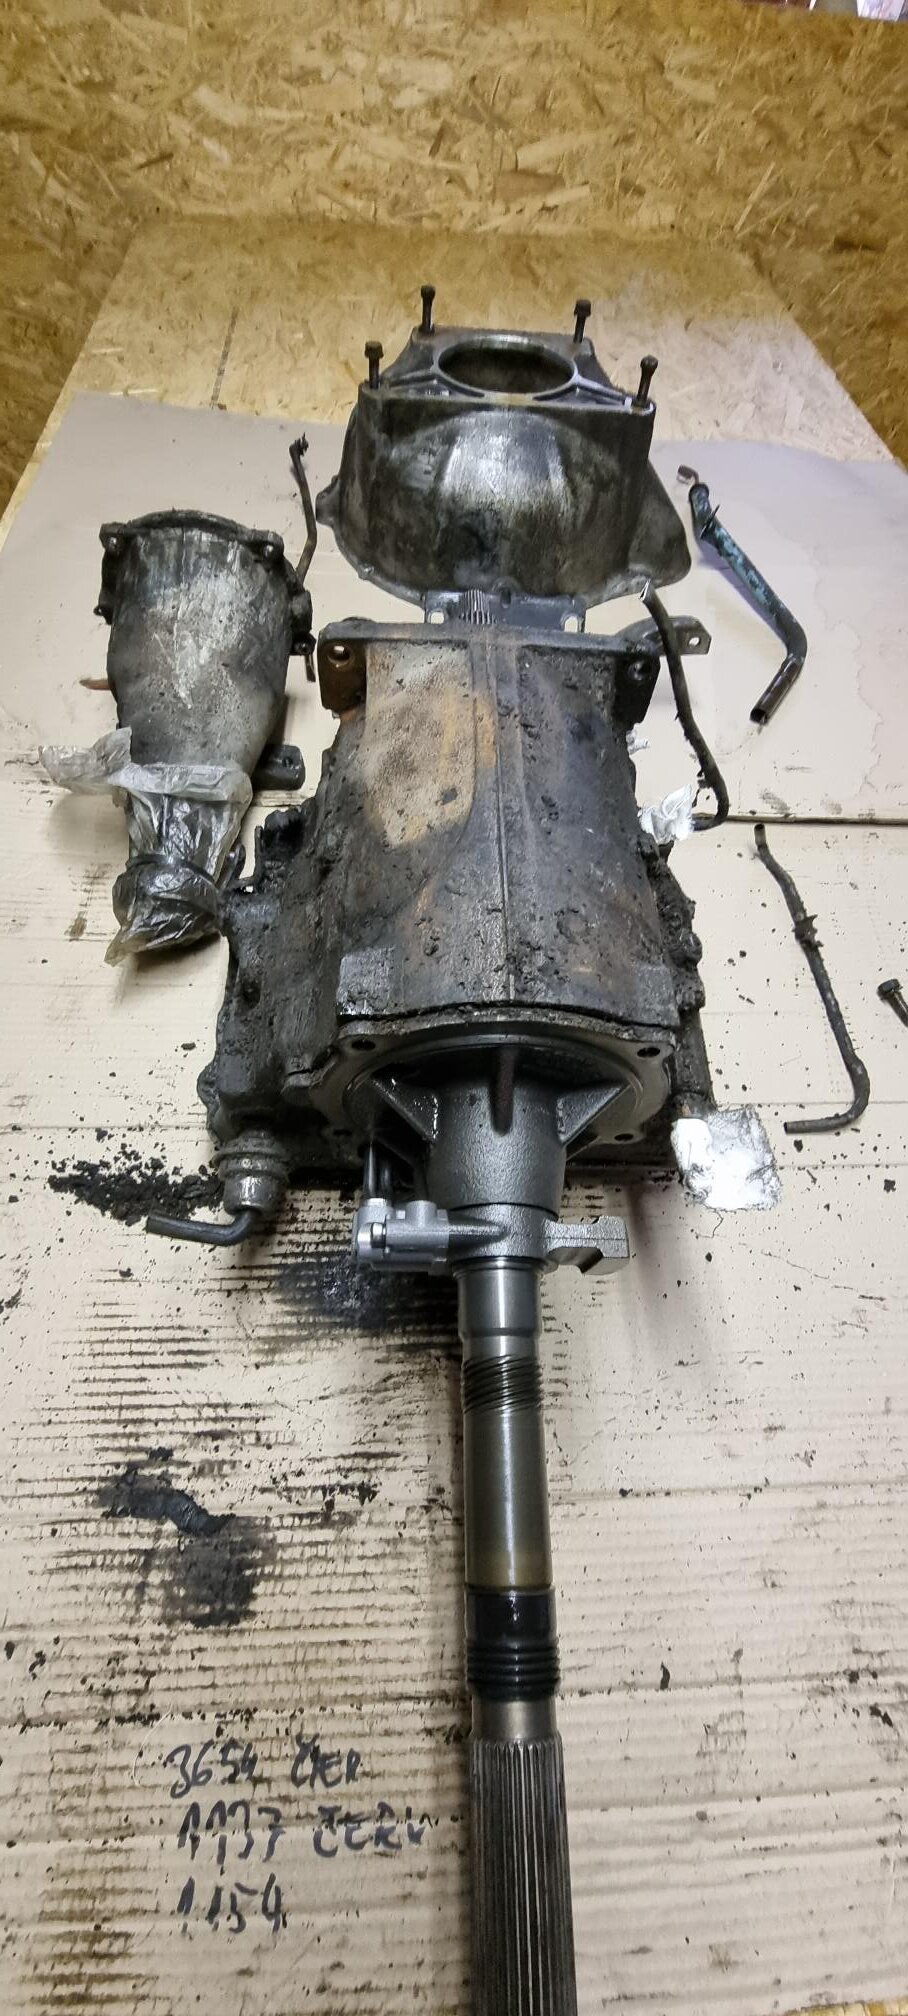
sooo, my tranny is ready to install. I got lucky a found one „new“ upper strut for 70 and up FMX on ebay. The lower one was easy, so I made that one by myself. Adjusted according manual specs now waiting for installation.


-
-
Short update...
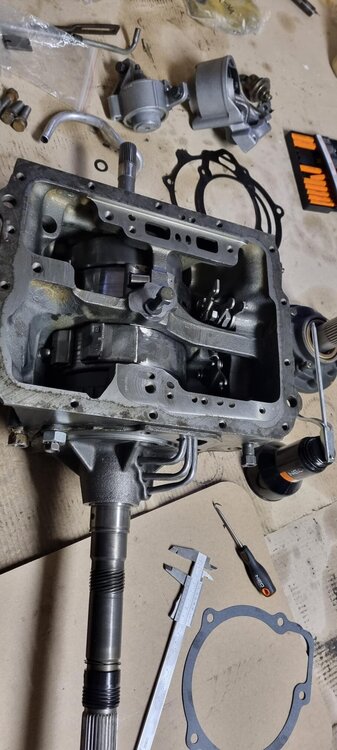
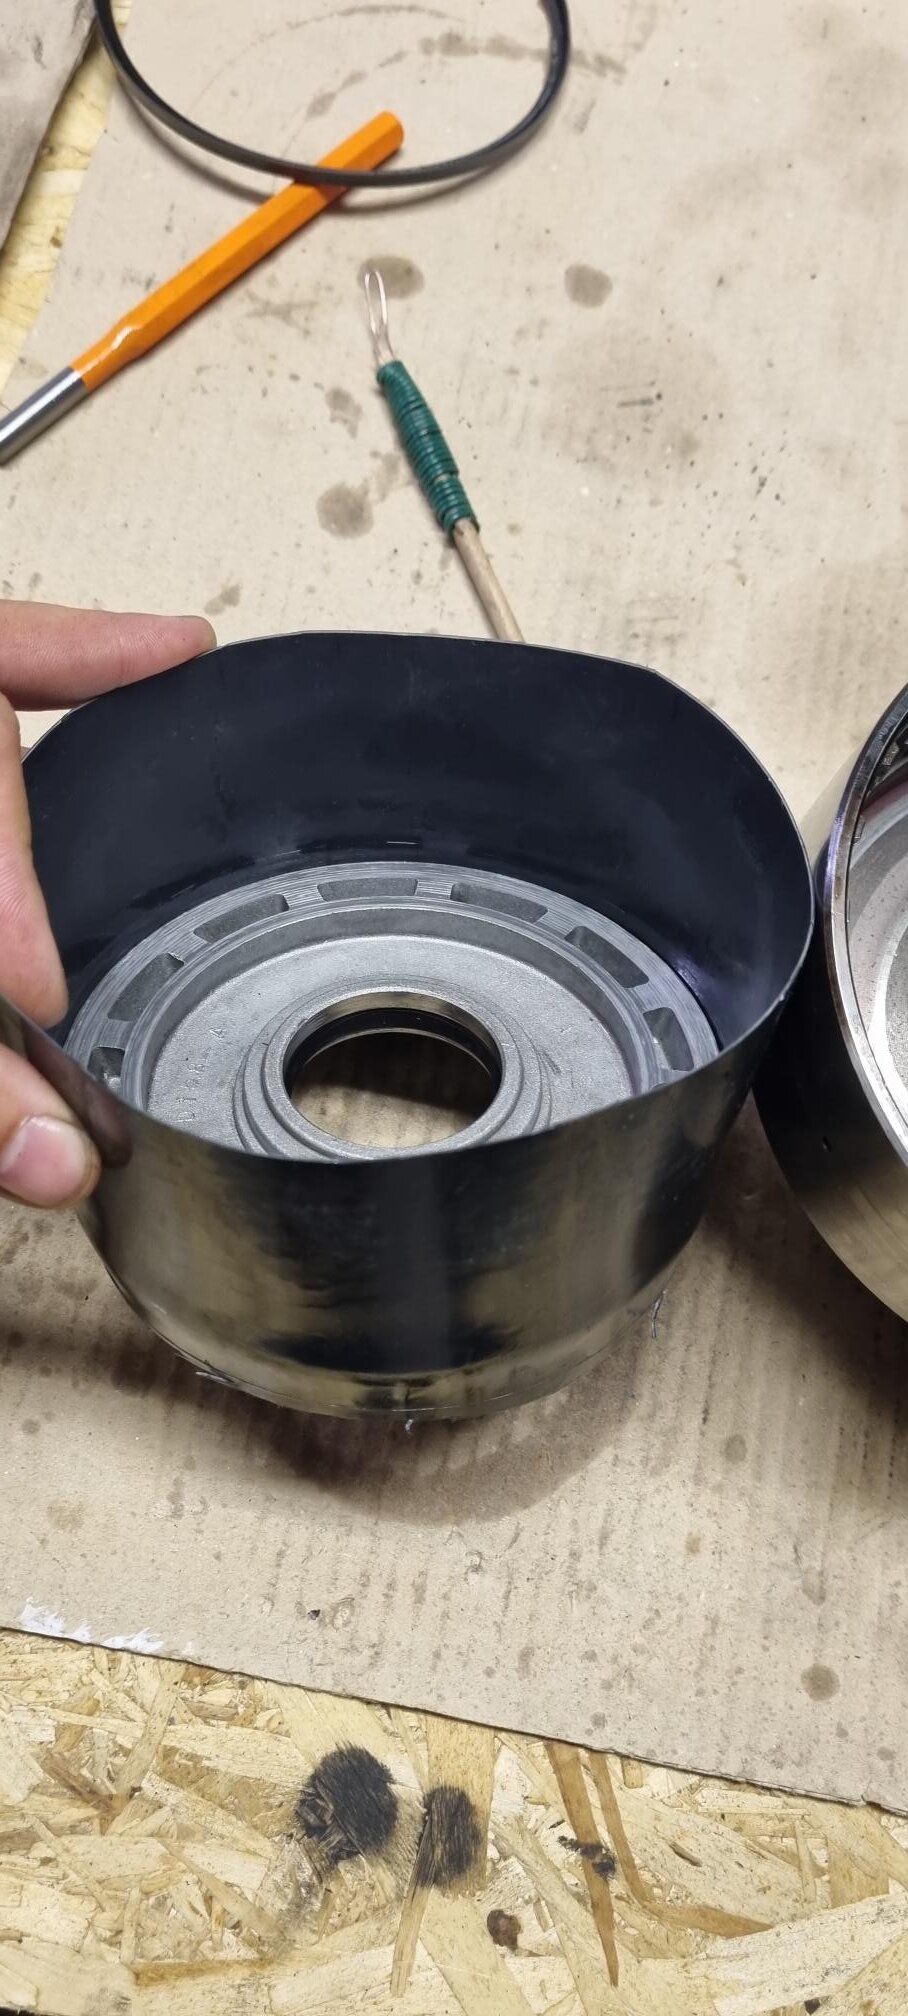
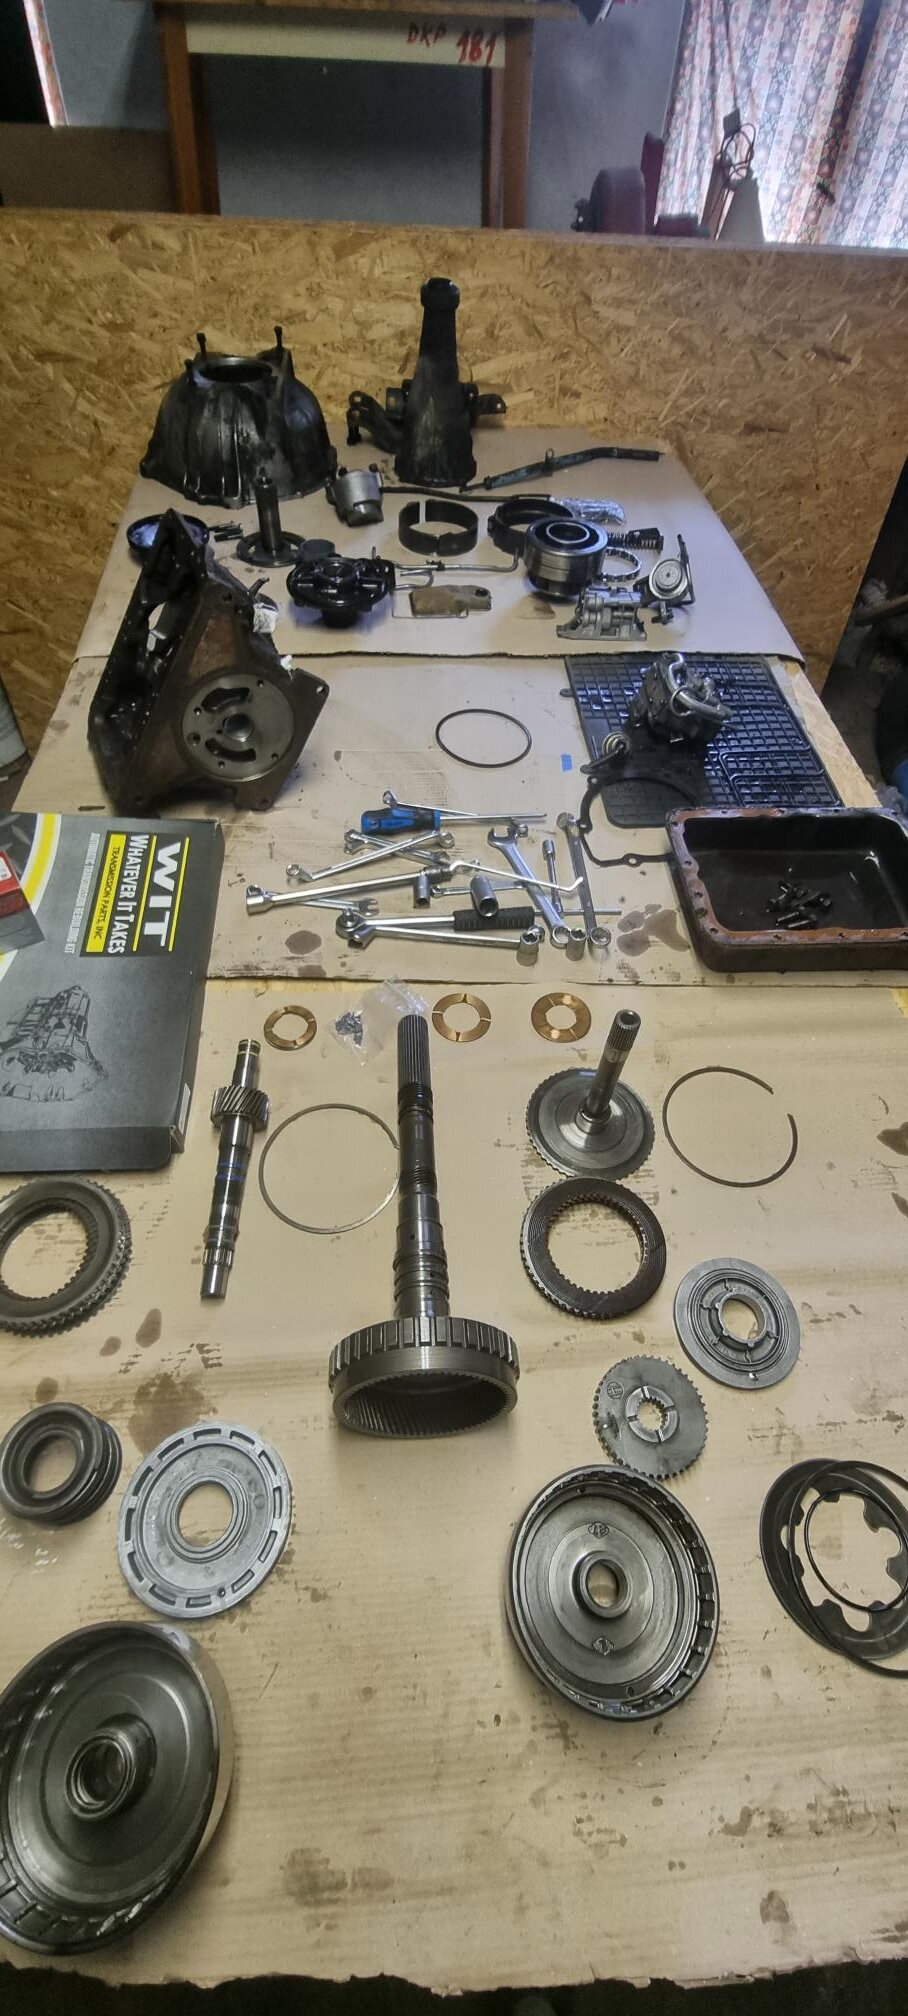
So, thanks Bob, Kens videos are great, and to work on transmission with them really fun! My front band had to be replaced / relined so I decided to buy a flexible band. Unfortunately, use of this type of band requires other strut (as for 1972-73 fmx), so I’m still not able to assembly the trany – waiting parts to come. Maybe it might help someone, so I’m posting a picture how I solved installation of direct drum piston. I used thin plastic flowerpot (cut flash at bottom ad left some rest above for pulling it out) to press the seal ring, inserted inside the drum and by constantly pressing on piston I slowly removed the pot strip.
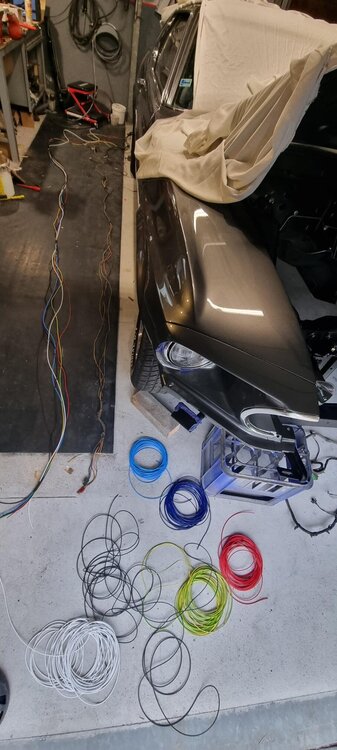
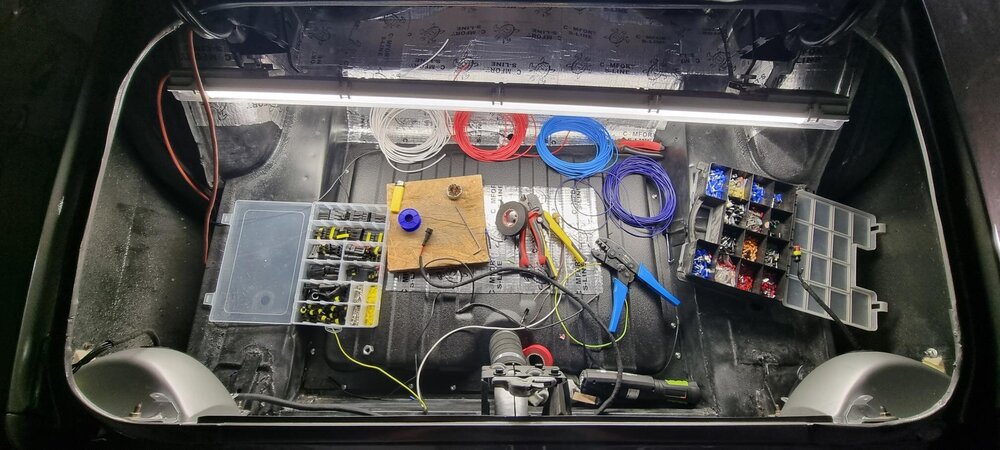
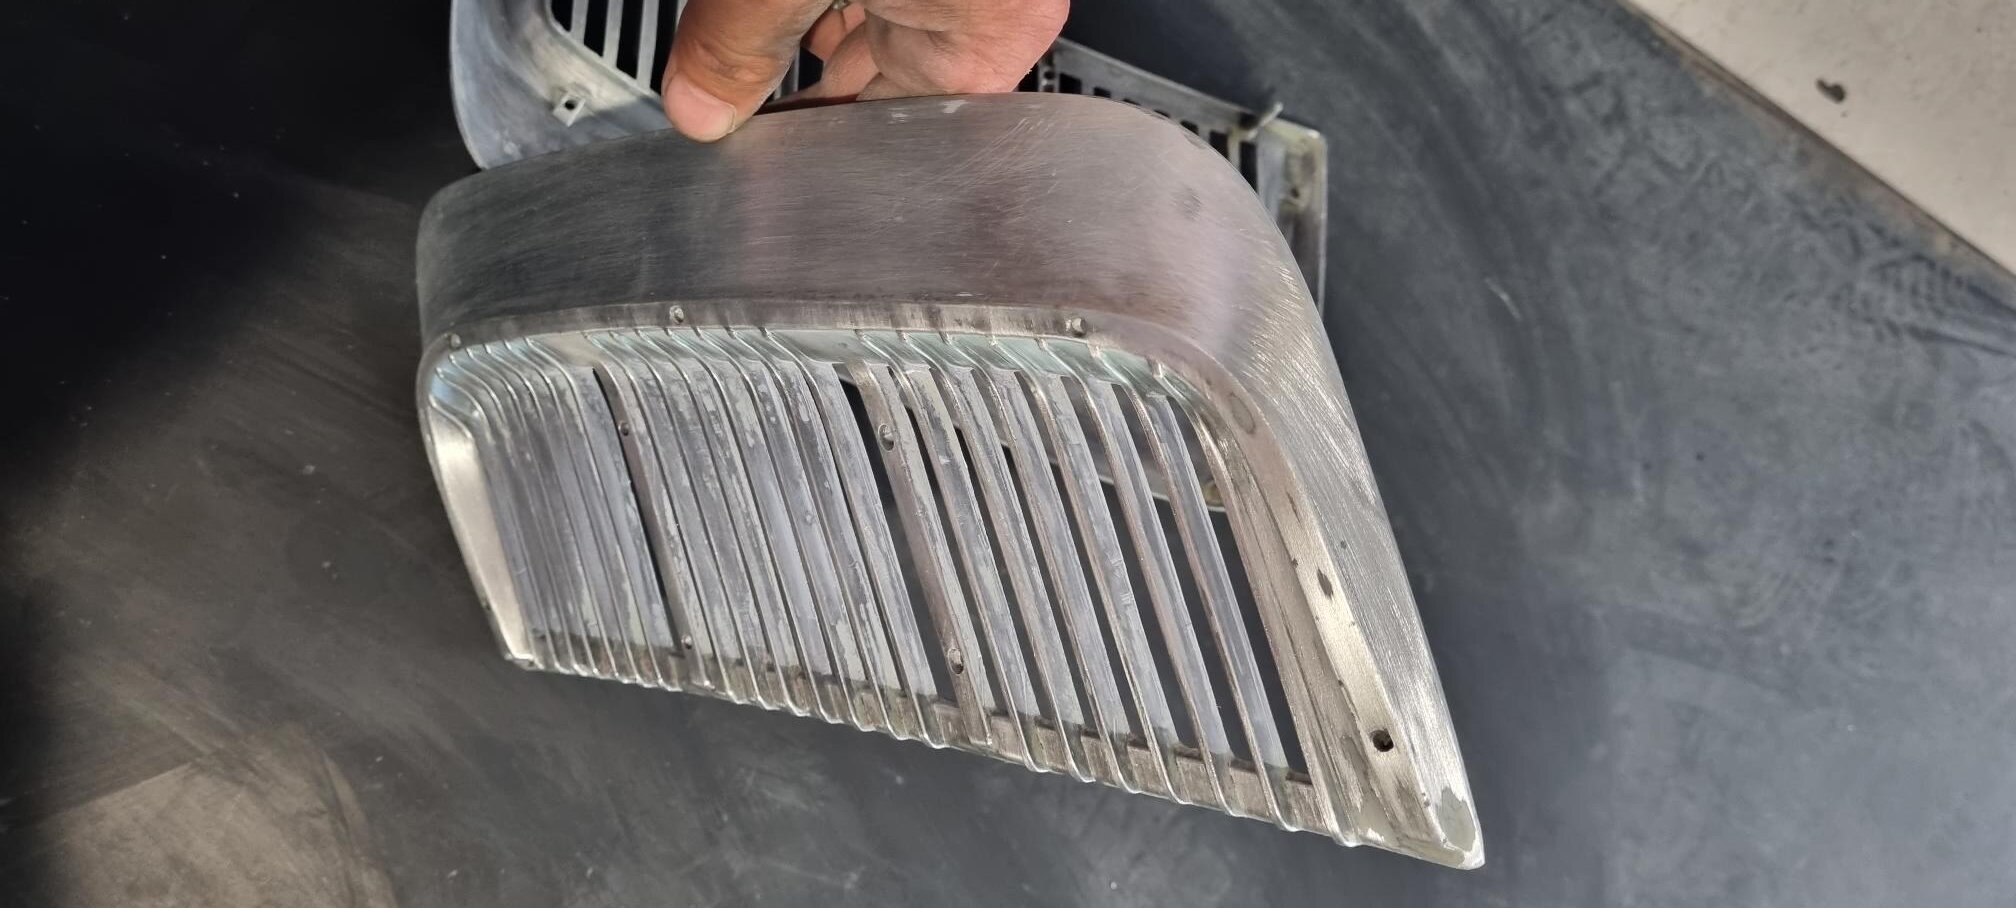
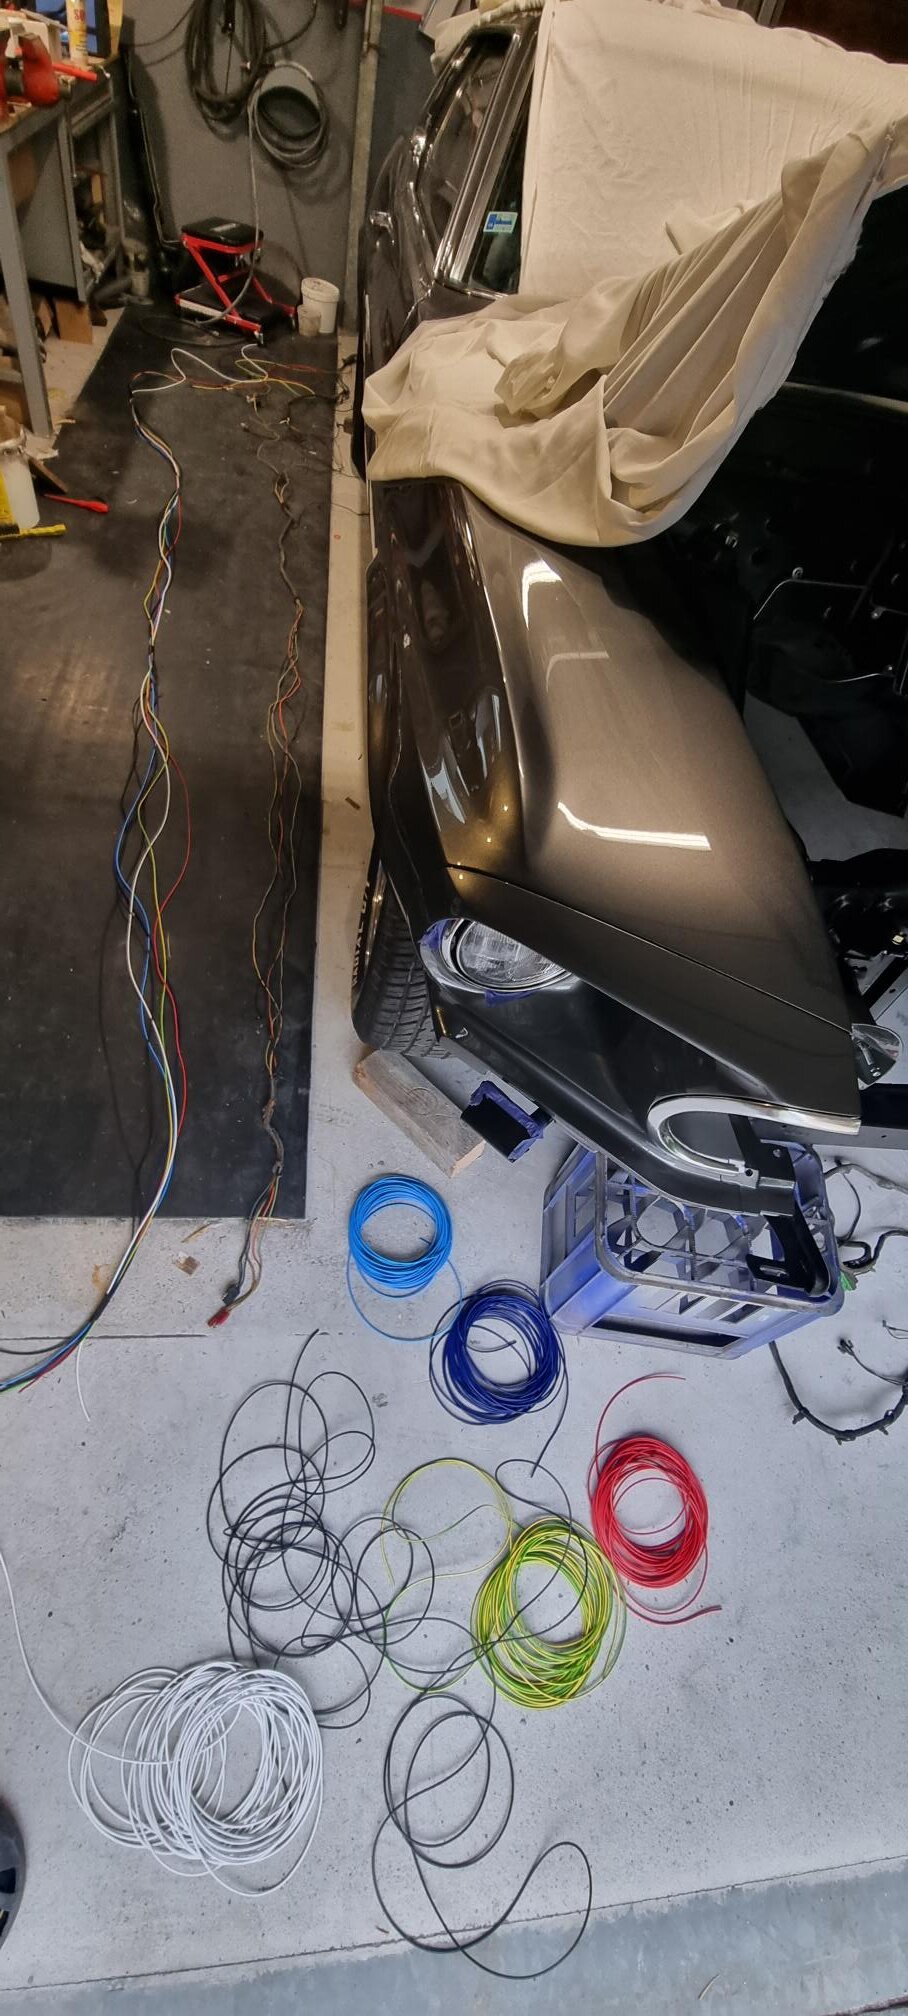
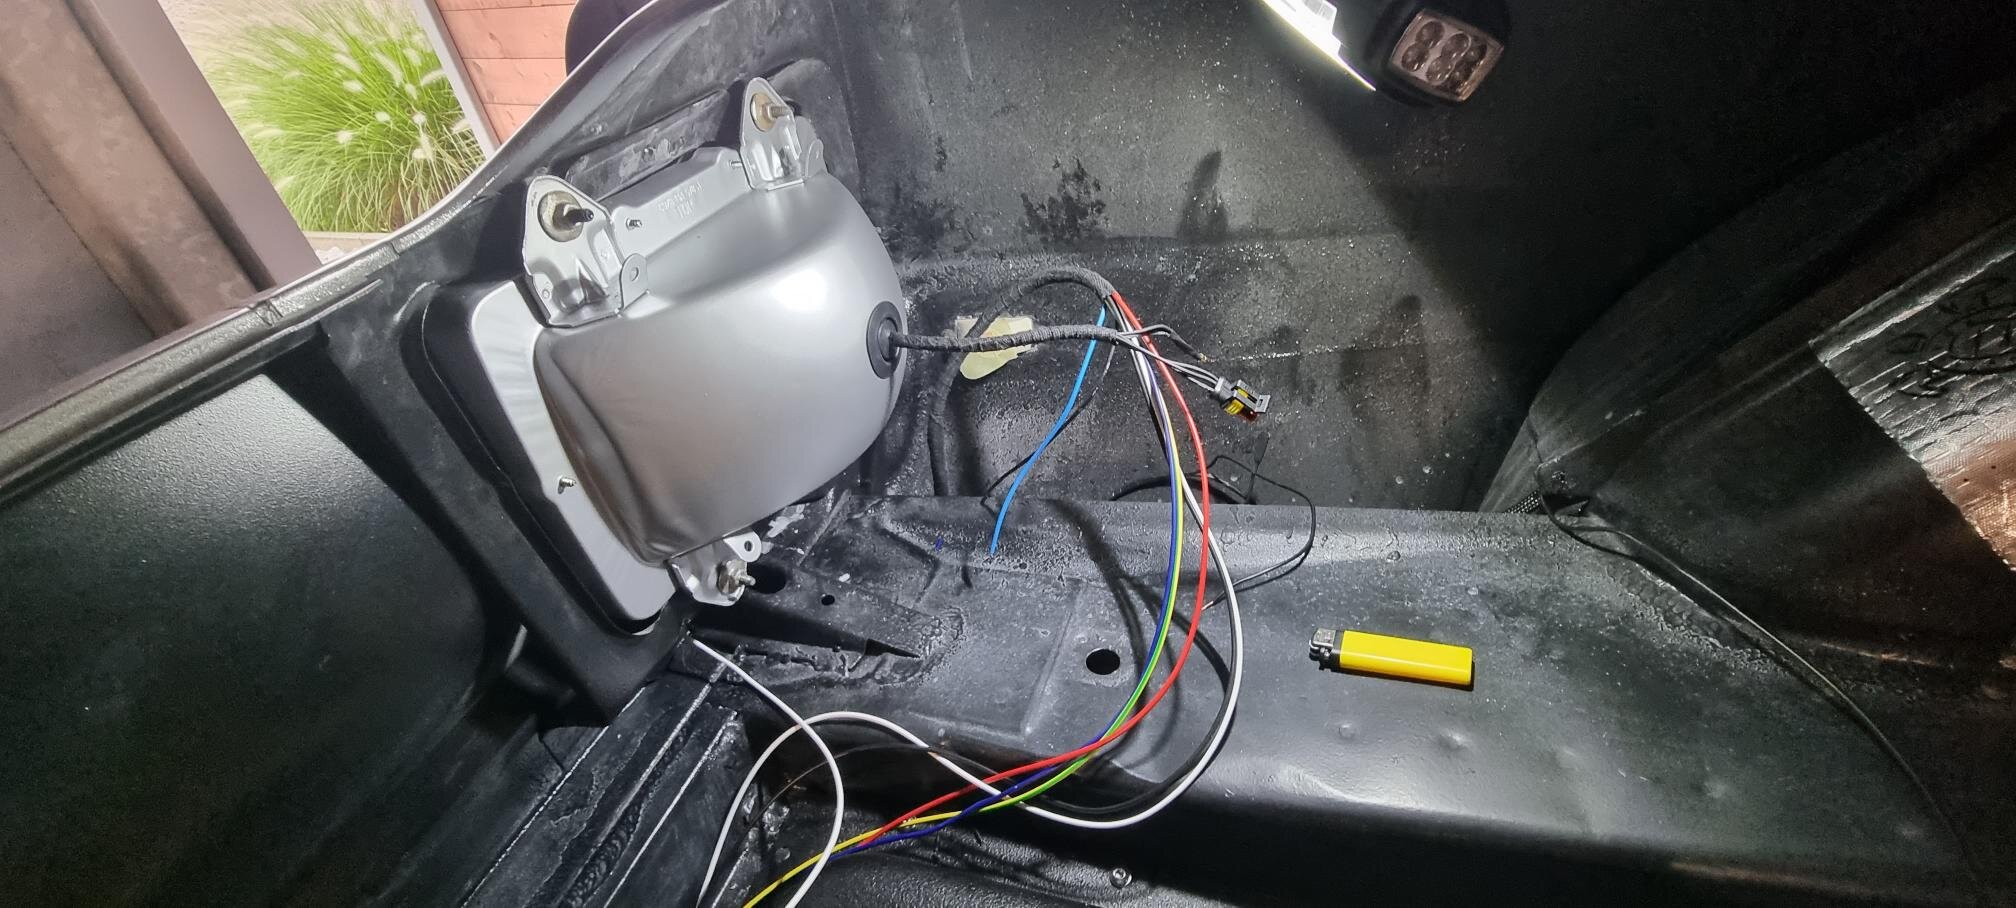
Till struts arrive I started to rebuild side louvres an rewire the car.


-
no Bob, i have to download it and watch. Thanks!
-
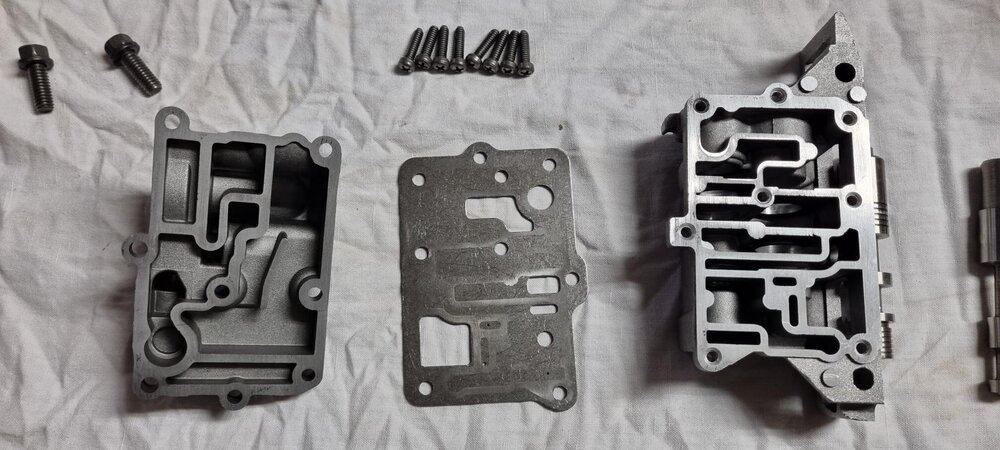
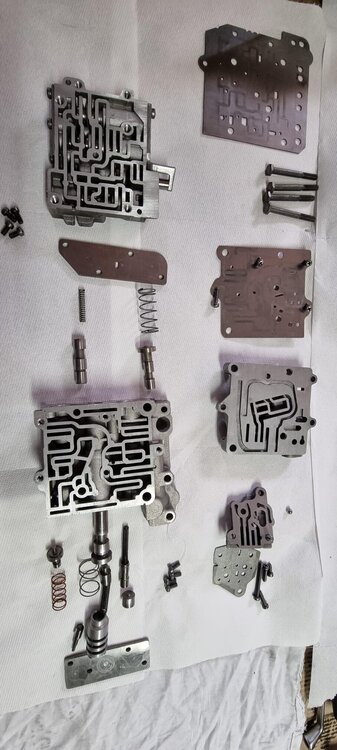
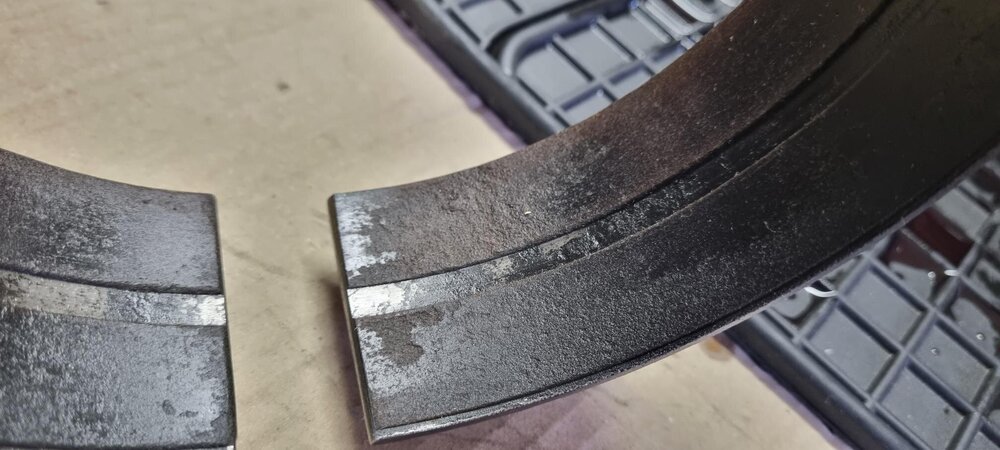
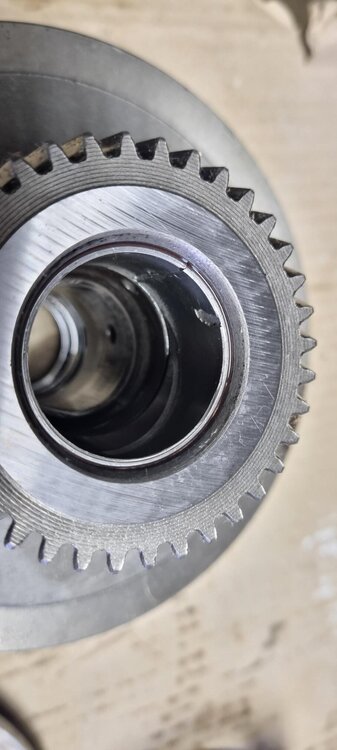
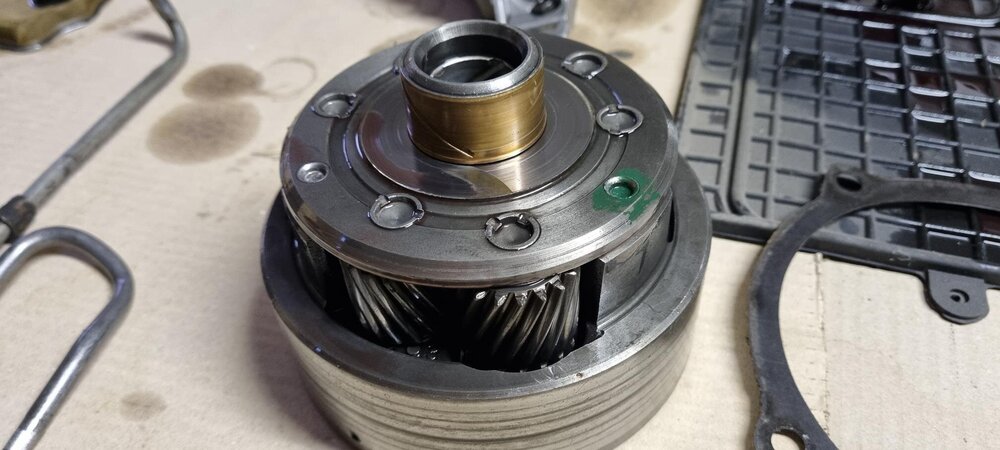
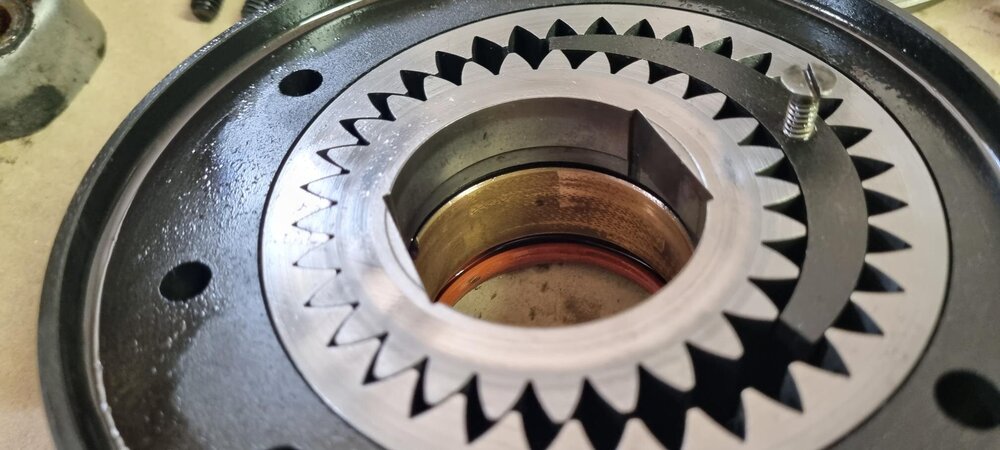
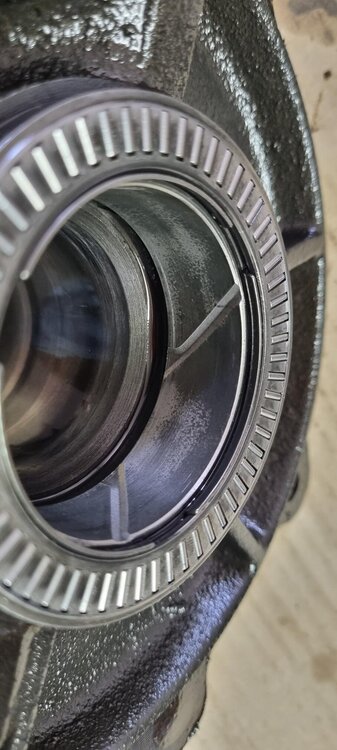
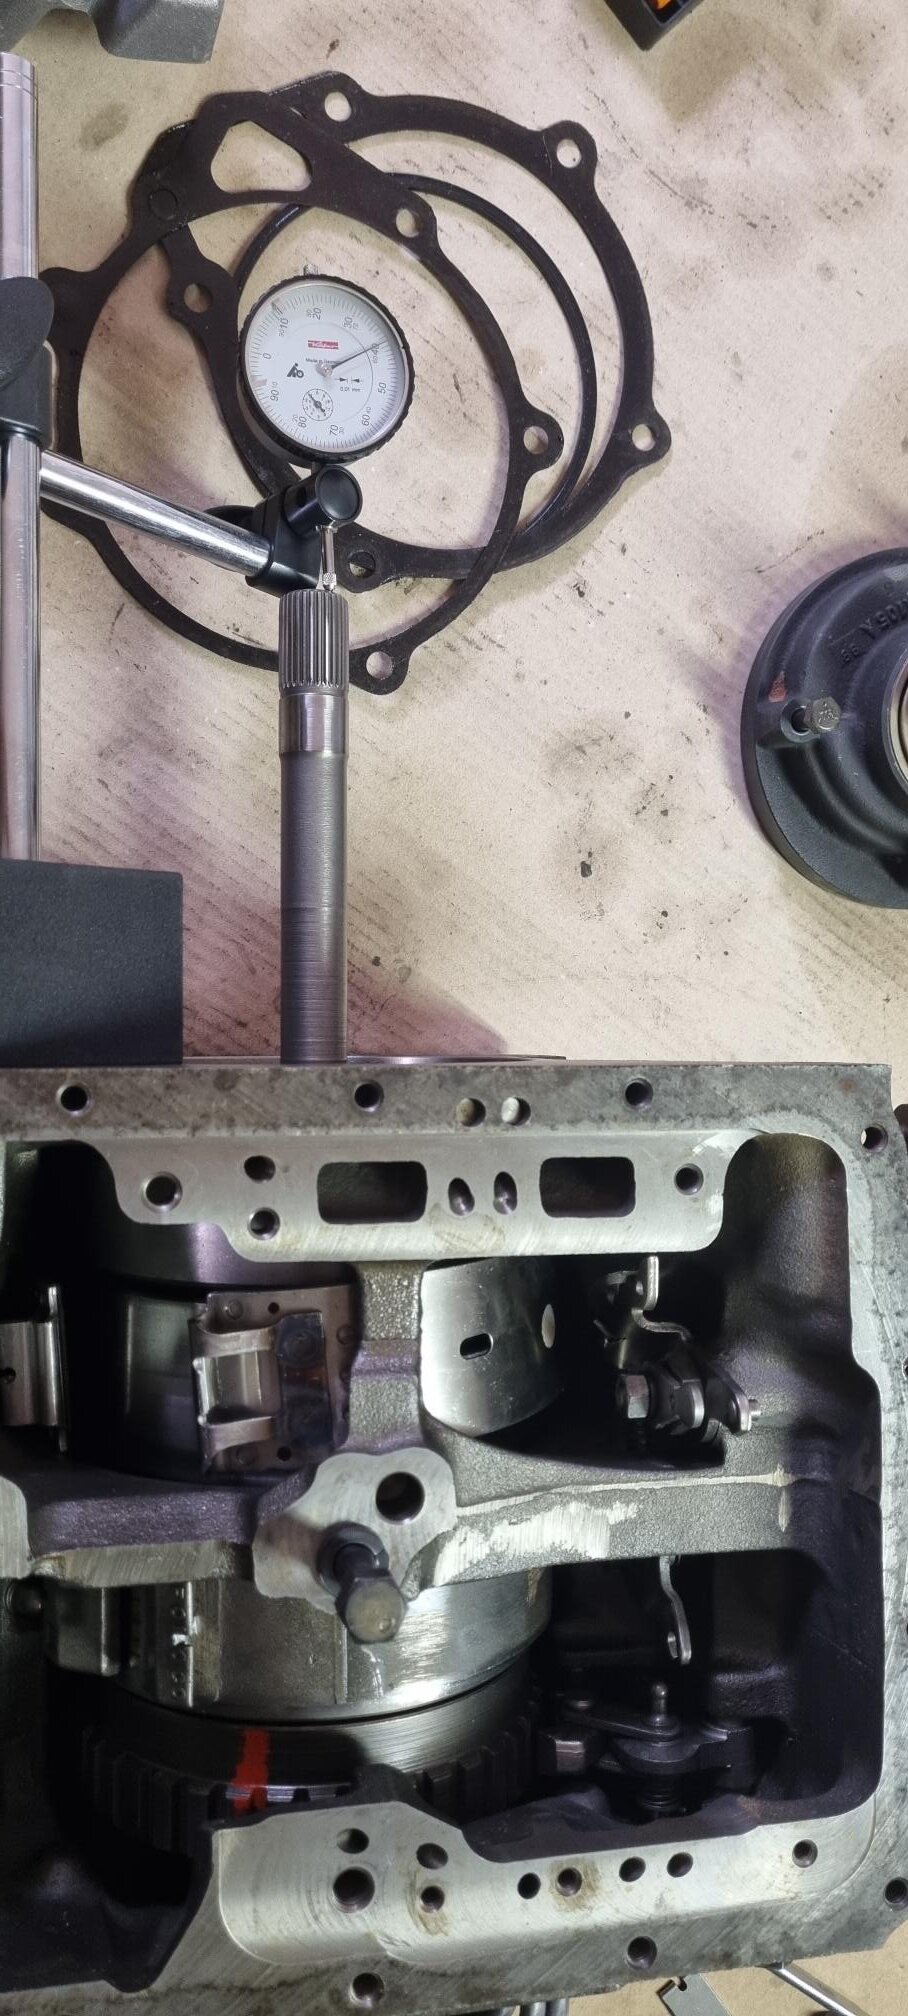
It was raining this weekend, so I started something new – rebuild of my FMX. I ordered master rebuild kit C9ZZ-7005-MK, output shaft bushing, output and pump seal. After disassembly I inspected bearings, seals and bands. Can someone confirm my finding and answer some questions, please?
- front band should be replaced
- Bearing on direct drum ich chipped - should be replaced
- is the lip on Planet bushing normal or its wear?
- is it normal that replacement flat seal for forward clutch piston is about 1/3 thinner than original?
- Is he wear on inside bushings (last two pics) OK?
Thanks for any answer / opinion, I’m trying to find some info on web, but except rebuild kits are even other bushing and parts hard to find


-
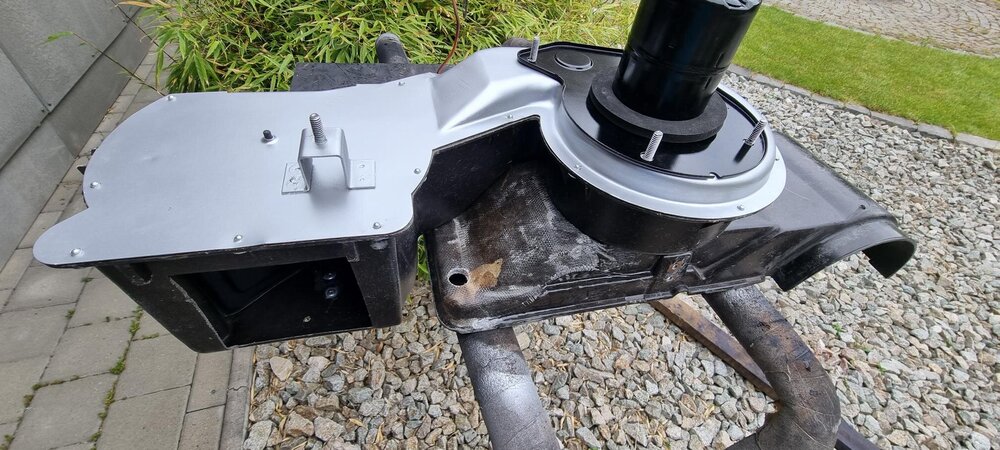
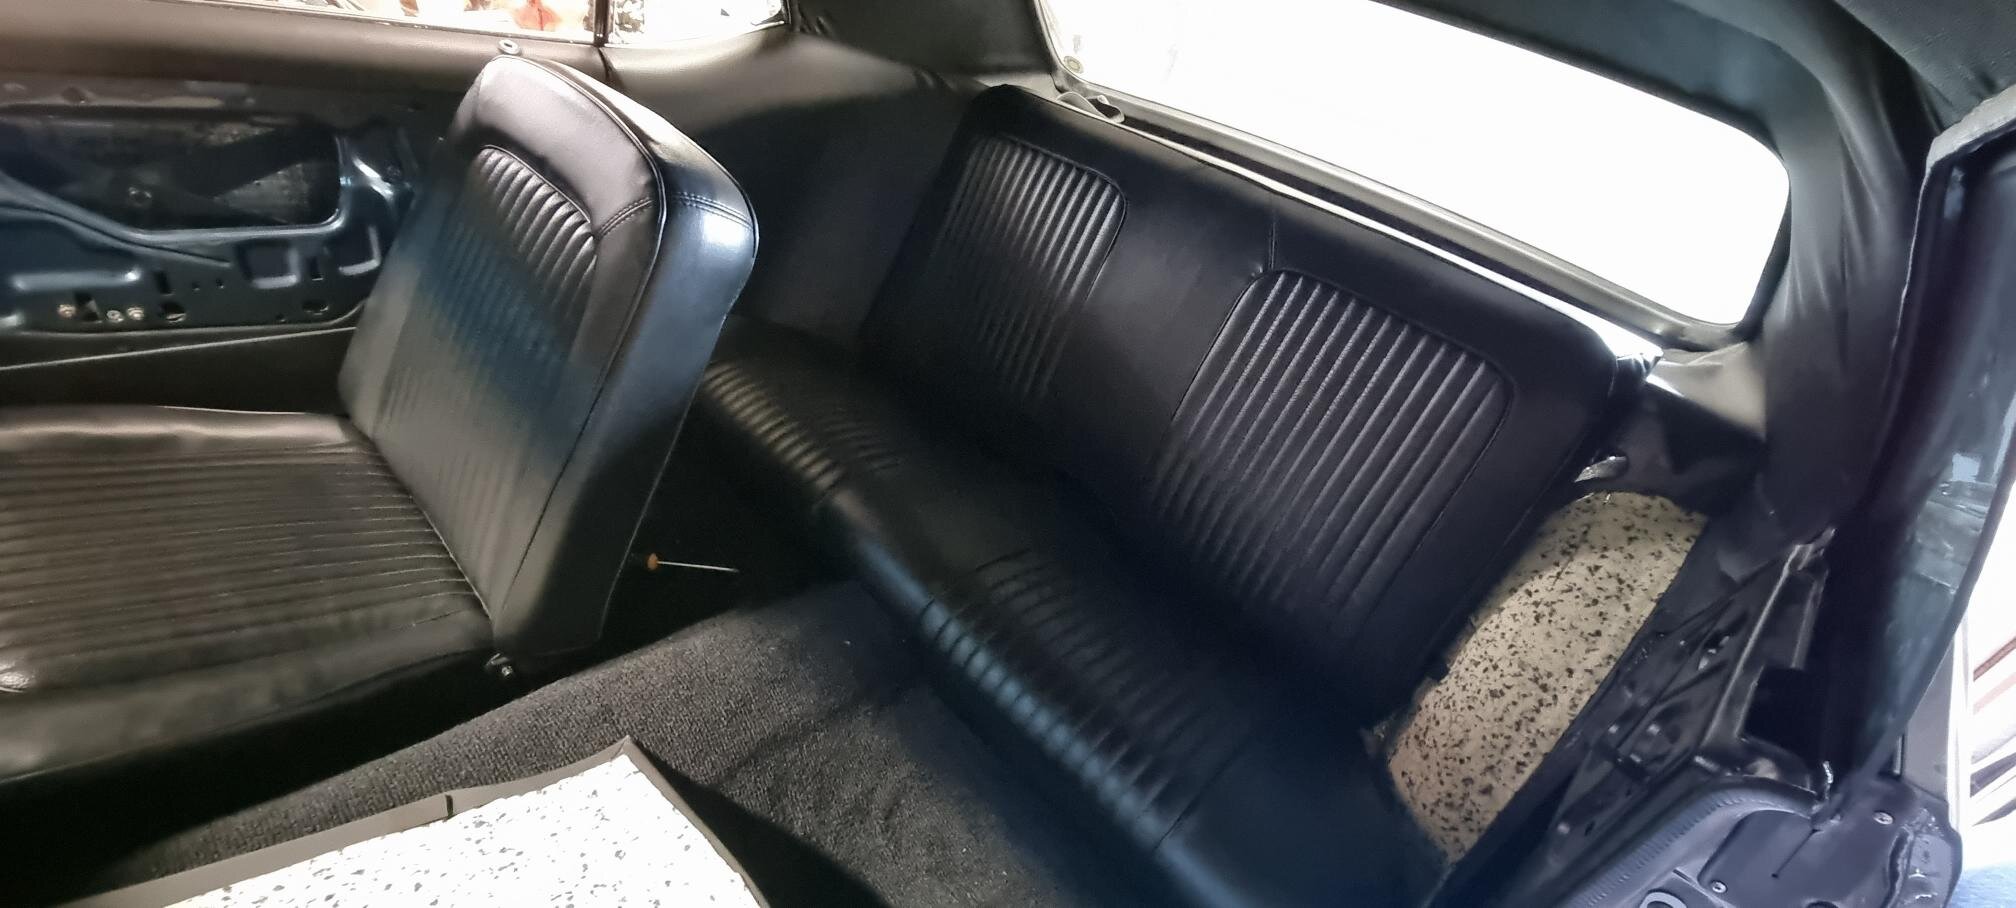
Broken heating housing repaired, and restored with new seals, finally all upholstery done and tadaaaaa. after 5 years back on own wheels!


 RPM and 69RavenConv reacted to this
 -
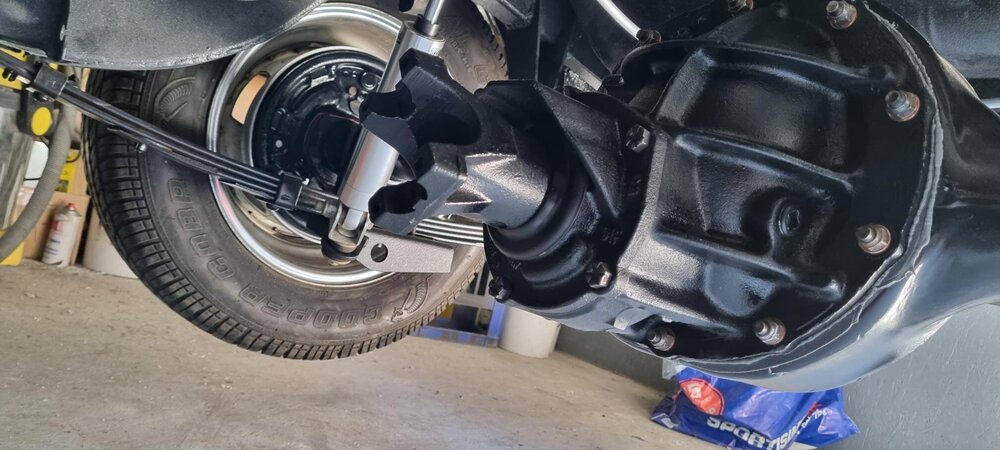
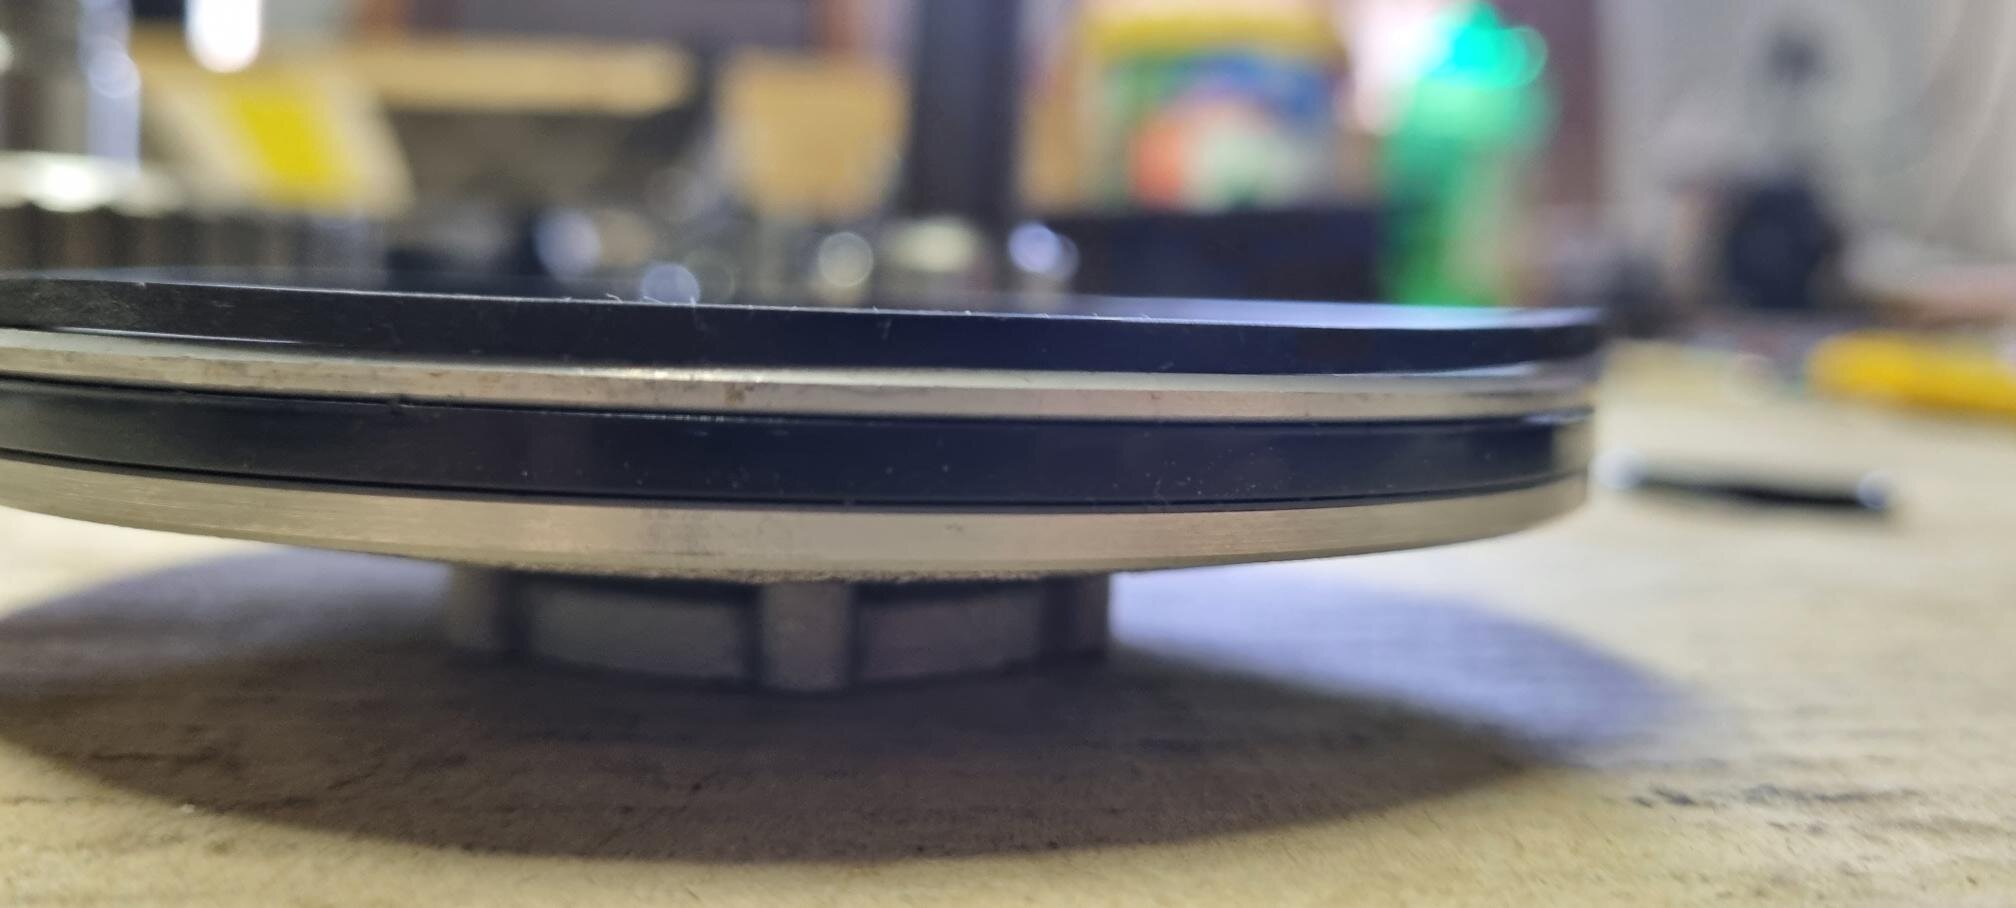
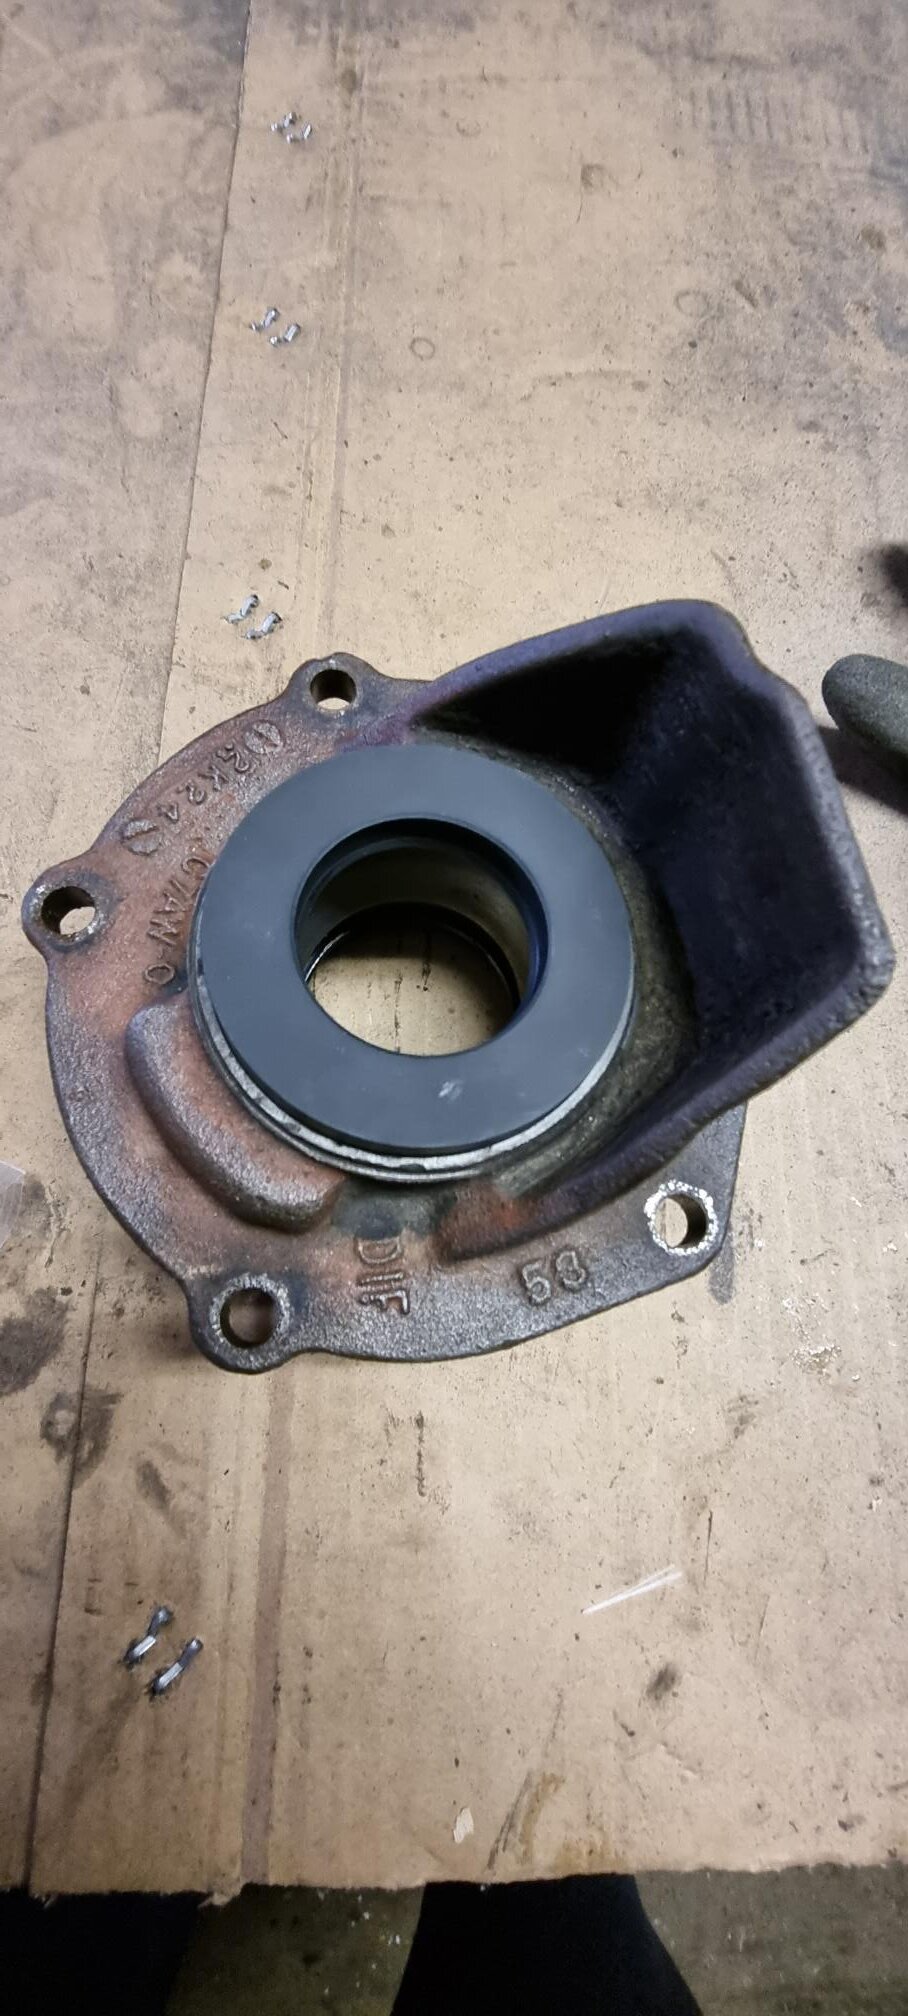
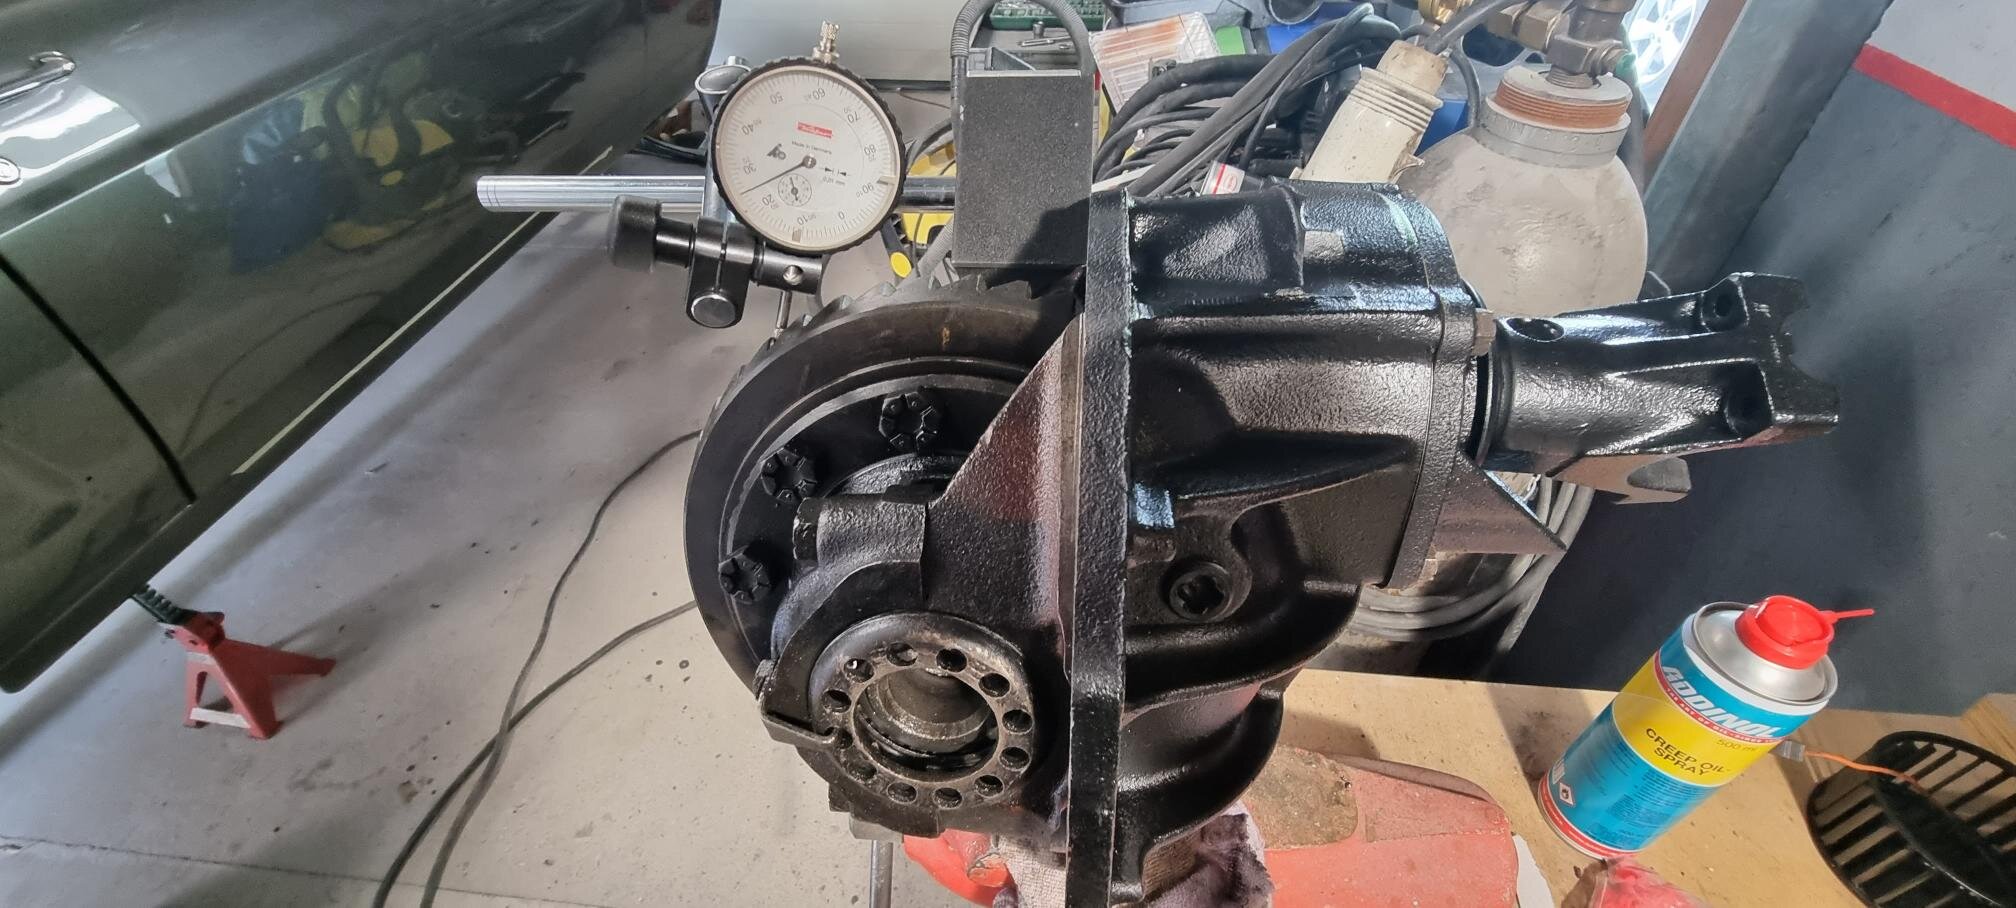
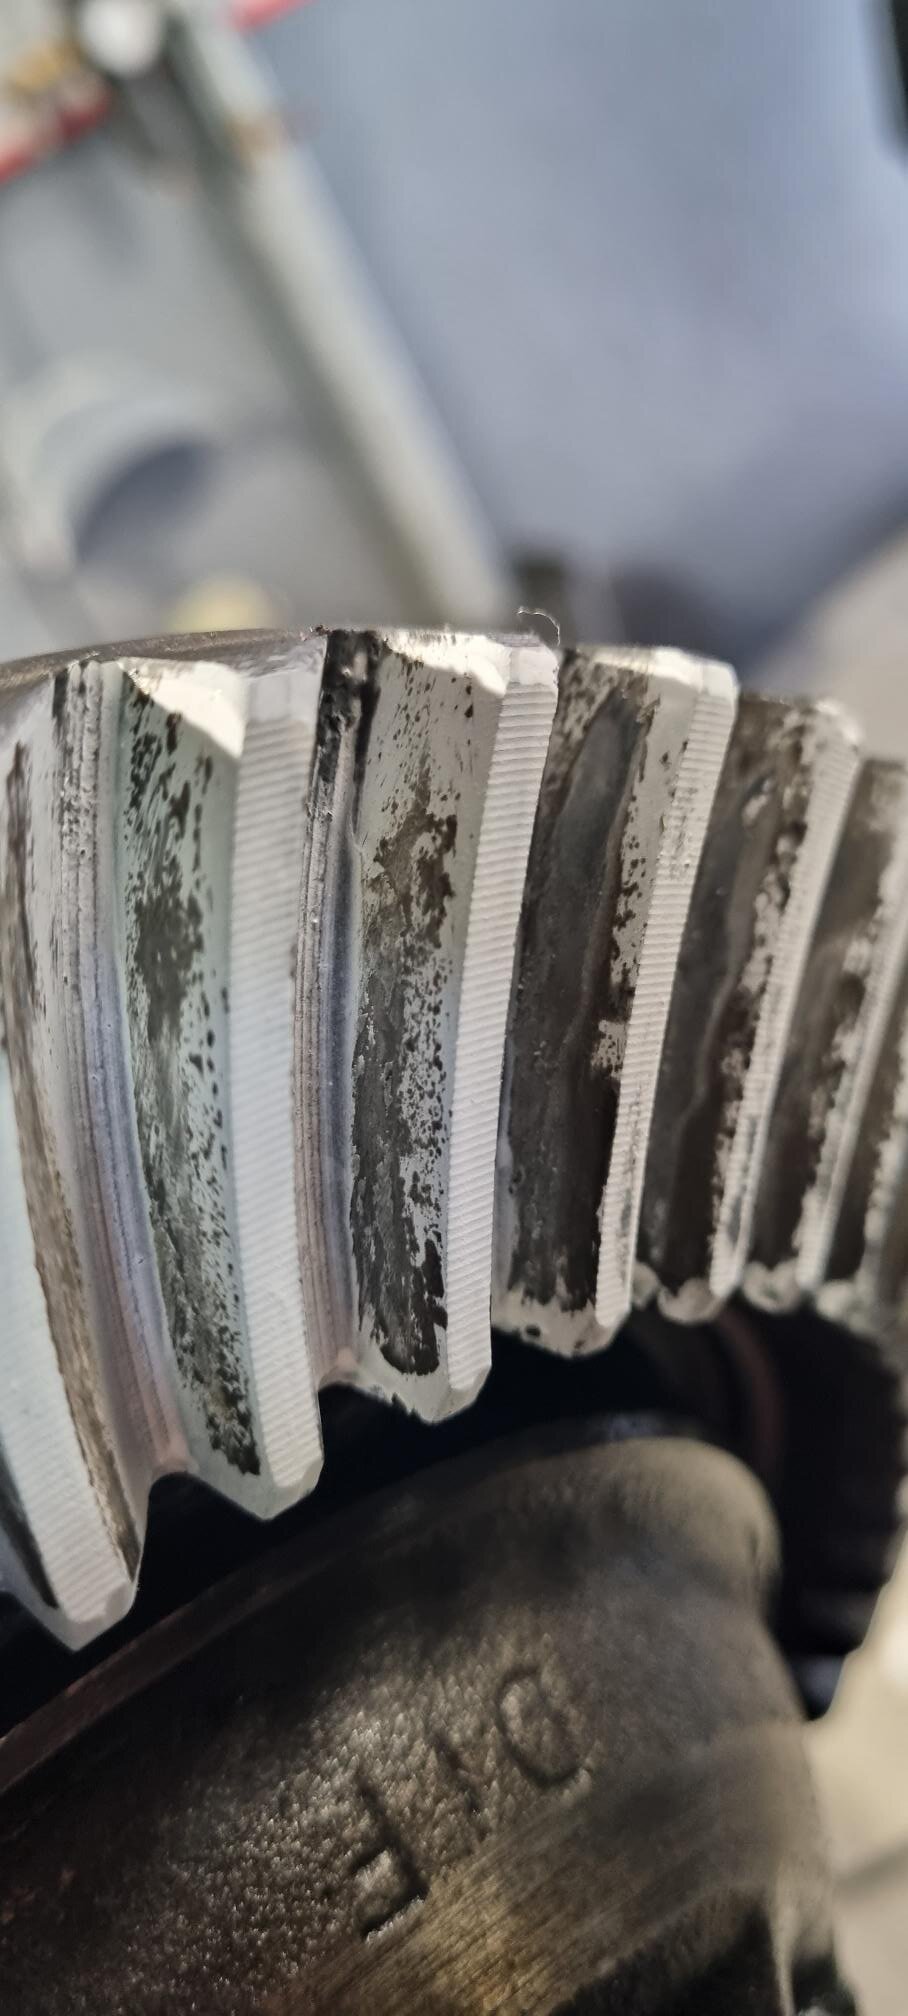
Meanwhile in my garage :)
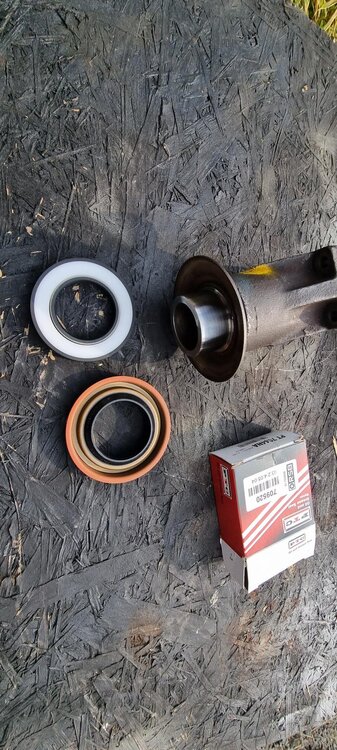
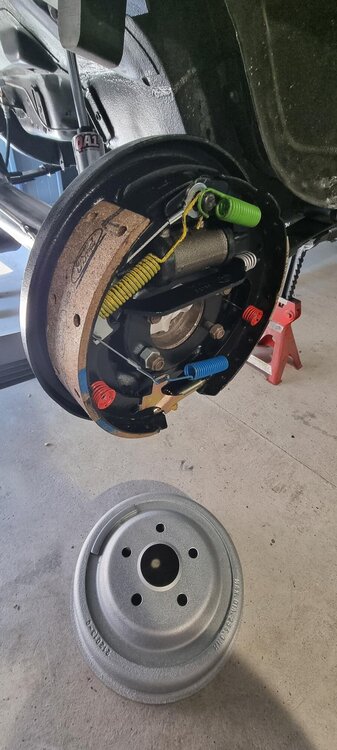
After disassembly of my differential I found heavy wear on yoke seal surface. Unfortunately it was deep and after machining the original seal had only light pressure, so I hat to get some custom seal. Backlash of differential and tooth position adjusted. Finally brake parts came (except rear brake cables), and I could put everything together.


69 coupe from SVK
in Project Progress Forum
Posted · Report reply
Vic, I have over 2 Inches from propeller to radiator: