

Machspeed
-
Content Count
739 -
Joined
-
Last visited
-
Days Won
17
Posts posted by Machspeed
-
-
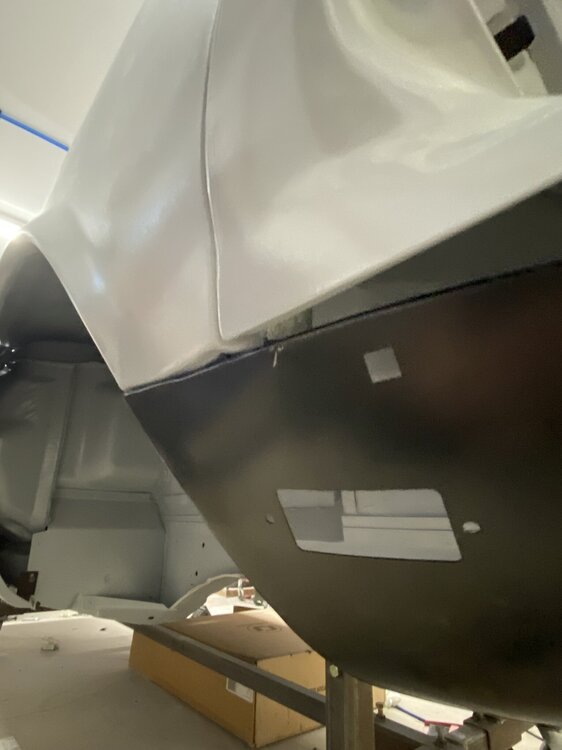
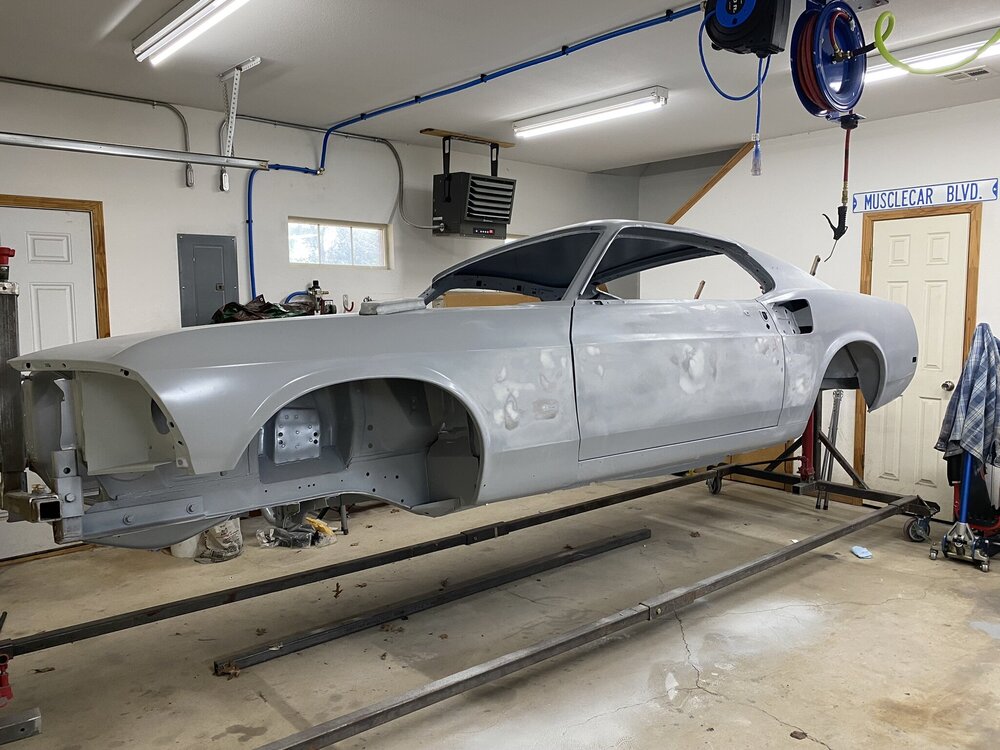
Spent half the day spinning my wheels trying to get the front valance to fit up correctly. For some reason, I can't get the passenger side of the valance panel to fit up flush with the front fender. The driver's side is good. If I remove the bolt that is attached to the headlight bucket tab, I can get it to fit a little better but then I can't get the bolt in the head light bucket tab. My fenders are OEM as is the headlight buckets. The valance is Dynacorn. Thinking the Dynacorn part was the issue, I pulled out the OEM valance and it too had issues on the same side and only fit marginally better. The doors, fenders, cowl and hood are all aligned.
I jacked around with the headlight bucket but that did nothing. As I sit here typing this, I'm wondering now if I need to adjust that front right fender, twisting it slightly. Thoughts and comments please? BTW, in the pictures, things are only loosely bolted in.

-
Very nice, Poose! Who did all the paint and body work?
-
That should do it for this!!! Thanks fellas, appreciate ya.
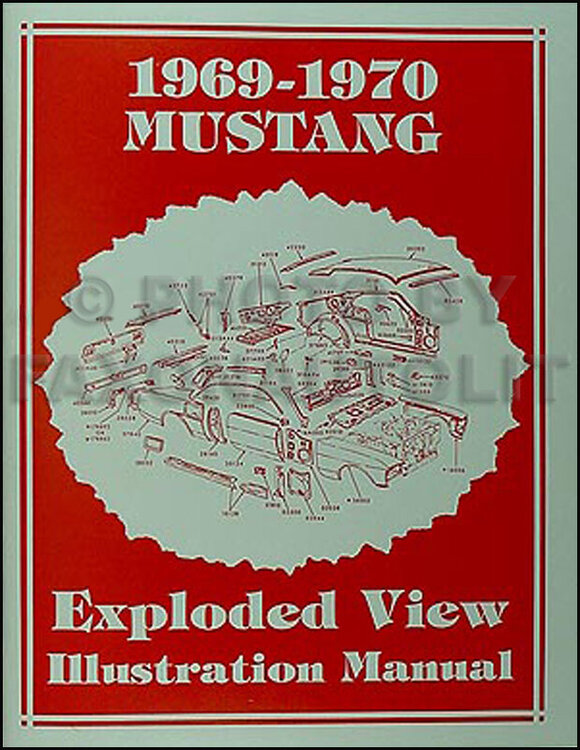
You know, I have the 1969 Car Shop manuals and also have the Osborn Assembly Manuals. Even with these, I find stuff challenging. The front valance panel illustrations are few and limiting. Is there anything better?
Can anyone comment on the attached? Is it merely just more of what I already have?
Thanks!
-
Those are great, Brian. Thank you! Any chance I could get a picture of the grill support and it's attachment points? Thanks, so much!
-
Hey friends, I'm mocking up panels on my car and struggling with the front splash shield or valance panel. I took lots of pictures when I took the car apart but that shield seemed intuitive at the time and I subsequently skipped the picture taking. Any chance I could get one of ya's to shoot some pictures of it's attachment points for me? I've been all over the web and apparently I'm not the only one questioning this. Nothing in this in my Ford assembly manual nor is it in the Jim Osorn manuals that I have.....arghh.
Thanks!
-
My trunk lid is OEM as is the spoiler, both original to the car. Unfortunately, my car is an early 69 build and does not have the oval cutout. I do have a bracket but it is not like that and does not protect the deck from what has transpired in the pictures above. If I recall correctly, the owner that bought the car new had the dealership install all the spoilers and window louvers. Anyway, bought an aftermarket lid tonight that has the correct cut out for that bracket. Keeping my fingers crossed that the aftermarket lid is a good one.
-
Thank you, gentlemen! Think I found what I'm looking for.
-
18 hours ago, jjstang said:I got the dynacorn. Happy with it. NPD doesn’t label them though.
So is the dynacorn unit this from NPD?
-
Wondering if I can get some comments on a couple of trunk lids offered by NPD. Item # 40110-3A is cheaper at $205. They offer another lid, #40110-3B, at $373 but it is out of stock. The latter more expensive one is supposedly thicker metal and quoted as better fit. Thoughts and comments on one or both of these is appreciated.
John
-
Bob, tell me about your aftermarket lid? Brand and fit? I'm considering a repop trunk lid. In fact, gonna post on this.
-
Well, apparently there is a difference in deck lids. Late 69 and 70's have an oval cut out. My early 69 does not have this cut out.
-
Probably a stupid question but, wondering if trunk lids differed between those that received spoilers and those that didn't. I ask because I have an OEM trunk lid and OEM rear spoiler. The trunk lid is deformed at the mounts with no underlying support. You have the outer skin and the inner skin separated by about 1/4". Even with the correct brackets, this seems like a rather cheesy setup and now one that I have to figure out a fix for.
-
-
11 hours ago, aslanefe said:John, sports roof do not have roof braces under the roof, right? Coupes have 2 braces, one in the middle and one between that and rear window but my first 70 Grande and 69 Grande has the oil canning on the roof between the front brace and windshield like yours. And the 70 Grande I am working on had it too. I made a 3rd brace from a metal conduit and installed between the front brace and windshield frame on the 70 Grande I am working on to fix the issue as I did not want to try to metal work it and make it worse. It is easy to mess up a big panel like the roof unless you are a real pro at metal work. I can get you some photos of my fix if you need. A heavy layer of bed liner or self sticking sound deadener/insulation should work too; I will also be applying self sticking on the roof.
Braces are front and rear only, large area in the middle with no bracing. I saw somewhere where a fella made a brace but don't recall where. I also talked to a local guy about adding a brace so, I'd very much welcome your photos and info on this brace, so please post on it.
Thanks for the well wishes too, appreciate that!
-
10 hours ago, aslanefe said:I am not seeing a 1/2" gap on the photo, can you post one showing this gap?
You can bend the tab at the aft bottom of the fender some to use thinner shims/washers if I am understanding your issue correctly.
Sorry, maybe not clear on my part. Gap is where the bottom of the fender attaches to the rocker area into the captive nut. Spacers go in there but that's a lot of spacers to fill that gap.
-
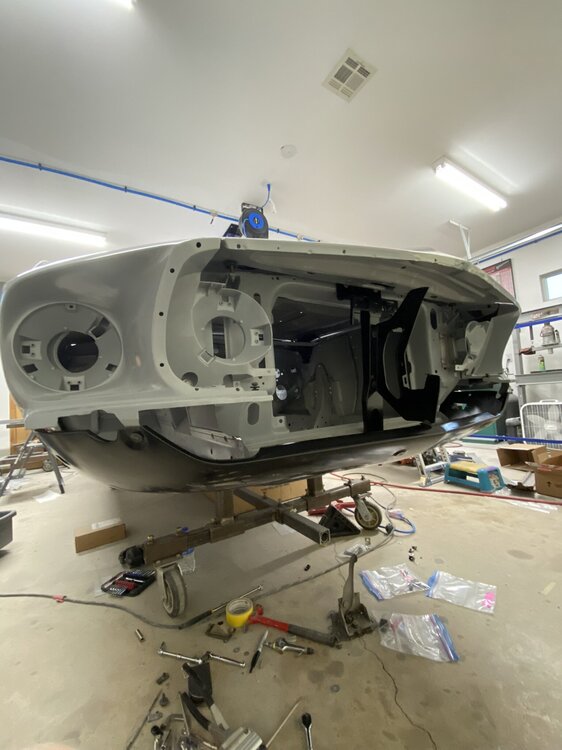
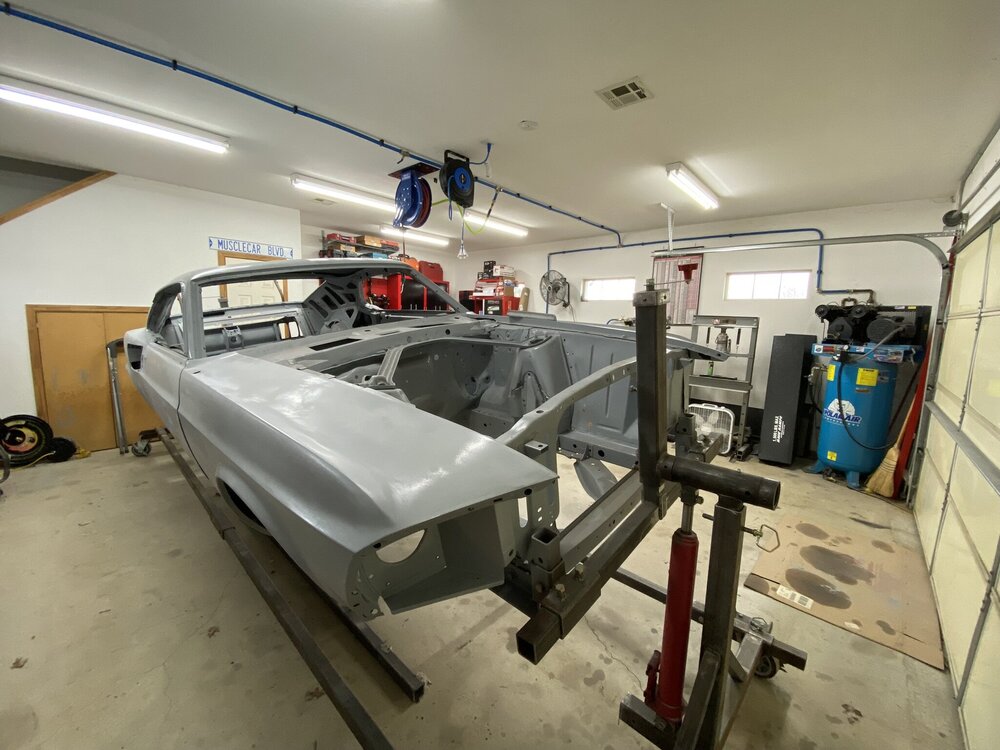
I need to get the front fenders and hood on to evaluate the gaps and panel fitment on my project. These are original doors, fenders and hood. The car is currently on the rotisserie and I will be moving it to the body cart for all that, pending the fix on my previously posted oil canning roof.
My doors are aligned pretty good but I just can't seem to get these fenders right. Is there some kind of order in bolting them in? We have bolts on top, two up front, one from behind and two at the bottom. At the bottom of the fender, a bolt goes in and attaches to the captive nut but there is a huge gap between the bottom of the fender and that captive nut. I realize they used spacers in there but this gap is every bit of 1/2" or more and I don't recall pulling out that many spacers when I pulled the car apart.
Also, in as much as I've pulled the doors and fenders on this car and scratched the epoxy primer, I have concerns now about damaging the paint when I go to put the car back together. Also, I want things to go back to their proper alignment once I figure all that out. Recommendations on this process, please?
Thanks!
-
Hey friends, been awhile! Good to see the usual gang still posting. For me, turn sixty and health goes to pot. First, surgery for a very large gallstone (freaking worse pain I've ever endured.), then double hernia surgery and finally, and most recently, triple bypass surgery. Seems there's always something to keep me from working on the Mustang. But, I'm thinking I'm back now!
Anyway, my goal is to get paint on the car this year! I've got a couple of obstacles I need to address and will be posting on them separately here. First and foremost, is some potential oil canning in the roof that I discovered while block sanding the roof. Not sure how this happened, perhaps in the media blasting but not sure. There is a few small dings in the roof but not that big of a deal and the roof has the correct contour. I'm going to address the small dings with a hammer and dolly and see where it takes me, but I'd like your thoughts as to whether this is normal or excessive? I'm pretty sure these roofs have some flex in them, but this much??? Anybody willing to push down on their roofs for me....LOL!
Thanks,
John
-
Thanks fellas. I had thought that seeing the gap with the tail lights in might be difficult. Thanks for that input and photos, jmlay. As Ridge Runner noted, I may bump it a bit.
-
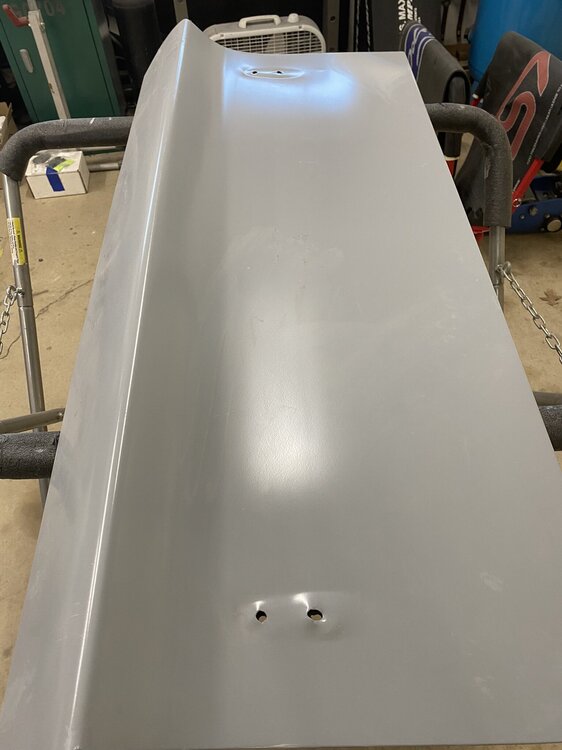
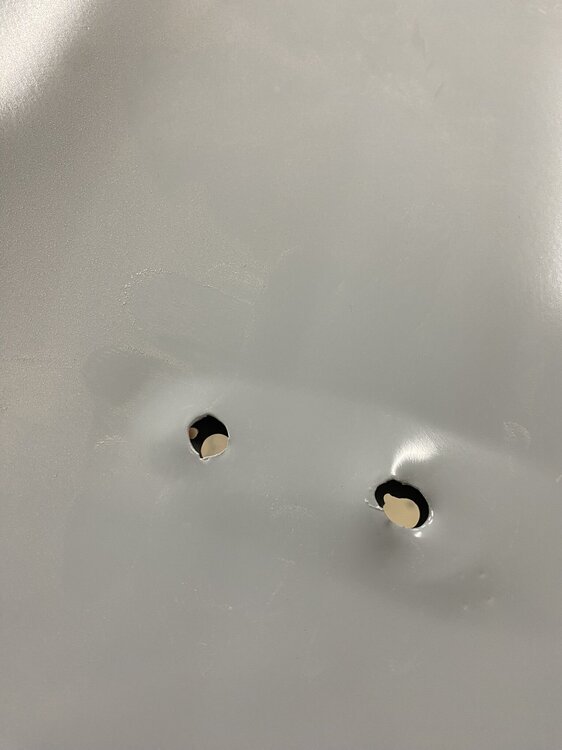
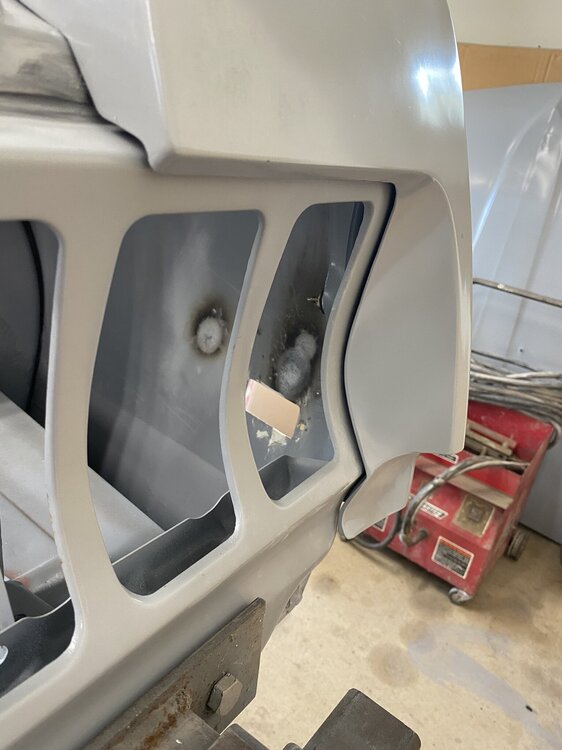
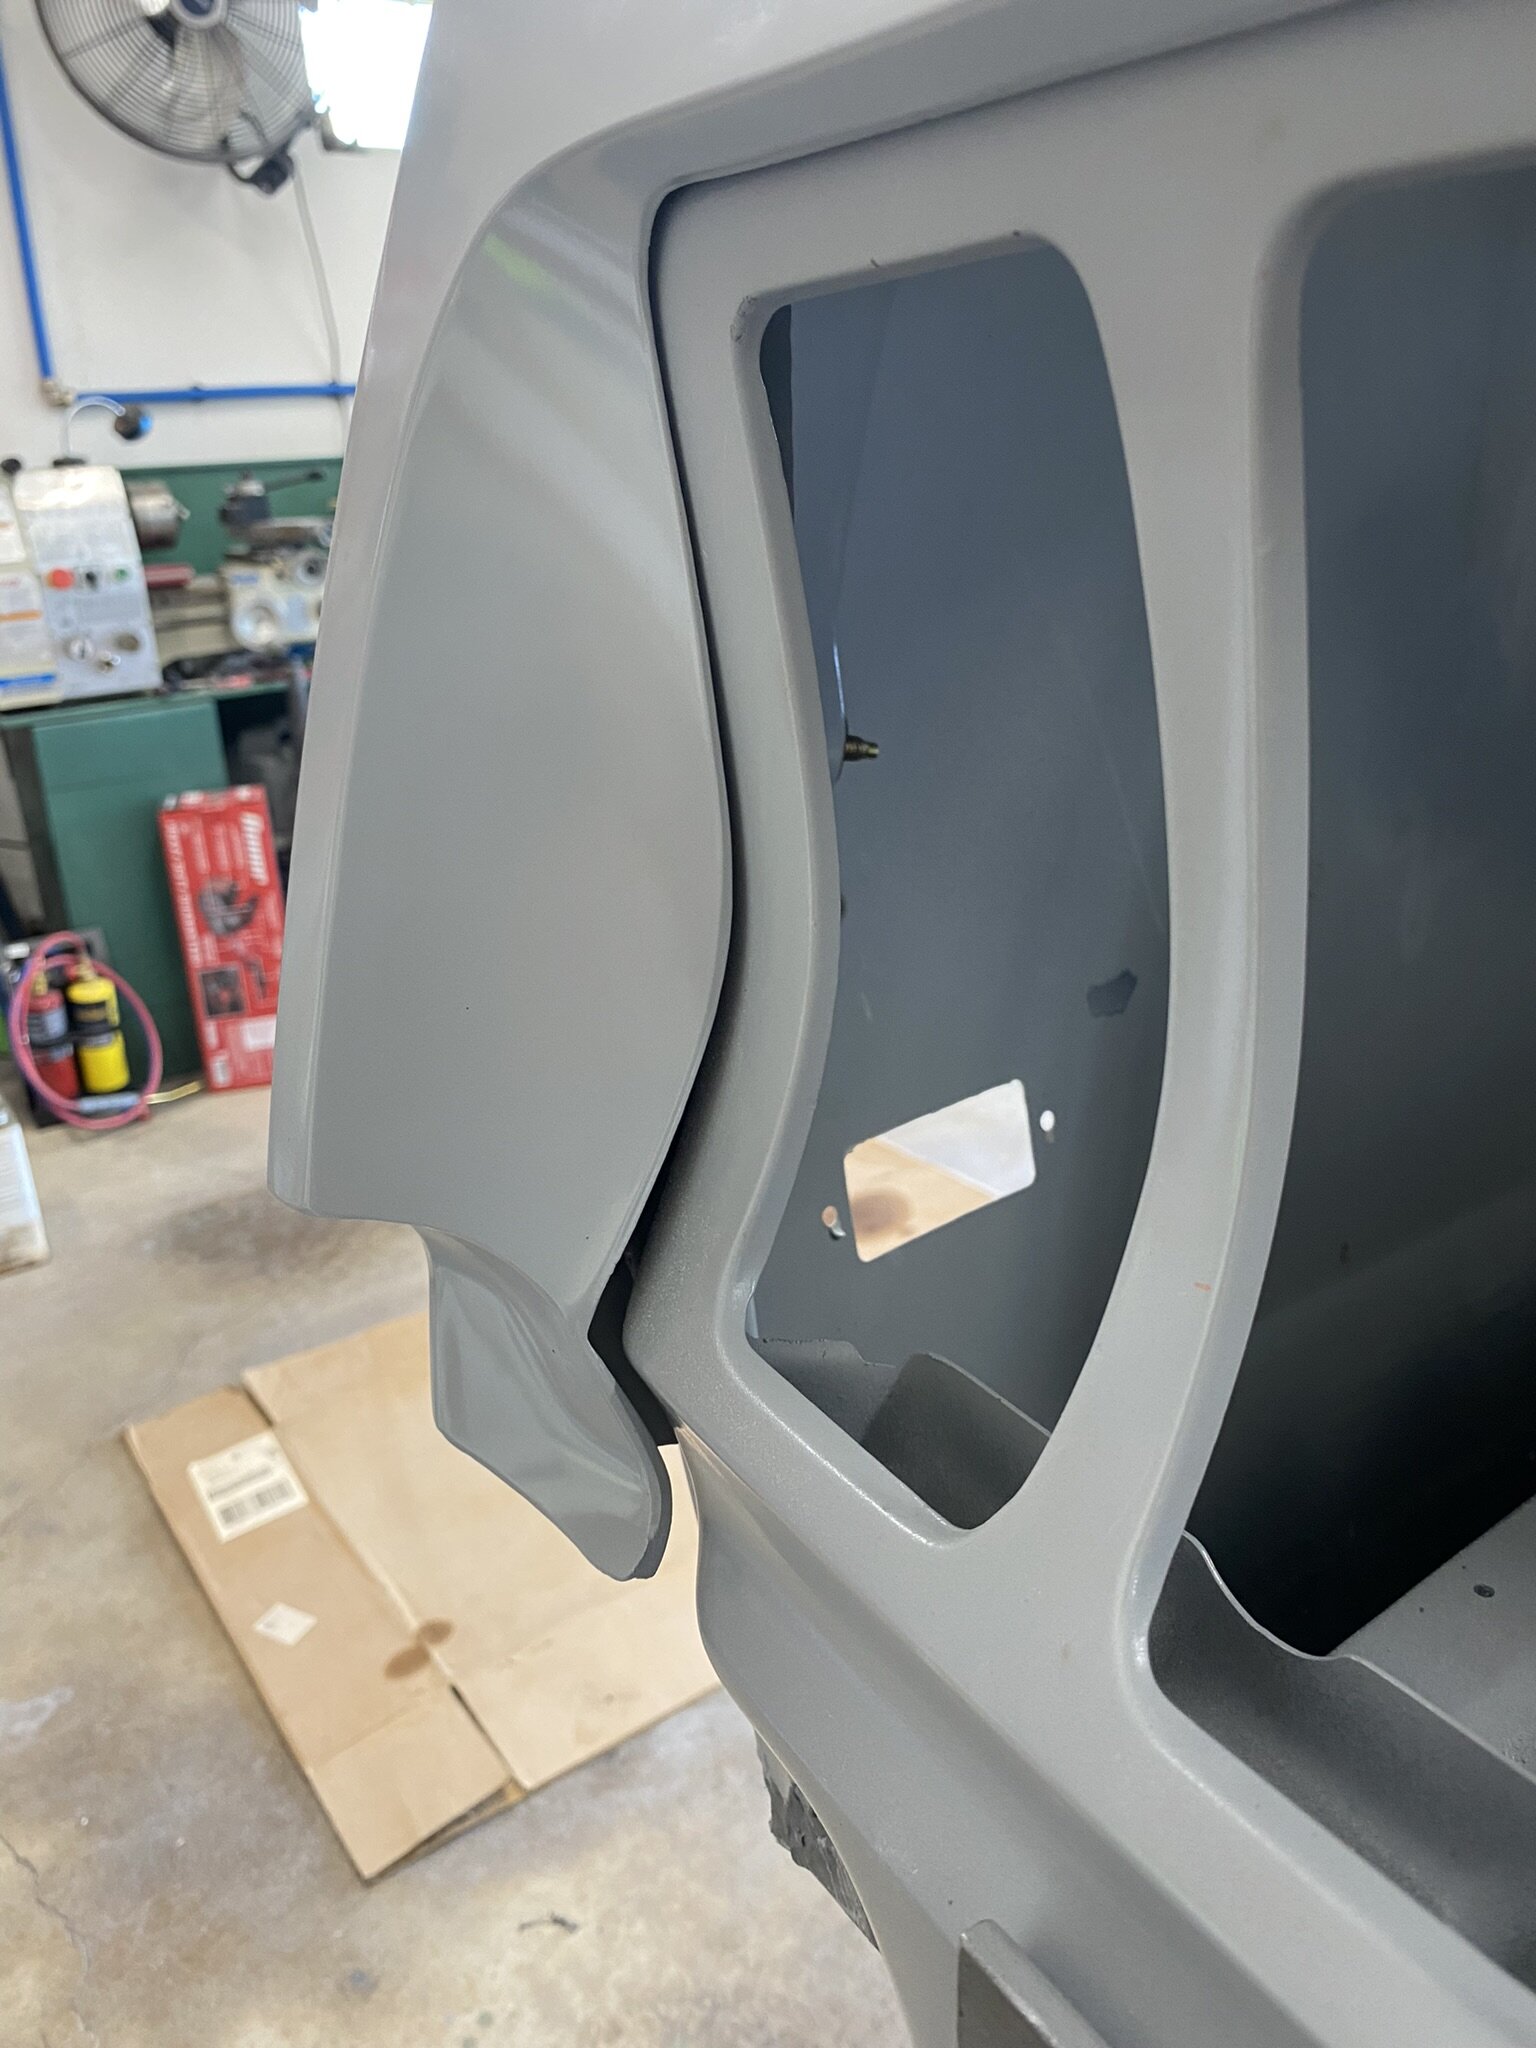
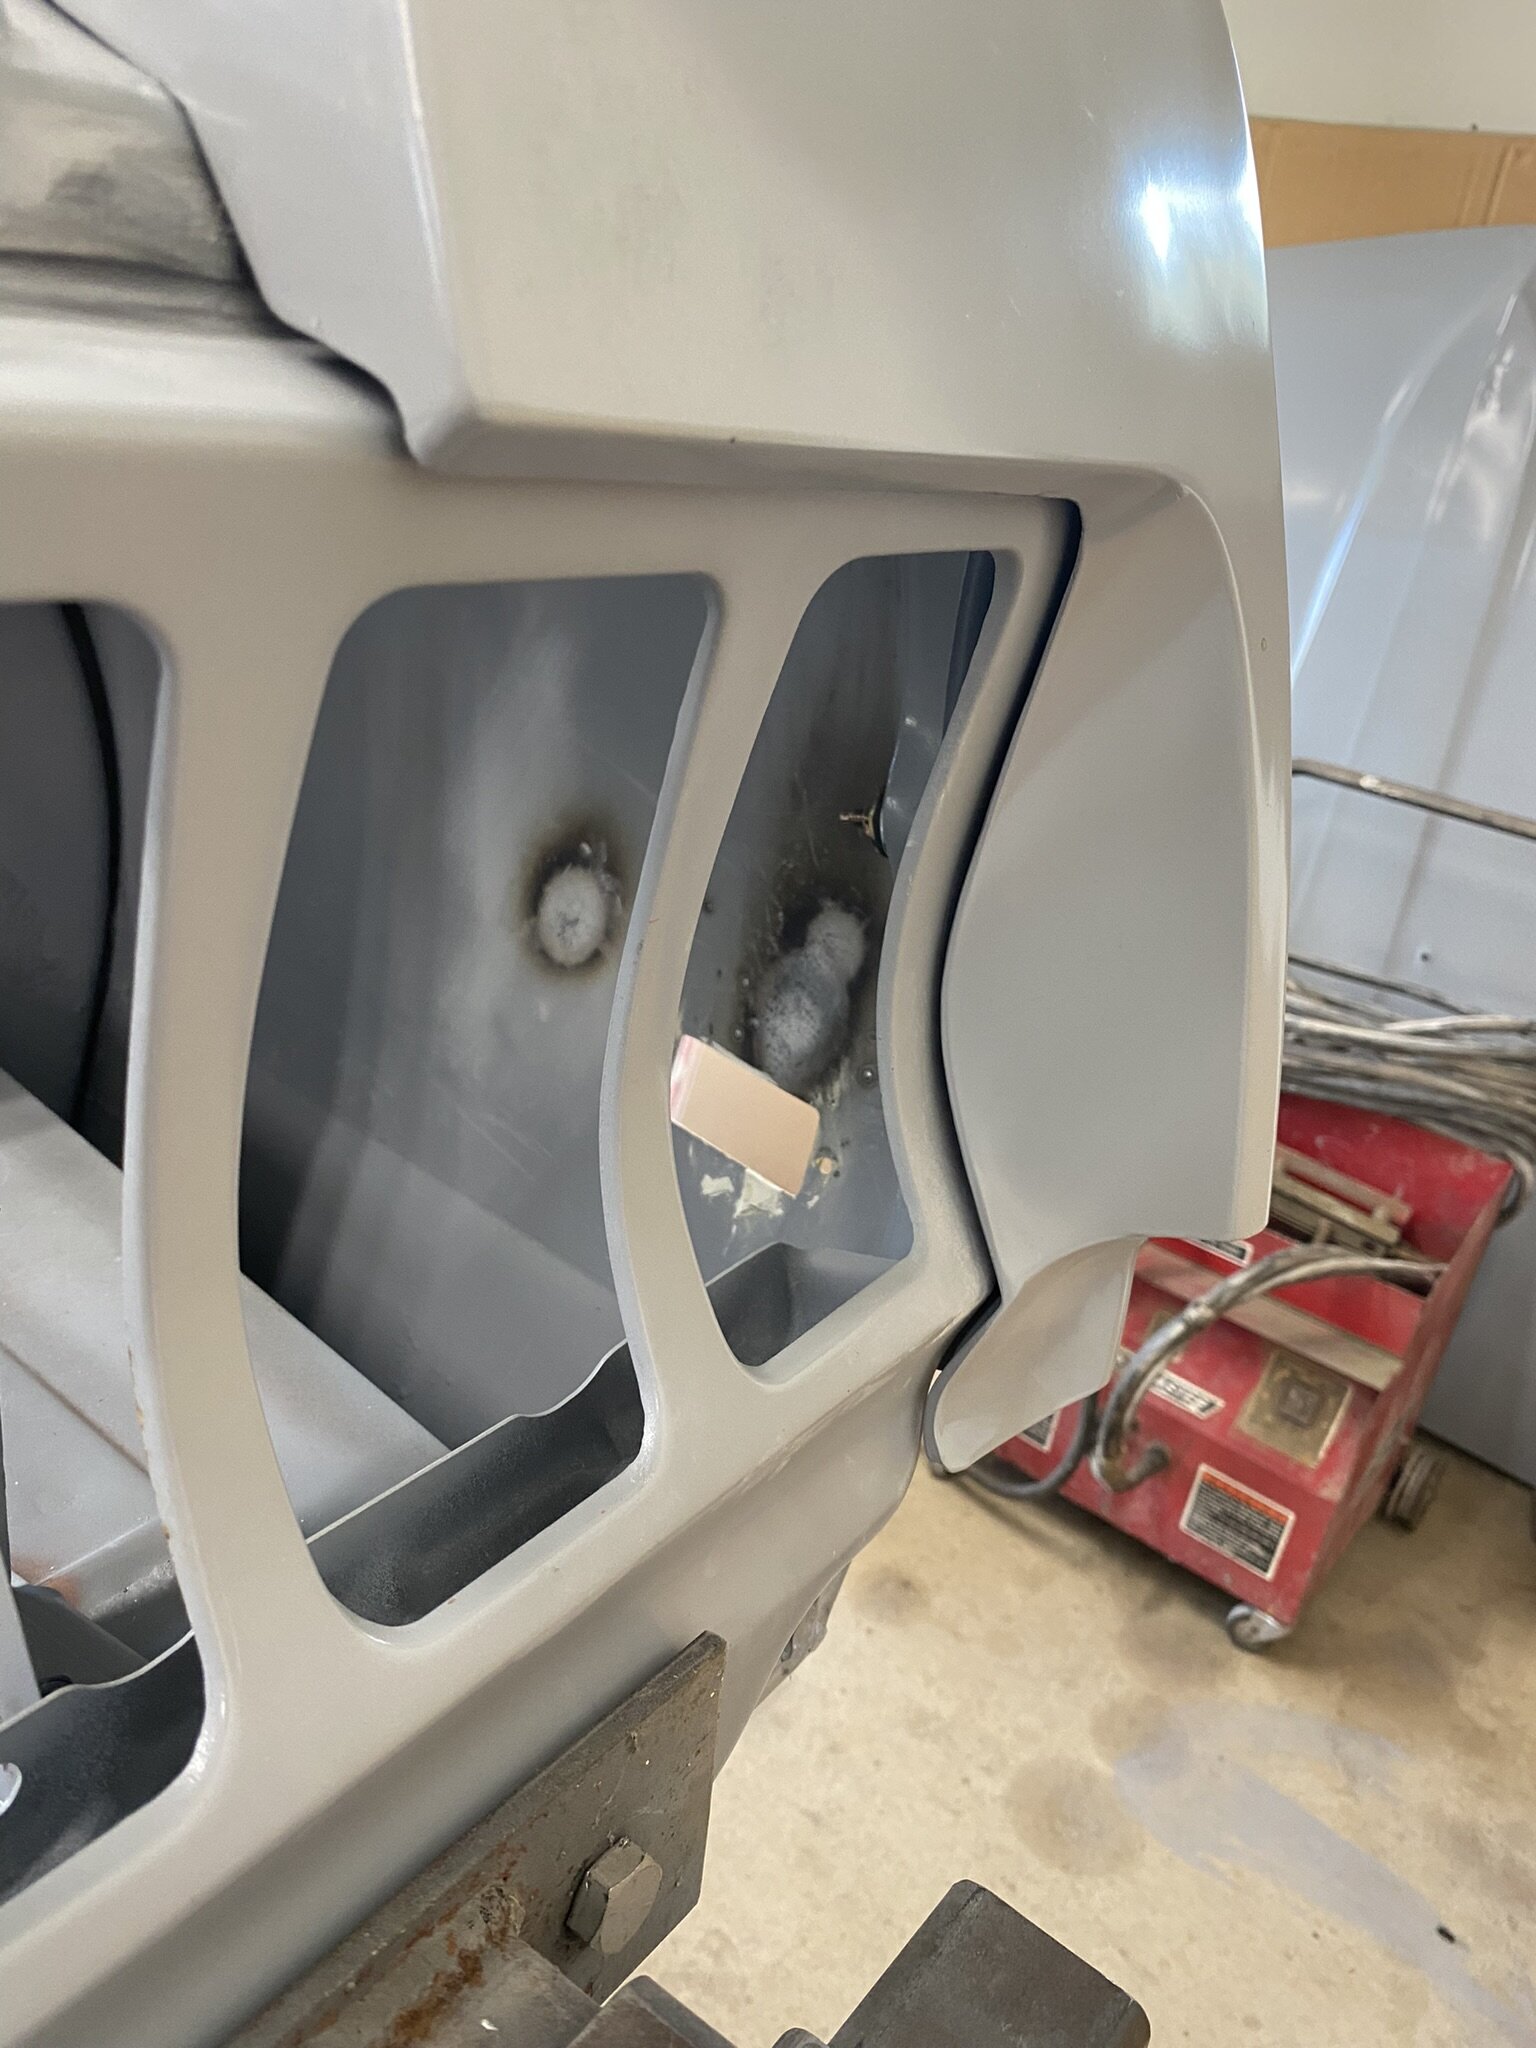
I've been doing some panel mock up and gap evaluation on my car before paint and question the fit up of my rear qtr end caps as they run across the tail panel. The rear quarters are OEM as are the end caps. I replaced the tail panel with a high end NPD part that was Ford tooling and it went in nicely but now I'm not sure about how the end caps are to fit against that tail panel. Mine are not uniform with a gap larger at the bottom than at the top.... see pics. Can I get pics of how these fit on your cars?

-
WOW! That is some incredible work there, Ridge Runner!
-
Nice find, indeed! Thanks you!
-
19 hours ago, det0326 said:This is just my 2 cents Ed, if I were in you're shoes knowing what I know now about classic cars, I would put the original engine up somewhere safe and get a later model roller. Not for just that reason tho there are several improvements that I like, things like a better style rear oil seal. Like I say tho that is just me but my thoughts are if I build HP with the original block I would drive it like a bandit and blow a rod out the side and it would be lost forever.
In total agreement with this! Pull yours, put it away, and build off a newer and better set up.
-
Man, that stinks! Sorry Ridge.......
-
7 hours ago, TexasEd said:Yeah my door is the passenger side. I missed that part.
Yeah, that's just about how my luck goes too! Given a 50/50 chance at anything, I might get lucky 2 out of 10 times....arghhhh! Meh....just as well. I need to learn to work these complex type of patch panels. Thanks Ed.
Thanks for the input friends.


69 Front Valance Assembly
in 1969-70 Technical Forum
Posted · Report reply
Thanks Bob, I was wondering if this was a common problem on our cars. I have both the OEM valance and a Dynacorn one. The OEM fits marginally better. I have spent literally eight hours so far just jacking with this valance and it don't matter what I do, it won't fit fully flush.
Brian, I thought about that too. I just hate it when crap doesn't go like I want it to, thus the crazy amount of time I've spent on it thus far....ARGHHHH