

latoracing
-
Content Count
1,077 -
Joined
-
Last visited
-
Days Won
47
Posts posted by latoracing
-
-
Full floors are the way to go IMO. They are fairly easy to install and look much better than long pans once completed. The up front cost of the pan looks a little steep, but is much quicker to install. I highly recommend full floors.
-
-
'82 GT, Coupe or GLX type?
-
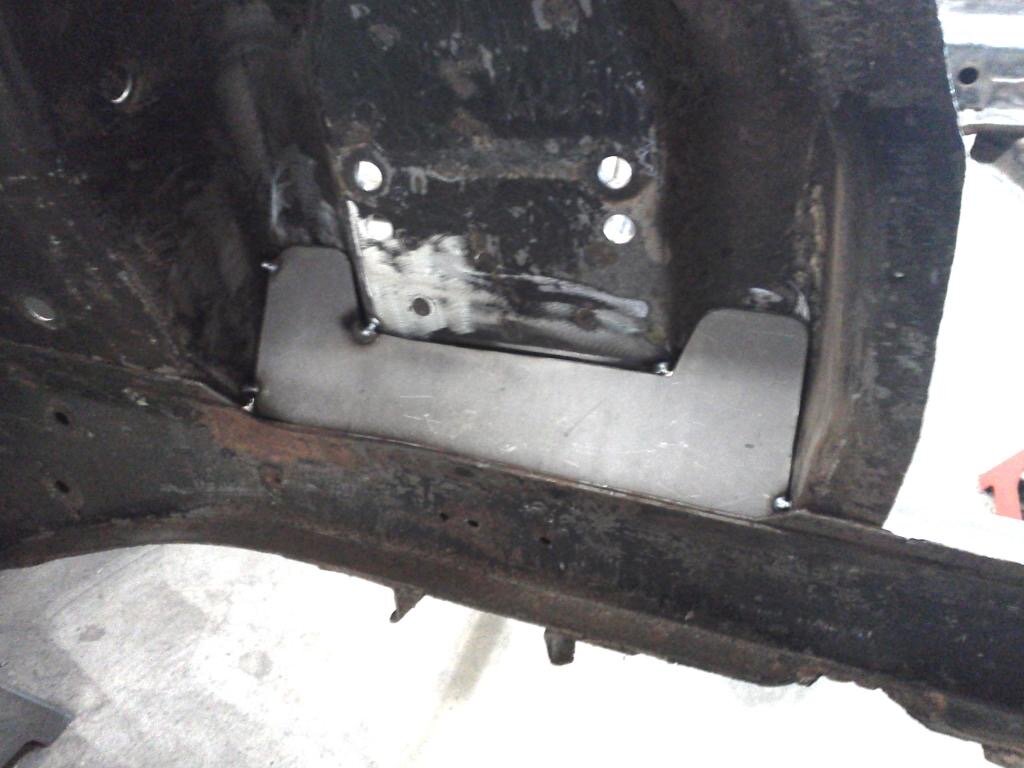
I have never seen an aftermarket torque box with the E-brake channel in it. The originals that I have messed with , 69's had it, 70's did not. Routing the cable is fairly easy as there should be an access hole in the rear of the torque box close to the floor support. the cable hole can be drilled in the upper left hand fire wall extension, through the TB lid and you should be good to go. This is a picture of Vic's 70 vert when I was fixing up that area. You should be able to get a decent gustimate from the pic.

-
I use my welders a lot. The Miller doesn't like thin body work, especially newer cars. They manufacture higher amperage machines that will do thin to 3/16" without having to go to an industrial machine.
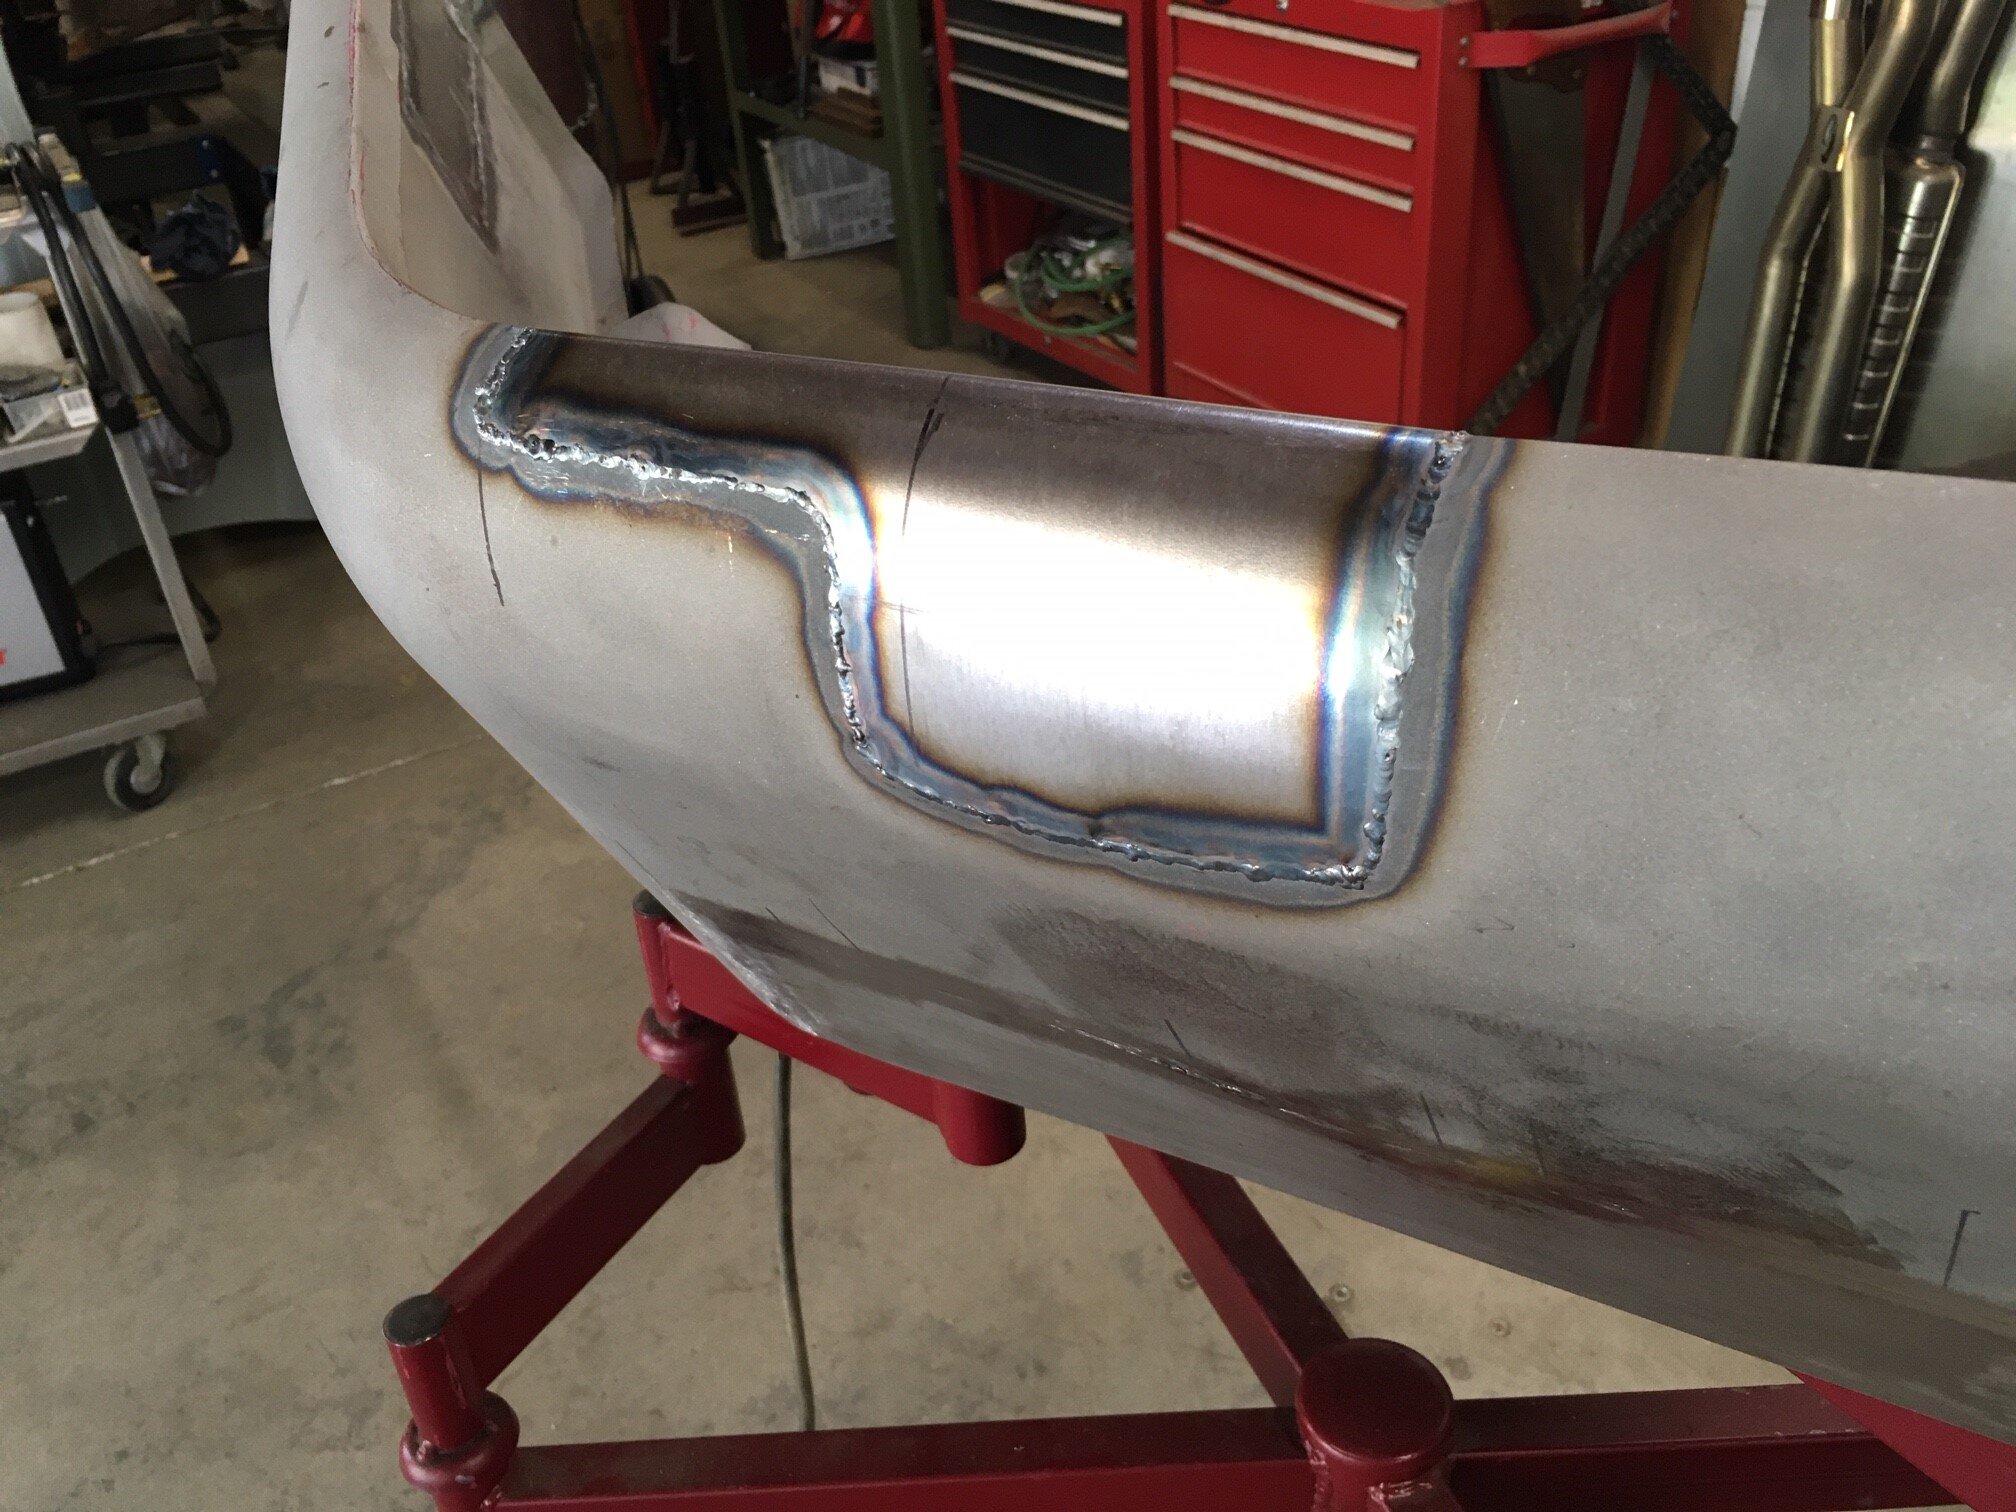
You can do the big block wraps in 1/8", should work.
-
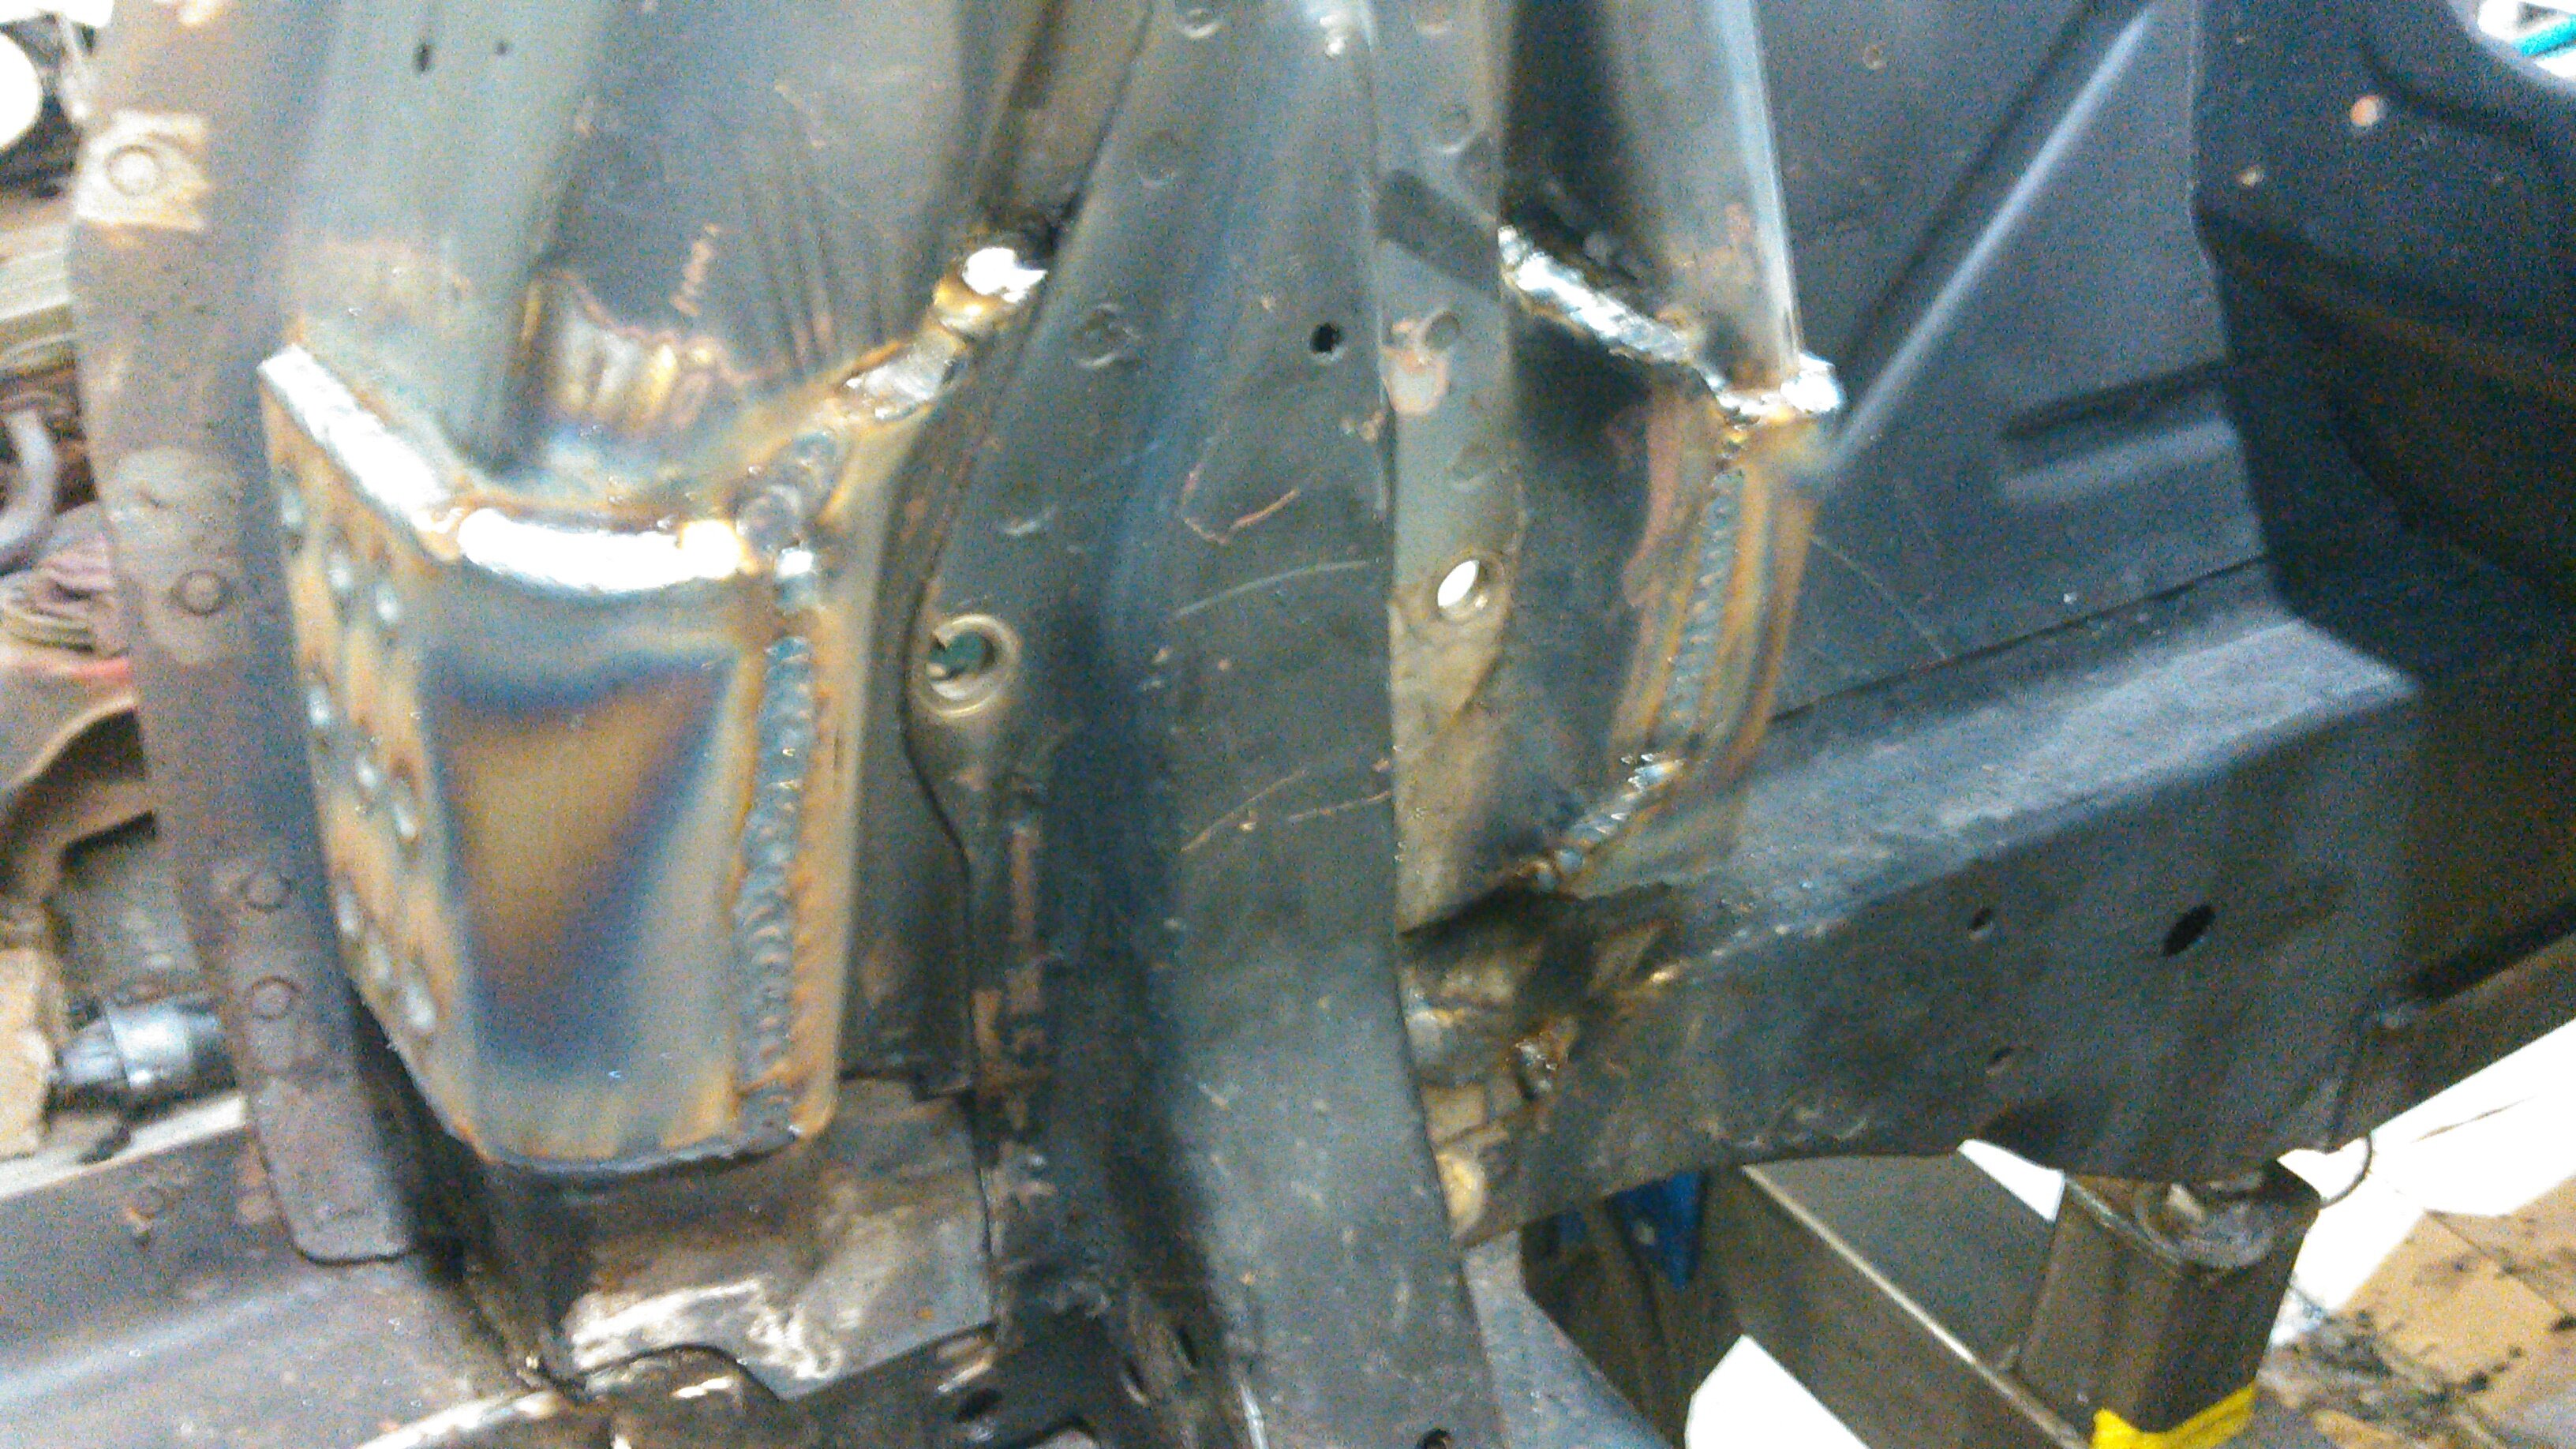
Pretty much. Fully welding the bottom of the shock tower to the frame rail and a few other gussets are all I know to do to them.
If you have a local fabrication shop, all this material may be just a scrap bin away.
Do not get rid of your little welder. It will be very valuable for doing thin sheet metal. You can barely see my setup behind the shock tower. A Miller 210 and a Lincoln 175, both are 220v. I keep .030"-.035" in the miller and .023" wire in the Lincoln. You can run .030" in the small welder, but it will duty cycle in about 5 minutes of welding doing thicker stuff. It takes a bunch more prep to get it to weld correctly IMO.
-
The B302 gusset would be my first choice for reinforcements. Use poster board for your template and get it fitting like you want it. You can easily cut out your own plates from 1/8" material with a grinder / cut off tool. Your 140a welder should be able to handle this with ease.

If you're wanting to do the big block style reinforcements it might be a little more difficult, but some 3/16" plate and some creative bending will result in quality parts. Fitting these pieces will take a large hammer to adjust various components, trim and tack weld in place. This thicker material may be a little much for your welder as you will have to run it wide open. Bevel all weld joints to help with the lack of penetration.
A little grinding, and it will look better than factory.
If you are wanting to go a little overboard, you can reinforce the UCA attachment area. More cardboard templates and 1/8" material will be needed to build your own. Fully welding all factory seams and using several small filler pieces to fill in the recessed areas then plating over all of it, fully welding all seams with added rosette welds in the middle, and re-drilling your holes, you'll have some pretty strong towers.
 RPM and lalojamesliz reacted to this
 -
14 hours ago, RPM said:Ya, but did they delete any more of your photos?
Haven't posted that many but they are still there.
-
Yea!!!! Glad it's back!
-
2 hours ago, RPM said:Niiice! So I take it you're building new??? Same area Mike?
Yes, all new. It's just up the road a few miles, outside the city limits. Pretty close to swapping the building's square feet for house square feet. Existing house 2800 sf., 1500 sf. building. Going to build a 1500+ sf. house and a 2400 sf. metal building. (40 x 60). No subdivision, no city taxes, lots and lots of grass, much better.
-
That doesn't look good. Quick check would be to put an export brace on it or get the rockers level then see if the top of the front frame rails are on the same plane as the rockers. The front of the car could be bent upwards. Is the firewall dented in at the top of the rear apron as well?
-
I've been busy trying to fill in the Covid salary deficit over the past month with several extra jobs. Recently fixing some vintage FJ fenders that were quite crunchy. Lots of work, but helps pay the bills.


When I'm not working, I'm working on our next large project...

... downsizing the house and upsizing the shop. No more raking leaves in the fall, YEAAAAA!!!
-
-
As you have discovered, the datum line on that drawing is not where you would think it should be. Having a line to measure from is helpful, but you've got to remember how these cars were built and the not so accurate tolerance they were built too, along with many years of use. I personally build with the rockers level in all directions. The frame rail tops are fairly level (I have checked this on several cars and they vary) and reference the datum line for verification. The laser level is also another great way to set this line and can be referenced with a ruler under the car, and you do not rely on a completely flat floor (none of them are lol). If you had a surface plate setup, that would be different.
How much have you taken apart?
-
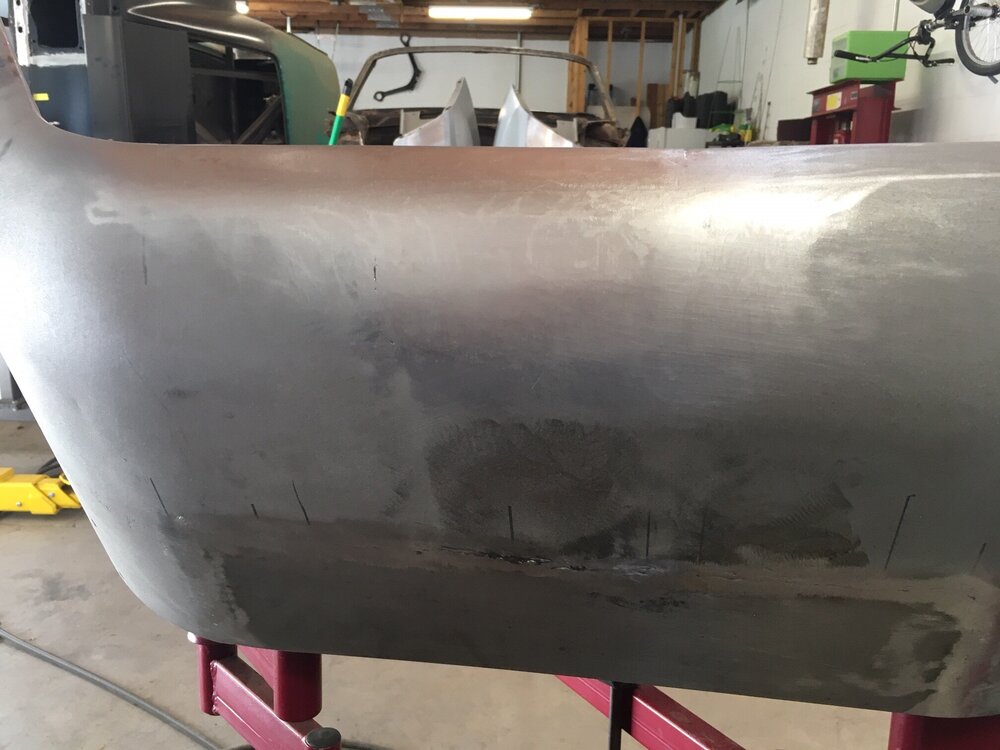
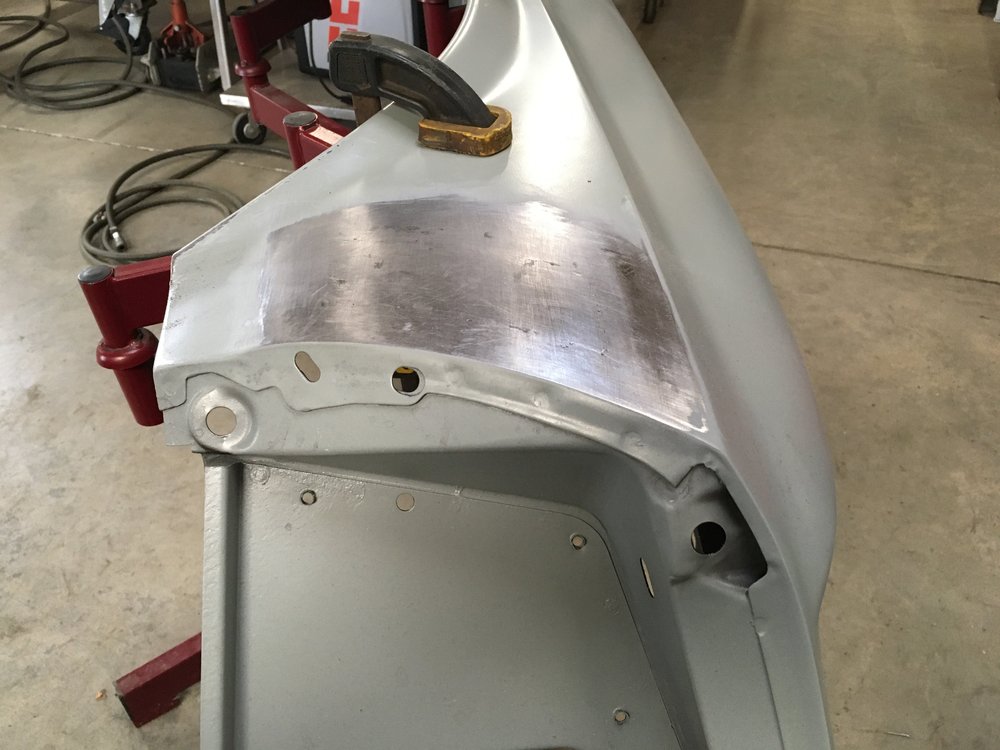
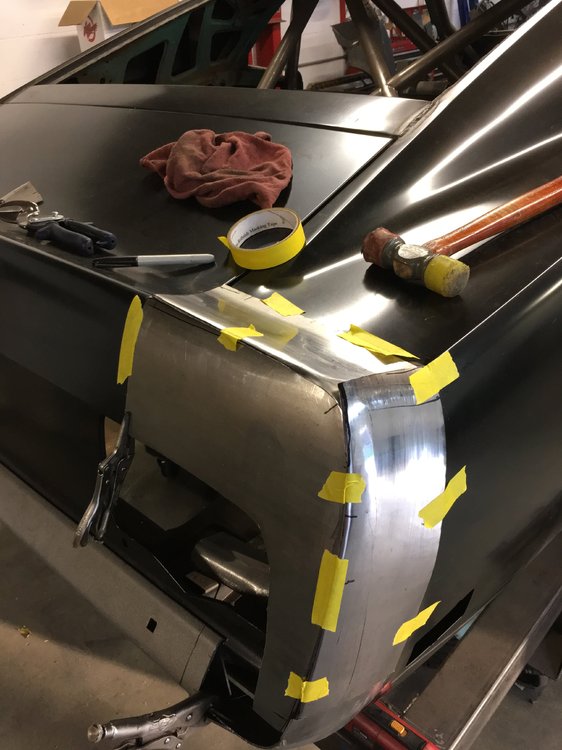
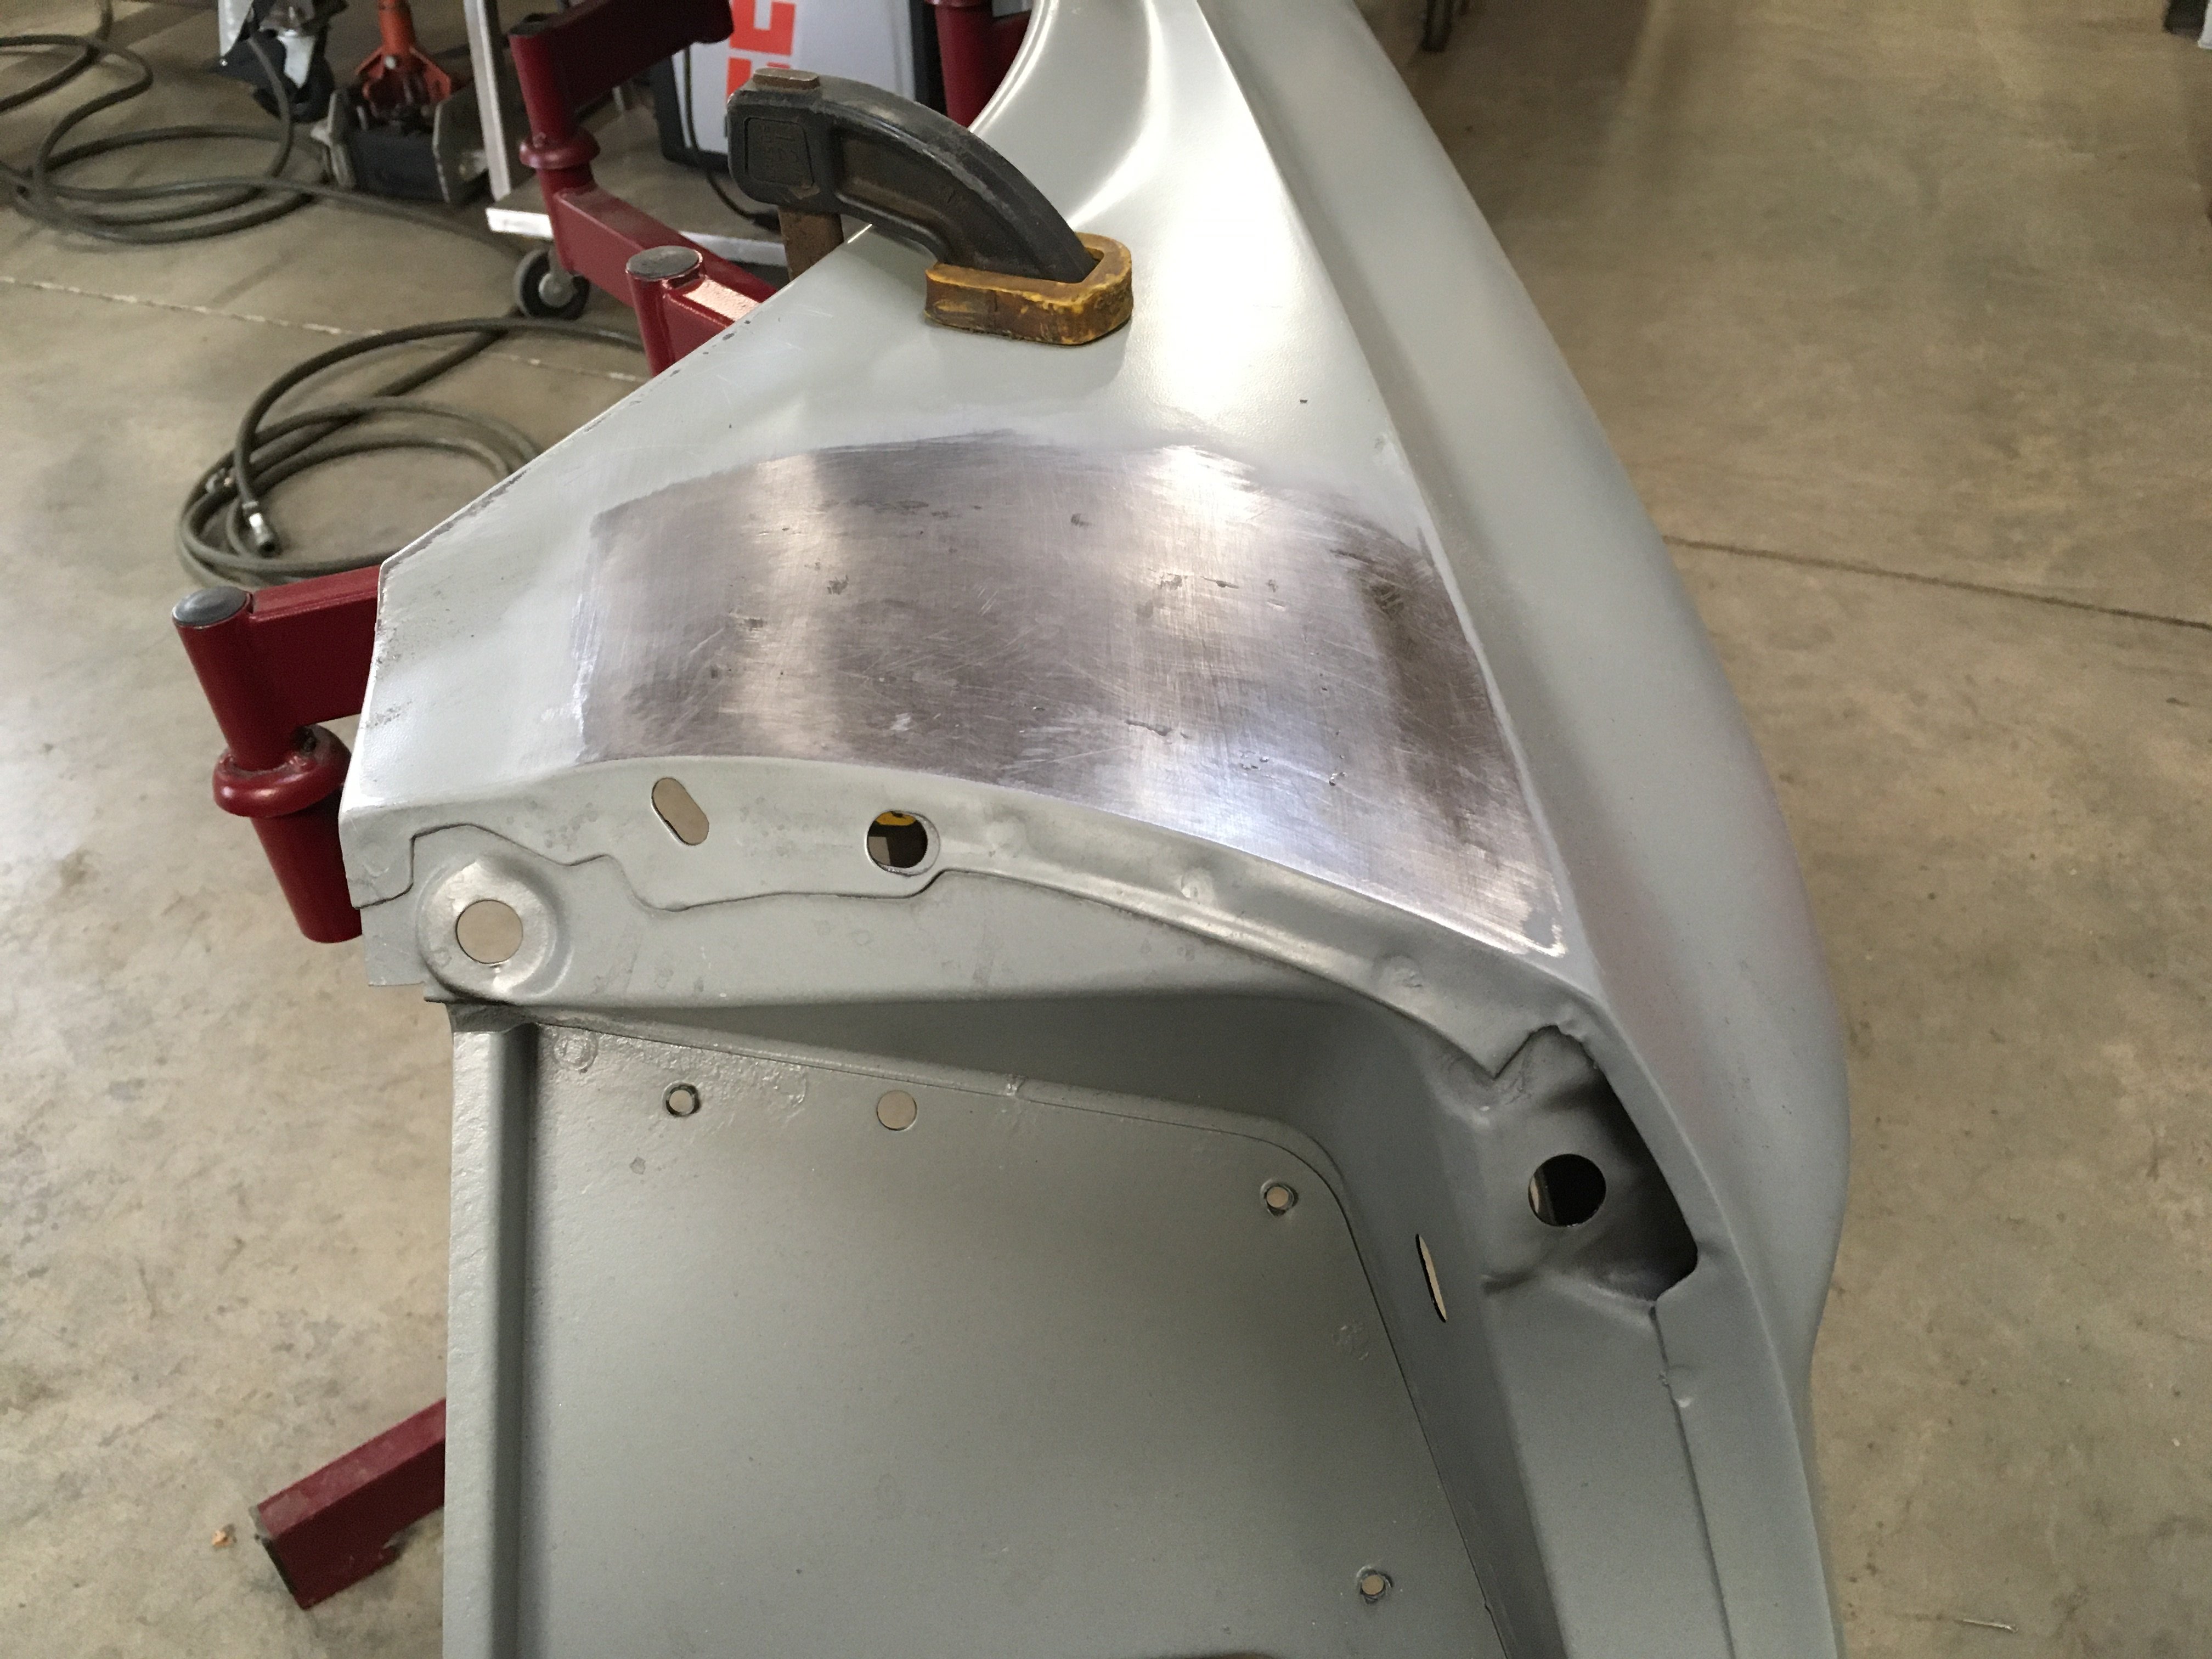
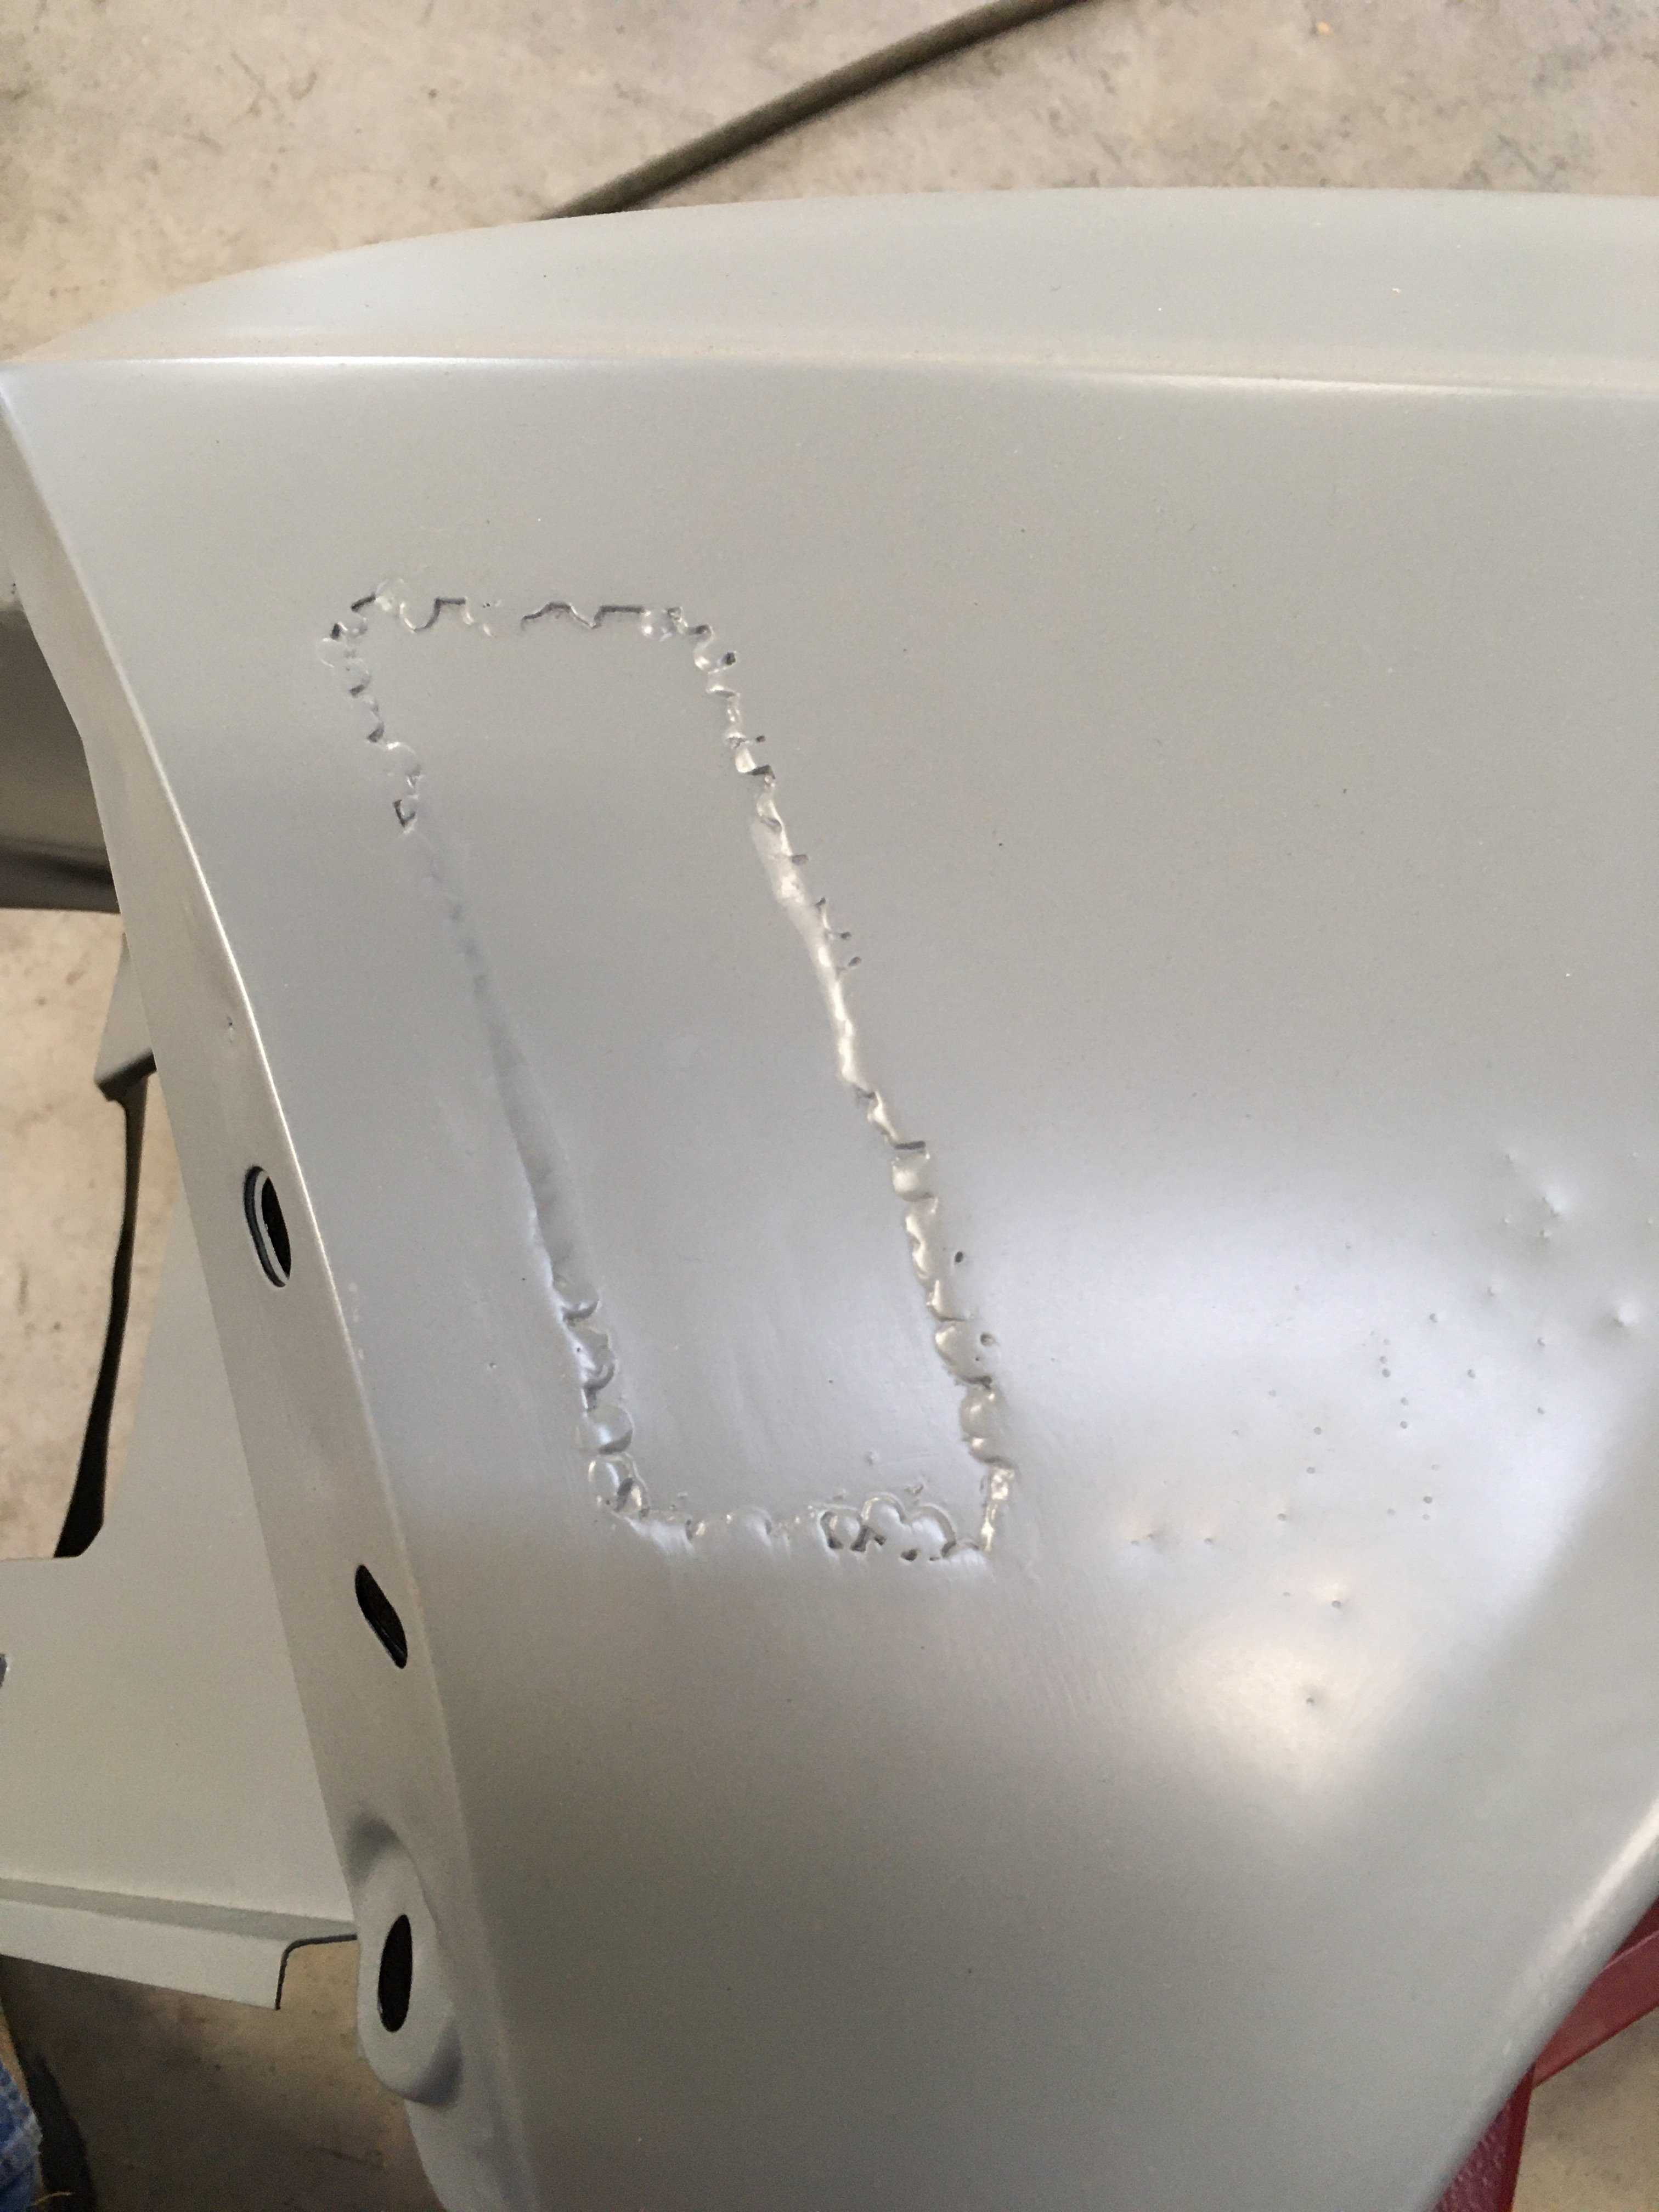
Been messing with the passenger side fender the past couple of days. I took a little more time getting the surface fairly flat but still have minor issues around the welds. Getting all the shrinking out of 20ga and not cutting through the part is difficult. Maybe with a little more practice I might get the hang of this metal working stuff.
-
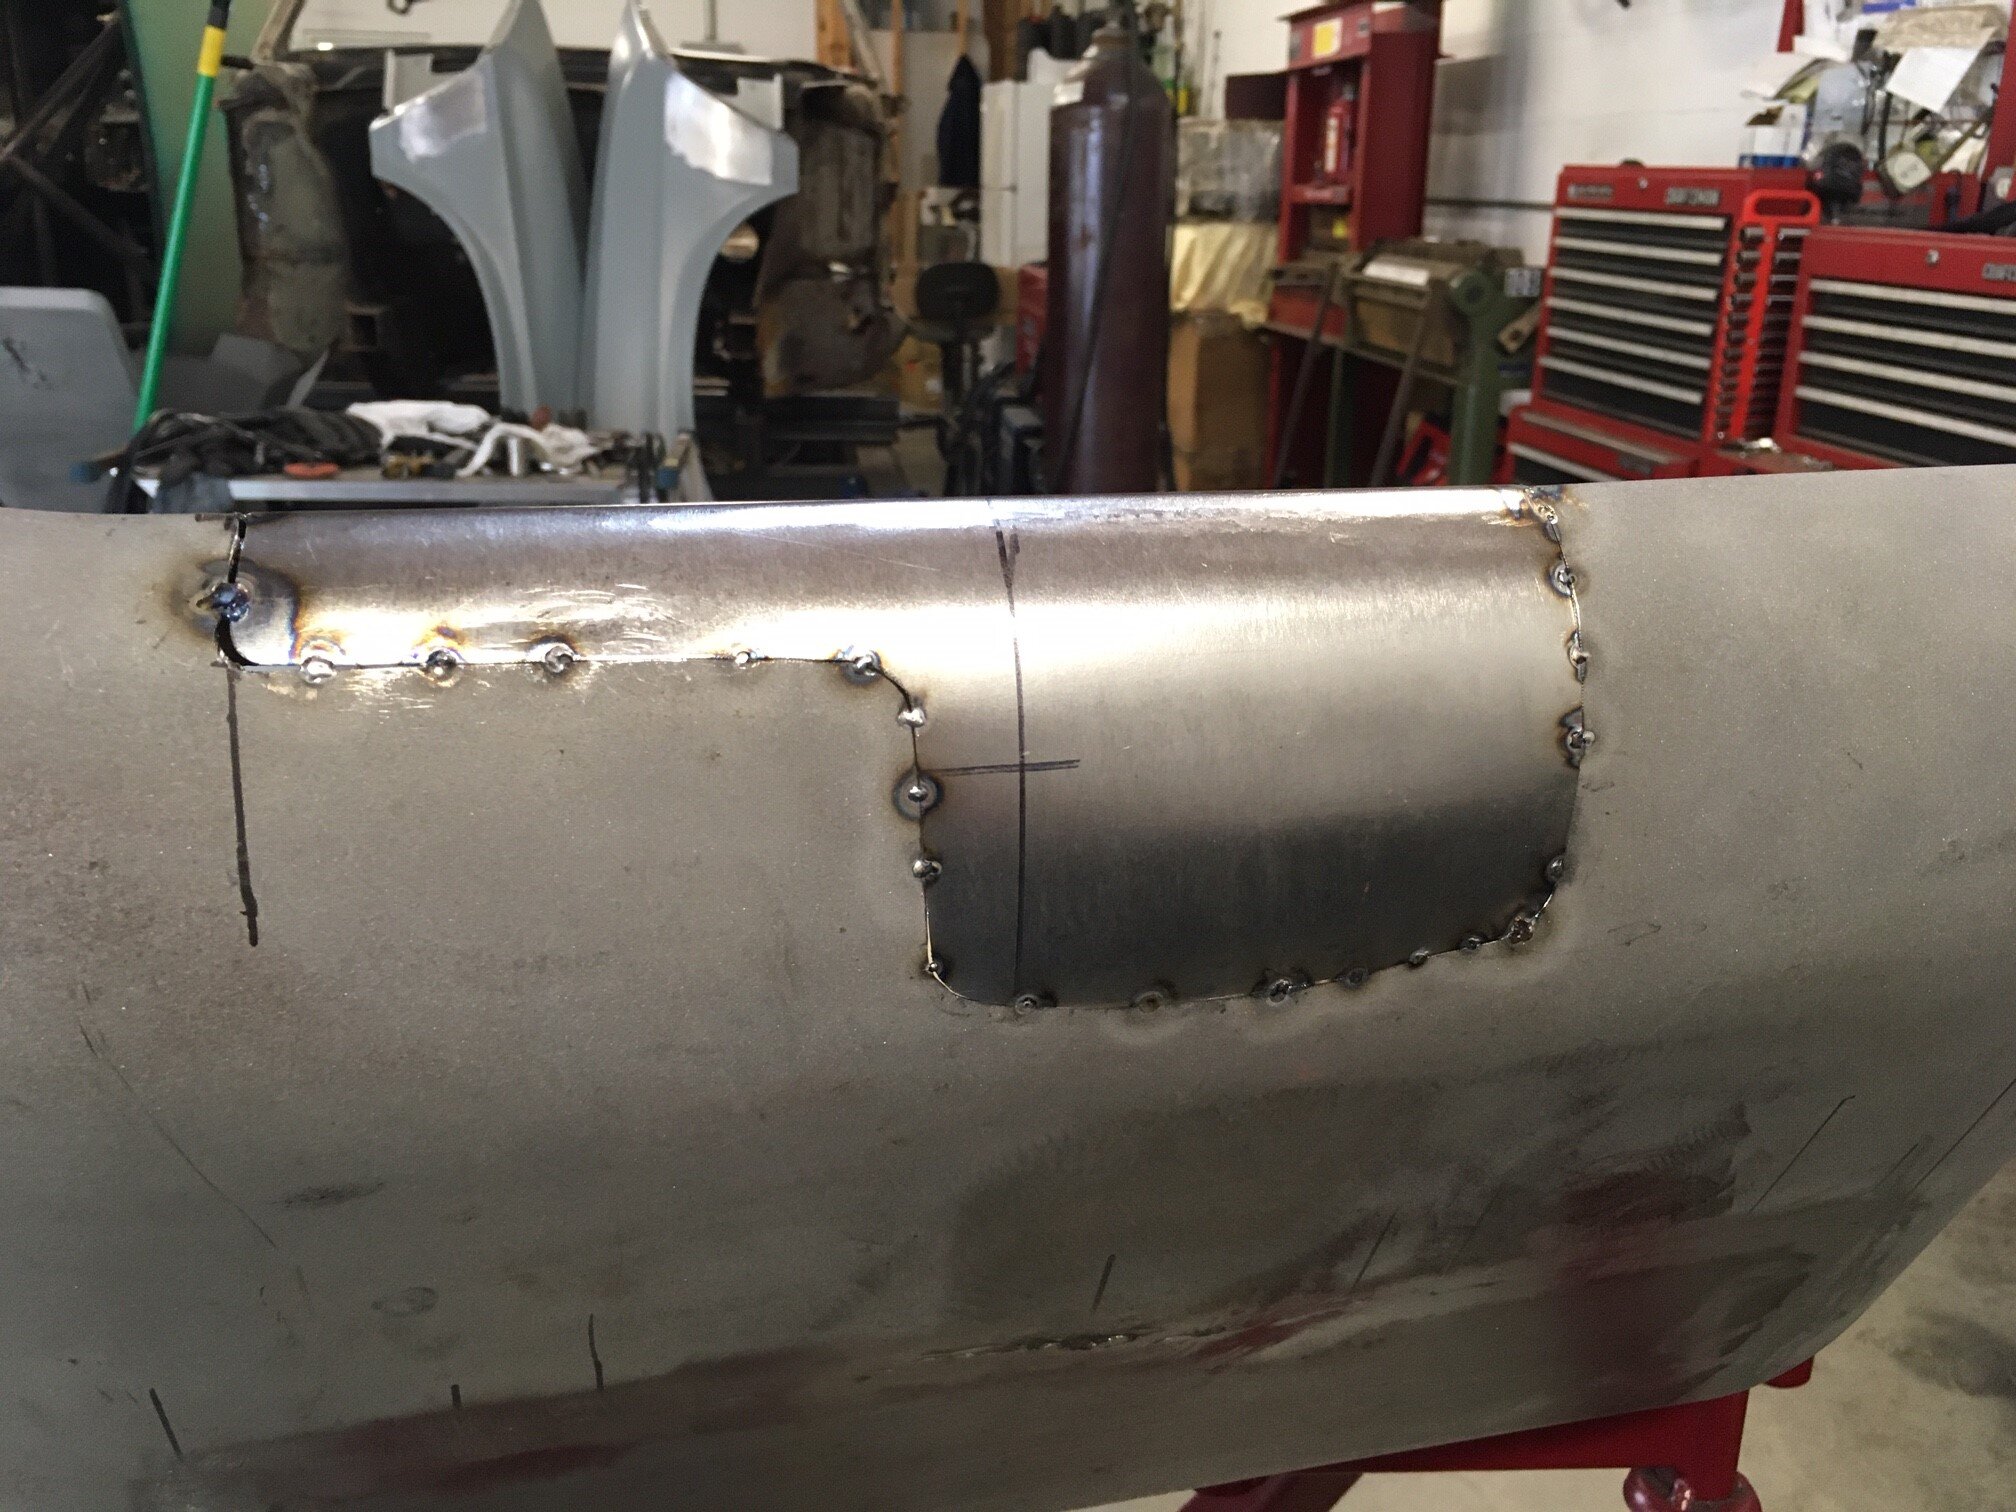
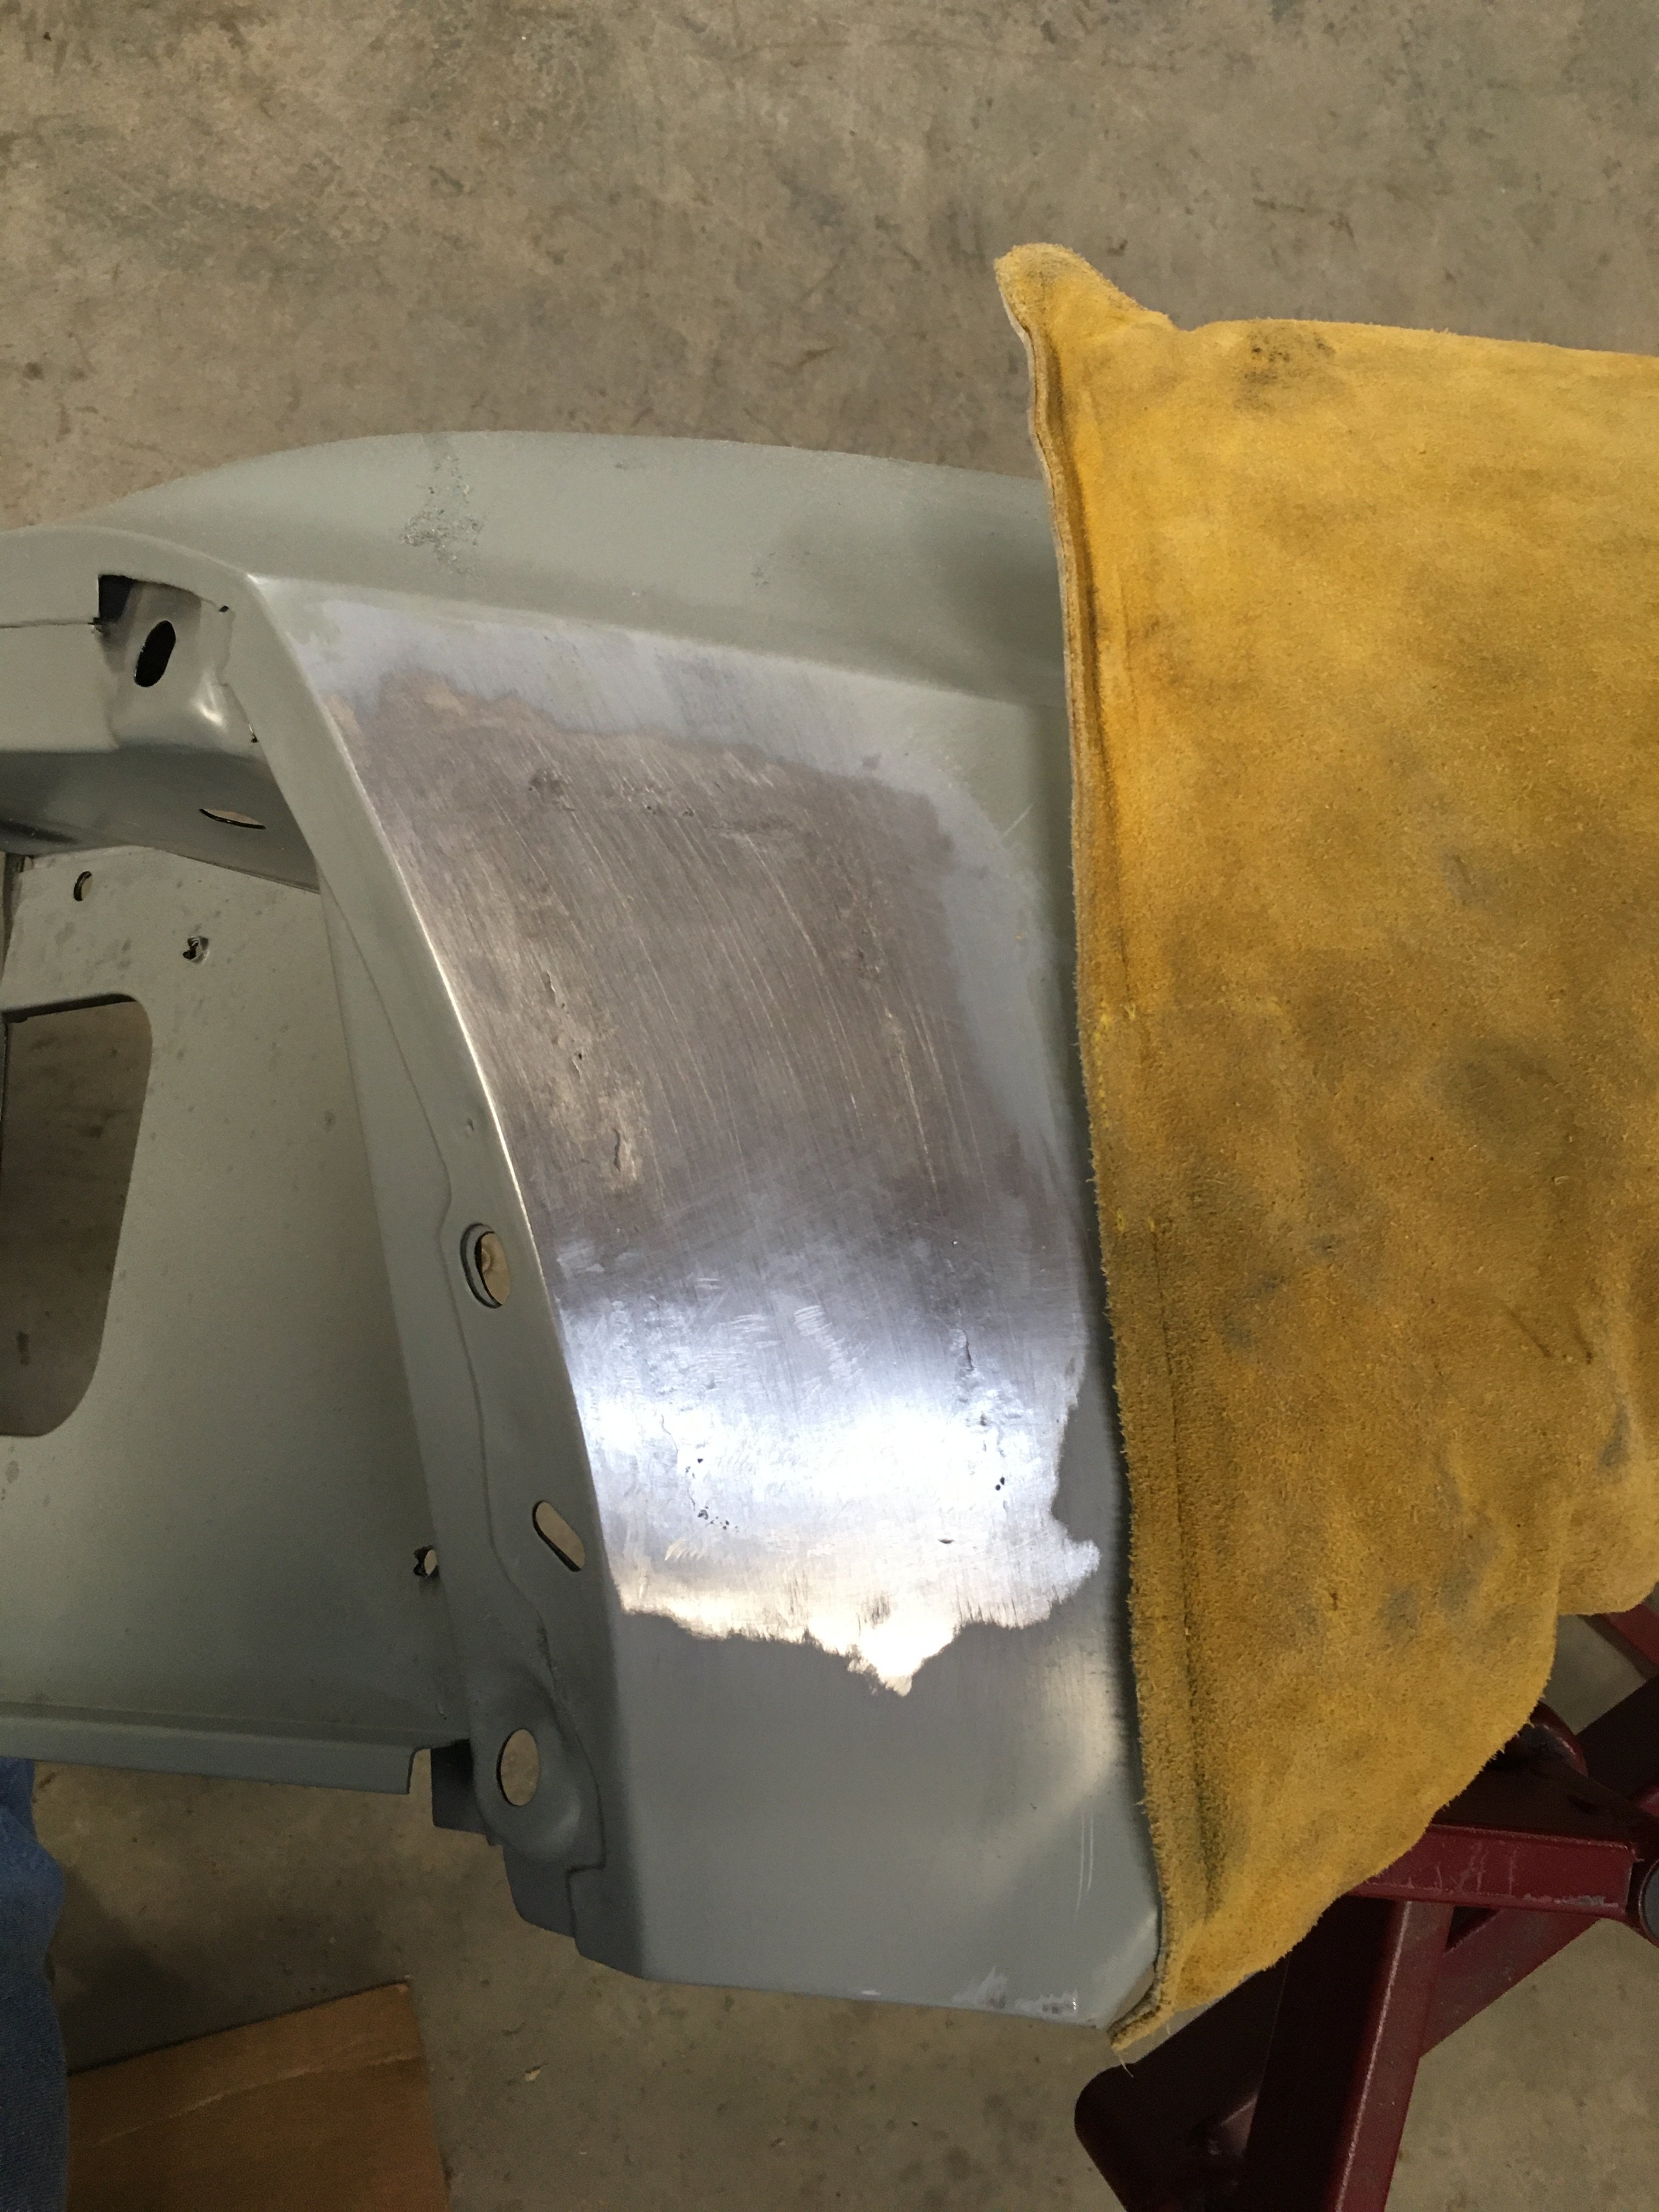
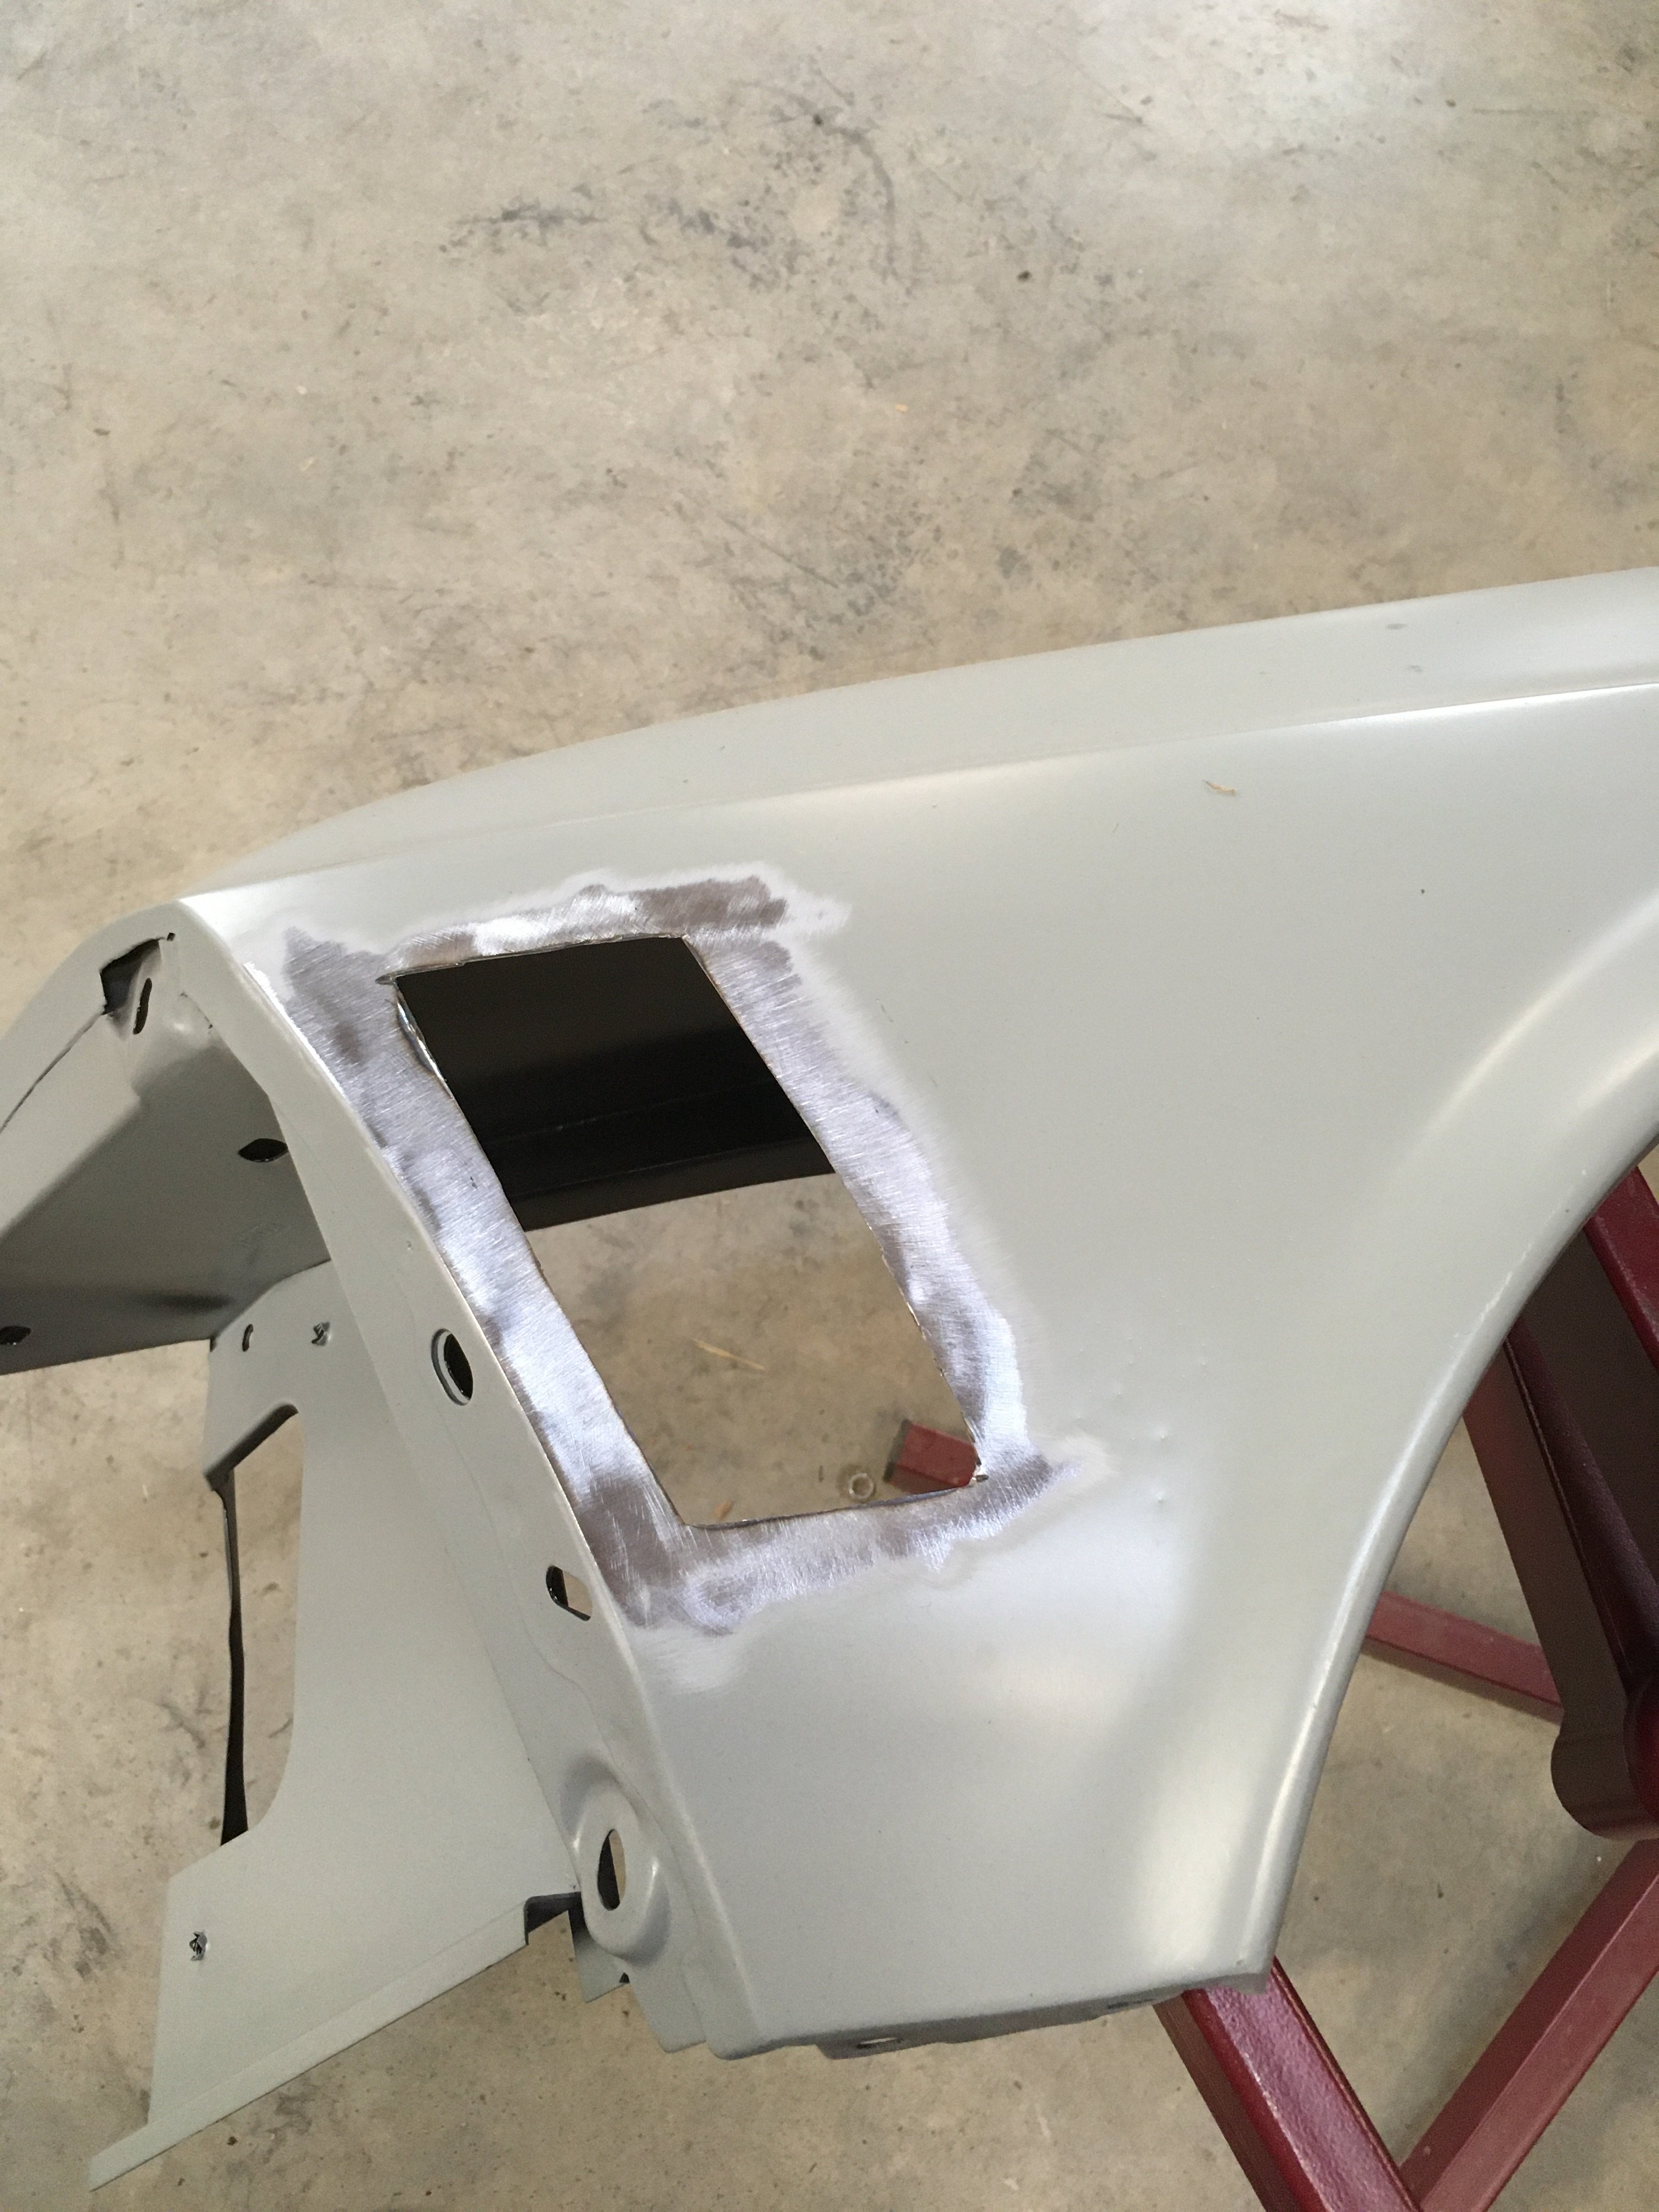
Patch is all ready to tack in place. There is some tape on the back holding it up.
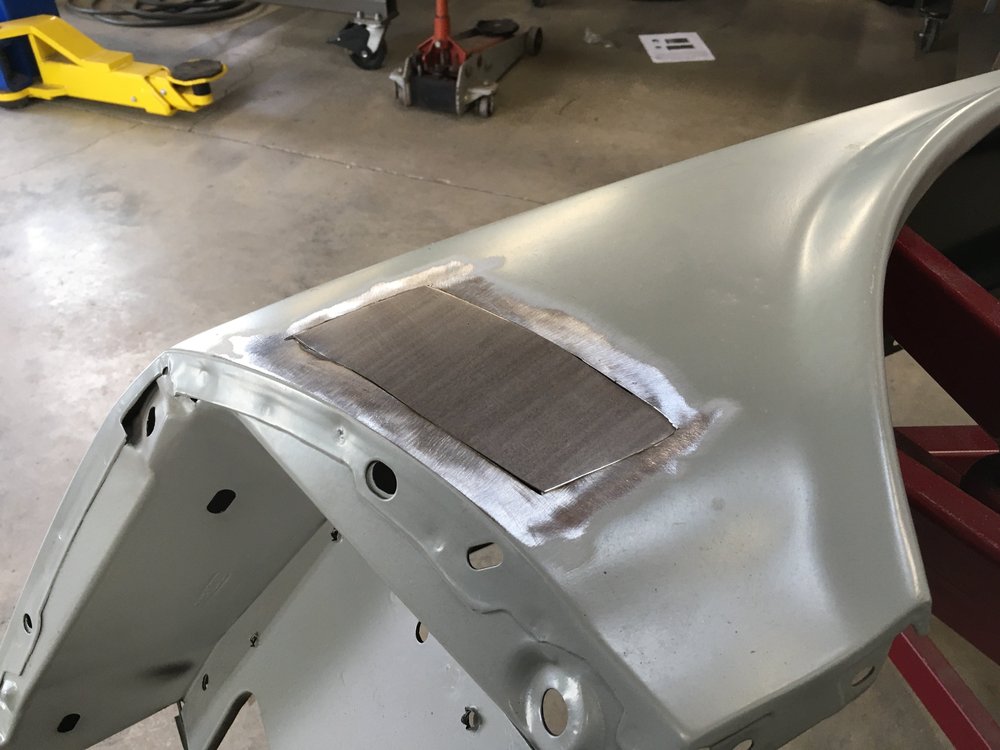
The general fit, tack, beat, repeat until it is all fully welded. A little sanding and its ready for more beating. Sanding the inside is helpful to get a smooth finish.

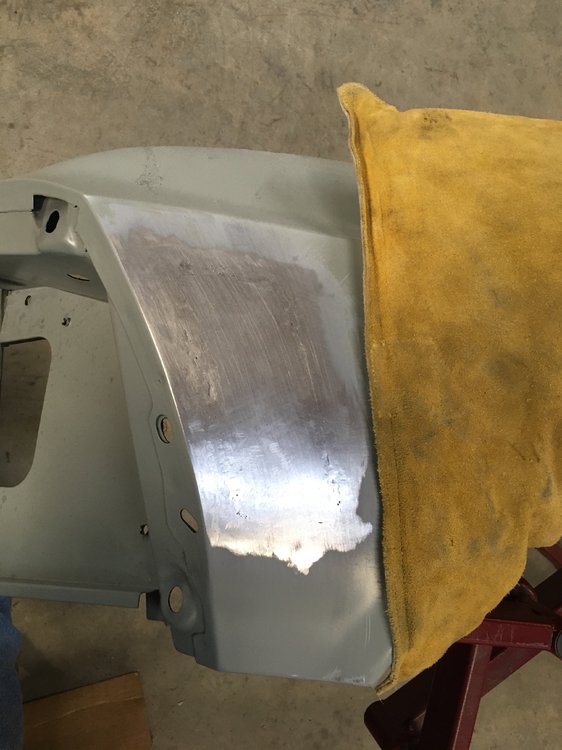
Between filing off the proud weld, more beating and a ton of planishing it looks presentable. Once again, I left some of the minor imperfections that will only require some putty to get ready for primer. There are a couple of places I'm going to take care of while I'm at it, then it"s on to the passenger side fender.
-
Hopefully you'll find an appropriate sized hole in the lid of your torque box to size the hole, if not, a drill and a rotary file will get you fixed up fairly quickly.

-
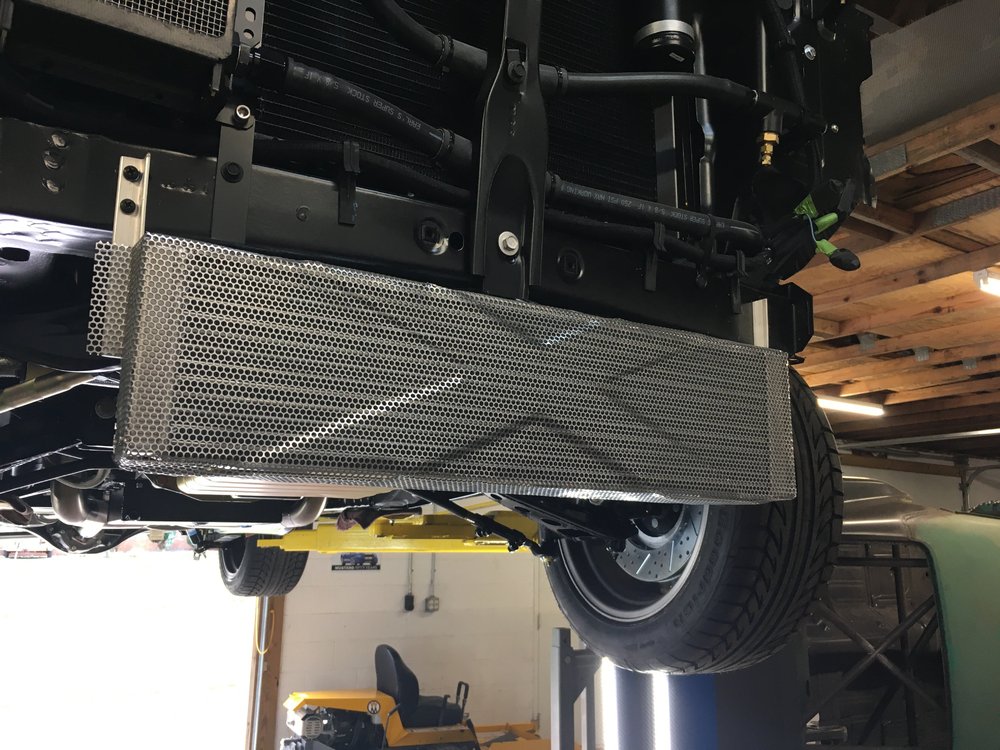
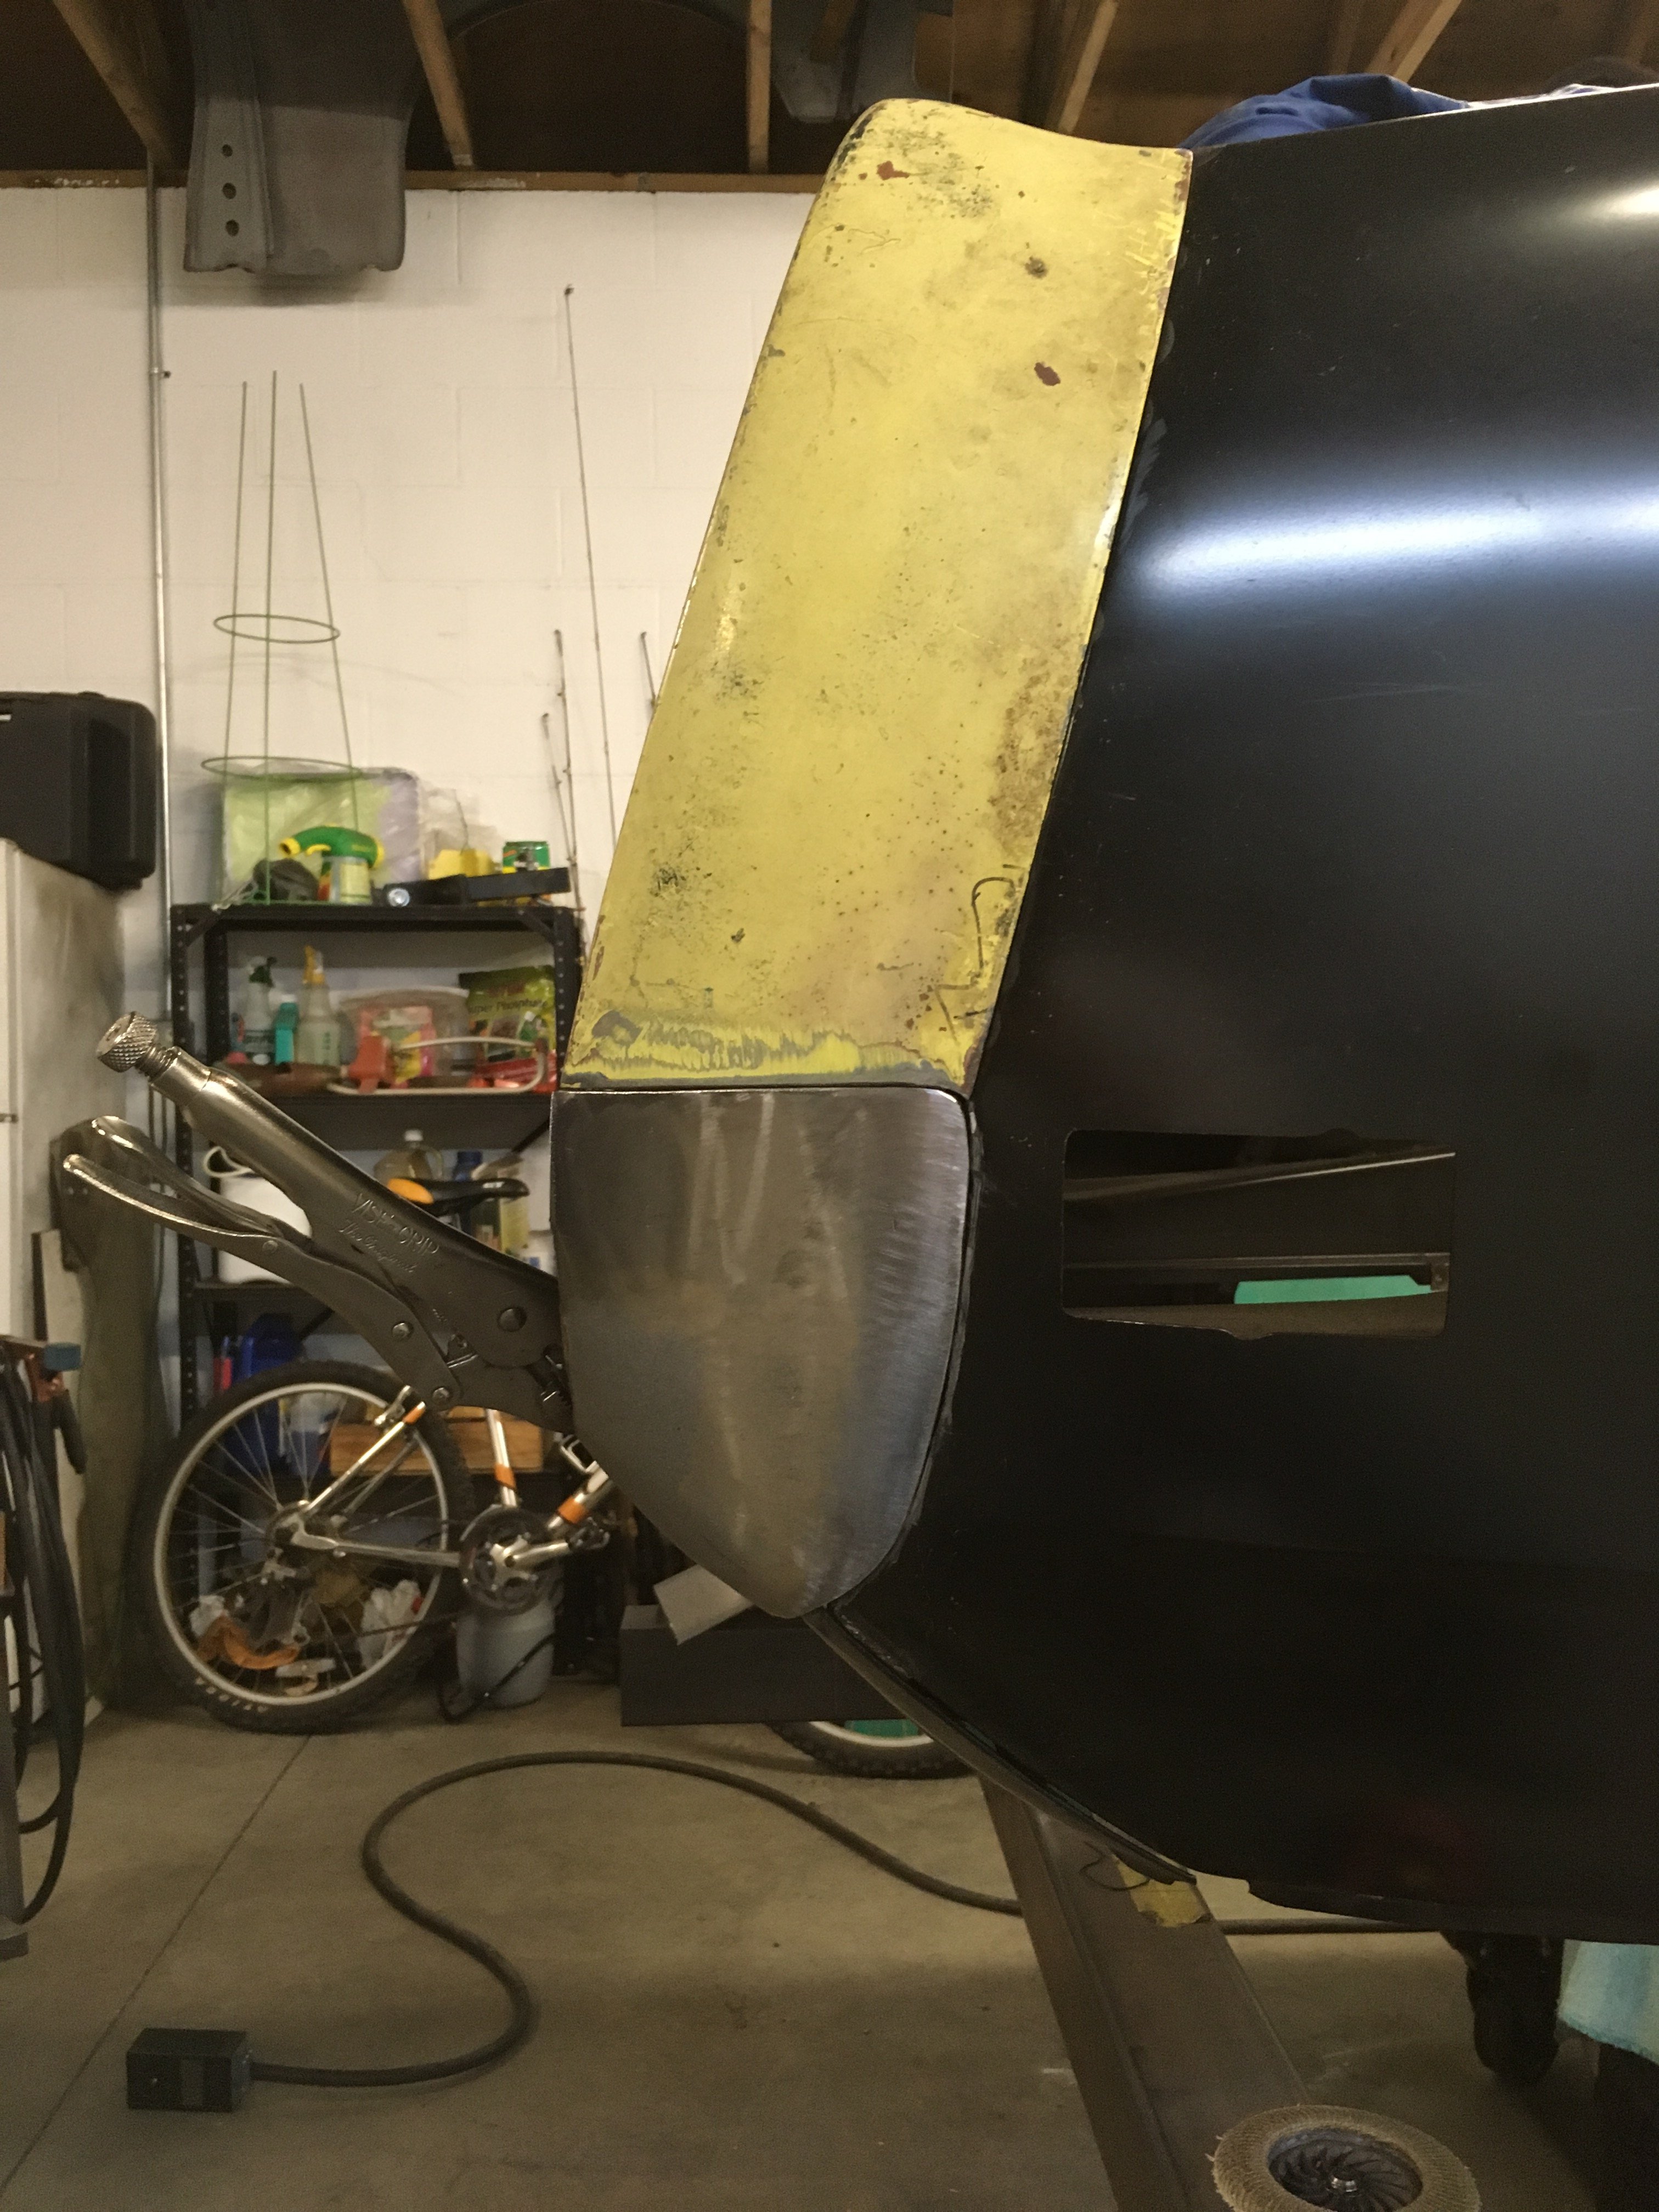
Down to the small details and little jobs. Vic brought me some aluminum perforated metal to cover his trans cooler. I was going to try some really thick stainless screen, but this stuff was too good to pass up. A little bending and some creative riveting, a couple of bolts (that I have yet to install) to hold it in place, and it's ready to ride.
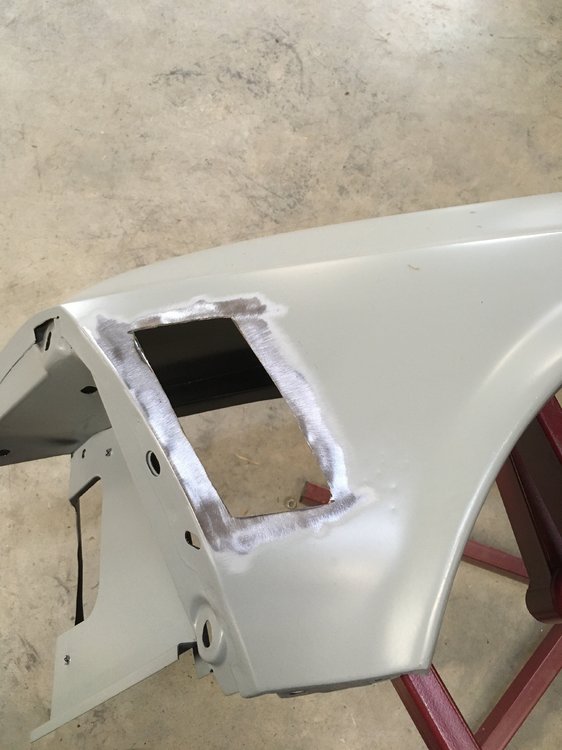
Starting on the front fender marker light erasing I've got to get rid of the previous attempt and do it a little neater.

All chopped out and ready to wheel a new patch.
-
On 2/20/2020 at 12:11 PM, Mach1 Driver said:now show us the front!!
It's not complete yet. I'm building the quarter extensions out of sheet metal and re-shaping everything to fit together. My car is back on the rotisserie and another convertible is going on the chassis table for a bunch of metal parts. I'll get back to mine sometime.
 Mach1 Driver reacted to this
 -
Sorry for your loss. I hope your memories of your lost companion will be treasured for years to come. I know you will miss her.
-
1 hour ago, grendi said:i guess you found the only tire available in that size, and yes, it is street legal (DOT Certified)!
but unless your planing to convert your mustang to front wheel drive, i don't think putting those on your car is a good idea. :-DIf you're trying to prove you're correct in the fact that they do not exist in a standard tire, then my example is incorrect, you win! Excuse me for not fact checking my "theoretical" idea of a size that would offer a similar tire bulge before posting. No one in their right mind would put a drag radial on a steering axle for street use, front wheel drive or not.
-
You can get just about any color you can imagine these days. If you look at several vendors websites (Sherwin-Williams, Tiger Drylac, Cardinal, IGP) most have color samples to view. Most companies will sell "sample" size 1 to 5 pound boxes that you can take to your local powder coater, or spray yourself (if you're set up). I'm certain a local coater will have a color you might like or will be able to get. I haven't looked at Eastwood in a while, they might also have the color you're after.
-
If it didn't fit like I wanted, I'd be modifying the mounts to bring it in and trimming things to fit. Rich's parts are really nice, but I'm sure they might need a little tweak here and there for a perfect fit.
-


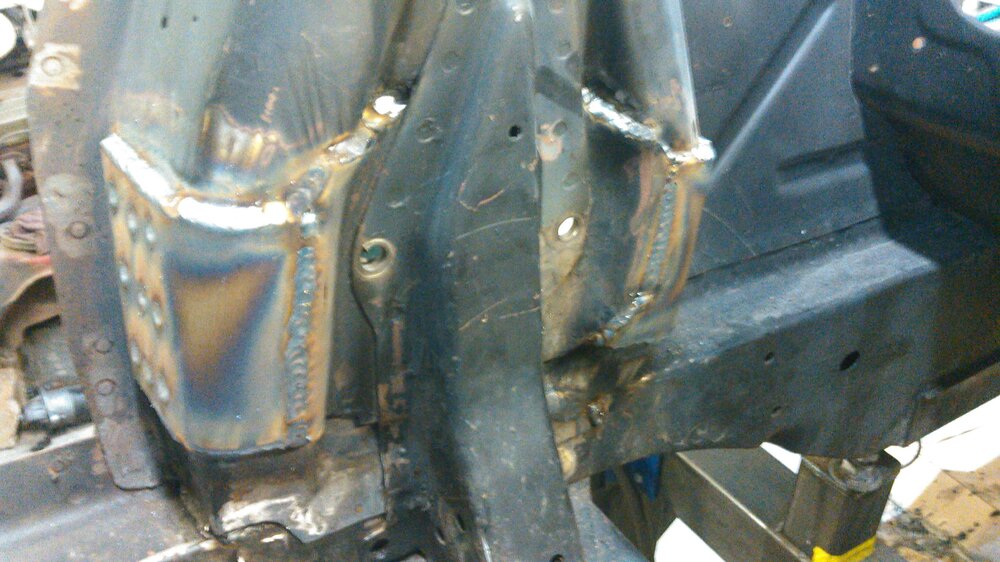
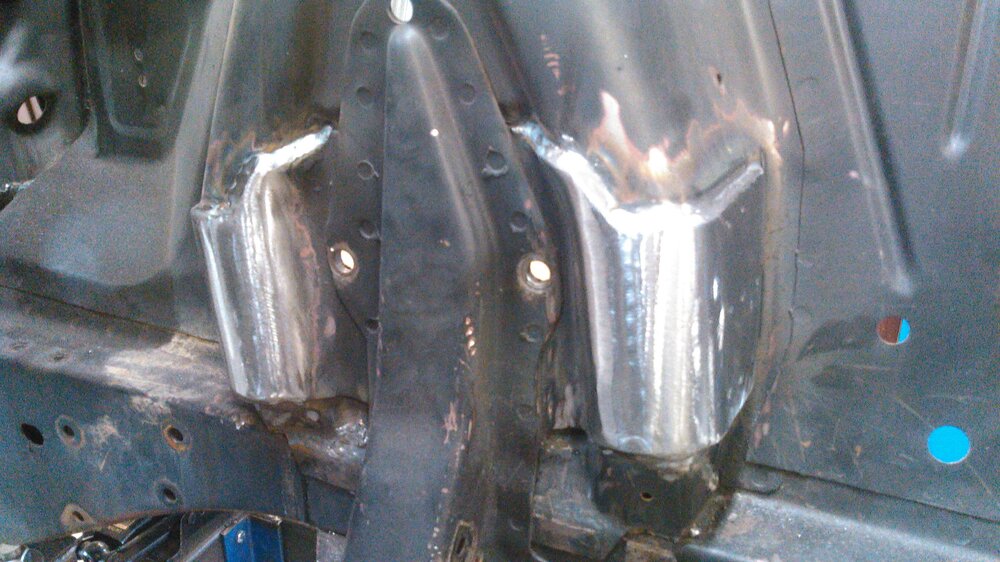
Boss 302 shock tower reinforcements
in 1969-70 Technical Forum
Posted · Report reply
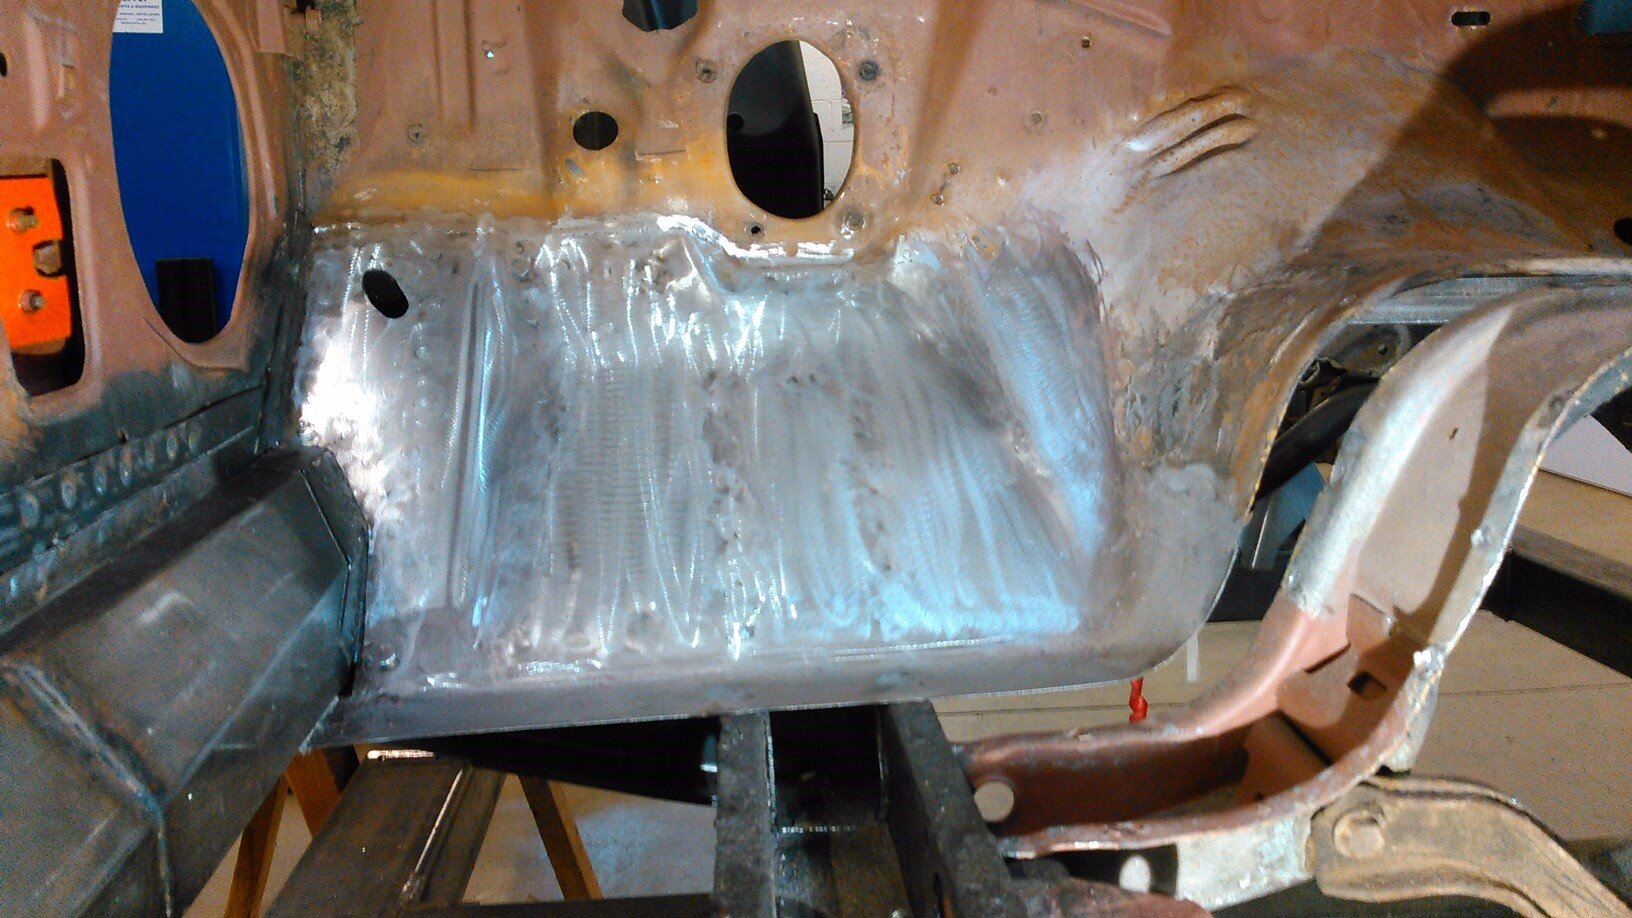
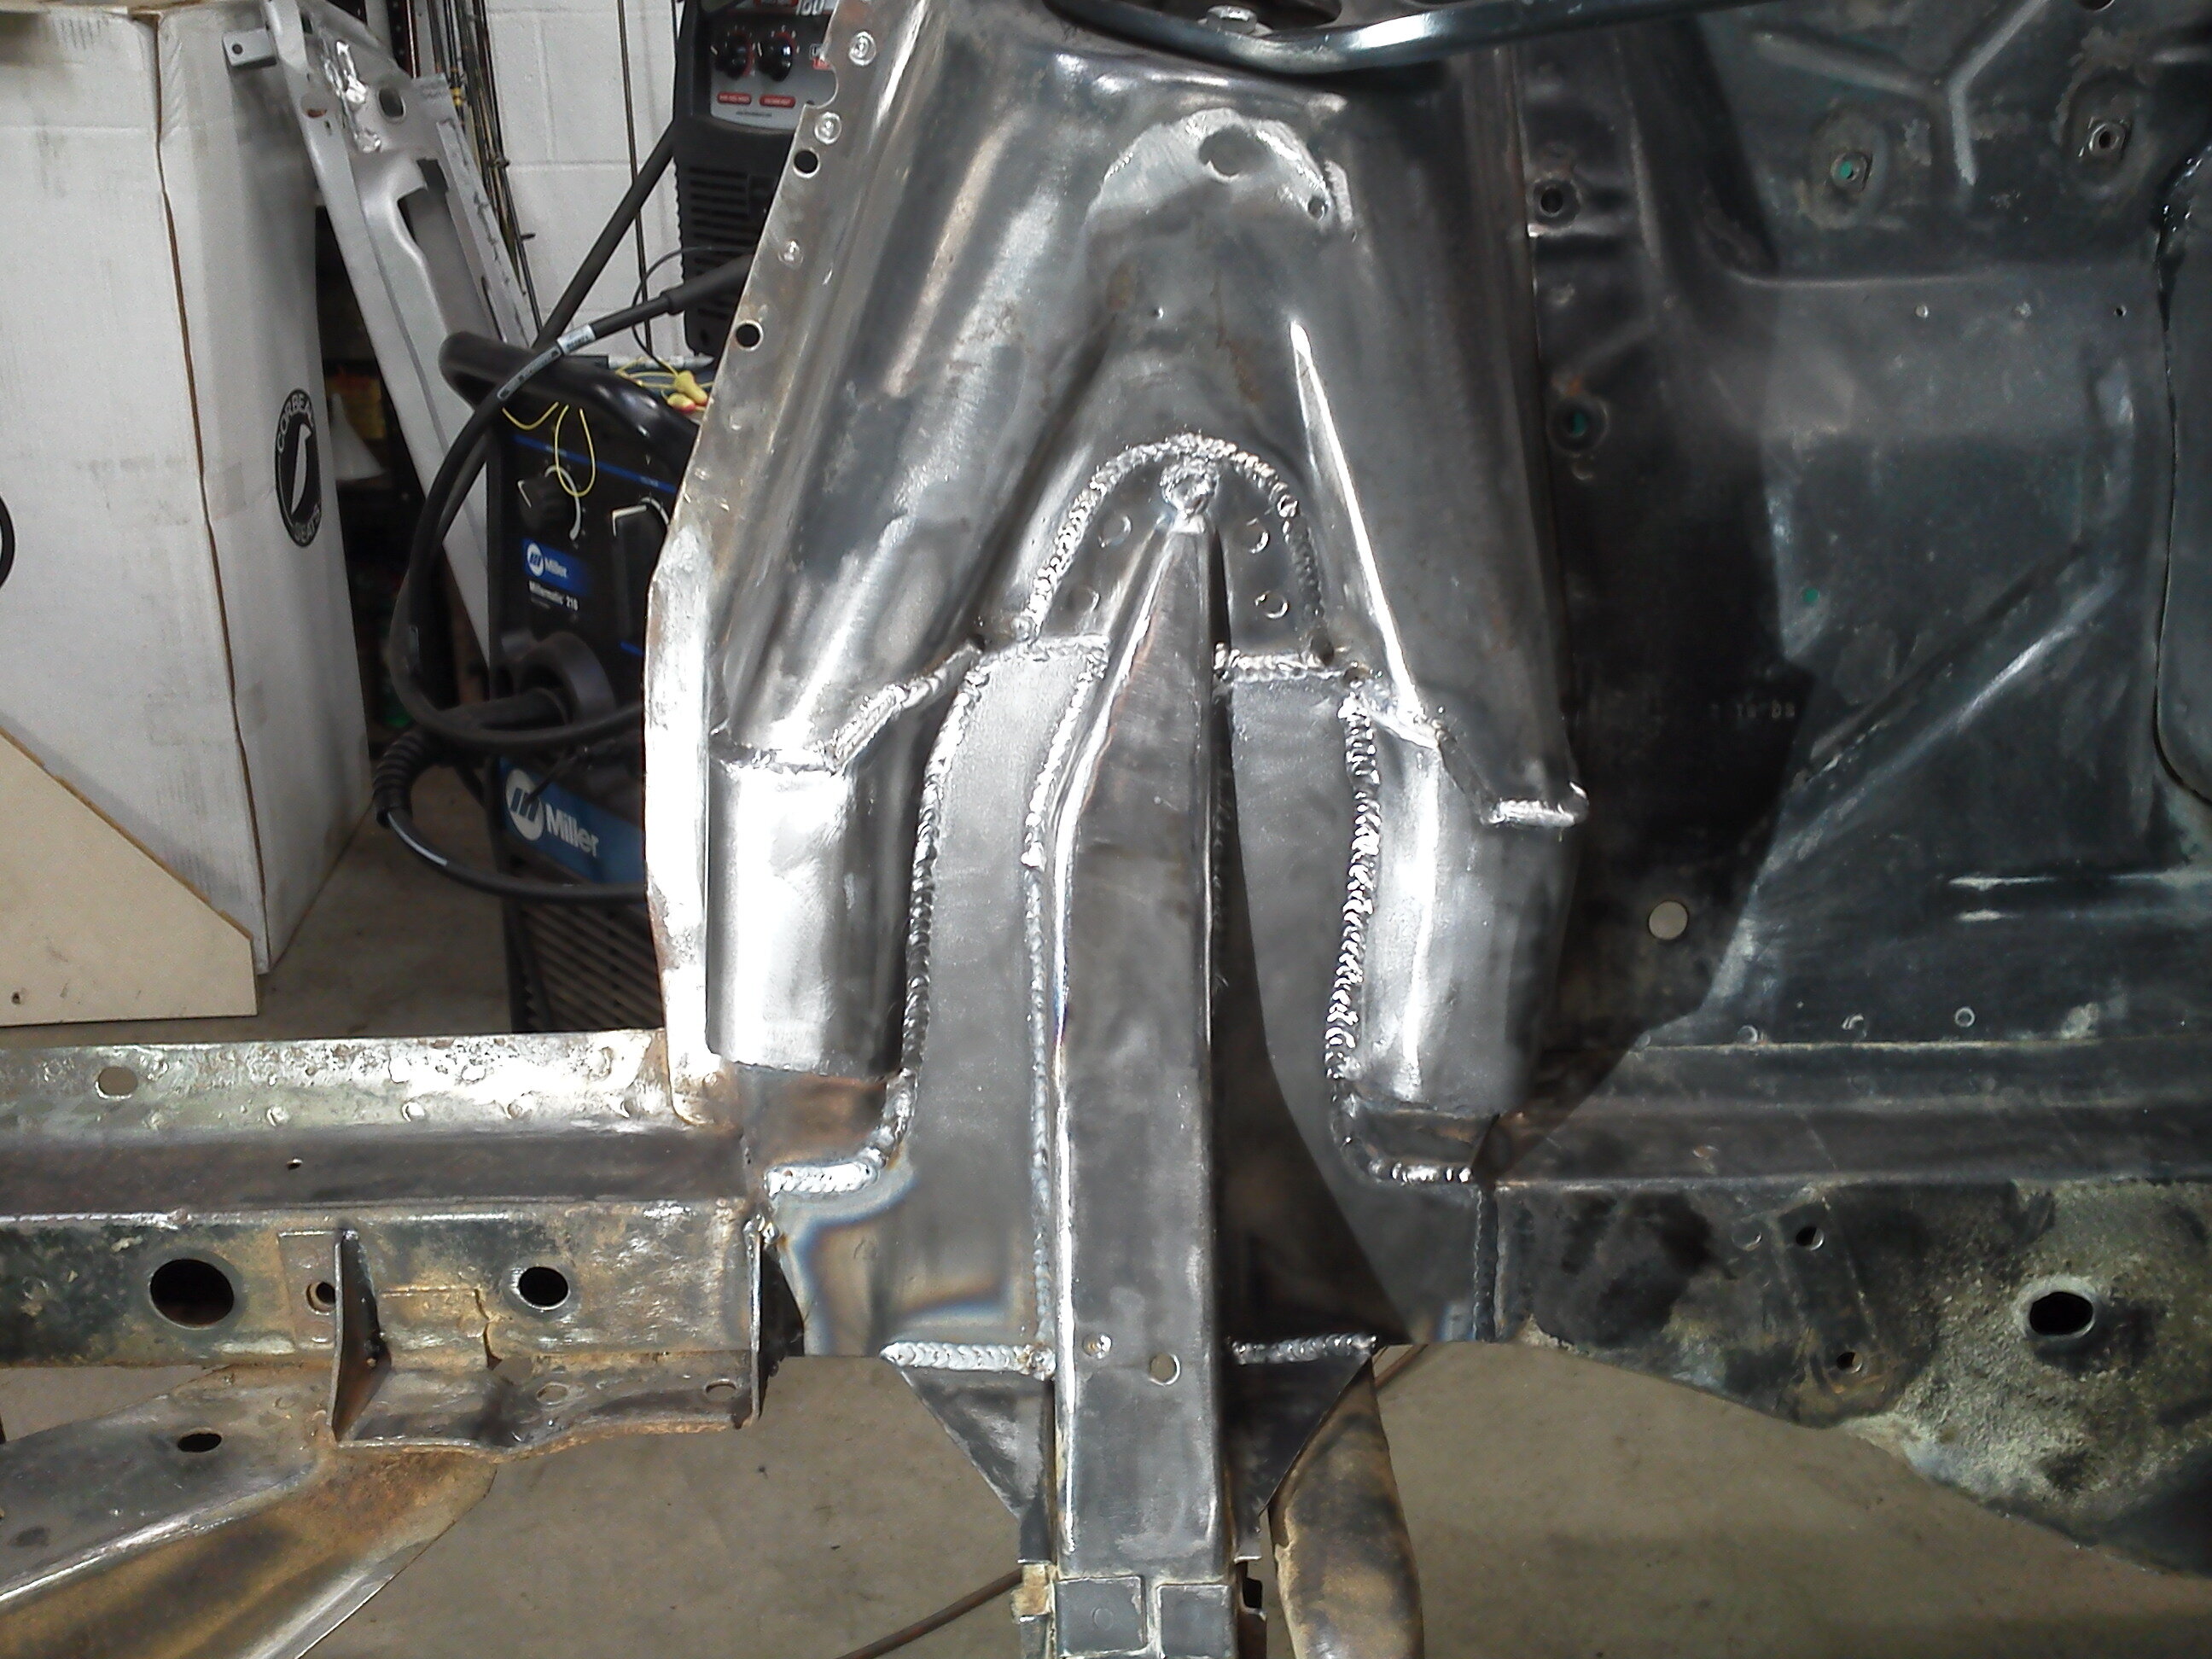
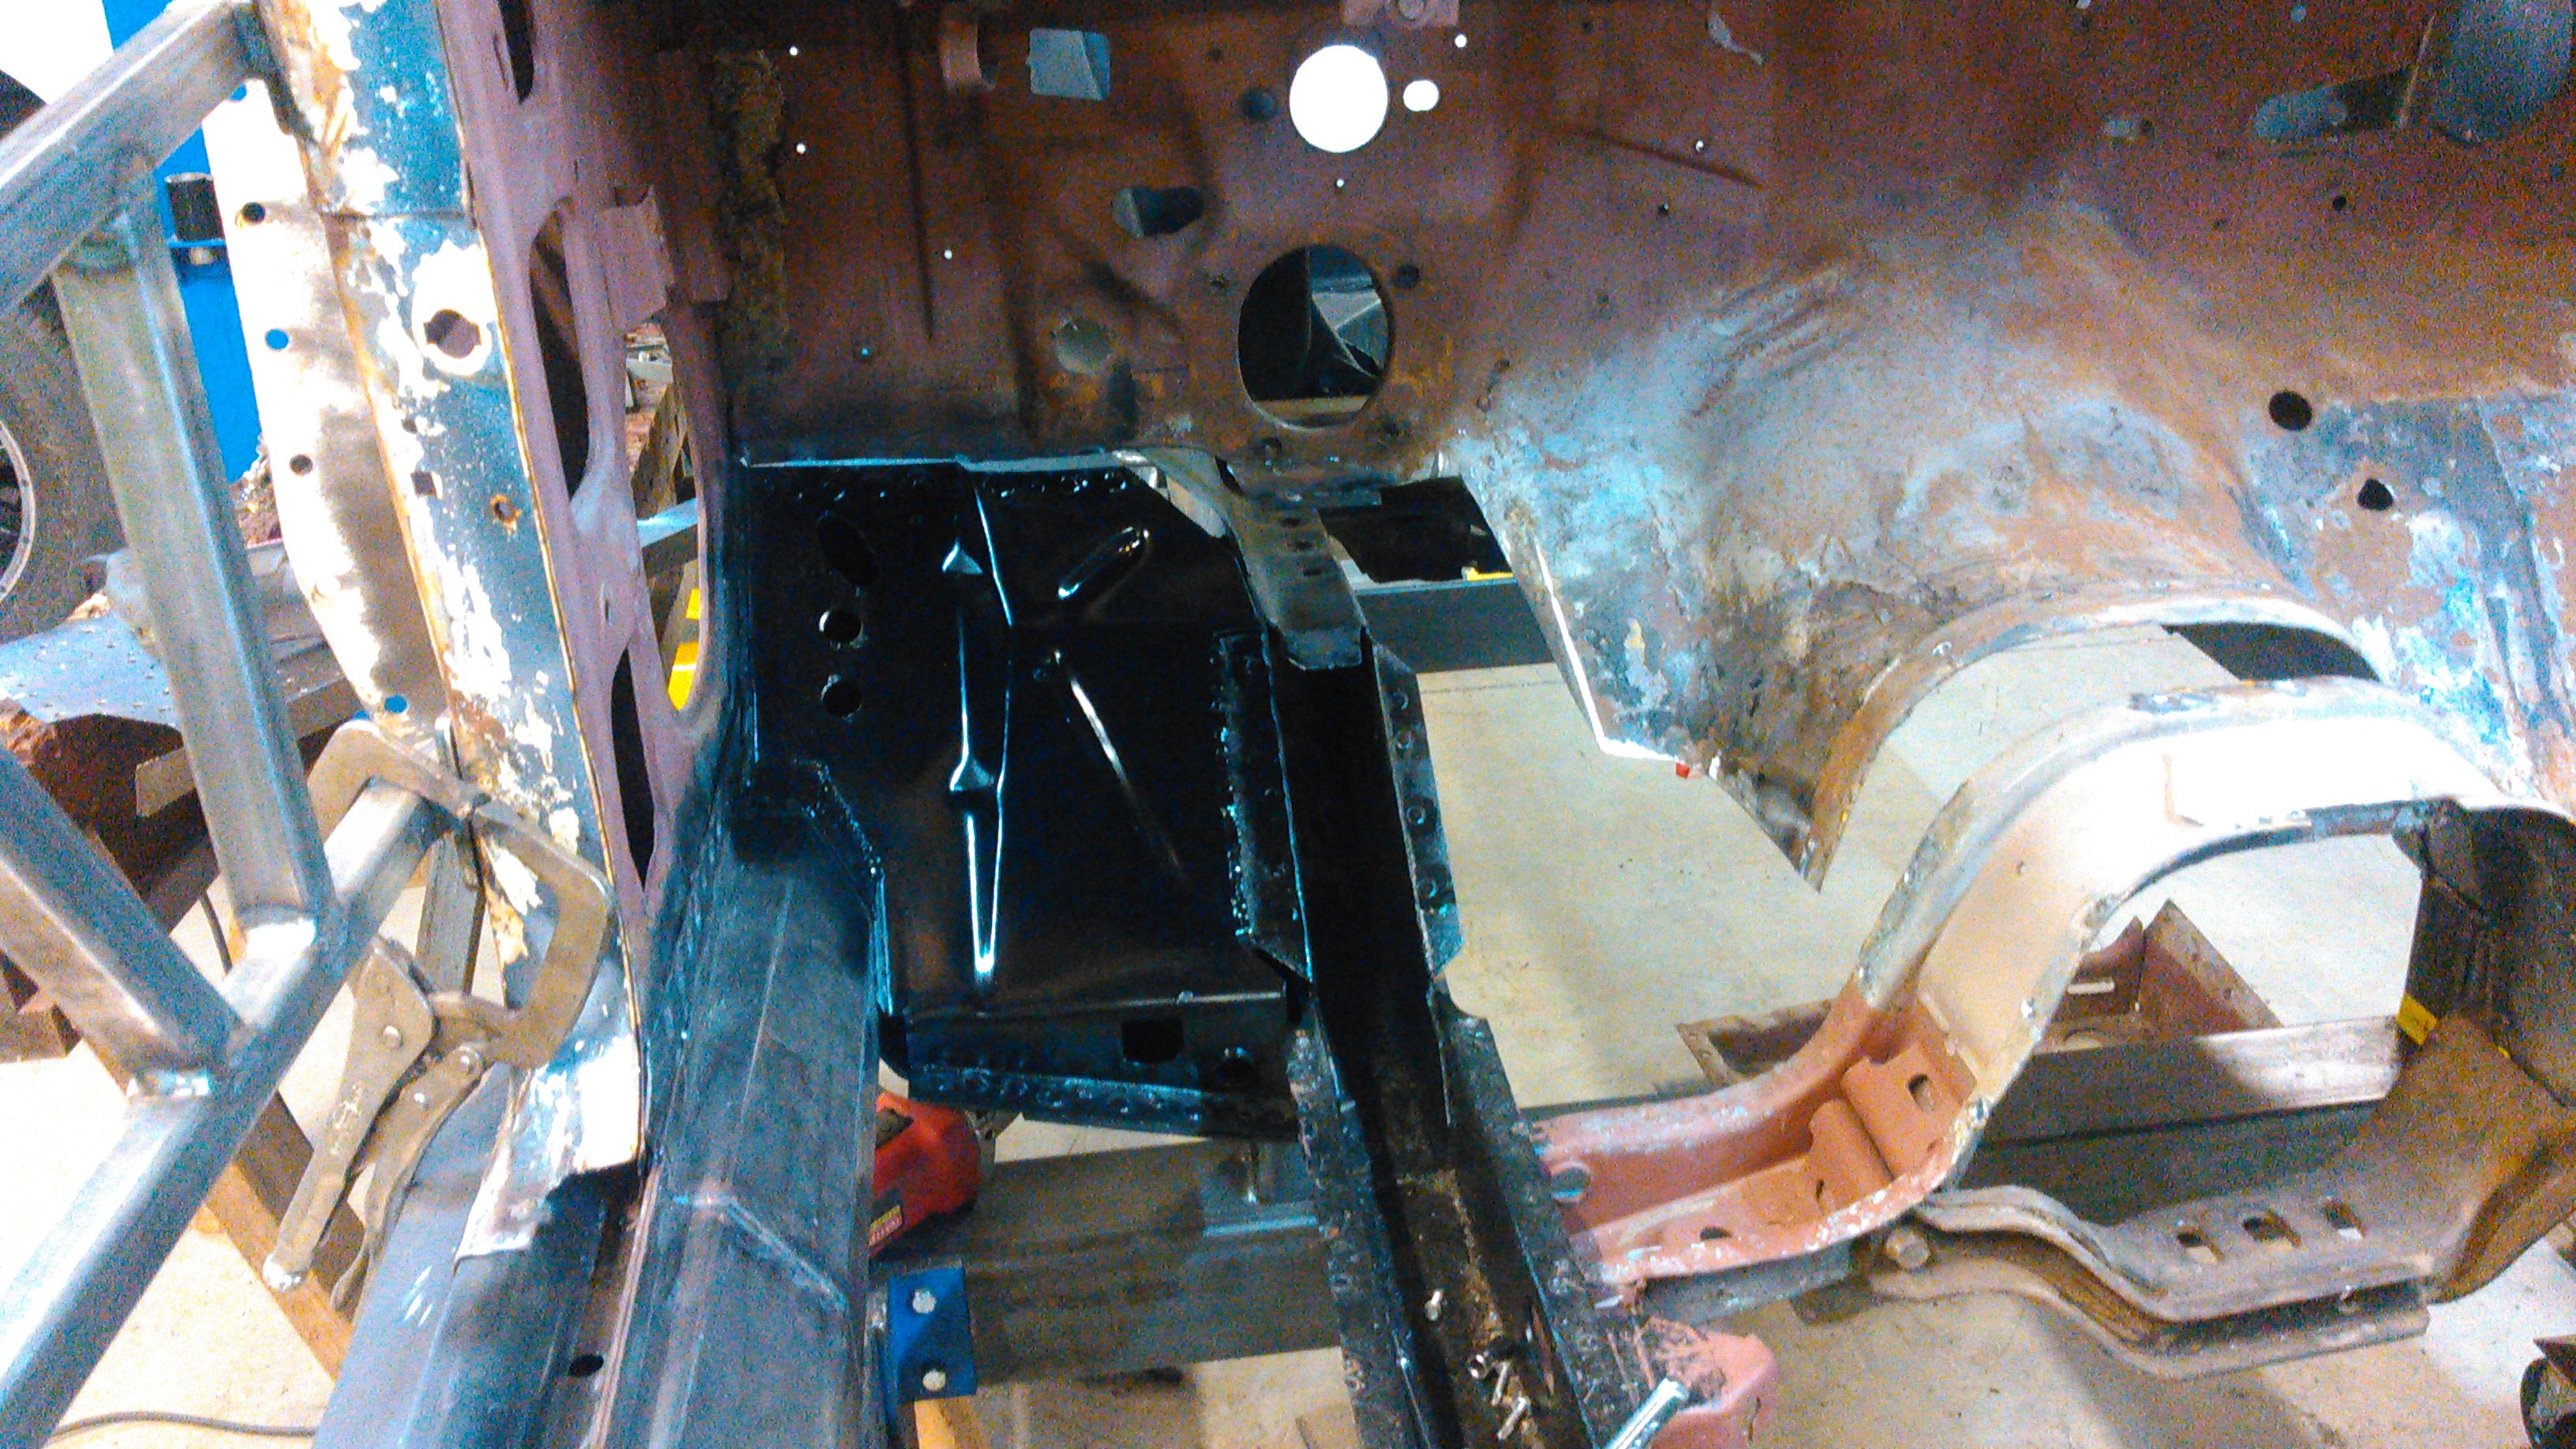
I did templates of the areas to fill in and cut them out of some leftover 11ga. I also fully welded all the seams on the shock towers before installing the plates, then fully welded them in place. The big block reinforcements were also fabricated (these are out of 7ga) and fully welded and blended. The inner brace was more 7ga, fully welded.