

latoracing
-
Content Count
1,077 -
Joined
-
Last visited
-
Days Won
47
Posts posted by latoracing
-
-
13 hours ago, RPM said:Wow! How'd ya fix it?
Tried to adjust the doors where it wasn't as oblivious, wasn't great, but was my first time. Second time on a running/driving car (also a fox body) put it on ramps which kept the weight on the wheels. No gap issues. Wouldn't think that adding two fairly short pieces of tubing could mess up a car that bad, goes to show how "rigid" unibody's really are.
(Also not a 69/70 Mustang) I prefer to not have any drivetrain what so ever when accomplishing major structure reinforcements. Get it straight and I'm betting that it will stay straight when the drivetrain is installed.
-
I made the mistake of welding SFC on a fox body Mustang with the engine/trans in the car, supported on jack-stands, placed at the front and rear torque boxes. Probably wouldn't have been too bad if I had supported it closer to the suspension areas. This placement allowed the nose to droop, once welded together and back on the ground there was a 1/2" gap between the B pillar and the door at the top. Never thought it would move that much... I've learned a little bit since then lol.
-
The shifter hole is located closer to the driver's side and not in the center of the tunnel. It drove me nuts when I was putting mine in so I did a little strategic cutting and flipped the shifter hole 180 deg so the engine/trans would not have to be installed crooked. Basically moved the shifter hole 1" towards the passenger side to center everything. Got a TKX sitting on the shelf to install if I ever get to work on mine, but set it up using a TKO.
-
I have some oem70 fenders. They have been sand blasted, not fantastic, but not awful.
-
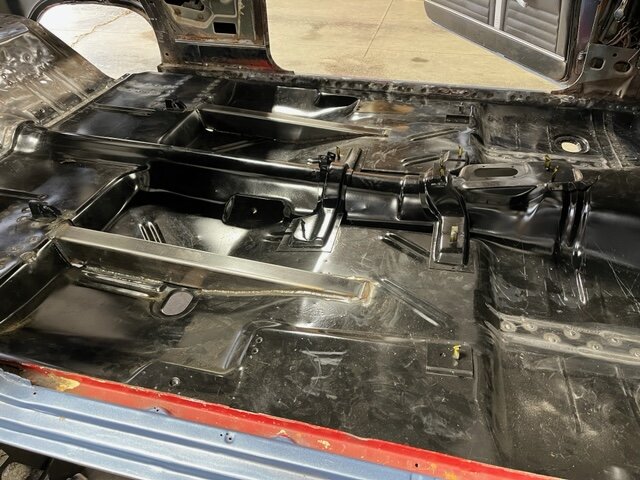
I'd think that the torque boxes and all the lower structure would be in place, install the firewall assembly, then the one piece floor.
If you have a replacement lower assembly (outer rockers, floor pan, rear frame rails... all put together) then the firewall would have to go under the front of the floor pan and over the floor supports. Guess it depends on how far apart the body is and what all you're replacing. Having the front frame rails attached would dictate quite a bit.
-
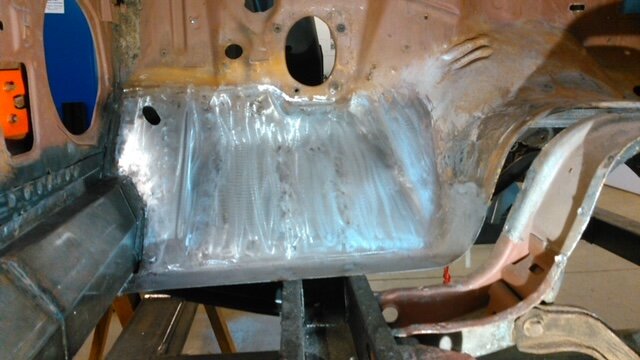
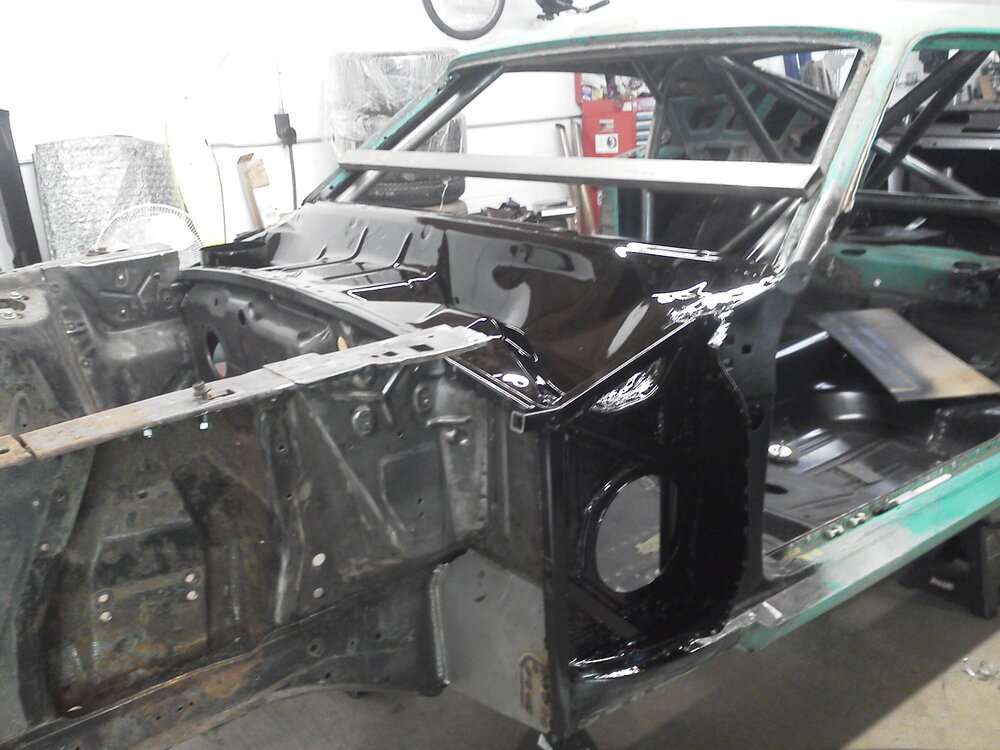
The flange does go up, but on convertibles (which I seem to work on all the time) it is removed. The two pieces of the torque box weld to the upper seam area of the toe board and should fit fairly decent. I prefer to butt weld all my repairs but you can see the remnants of the spot welds in the second picture where it is welded to the top flange of the torque box. I also prefer using two piece torque boxes. Much easier to install.
 69Mach1 M code and Ridge Runner reacted to this
 -
I prefer using good masking tape, like the green or yellow 3M tape. Take the tape and cover the area where you're wanting to duplicate with a couple of layers in a 90 degree orientation. Cut the tape where you can manage to duplicate the parts (looks like that area will require several small sections), remove the tape from the damaged area and transfer to your new sheet metal, being sticky helps hold it in place. Cut, bend/shape as needed, a little fitting and welding, your door will be good as new. Very simple, very easy :)
-
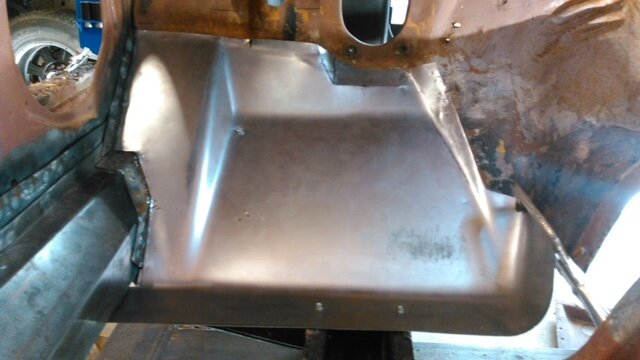
Going from underneath is fairly easy by yourself. Being able to lift the "rear seat" area high enough to get the front end up onto the floor extensions is the worst of it. I have gone through the windshield, another good method for the single person install. They will fit through the door, but you will need an extra hand as the full floors tend to bend easily along the tunnel. I have installed more convertible floors than other, they are simple except for the rear braces. Unless it is a very small patch, (or very rare car) I will never install parts of a floor again, always full floor. Much quicker.
-
44 minutes ago, Mach1 Driver said:Wow! Did you build a die for those? It looks like I can see a little stretch ripple on that right sheet. Outstanding job, I'd be interested in seeing your process.
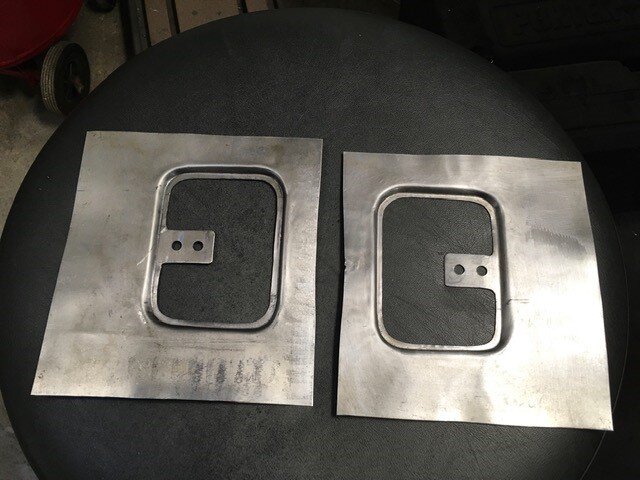
Just a quickie very low production stamp, there is a lot of wrinkles and waves along the outside. The shape and a little around the edge was the goal. My shop press (20 ton) is useful for the majority of patch panel parts and they surprisingly do fairly well. Having mirrored parts usually requires me to have crude setups, but majority of parts are stamped using laser cut pieces of plate and sharpie marks for alignment. The vent repair part was done by hand, but I have an idea on how to stamp it :)
Mach1 Driver and Grabber70Mach reacted to this -
-
12 hours ago, 69Mach1 M code said:Wow, nice work, Latoracing. Looks like it even has the inner lip on the I.D. in place.
I've got a similar situation as Casgar where I'll have to repair about 1/3 of the flange and POR15 the balance of it.
If you need something, I'm right up the road.
-
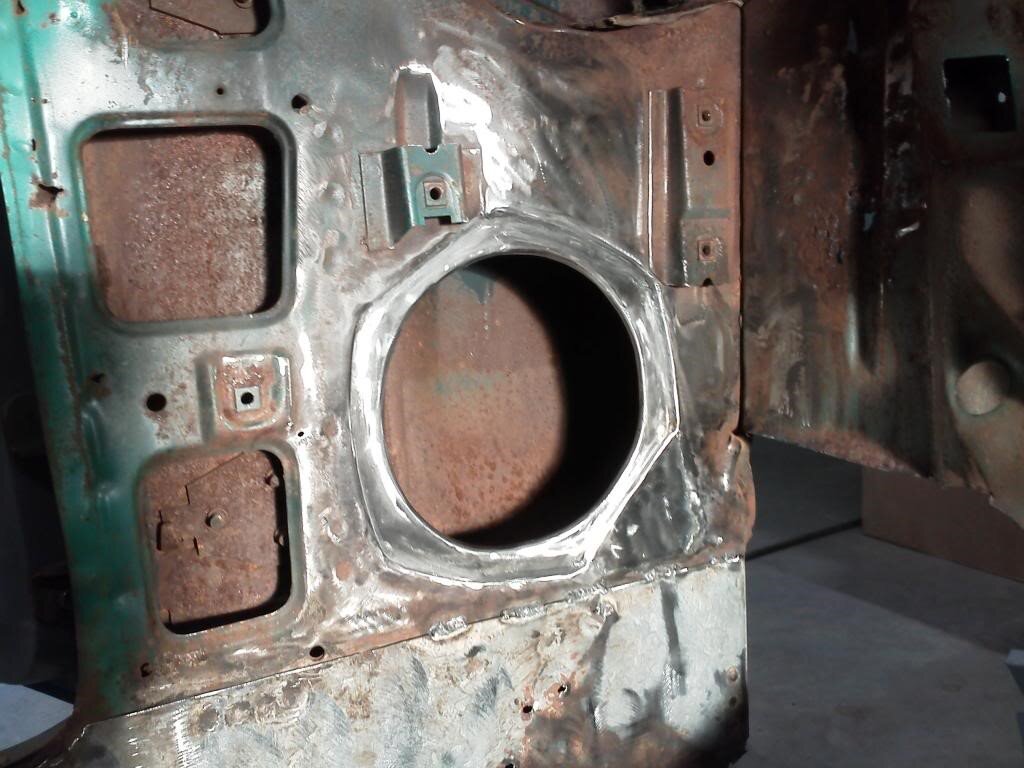
Built the flanges for both of my kick panels, wasn't too awful.

-
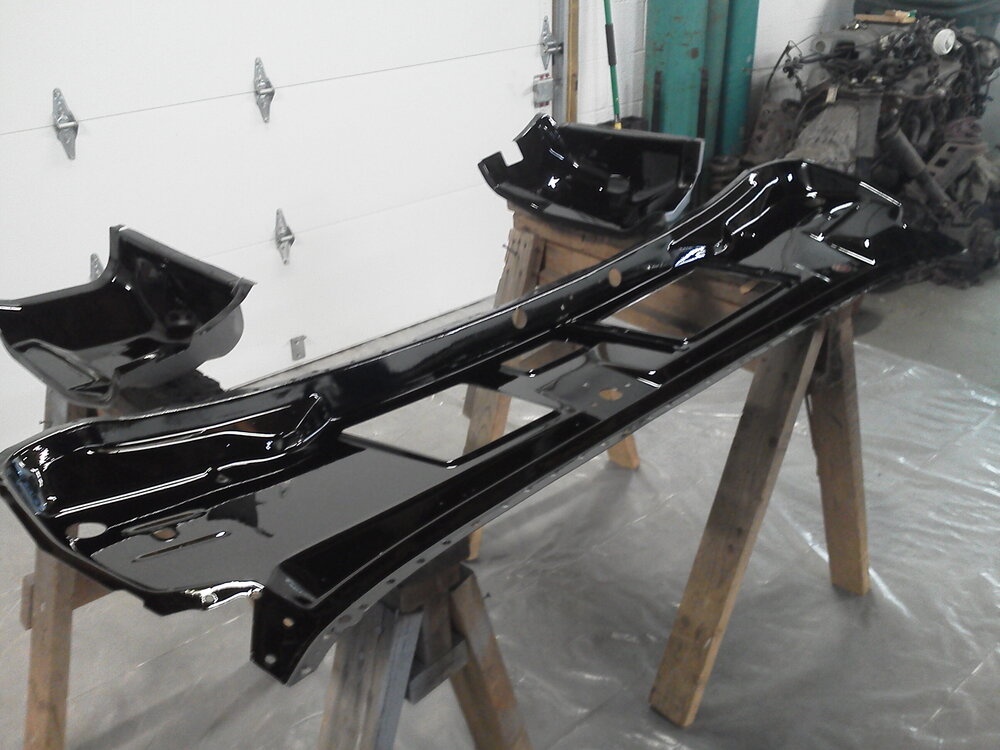
I have ran into the replacement floor supports varying in width, and some parts I wouldn't install because they were ridiculously too wide. Check the dimensions between the new parts and the originals to see if or how much wider the replacement parts are. The frame rail is in two pieces and can be modified to fit a little wider floor support without using shims.
-
Please Delete
-
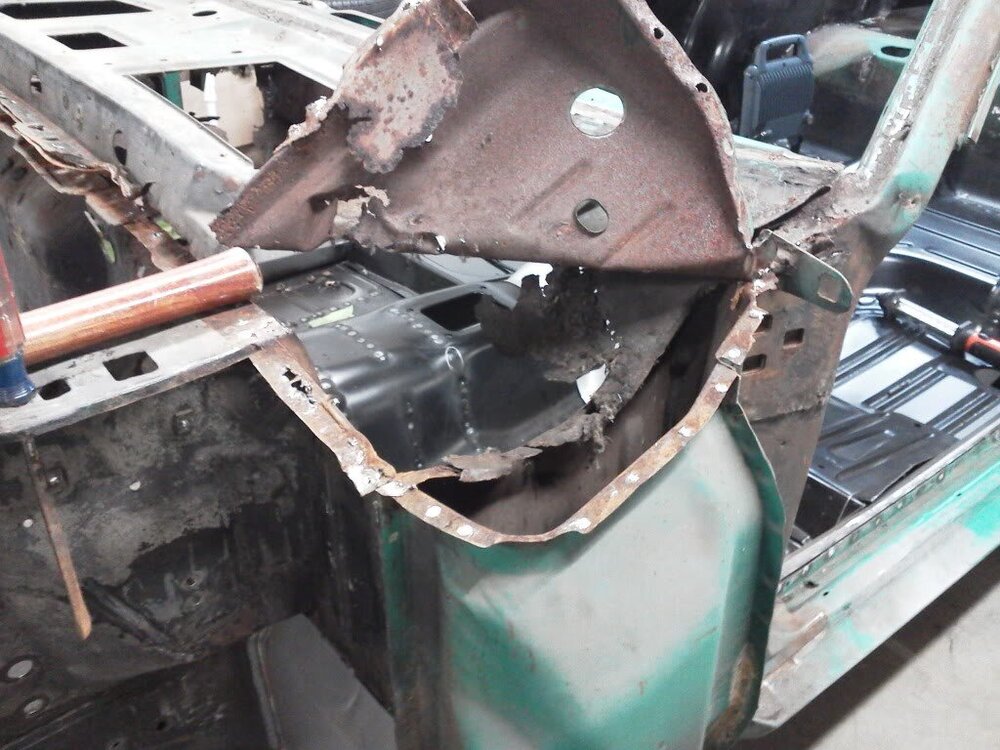
Don't have a pic of the passenger side, but you can see where the driver's side lower cowl is supposed to be joined to the lower A pillar panel flange. These were spotwelded in place and can be fun to get at without major surgery. If the hat (passenger side) is leaking and there is a bunch of corrosion, you might need to access the area from the top as well. I have seen some people cut the upper cowl off above the hat, repair the area, then weld the upper portion back in place. I completely replaced mine as there was nothing left of it; thanks mice!
-
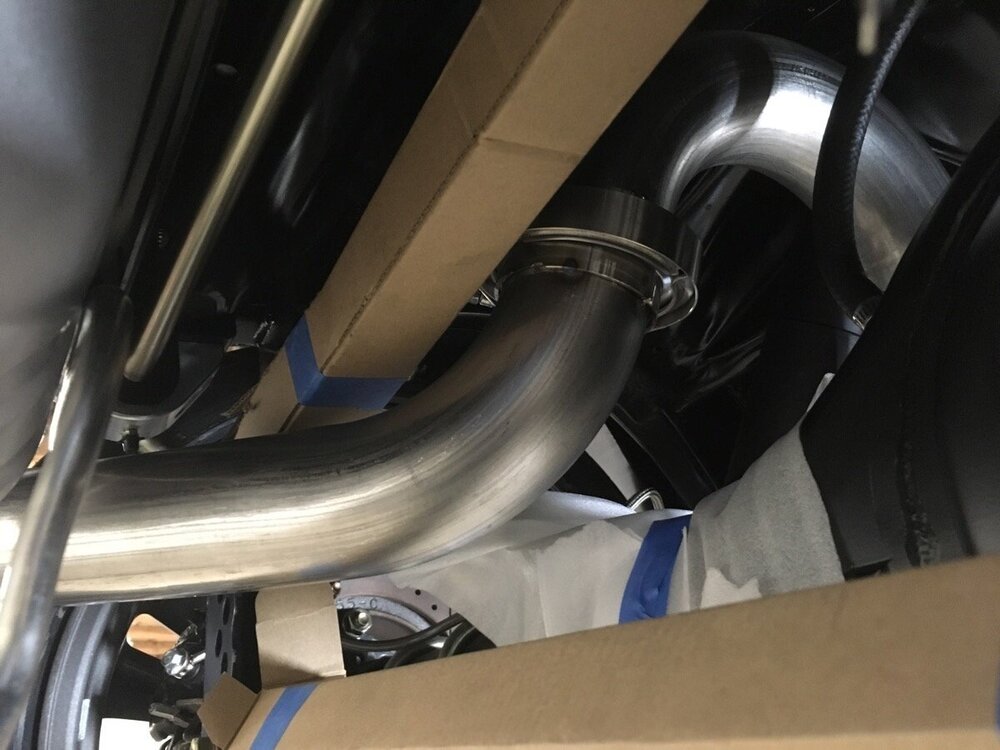
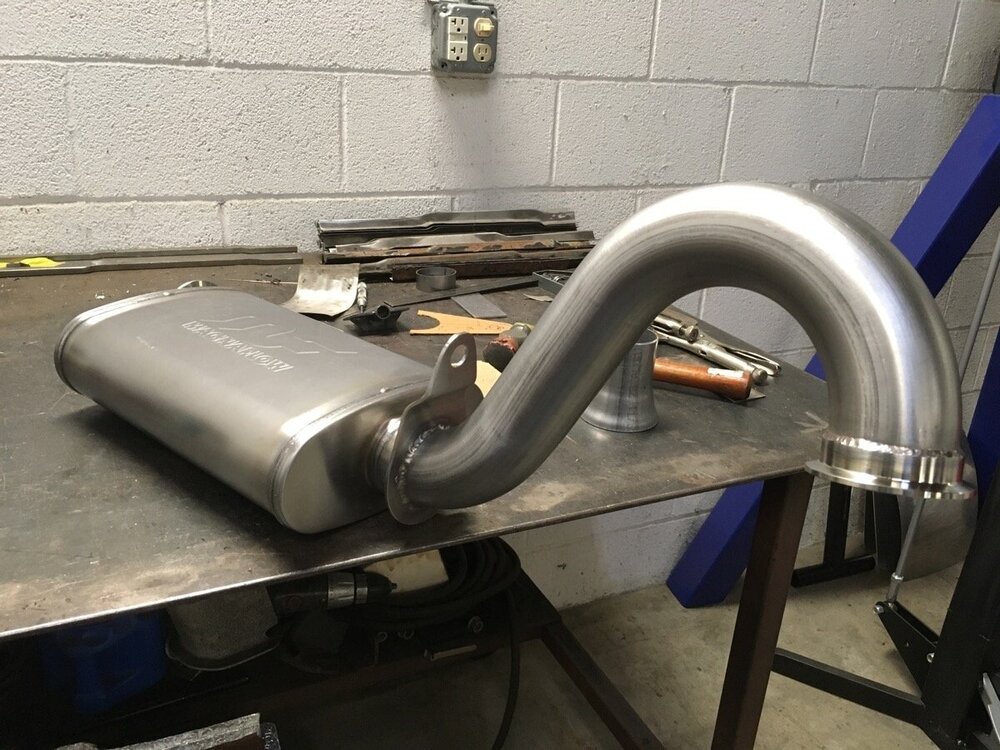
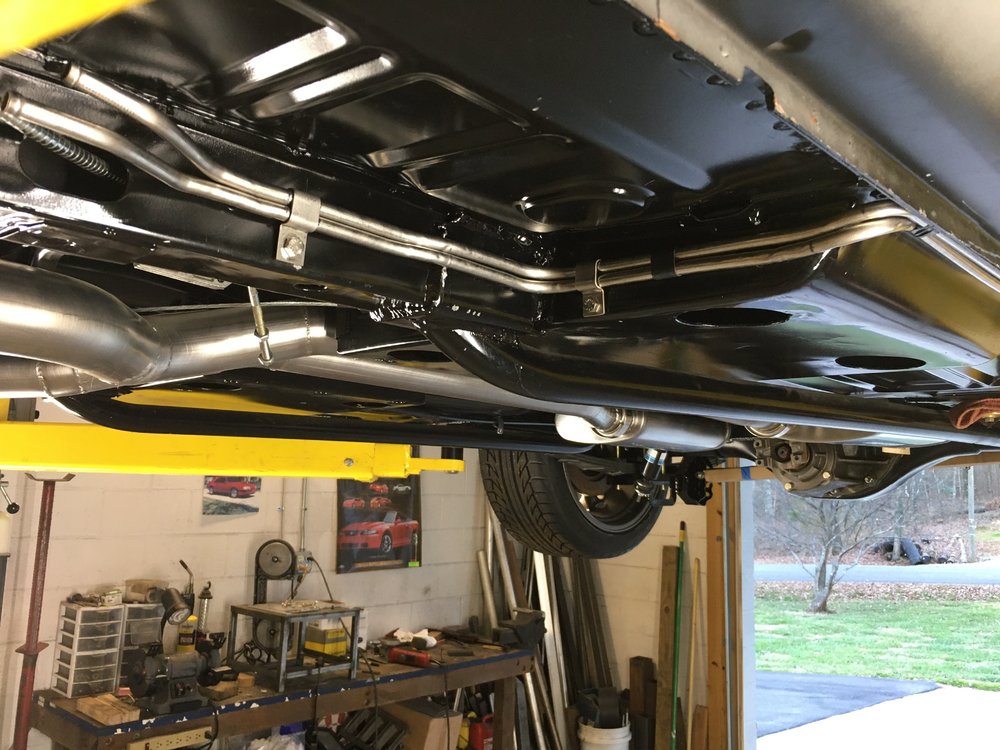
The V-Band clamp on Vic's set-up really helped in getting the system in and out of the car numerous times. Once the over the axle portion was where is should be, the rest had to be finessed into position. There is a lot of clearance between the bars, nothing is close in this area. Now the tips, thats another story.
-
-
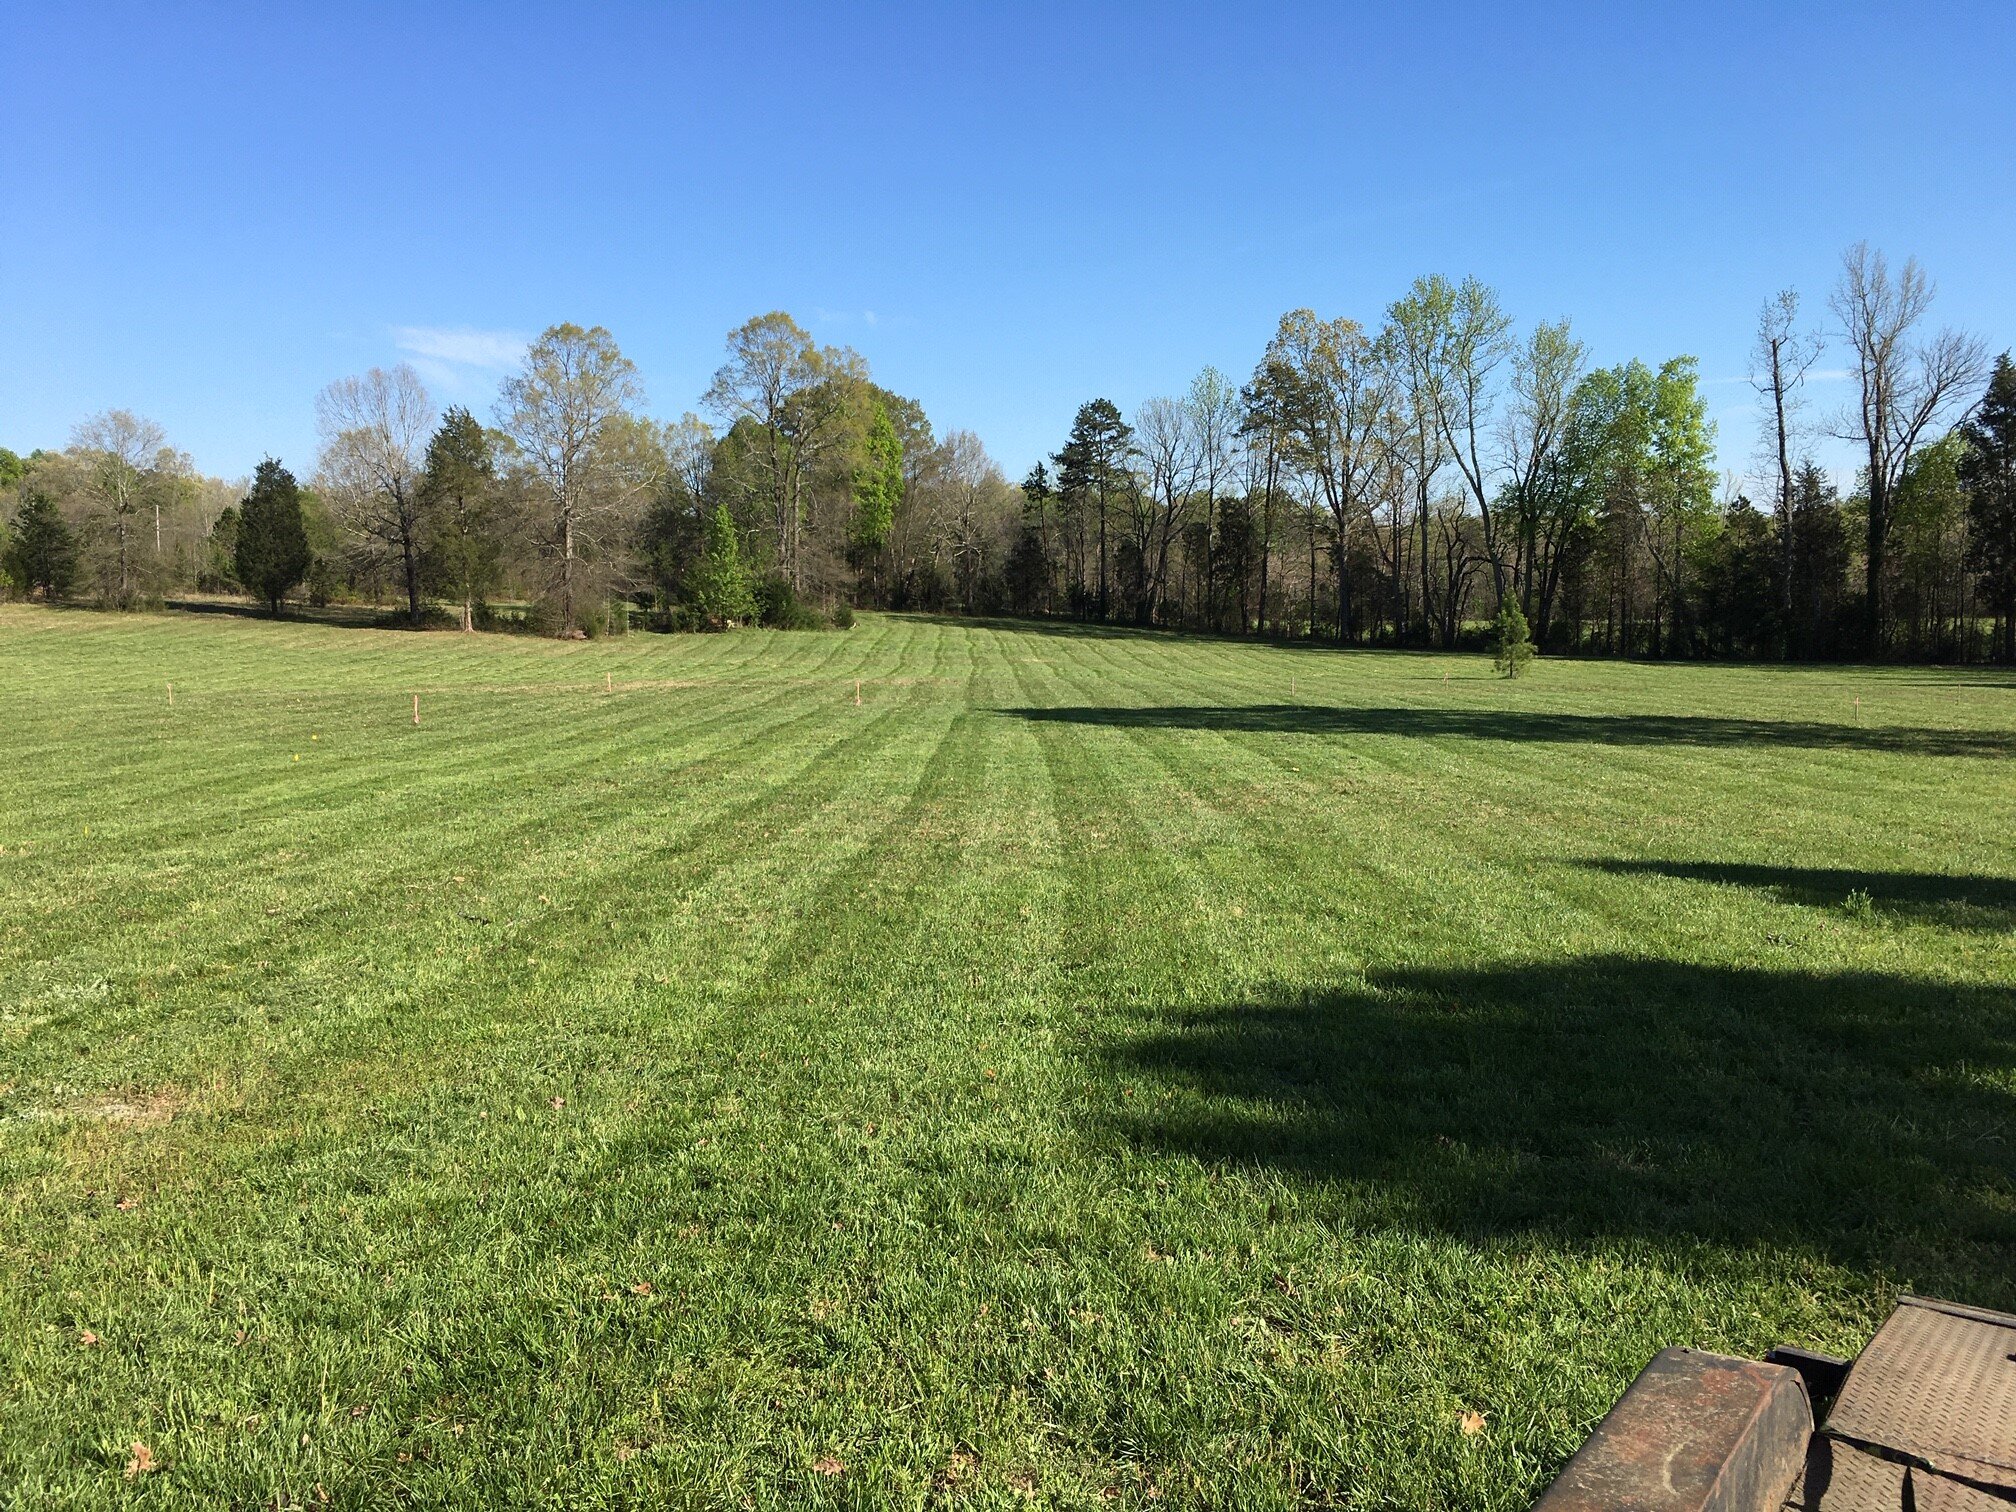
26 minutes ago, RPM said:That's gorgeous Mike. Being a city boy from Cali, what is that ground cover? Planted grass, native grasses, weeds? And how often does it need mowed?
That was before it was all tore up. It was an old horse pasture and was mostly fescue with an abundance of miscellaneous weeds. It grows like crazy and "needs" mowing once a week, but at the time I mowed it every other week. As I have replanted it and filled in numerous holes it will hopefully look better, and will be mowed every week. I love to mow (obviously) and look forward to lots of stripes in the yard :)
-
Don't know about the smartest nor richest (I'm broke lol) and I bought a field to plant this building and house in, I am sick of raking leaves...

... unless those trees did produce money, then I might plant a few dozen...
-
I upgraded my shop recently, went from 1,500sqft to 2,400sqft out in the country away from city taxes and such. You really don't know what all you have until you have to move it in one week. Went from nothing in the way...
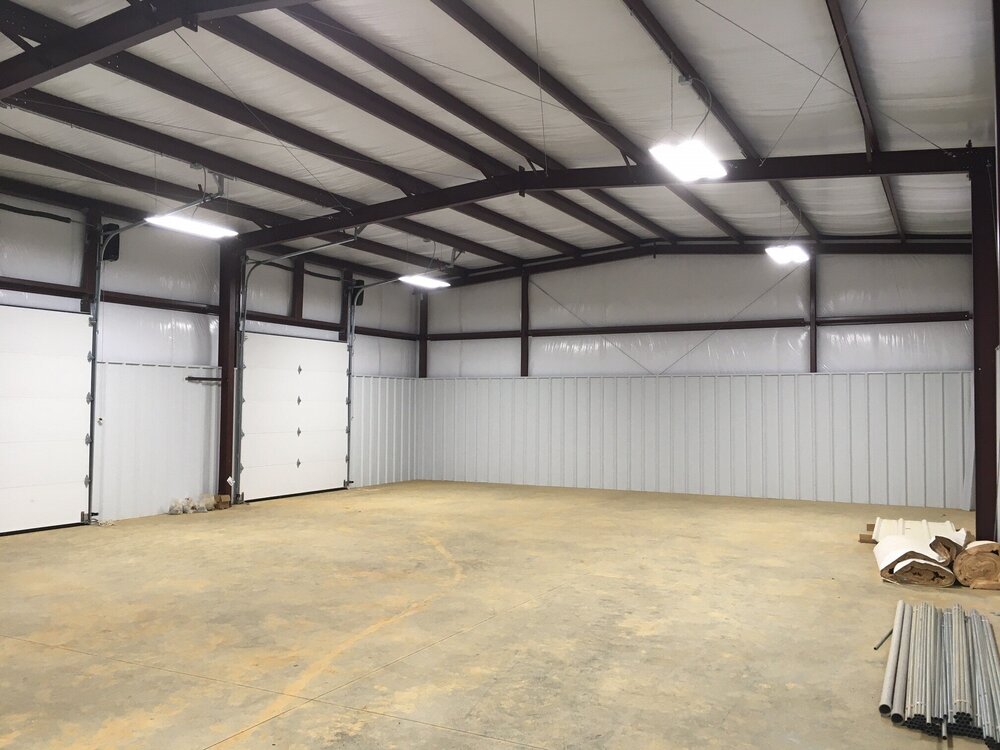
... to having to get everything under roof. Our old property sold rather quickly and our new place was on the verge of being completed. A month and a half later, things are starting to get put in place, but there is still a bunch of stuff to go through before it is completely opperational.
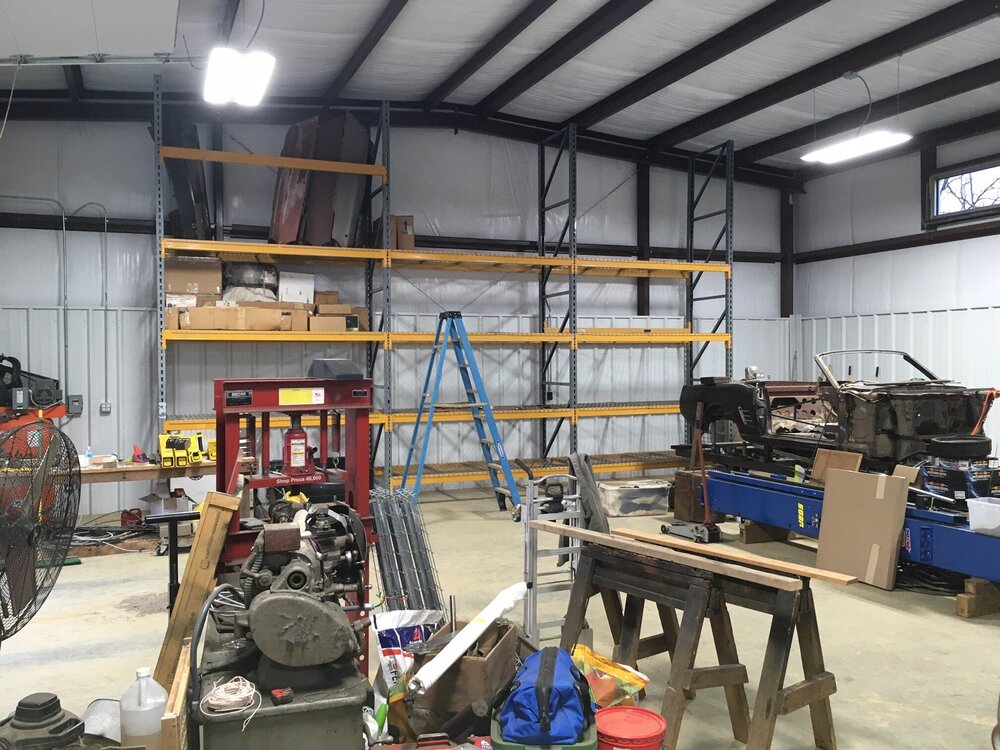
Got to get the lift put back together and finish wiring the rest of the building, construct the restroom and small office, go through some more boxes... this is taking forever.
-
-
I have installed a few cowls and I prefer to install them in two pieces. When you weld in your lower portion you can prime / paint the lower section and the inside of the upper for a little more corrosion control. The lower portion has all the rosette welds ground smooth so when you weld your upper part on a little wire brush on a drill makes short work of the areas that need to be bare metal for a good weld. I do not see how one can get really good paint coverage on an assembled cowl. The inside of this one was bare metal in several places when I disassembled it, as it was spot welded together when I bought it.
 newstang and Grabber70Mach reacted to this
 -
-


1970 Convertible Restoration
in Project Progress Forum
Posted · Report reply
From something most would have given up on to seeing it actually drive again, I'm just glad to have been a part of it's resurrection. It will be a stunning car when it is complete and quite a story to share with those who meet "Gerry" in the near future. Persistence does pay off. Looking GOOD!!!