


GypsyR
-
Content Count
104 -
Joined
-
Last visited
-
Days Won
1
Posts posted by GypsyR
-
-
Possibly because there are two different sizes of tailhousing bushings for 4R70W's. A 1992 (technically an AODE) used a 1.506" tail bushing. And matching seal. From 1993 on up the AODEs', 4R70W's, and all supposedly used a 1.606" inside diameter bushing. It's possible to swap the entire tailhousing and not notice until you have a yoke mismatch. Pretty sure you can't swap just the bushings, nor the seals either.
-
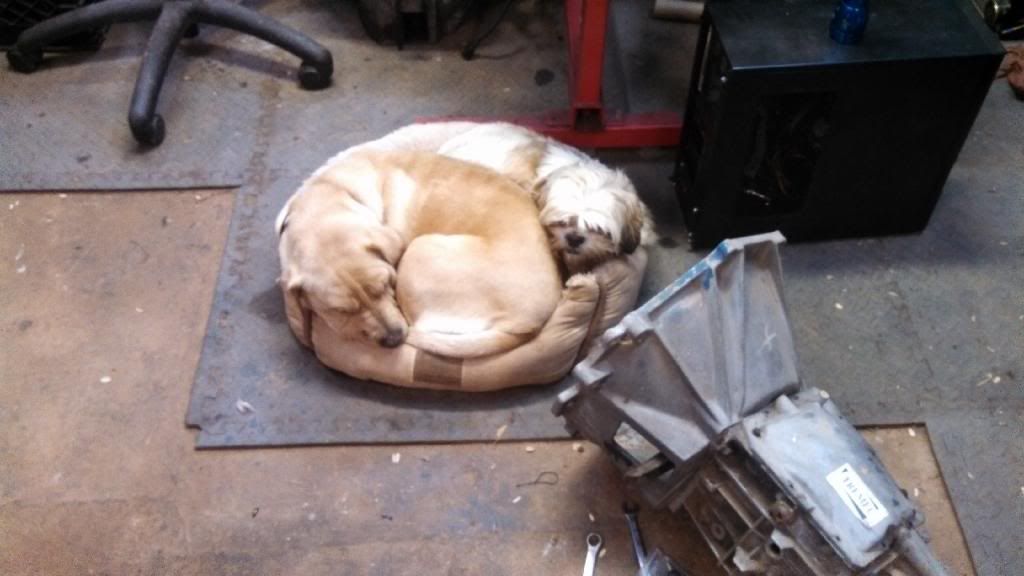
Generic yellow mutt who lets me hang out in her garage. Shih-Tzu is daughter's. He likes to hang out with us when he can. That's supposed to be HIS bed.
 TheRktmn and Ridge Runner reacted to this
 -
The lock assemblies I've found to work from full-sized Fords and Mercurys back to about 1974. I pulled every one I could find at a local junkyard some years back and sold them for 1967-1970 Mustang use. On my '67 coupe at one time I had the torsion bars too tight and the lid would jump up pretty hard. Being keyless this was recipe for fun.
This little person completely cleared the roof and hit the hood running at full speed. I'd give about anything to have had video of it.

-
Nice!. I never found a location I really liked for one so skipped using a button at all and wired mine to remote keyless entry only. Your under seat idea though...
-
An FYI for MikeStang. Should you care to take the trouble, you can swap your timing cover for a 1985 Mustang 5.0 cover and have a mechanical fuel pump while keeping reverse rotation. I've run across other timing covers that were reverse and had the mounts for the fuel pump drilled and tapped but the center hole for the pump arm was never "knocked out". Few minutes with a Dremel took care of that.
Just saying there are those options out there. If you are all set up with an electric pump you're happy with that's fine too. I'm good with either pump style myself, just depends on the circumstances.
-
VR-1 is almost always on the shelf at my local Advance Auto Parts store.
Synthetic is nice stuff but all motor oil is petroleum based, one way or another. Except Amsoil, which is apparently made from hydrolyzed magic unicorn milk.
Even though it has an unlikely name, the "Bob is the oil guy" forum has an astounding amount of petroleum product information. Links to white papers, actual SAE specification documentation, petroleum institute information. All kinds of stuff which is not guesswork, opinion, hearsay, and advertising based propaganda.
Opinion has worth though. My opinion is that once the cam has been broken in, use whatever you like as long as it's a good quality brand name oil. Doesn't hurt if happens to be on sale. More important is to keep the oil changed at decent and regular intervals. What intervals exactly is probably a subject to start a whole other thread.
-
I hang out on a number of different forums so I'm pretty easy on changes. One thing that's currently bugging me though is that when you hover over a thread title what pops up is the thread's title, start date, and start time. Since I'm hovering over the thread's title, that info is absurdly redundant, as is the start date. I take it as the hover feature needs a bit of tuning. Having the hover feature that shows the first line or so of the first post in a thread is a feature I REALLY like. Other than that small issue the changeover is looking pretty good to me.
-
Bob (Dooley) sold the VMF and basically has nothing to do with Mustang internet forums anymore. If you still need to contact him Red Five is still his company as far as I know.
-
Now THAT is cool. I've swapped parts between a '69 and '67 but thought the '71+ caps were off limits. Never occurred to me you don't HAVE to have a base. Shows how little I know about '71-3 cars I guess.
Nice work. A little different without being radical.
-
The light will still be greenish. We forget old incandescent bulbs cast a yellowish light. Yellow through blue covers makes green. The newer the covers, the more blue-green. White LED's through blue covers make a more true blue. Of course if you go messing with LED's you can pick your colors and skip the covers if you like.
-
"Early" '90's AODE's? AODE's weren't used in Mustangs until 1994. An "early" 1993 or older would be an AOD. I'm not sure you have what you think you have. I've seen a few AOD's, AODE's, and 4R70W's in my time (and have some around) but I don't recall seeing any with what I would call a starter at "9 o'clock". They are all at 7 o'clock. That I've personally seen anyway.
I would say post some pictures but I'm just curious as to what you have. It kind of matters a lot to you though and some of us can help you identify what you have. Or look at them really closely and compare them to pictures you search up.
In any case I'd like to know about the one with the 9 o'clock starter.
-
This thread made my day. These parts are so far down on my list of what my car needs that I haven't even looked into them. I did inspect them though and vaguely hoped there was some way to restore mine to looking nice without breaking the bank. I didn't even know there was a such high quality DIY solution for woodgrain replacement. Just knowing that I can at least attempt to make mine look as good as yours came out is a relief. I can now mark one small nagging thing off my worry list and onto the regular old to-do list.
-
I've "fixed" a couple of older Ford charging systems by simply running a ground wire from the stud on the back of the alternator case to the engine block. Even though anybody and everybody would think that being solidly bolted to the brackets and engine would make a fine ground. A little rust, oxidation, and/or paint can kill the connection. The cars I repaired already had new alternators, batteries, cables, etc but just wouldn't charge.
So it's my habit now to add a ground wire to the alternators of my personal vehicles if they don't have one. I have no doubt that you could do the same thing by cleaning all the connections at the bolts and brackets but I still add the wire.
-
Looks like a three speed manual to me but I'm no expert. I know a bit about AOD's though which is why I'm in here. If you want to know what it actually is post again asking "what manual transmission is this" to get educated opinions.
If you don't care because you were actually shopping for an AOD, nevermind.
-
"actually meant the dizzy cap with the male terminals (usually found in GM),"
Sorry, No. Male terminals have been in use by Ford since the 1970's and Ford's version of "HEI" called "Duraspark" which looks completely different. The only thing they have in common is the male plug terminals. If you use a stock factory Ford Duraspark distributor, MSD sells an adapter plug that will allow it to mate directly to the "6" series MSD box of your choice. The adapter runs like six dollars, no GM parts involved at all.
In recent years there have been for sale HEI style Ford distributors. Pioneered by Davis Unified Ignition, they basically just mate the top half of an HEI distributor to the bottom half of a Ford. They work but most folks don't seem to care all that much for them. There are now cheap copies of the DUI unit out there that folks have found to be rather low quality in the long term.
As for the swaps, over and over I hear the reasoning for using a GM drivetrain swap into a different brand car is that is was the "easiest and cheapest" way to go.
IMHO anytime you're working on a classic car and you choose the easiest and/or cheapest way there's a very very good chance you're doing it wrong. Whatever it is.
-
Some years ago another Mustang owner and I got into a discussion about how or why a simple bi-metallic spring would "require" 12 volts over 7 or 8 volts. In the end we did some informal comparison testing. His with relayed 12 volts, mine with the Stator voltage. With the same basic engine setups and the same carbs we timed them from cold. At approximately the same ambient temperature. His choke opened fully an average of six seconds sooner. We agreed that was close enough as to make no practical difference. So either way works fine, no matter what Holley (or Edelbrock) says. For simplicity and reliability you just can't beat a single wire to a Ford's stator post. Notice I said Ford. If you are working on a different brand of vehicle apparently there are good reasons for not using the stator connection because of different designs. Non-Fords aren't really my area though.
-
I've had old dead gas do that. Ran OK and was fully warmed up. A couple of days later I cranked it up and evidently immediately bent a couple of pushrods. All intake valves. The gas put lacquer on the intake valves which apperently dried like paint after the engine cooled off. Upon restart the valves were "glued" into the guides. Something had to give. I had to heat the affected guides with a torch and hammer the affected valves out of them.
-
Strange. I always install them separately because I work by myself and find it too difficult to swing both in and out. Just the engine I can can swing and wiggle as needed and still have one hand on the cherry picker controls.
In a junkyard situation where I would be in a hurry and could care less about the car getting banged up and bashed into, for sure I'd yank both together. Especially if I had a forklift on hand to drag it all out of there.
-
IMHO, linear actuators are overkill for the application. 250lbs is enough force to break stuff and even distort the door. Amputate stray fingers too. I can picture one shattering the glass if it keeps driving after the glass hits the stops. An install of them should include some VERY carefully placed limit switches. The reason they are slow is that they are geared very low. Low speed but a bunch of torque.
I feature of purpose made window motors is they have just enough torque to get the job done and not enough to cause harm to the inevitable stray body part in the window as it shuts.
Many years back Mustang Monthly did a feature where they cut off the three hole section of a power regulator scissors (like from a Tbird or F150, whatever) and cut the Mustang regulator the same way. Then welded the piece to hold the motor in place of the manual crank area. I fooled with visualizing this on my '67 a few years back but could never make out how I could "clock" the motor to not interfere with anything. Earlier Ford window motors are largish and ROUND. Later models, like 1995 F150's and 1996 Aerostars use the same 3 bolt mount style but motors that are slim and flatter. No doubt the later motors would be better choices for retrofit. MM promised a follow-up article of how to do the rear windows on a coupe which never materialized (and ticked me off no end). The rears are tricky. The only options I know of (so far) are to use Cougar pancake setups or the SPAL universal things. I have some the SPALs I've played with a bit and I really don't care for the way they mount. They haven't impressed me at all with their long term durability either. I've needed to replace two for friends so far. Which is how I came by the leftovers, they come only in pairs.
At one point I got very interested in power windows (and batted some ideas around with Buening) but pretty well shelved the idea in favor of way too many other projects and distractions. Never quite gave up on it though. I figure I could pretty well work out the fronts if a reasonable solution for the rears comes up. Other than somewhat overly expensive Cougar rear regulators. I refuse to do power front windows without rears. My Sportsroof is another matter. At this point it doesn't even have viable doors so fooling with regulators isn't anywhere near being on the table yet.
-
A condenser does reduce airflow. That's why for old school cars the OEM's gave AC cars fan shrouds, or better shrouds, and bigger fans with more blades. Depending on what manufacturer and vehicle you look at for particular combinations of upgrades. Plus you want to figure in that he radiator is no loner seeing "fresh" air when the AC is on. The air will have been pre-warmed slightly by the condenser's shed heat.
-
All I was really after, an answer one way or the other. Thanks.
-
Is it no longer for sale or what?
-
With a decent aftermarket coil it's more like 40,000 volts.
It's a trade-off deal. On the engine there is more heat which may shorten the life of the coil. Performance rule of thumb is the shorter the coil wire the better. So you might be giving up something moving the coil away and for sure are increasing the chance of arcing.
I've got a car with a Accel coil and one with an MSD coil. Both mounted on the fenderwell. They aren't racers and I like reliability. I'm using 8.5mm plug wires on one and 9mm on the other so I'm not worried too much about arcing. I'm with you on the one coil wire hanging across though, I've never been happy with how that looks.
Worth considering that my 351W EFI truck has the coil mounted over the rear of the driver's valve cover from the factory. A little close to the engine but up a bit so it has airflow all around it. This setup obviously works fine for thousands of other trucks like mine. You can how it mounts in this pic I pirated off a for sale ad. You might consider fabbing something similar.

-
Pilot bearings can indeed be a pain. I've had the best luck with the slide hammer type tools. But on a few I've have to chisel them out.
The rotation of the clutch setup doesn't matter just line up with the bolt holes. DO NOT tighten the bolts one at a time. Tighten them just a turn or two then across to the opposite one. And so forth around and around, little by little. One reason is that as someone posted a while back that if you try to run down the bolts one at a time you can snap them right off. Then you have to pull everything and try to get the broken bolts out, find new bolts, etc.
Before you tighten the pressure plate bolts, snug them down so you can just wiggle the plate with the line up tool. Then use your fingers to feel where the edge of the plate is. Plates aren't usually a perfect match in size and there should be three gaps where you can feel how exactly the edge of the clutch plate matches the edge ofthe pressure plate. Line up tools don't line up perfectly. Usually the weight of the plate lets it "sag" down a little. By feeling with your fingers and tightening the bolts just a little you can get it close to perfect. It isn' necessary but sometimes it can be a bear to get the input shaft lined up with the clutch and pilot bearing. Every little bit helps as wrestling a transmission into a clutch is not much fun. Every once in a while one just drops right in. Lining up the clutch with your fingers AND the tool increases the odds that it may happen that way.

70 351w into 69 mustang coupe torque converter and flexplate question
in 1969-70 Technical Forum
Posted · Report reply
Until this thread I thought Ford didn't do a 351/C4 combination. I learned something today. I knew about the big bell/"truck" C4's but thought they were 302 only.
This made it occur to me to wonder something I haven't thought about before. When exactly DID Ford come out with the small block version of the C6?