


stangs-R-me
-
Content Count
988 -
Joined
-
Last visited
-
Days Won
22
Everything posted by stangs-R-me
-
 My original front (headlight feed) harness was in pretty bad shape, so I bought & installed a new harness made by Alloy Metal Products about 12 years ago. All other under hood wiring is new Alloy Metal harnesses as well including front & rear Hood Scoop wiring harnesses, engine feed, & alternator. Love the OEM Look and Fit (if not exact copies). When I had my dash apart at the same time, I gave my factory Tach Dash harness some attention too. Only old wiring left is the rear taillamp harness and it is pretty tired looking in the trunk area, braided loom sleaving is shot (now wrapped in electrical tape by me) and have been wanting to replace it as well. Only thing that has held me back to never pulling the trigger is the new harness does not include the taillamp sockets. My originals sockets are in OK shape; but have paint all over them from a paint job before I owned the car so they would need to be cleaned up before re-use. They also have rubber boots which are crimped into the sockets, so I'm wondering how easy it is to swap onto the new harness without it looking butchered. Really don't want to "splice" in the old taillamp pigtails to this new harness. Anyone buy this Alloy Metal Products rear taillight harness and successfully swap the sockets so you can't tell it was ever done ?? Randy / Midlife do you have any tips ?? Thanks, Doug
 -
I stand corrected !! YES ... it was Scott at Muscle Car Research that I bought these parts from back in 2011. Also bought the seal kit for the Disc Brake Distribution Block that you could not find anywhere else back then either which was also prior to the whole distribution block & proportioning valve being reproduced. And until this past weekend, I had never bought anything from Jack at Dead Nuts On, just drooled at all the mostly 1969 specific oddball parts he offers (many of which are made by MCR). And when scrolling through all the current parts I saw the Steering Column Seals & Retainer so just got confused. Not sure if Jack had even started his web site yet back in 2011, so thanks again for catching my error. Doug
-
All the seals (2 foam rings & a foam plug for the end of the shaft) and the brittle plastic bushing for the bottom of the column are available here ... https://www.deadnutson.com/ When I rebuilt my column in 2011 there was no evidence of any of these seals ... so I got all the seals from them however the plastic bushing thing was not yet being reproduced. Mine was trashed, so I made something to serve the same purpose out of a piece of plumbing PVC. My shaft sagged and rubbed on the bottom tube like yours before the rebuild ... having all new seals will center everything in the lower part of the column. Then you can adjust it to line up with the steering box. Shopping on "dead nuts on" will make you want to buy all sorts of stuff you had no idea was available new. I just bought $93 worth of stuff over the weekend that was not on their site back in 2011 !! There are also a few threads on THIS site detailing rebuilding a '69 column and I think I posted some info in one of them back in 2011. Doug
-
Building material costs in general are crazy now, so you build what you can realistically afford ... I don't even want to know what it would cost today to do what we did in 2001. Doug
-
It did come with a lot of desirable options ... especially for a 302 car ... 302 is better than a six, but too bad they did not at least pick a 351. They built way more Mach 1's than Deluxe Interior Decor Group Sportsroofs. And with the console, it is a Mach 1 interior but without the highback seats (that were optional). I would restore it stock including the unique and rare PINK color. Build up the 302 to a stroker (347 or ??) or swap in a mild 351W. With the stronger engine, you'll obviously want to put dual exhaust on it. May as well then buy the dual exhaust cut out valance panel and use the factory quad tips to keep the factory look. Upgrade the wheels/tires and if you want a factory look but in modern aluminum wheels, Legendary Wheel offers three '69 vintage options: LW60 = Mach 1/GT style wheels in 15x7 ... https://www.holley.com/brands/legendary_wheels/products/wheels/wheels/vintage/legendary_wheels_lw60/ Magnum 500 in 15, 16 & 17" sizes ... https://www.holley.com/brands/legendary_wheels/products/wheels/wheels/vintage/magnum_500/ LW69 = Shelby in 15 or 17" sizes ... https://www.holley.com/brands/legendary_wheels/products/wheels/wheels/vintage/legendary_wheels_lw69/ I've got the LW69's in 15x7 on my '69 GT (see avatar) and really like the look and quality of them. The LW60 style is what my car originally had (and was a factory OPTION on your car), but they were not released yet when I bought my wheels in 2017. I'm really happy with the LW69's, but it certainly would have been a tough choice if the LW60's were available. If the seat covers / front seats are trashed, you could find a set of highbacks and then do the nicer and more comfortable Mach 1 upholstery, which would have been the stock upholstery had the factory "highback" option had been selected on your car ... so this would still maintain the "stock look". This rare and unique car restored "stock" would draw crowds at car shows and everywhere you go ... my suggestions (easily reversable mods) would make it more so. Doug
-
We did a big remodel in 2001 and knocked down an old 2 car "detached" and put up a 24x48 x 10' high "attached" garage with a 10x10 mudroom between ... and YES within 10 years I wish I had made it BIGGER. The '69 hibernates sideways in the back of the garage so I can fit 4 DD's up front for winter months. Deeper would allow 3 cars deep nose-to-tail and Wider would give a little more breathing room plus would have allowed an 18FT. door. Our house is not all that big (about the same 24x48 footprint as the garage), so the garage also serves as our great room for year-round parties. Sorry, did not mean to hijack, but thought I'd share !! Mike does have the carport that one DD could park in, so that helps. Doug
-
Way cool ... thanks for sharing !! Doug
-
Very nice ... glad to see you finally have decent space to store / work on your Mustang and other projects. Doug
-
Funny that someone resurrected this old thread. The parking brake assembly in my car is a replacement as I myself once caught the release lever with my foot and bent the hell out of it !! Thankfully the one in it now was a spare I saved from a parts car. I do think the release handle hangs too low and have often thought I should try and tweak it up closer to the bottom of the dash so I don't accidentally do in this one someday. Just one of many things on my endless "to-do" list. Doug
-
Welcome to the forum Jeff !! I'll need to watch videos when I've got some time. Doug
-
Sorry to hear about the accident and the Hardtop being totaled, but sure is a blessing you survived to be able to start again with a Sportsroof. Very nice work and great color choice. Oh, and welcome to the forum !! Doug
-
Side Mirror Install Frustration
stangs-R-me replied to Mountaineerfan's topic in 1969-70 Technical Forum
The key to successful threaded insert installation is using a drill a couple sizes smaller first, then following with a reamer the actual hole size needed. A drill bit can't make a perfectly sized & round hole. Step drills are now pretty common & inexpensive and do a much better job than a normal drill bit, so this is an option too if you don't want to buy special reamer(s). Inserts must be the type with ridges on the outside, and the one-piece type like Mountainerfan bought in his kit that expand and pinch the sheet metal are much better than the ones that split so the inner goes inside and expands the outer half (look like what BobW70Mac1 posted). We used to use the split type at work until we found the one-piece type and never went back. I used the split type to mount racing mirrors and was not happy with the results after a few years. Thankfully the one-piece uses a larger dia. hole, so it was easy to change them out later on. Doug -
It has been 4 summers of driving now and I absolutely love these belts. Ended up buying the rear belt sets too in April of 2018, so the different buckle style could not be compared. They say the buckles are similar to '67 Mustang and the look is close enough for me to the deluxe '68-69 belts I had that only me or another '68-69 Mustang expert would notice the difference. A bonus is the buckles do NOT rattle in the console like the originals did. At first, I was thinking of being stealthy and figuring out how to get stock male ends onto the retractor assemblies so I could use the stock center buckles, but then I'd be back to hearing the buckles rattle in the console holders, so that idea went away quickly. Doug Last 3 pics ...
-
4 more pics ...
-
4 more pics ...
-
I had posted all these pics of the Scott Drake 3-Point Kit that I installed in my Hardtop in this thread ... seat belt buckles - 1969-70 Technical Forum - 69stang.com and 1969stang.com The 1969 and 1970 Mustang Supersite ... back in 2017. All the pics are gone, so I'm reposting them here. Used all the stock mounting locations and just had to ream out the inner belt and retractor anchor plates (used a 0.501" reamer) to be able to use the OEM bolts. Read the thread (last 3 posts on page 1 & more on page 2) for all the details.
-
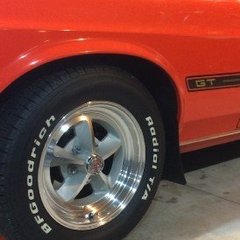
First off ... WELCOME to the site and very nice Champane Gold Mach !! I last tire shopped in 2017 for my '69, but I wanted white letter and 225/60-15 size. At the time there were really only 2 options ... BFG Radial T/A & Cooper Cobra. Just looked on Coker Tire (probably stock / sell the most 14 & 15" classic car tires than anyone else) and only ONE Narrow (1") Whitewall option popped up in your size: https://www.cokertire.com/tires/p215-75r14-american-classic-1-whitewall-tire.html Here is a 215/70-14, which they claim is for '69 Mach 1 / GT with a 3/8" wide whitewall: https://www.cokertire.com/tires/p215-70r14-bf-goodrich-3-8-pin-whitewall.html My '69 GT ran 225/70-14 between 1983-2017 on the stock GT wheels like you have but argent instead of chrome. However, no narrow white wall option pops up in this size. Good luck !! Doug
-
The '72 Ford Country Squire wagon I drove in HS had the vacuum actuated locks that worked like this ... it was pretty cool. Don't know when Ford switched to solenoid, but the next Country Squire my dad bought (1978) had normal electric operated locks. Electric is simpler and probably more reliable / easier to service ... but I think the 72's vacuum system was still working when my dad sold it in the early 80's with 100k+ miles on it. Whether the lock system was ever serviced in the 10 years we had the car, that I don't know. Doug
-
Definitely not a factory vent, guessing the vent & controls are both part of an aftermarket or dealer installed A/C set up. Doug
-
Just went to the NPD site and there is says the Exact and Concours Correct Dearborn versions (011202-1C) are for Metuchen built cars too. My driver's side with the factory sealer oozing out really looks as if a valve was never there though. So now that I know where they go and how they install, I probably should order a set !! Doug
-
I've had my car since 1981 and the drop-off metal is all original and complete, but these valves appear to have never been installed on my Metuchen built car. Until today seeing Briain's original valve in place, I had no idea how or where these things mounted !! Looking at the NPD catalog, they show 3 options for '69: 67-70 "Good Repo" 68-70 Dearborn built "Exact & CC" 68-69 San Jose built "Exact & CC" Is it possible that these were not installed on Metuchen built cars ?? Figured pics would be good to show OE metal without the valves in place. Doug
-
Where does this bar go (dash support)?
stangs-R-me replied to TexasEd's topic in 1969-70 Technical Forum
Above the gas pedal from firewall to bottom of dash ... -
Most people that have seen my inners lamps "ON" call them "brights", mostly due to the fact that they are very bright 100W GE # 4537 Aircraft Landing lights. Outers are Cibie' 57-28-02's with 55/65W H4 bulbs, which put out decent and useful light on their own. Doug
-
Need Opinions: Engine Bay Color
stangs-R-me replied to Jesse 69 Fastback's topic in 1969-70 Technical Forum
Body color engine compartment in the 60's-70's was mostly a MOPAR thing ... this is part of the reason I could not do it to a '60's-70's Ford as I'm a Ford guy and not a Mopar guy. I think most 60's & 70's GM cars were black too. YES ... modern Mustangs have had body color engine compartments since the FOX body (1979), but I just don't think it looks right on a classic Ford. I don't know how the Mustang II's were done, as if it even matters. Heck I had a powder blue '79 Fairmont Futura that I painted the engine compartment BLACK because it looked better than powder blue. There, you have my opinion !! Doug -
My linkage is the OE Ford 1970 Mustang for the OE Ford-Hurst shifter. Purists will notice I modified the linkage at the shifter eliminating the factory rubber bushings and replaced with custom made metal bushings and drilled holes for hairpins. I think the Hurst tailshaft mounting plate (shown in 1st & last pics of RPM's 10/13 post) is the same for the OE and the Competition Plus that it is based on. Looking at RPM's last pic, the 2 counterbored holes (upper left & lower right) mount to the tailshaft, the 3rd mounting hole is the non-counterbored hole directly above the lower right hole. On my installation, you can see this 3rd mounting hole in the 1st pic is next to the shifter with NO bolt in it since I don't have the mating boss & tapped hole for this bolt. The upper centered shifter mounting bolt goes in the tapped hole in the Hurst mounting plate just to the right of the upper left c-bored hole, and the lower right shifter mounting bolt goes in the threaded hole just to the left of the lower right c-bored hole. On mine, you can see in the 2nd pic that I've got a nut on the back side of the plate on that lower right shifter mounting bolt so maybe it is just a through hole in the plate (not tapped), or the threads were stripped out on mine and I fixed by using a longer bolt & nut on the back side. The Hurst Competition Plus must use the Hurst linkage for a Mustang application (and the OE Ford-Hurst must use the OE Ford linkage). Doug

